back up light Hyundai Santa Fe 2020 Owner's Manual
[x] Cancel search | Manufacturer: HYUNDAI, Model Year: 2020, Model line: Santa Fe, Model: Hyundai Santa Fe 2020Pages: 557, PDF Size: 19.29 MB
Page 24 of 557
2-6
Safety system of your vehicle
Front Seats
Take the following precautions
when adjusting your seat:
NEVER attempt to adjust the
seat while the vehicle is mov-
ing. The seat could respond
with unexpected movement
and may cause loss of vehicle
control resulting in an acci-
dent.
Do not place anything under
the front seats. Loose objects
in the driver's foot area could
interfere with the operation of
the foot pedals, causing an
accident.
Do not allow anything to inter-
fere with the normal position
and proper locking of the seat-
back.
Do not place a cigarette lighter
on the floor or seat. When you
operate the seat, gas may exit
out of the lighter causing a fire.
WARNING
To prevent injury:
Do not adjust your seat while
wearing your seat belt.
Moving the seat cushion for-
ward may cause strong pres-
sure on your abdomen.
Do not allow your hands or
fingers to get caught in the
seat mechanisms while the
seat is moving.
CAUTION
Use extreme caution when
picking up small objects
trapped under the seats or
between the seat and the cen-
ter console. Your hands might
be cut or injured by the sharp
edges of the seat mechanism.
Take the following precautions
when adjusting your seat belt:
NEVER use one seat belt for
more than one occupant.
Always position the seatback
upright with the lap portion of
the seat belt snug and low
across the hips.
NEVER allow children or
small infants to ride on a pas-
senger's lap.
Do not route the seat belt
across your neck, across
sharp edges, or reroute the
shoulder strap away from
your body.
Do not allow the seat belt to
become caught or jammed.
WARNING
Page 25 of 557
2-7
Safety system of your vehicle
2
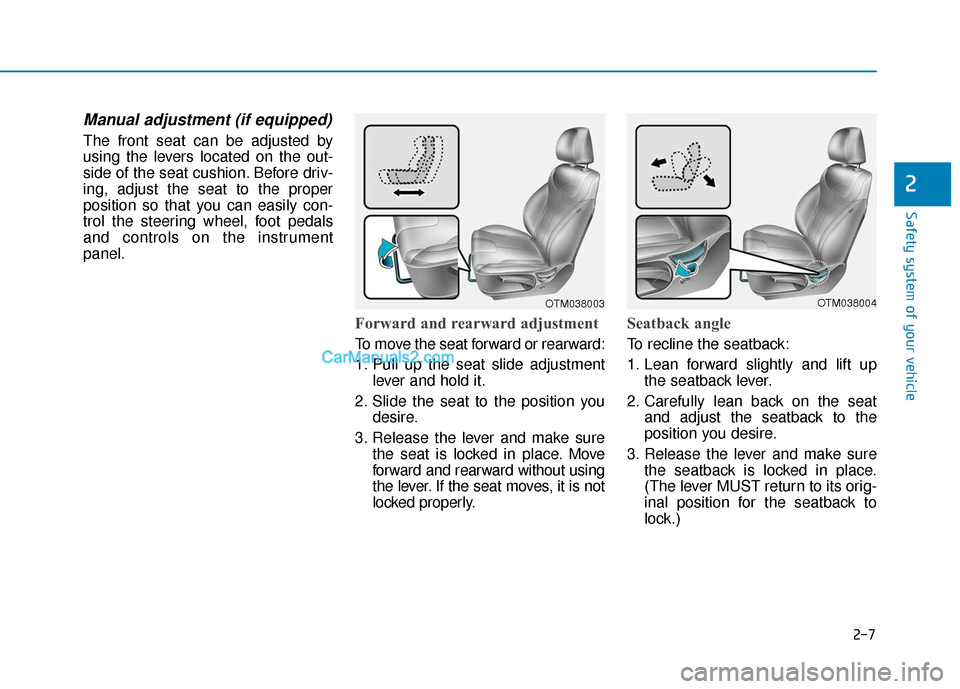
Manual adjustment (if equipped)
The front seat can be adjusted by
using the levers located on the out-
side of the seat cushion. Before driv-
ing, adjust the seat to the proper
position so that you can easily con-
trol the steering wheel, foot pedals
and controls on the instrument
panel.
Forward and rearward adjustment
To move the seat forward or rearward:
1. Pull up the seat slide adjustmentlever and hold it.
2. Slide the seat to the position you desire.
3. Release the lever and make sure the seat is locked in place. Move
forward and rearward without using
the lever. If the seat moves, it is not
locked properly.
Seatback angle
To recline the seatback:
1. Lean forward slightly and lift upthe seatback lever.
2. Carefully lean back on the seat and adjust the seatback to the
position you desire.
3. Release the lever and make sure the seatback is locked in place.
(The lever MUST return to its orig-
inal position for the seatback to
lock.)
OTM038003OTM038004
Page 54 of 557
2-36
Safety system of your vehicle
If the shoulder belt portion slightly
touches the child's neck or face, try
placing the child closer to the center
of the vehicle. If the shoulder belt still
touches their face or neck they need
to be returned to an appropriate
booster seat in the rear seat.
Transporting an injured person
A seat belt should be used when an
injured person is being transported.
Consult a physician for specific rec-
ommendations.
One person per belt
Two people (including children) should
never attempt to use a single seat belt.
This could increase the severity of
injuries in case of an accident.
Do not lie down
Sitting in a reclined position when
the vehicle is in motion can be dan-
gerous. Even when buckled up, the
protections of your restraint system
(seat belts and air bags) is greatly
reduced by reclining your seatback.
To reduce the chance of injuries in the
event of an accident and to achieve
the maximum effectiveness of the
restraint system, all passengers
should be sitting up and the front and
rear seats should be in an upright
position when the car is moving.
A seat belt cannot provide proper
protection if the person is lying down
in the rear seat or if the front or rear
seats are in a reclined position.
Always make sure children
are wearing their seat belts
and that they are properly
adjusted before driving.
NEVER allow the shoulder
belt to contact the child’s
neck or face.
Do not allow more than one
child to use a single seat belt.
WARNING
NEVER ride with a reclined
seatback when the vehicle is
moving.
Riding with a reclined seatback
increases your chance of seri-
ous or fatal injuries in the event
of a collision or sudden stop.
Drivers and passengers should
always sit well back in their
seats, properly belted, and with
the seatbacks upright.
WARNING
Page 79 of 557
2-61
Safety system of your vehicle
2
Always be sure that you and all vehi-
cle occupants are seated properly
and wearing the seat belt properly for
the most effective protection by the
air bag and the seat belt.
The OCS may not function properly if
the passenger takes actions which
can affect the classification system.
These include:
Failing to sit in an upright position.
Leaning against the door or centerconsole.
Sitting towards the sides of the front of the seat.
Putting their legs on the dash- board or resting them on other
locations which reduce the pas-
senger weight on the front seat.
Wearing the seat belt improperly.
Reclining the seatback.
Wearing a thick cloth like ski wear or hip protection wear.
Putting an additional thick cushion on the seat.
Putting electrical devices (e.g. notebook, satellite radio) on the
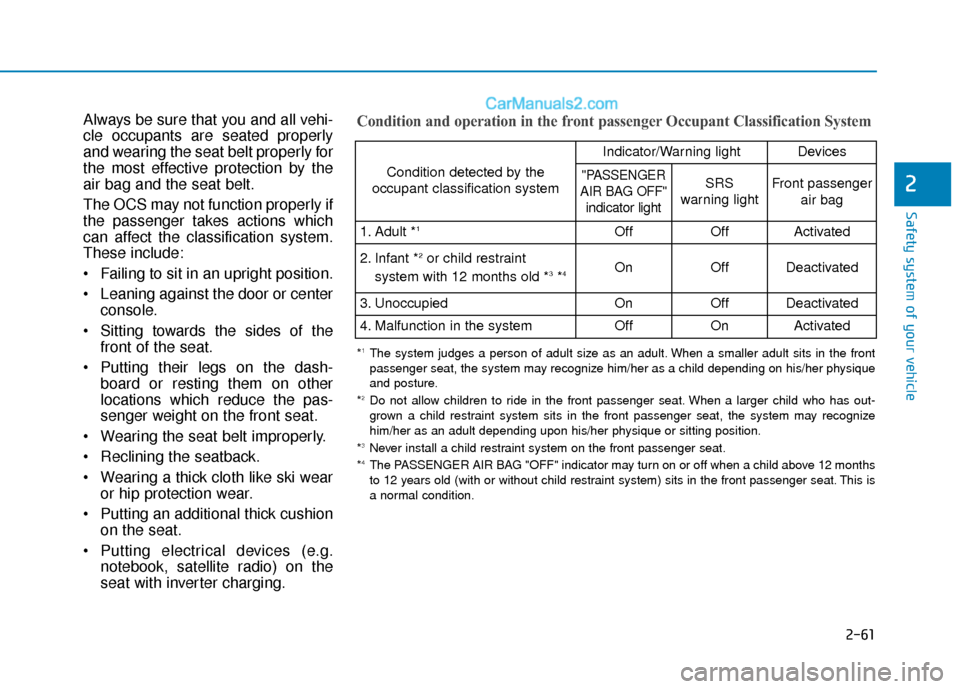
seat with inverter charging.Condition and operation in the front passenger Occupant Classification System
Condition detected by the
occupant classification system
Indicator/Warning lightDevices
"PASSENGER
AIR BAG OFF" indicator lightSRS
warning lightFront passenger
air bag
1. Adult *1OffOffActivated
2. Infant *2or child restraint
system with 12 months old *3*4 OnOffDeactivated
3. Unoccupied OnOffDeactivated
4. Malfunction in the systemOffOnActivated
*1The system judges a person of adult size as an adult. When a smaller adult sits in the front
passenger seat, the system may recognize him/her as a child depending on his/her physique
and posture.
*
2Do not allow children to ride in the front passenger seat. When a larger child who has out- grown a child restraint system sits in the front passenger seat, the system may recognize
him/her as an adult depending upon his/her physique or sitting position.
*
3Never install a child restraint system on the front passenger seat.
*4The PASSENGER AIR BAG "OFF" indicator may turn on or off when a child above 12 months
to 12 years old (with or without child restraint system) sits in the front passenger seat. This is
a normal condition.
Page 117 of 557
3-28
Convenient features of your vehicle
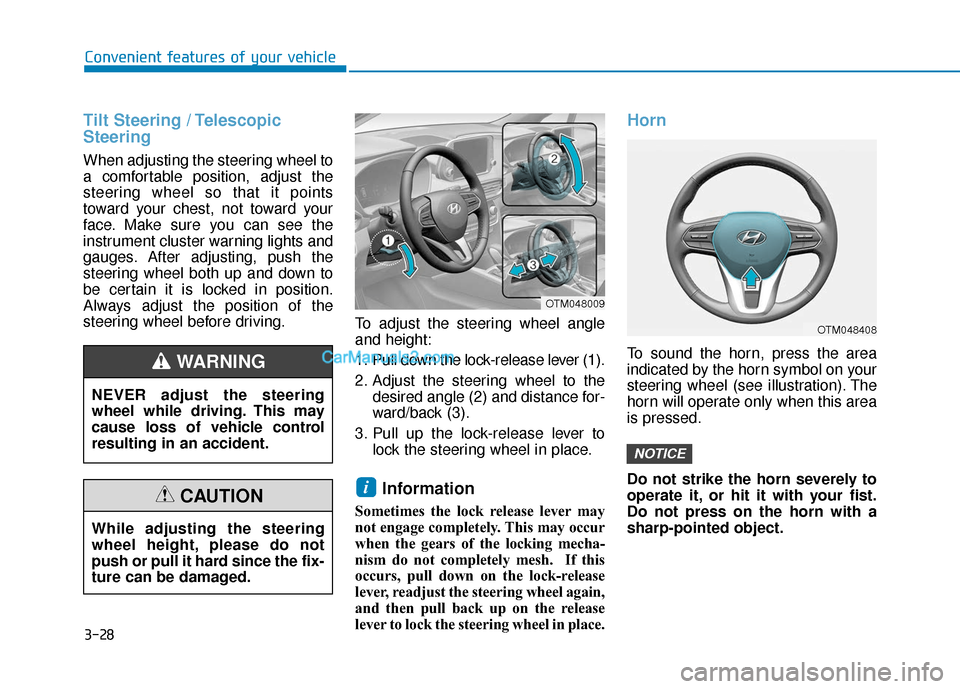
Tilt Steering / Telescopic
Steering
When adjusting the steering wheel to
a comfortable position, adjust the
steering wheel so that it points
toward your chest, not toward your
face. Make sure you can see the
instrument cluster warning lights and
gauges. After adjusting, push the
steering wheel both up and down to
be certain it is locked in position.
Always adjust the position of the
steering wheel before driving.To adjust the steering wheel angle
and height:
1. Pull down the lock-release lever (1).
2. Adjust the steering wheel to the
desired angle (2) and distance for-
ward/back (3).
3. Pull up the lock-release lever to lock the steering wheel in place.
Information
Sometimes the lock release lever may
not engage completely. This may occur
when the gears of the locking mecha-
nism do not completely mesh. If this
occurs, pull down on the lock-release
lever, readjust the steering wheel again,
and then pull back up on the release
lever to lock the steering wheel in place.
Horn
To sound the horn, press the area
indicated by the horn symbol on your
steering wheel (see illustration). The
horn will operate only when this area
is pressed.
Do not strike the horn severely to
operate it, or hit it with your fist.
Do not press on the horn with a
sharp-pointed object.
NOTICE
i
OTM048408
OTM048009
NEVER adjust the steering
wheel while driving. This may
cause loss of vehicle control
resulting in an accident.
WARNING
While adjusting the steering
wheel height, please do not
push or pull it hard since the fix-
ture can be damaged.
CAUTION
Page 135 of 557
3-46
Convenient features of your vehicle
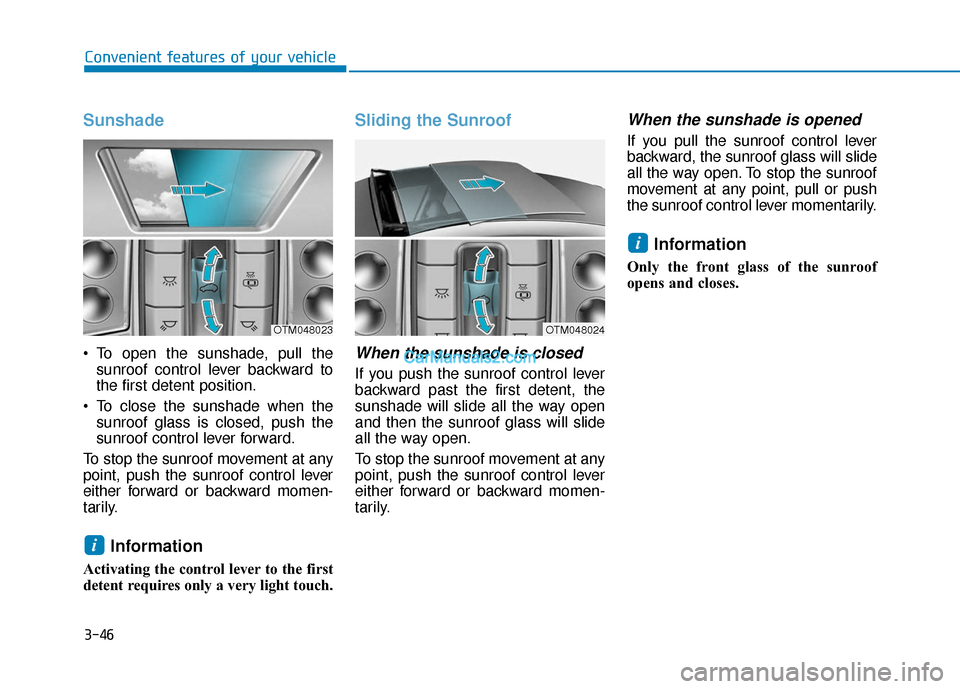
Sunshade
To open the sunshade, pull thesunroof control lever backward to
the first detent position.
To close the sunshade when the sunroof glass is closed, push the
sunroof control lever forward.
To stop the sunroof movement at any
point, push the sunroof control lever
either forward or backward momen-
tarily.
Information
Activating the control lever to the first
detent requires only a very light touch.
Sliding the Sunroof
When the sunshade is closed
If you push the sunroof control lever
backward past the first detent, the
sunshade will slide all the way open
and then the sunroof glass will slide
all the way open.
To stop the sunroof movement at any
point, push the sunroof control lever
either forward or backward momen-
tarily.
When the sunshade is opened
If you pull the sunroof control lever
backward, the sunroof glass will slide
all the way open. To stop the sunroof
movement at any point, pull or push
the sunroof control lever momentarily.
Information
Only the front glass of the sunroof
opens and closes.
i
i
OTM048024OTM048023
Page 153 of 557
3-64
Convenient features of your vehicle
Do not get back into a vehicle
once you have begun refuel-
ing. You can generate a build-
up of static electricity by
touching, rubbing or sliding
against any item or fabric
capable of producing static
electricity. Static electricity
discharge can ignite fuel
vapors causing a fire. If you
must re-enter the vehicle, you
should once again eliminate
potentially dangerous static
electricity discharge by touch-
ing a metal part of the vehicle,
away from the fuel filler neck,
nozzle or other gasoline
source, with your bare hand.
When using an approved
portable fuel container, be
sure to place the container on
the ground prior to refueling.
Static electricity discharge
from the container can ignite
fuel vapors causing a fire.
Do not over-fill or top-off your
vehicle tank, which can cause
gasoline spillage.
If a fire breaks out during refu-
eling, leave the vicinity of the
vehicle, and immediately con-
tact the manager of the gas
station and then contact the
local fire department. Follow
any safety instructions they
provide.
If pressurized fuel sprays out,
it can cover your clothes or
skin and thus subject you to
the risk of fire and burns.
Always remove the fuel cap
carefully and slowly. If the cap
is venting fuel or if you hear a
hissing sound, wait until the
condition stops before com-
pletely removing the cap.
Always check that the fuel cap
is installed securely to pre-
vent fuel spillage in the event
of an accident.
Once refueling has begun,
contact between your bare
hand and the vehicle should
be maintained until the filling
is complete.
Use only approved portable
plastic fuel containers designed
to carry and store gasoline.
When refueling, always move
the shift lever to the P (Park)
position (for automatic trans-
mission/dual clutch transmis-
sion), set the parking brake,
and place the ignition switch
to the LOCK/OFF position.
Sparks produced by electrical
components related to the
engine can ignite fuel vapors
causing a fire.
Do not use matches or a
lighter and do not smoke or
leave a lit cigarette in your
vehicle while at a gas station,
especially during refueling.
Page 184 of 557
3-95
Convenient features of your vehicle
3
- Smart Cruise Control with Stop &Go radar blocked (if equipped)
- Lamp malfunction
- High Beam Assist malfunction (if equipped)
- Tire Pressure Monitoring System (TPMS) malfunction
The Master Warning Light illumi-
nates if one or more of the above
warning situations occur. At this time,
the LCD Modes Icon will change
from ( ) to ( ).
If the warning situation is solved, the
master warning light will be turned
off and the LCD Modes Icon will be
changed back to its previous icon
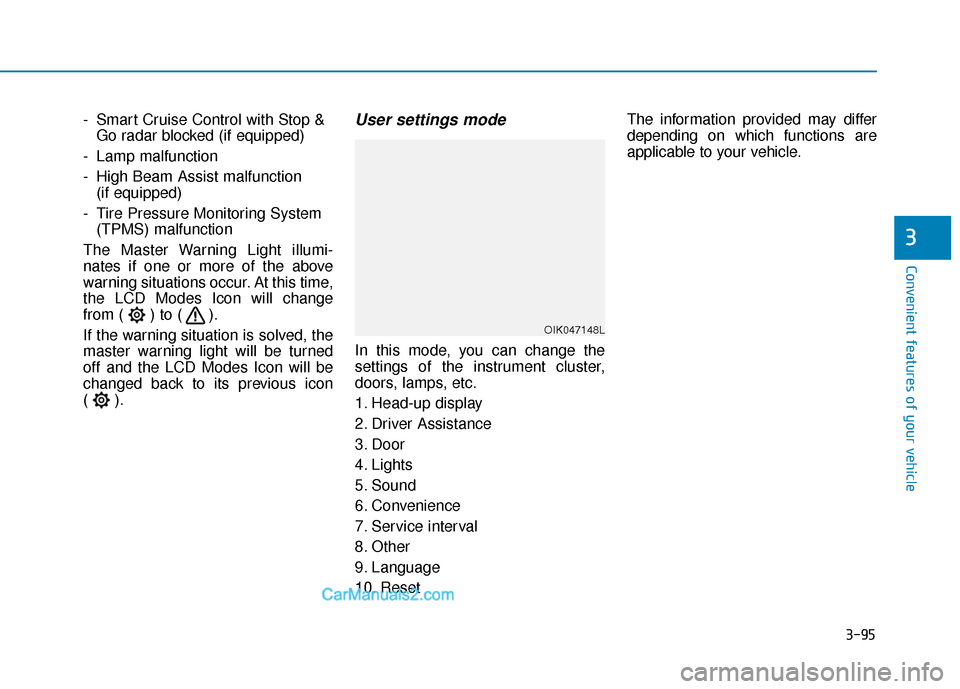
().User settings mode
In this mode, you can change the
settings of the instrument cluster,
doors, lamps, etc.
1. Head-up display
2. Driver Assistance
3. Door
4. Lights
5. Sound
6. Convenience
7. Service interval
8. Other
9. Language
10. Reset The information provided may differ
depending on which functions are
applicable to your vehicle.
OIK047148L
Page 233 of 557
3-144
Convenient features of your vehicle
Air conditioning system operation tips
If the vehicle has been parked indirect sunlight during hot weather,
open the windows for a short time
to let the hot air inside the vehicle
escape.
After sufficient cooling has been achieved, switch back from recir-
culation mode to fresh mode.
To help reduce moisture inside of the windows on rainy or humid
days, decrease the humidity inside
the vehicle by operating the air
conditioning system with the win-
dows and sunroof closed.
Use the air conditioning system every month only for a few minutes
to ensure maximum system per-
formance.
If you operate air conditioner excessively, the difference
between the temperature of the
outside air and that of the wind-
shield could cause the outer sur-
face of the windshield to fog up,
causing loss of visibility. In this
case, set the mode selection knob
or button to the position and
fan speed control to the lower
speed.
System Maintenance
Cabin air filter
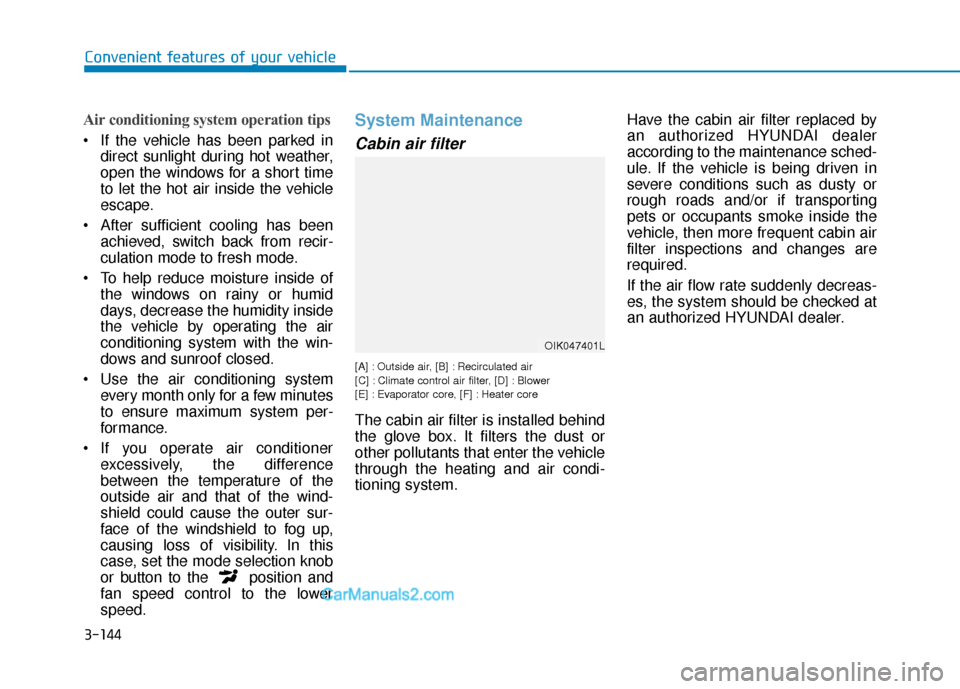
[A] : Outside air, [B] : Recirculated air
[C] : Climate control air filter, [D] : Blower
[E] : Evaporator core, [F] : Heater core
The cabin air filter is installed behind
the glove box. It filters the dust or
other pollutants that enter the vehicle
through the heating and air condi-
tioning system. Have the cabin air filter replaced by
an authorized HYUNDAI dealer
according to the maintenance sched-
ule. If the vehicle is being driven in
severe conditions such as dusty or
rough roads and/or if transporting
pets or occupants smoke inside the
vehicle, then more frequent cabin air
filter inspections and changes are
required.
If the air flow rate suddenly decreas-
es, the system should be checked at
an authorized HYUNDAI dealer.
OIK047401L
Page 245 of 557
3-156
Convenient features of your vehicle
When using the air conditioning
system, monitor the engine tem-
perature gauge closely while driv-
ing up hills or in heavy traffic
when outside temperatures are
high. Air conditioning system
operation when climbing a steep
grade or in high outside ambient
temperatures can cause engine
overheating. Continue to use the
fan, but turn the air conditioning
system off if the engine tempera-
ture gauge indicates engine over-
heating.
Air conditioning system operation
tips
If the vehicle has been parked in direct sunlight during hot weather,
open the windows for a short time
to let the hot air inside the vehicle
escape.
After sufficient cooling has been achieved, switch back from recir-
culation mode to fresh mode. To help reduce moisture inside of
the windows on rainy or humid
days, decrease the humidity
inside the vehicle by operating the
air conditioning system with the
windows and sunroof closed.
Use the air conditioning system every month only for a few min-
utes to ensure maximum system
performance.
If you operate air conditioner excessively, the difference
between the temperature of the
outside air and that of the wind-
shield could cause the outer sur-
face of the windshield to fog up,
causing loss of visibility. In this
case, set the mode selection knob
or button to the position and
fan speed control to the lower
speed.
System Maintenance
Cabin air filter
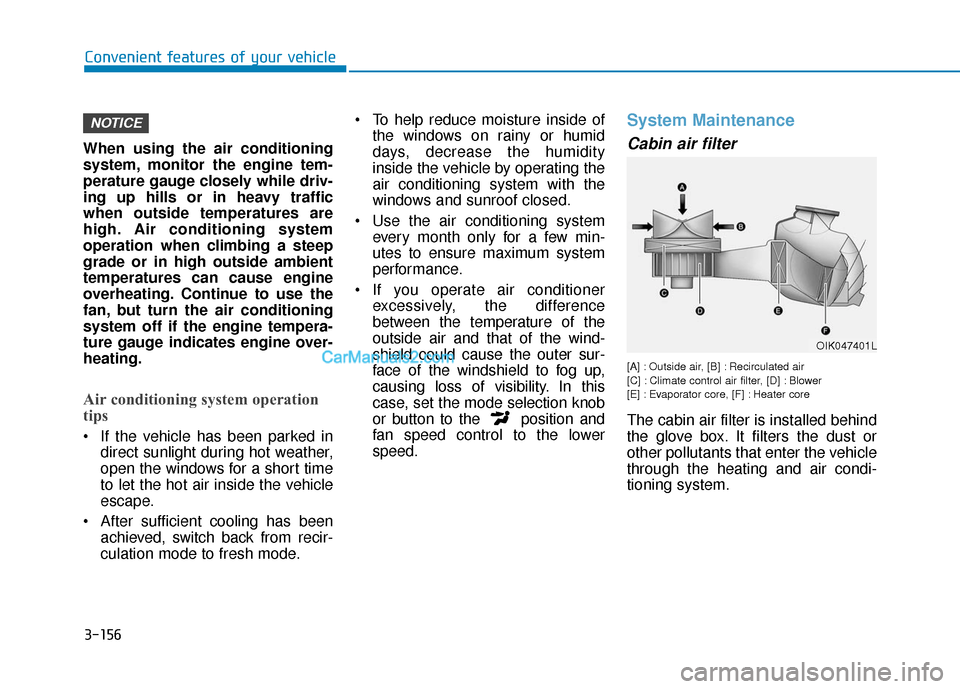
[A] : Outside air, [B] : Recirculated air
[C] : Climate control air filter, [D] : Blower
[E] : Evaporator core, [F] : Heater core
The cabin air filter is installed behind
the glove box. It filters the dust or
other pollutants that enter the vehicle
through the heating and air condi-
tioning system.
NOTICE
OIK047401L