ESP HYUNDAI SANTA FE HYBRID 2021 Owner's Manual
[x] Cancel search | Manufacturer: HYUNDAI, Model Year: 2021, Model line: SANTA FE HYBRID, Model: HYUNDAI SANTA FE HYBRID 2021Pages: 598, PDF Size: 66.6 MB
Page 223 of 598
05
5-65
WARNING
OTM050041
Do not hold the part (gas lifter) that
supports the liftgate. Be aware that
the deformation of the part may cause
vehicle damage and a risk of injury.
WARNING
• NEVER allow anyone to occupy the
luggage compartment of the vehicle
at any time. If the liftgate is partially
or totally latched and the person
is unable to get out, serious injury
or death could occur due to lack
of ventilation, exhaust fumes and
rapid heat build-up, or because of
exposure to cold weather conditions.
The luggage compartment is also
a highly dangerous location in the
event of a crash because it is not a
protected occupant space but is a
part of the vehicle’s crush zone.
• Your vehicle should be kept locked
and keys should be kept out of
the reach of children. Parents
should teach their children about
the dangers of playing in luggage
compartments.
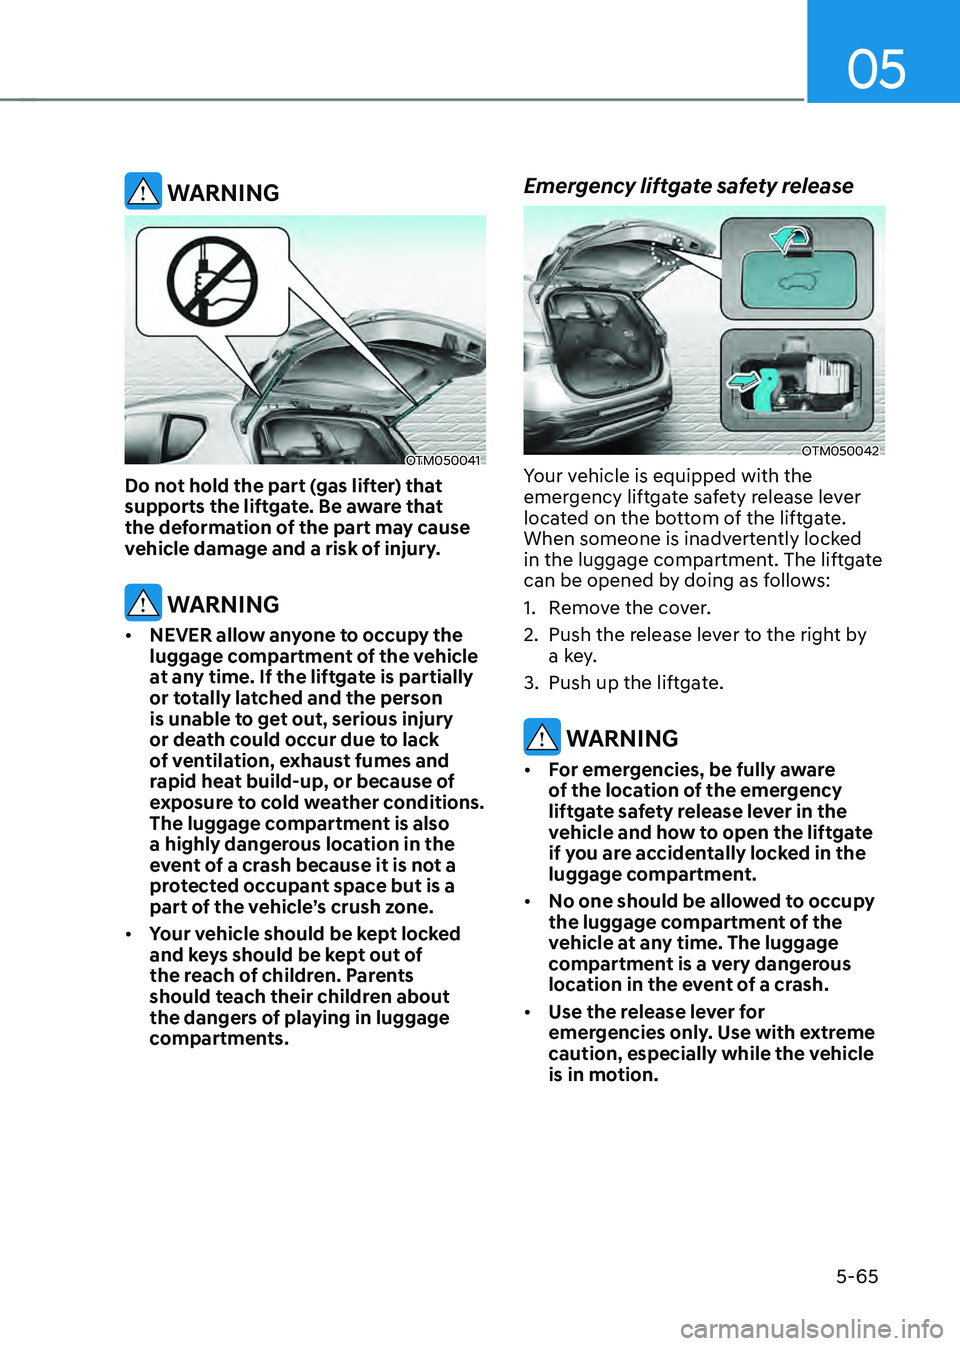
Emergency liftgate safety release
OTM050042
Your vehicle is equipped with the
emergency liftgate safety release lever
located on the bottom of the liftgate.
When someone is inadvertently locked
in the luggage compartment. The liftgate
can be opened by doing as follows:
1. Remove the cover.
2. Push the release lever to the right by
a key.
3. Push up the liftgate.
WARNING
• For emergencies, be fully aware
of the location of the emergency
liftgate safety release lever in the
vehicle and how to open the liftgate
if you are accidentally locked in the
luggage compartment.
• No one should be allowed to occupy
the luggage compartment of the
vehicle at any time. The luggage
compartment is a very dangerous
location in the event of a crash.
• Use the release lever for
emergencies only. Use with extreme
caution, especially while the vehicle
is in motion.
Page 228 of 598
Convenient features
5-70
Power liftgate opening height
OTM050049
The driver may set the height of a fully
opened liftgate by following the below
instruction.
1. Position the liftgate manually to the
height you prefer.
2. Press the power liftgate inner switch
for more than 3 seconds.
3. Close the liftgate manually after
hearing the buzzer sound.
The liftgate will open to the height the
driver has set up.
WARNING
Always keep the liftgate completely
closed while the vehicle is in motion. If
it is left open or ajar, poisonous exhaust
gases containing carbon monoxide
(CO) may enter the vehicle and serious
illness or death may result.
WARNING
Occupants should never ride in the
rear cargo area where no restraints are
available. To avoid injury in the event of
an accident or sudden stops, occupants
should always be properly restrained.
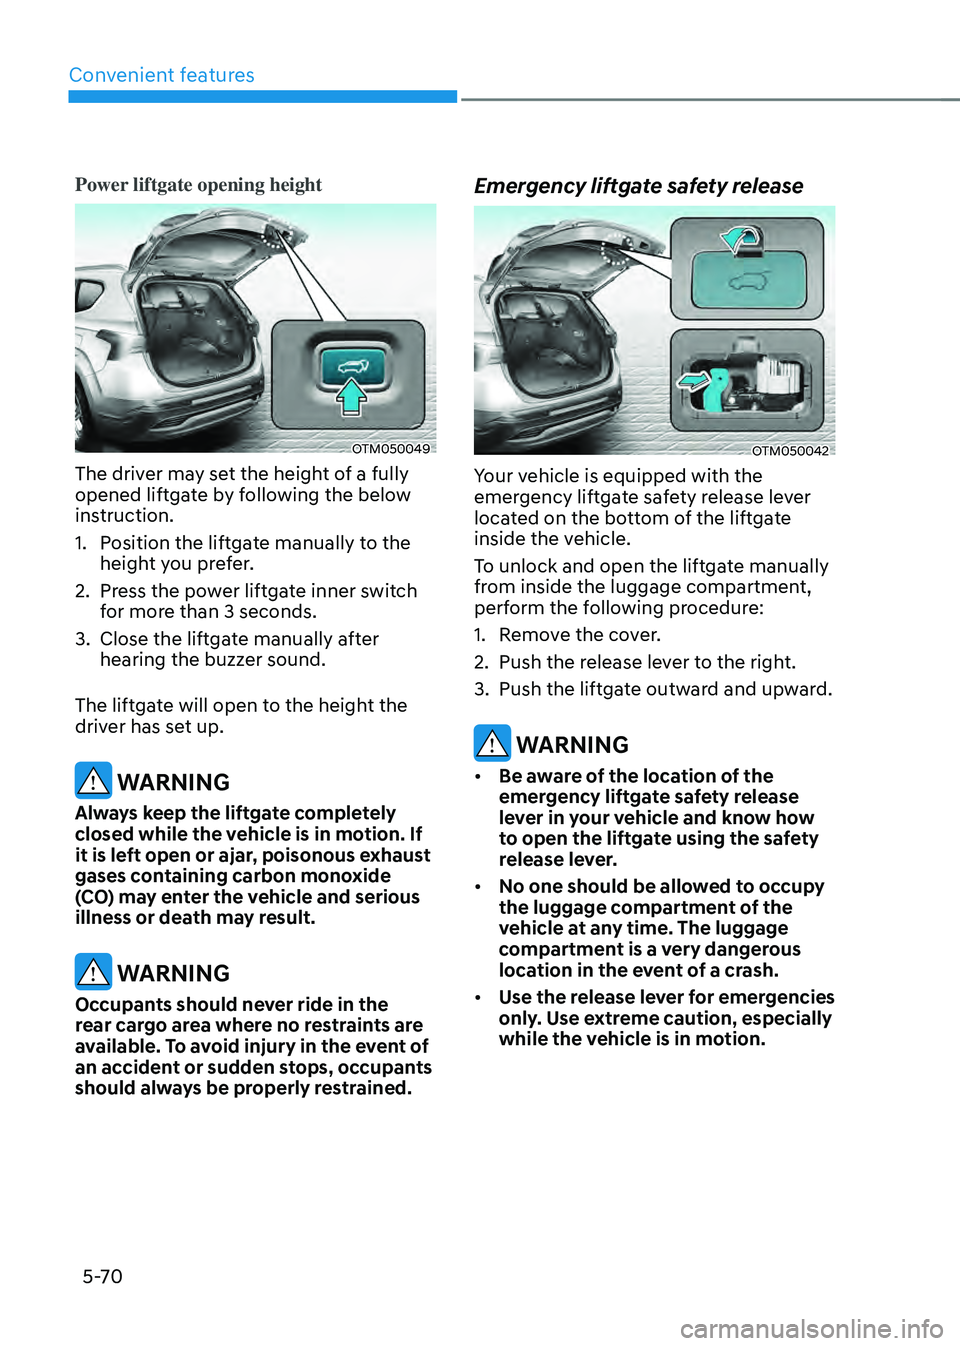
Emergency liftgate safety release
OTM050042
Your vehicle is equipped with the
emergency liftgate safety release lever
located on the bottom of the liftgate
inside the vehicle.
To unlock and open the liftgate manually
from inside the luggage compartment,
perform the following procedure:
1. Remove the cover.
2. Push the release lever to the right.
3. Push the liftgate outward and upward.
WARNING
• Be aware of the location of the
emergency liftgate safety release
lever in your vehicle and know how
to open the liftgate using the safety
release lever.
• No one should be allowed to occupy
the luggage compartment of the
vehicle at any time. The luggage
compartment is a very dangerous
location in the event of a crash.
• Use the release lever for emergencies
only. Use extreme caution, especially
while the vehicle is in motion.
Page 233 of 598
05
5-75
• Do not get back into a vehicle
once you have begun refueling.
You can generate a buildup of
static electricity by touching,
rubbing or sliding against any item
or fabric capable of producing
static electricity. Static electricity
discharge can ignite fuel vapors
causing a fire. If you must re-enter
the vehicle, you should once again
eliminate potentially dangerous
static electricity discharge by
touching a metal part of the vehicle,
away from the fuel filler neck, nozzle
or other fuel source, with your bare
hand.
• When using an approved portable
fuel container, be sure to place the
container on the ground prior to
refueling. Static electricity discharge
from the container can ignite fuel
vapors causing a fire.
Once refueling has begun, contact
between your bare hand and the
vehicle should be maintained until
the filling is complete.
• Use only approved portable plastic
fuel containers designed to carry and
store fuel.
• When refueling, always shift the
gear to the P (Park) position, set
the parking brake, and press the
Engine Start/Stop button to the
OFF position. Sparks produced by
electrical components related to the
engine can ignite fuel vapors causing
a fire.
• Do not use matches or a lighter and
do not smoke or leave a lit cigarette
in your vehicle while at a gas station,
especially during refueling.
• Do not over-fill or top-off your
vehicle tank, which can cause fuel
spillage.
• If a fire breaks out during refueling,
leave the vicinity of the vehicle, and
immediately contact the manager
of the gas station and then contact
the local fire department. Follow any
safety instructions they provide.
• If pressurized fuel sprays out, it can
cover your clothes or skin and thus
subject you to the risk of fire and
burns. Always remove the fuel cap
carefully and slowly. If the cap is
venting fuel or if you hear a hissing
sound, wait until the condition stops
before completely removing the cap.
• Always check that the fuel cap is
installed securely to prevent fuel
spillage in the event of an accident.
Information
Make sure to refuel your vehicle according
to the “Fuel Requirements” section in
suggested in chapter 1.
NOTICE
• Do not spill fuel on the exterior
surfaces of the vehicle. Any type of
fuel spilled on painted surfaces may
damage the paint.
• If the fuel filler cap requires
replacement, use only a genuine
HYUNDAI cap or the equivalent
specified for your vehicle. An
incorrect fuel filler cap can result
in a serious malfunction of the fuel
system or emission control system.
Page 236 of 598
Convenient features
5-78
LIGHTING
Exterior lights
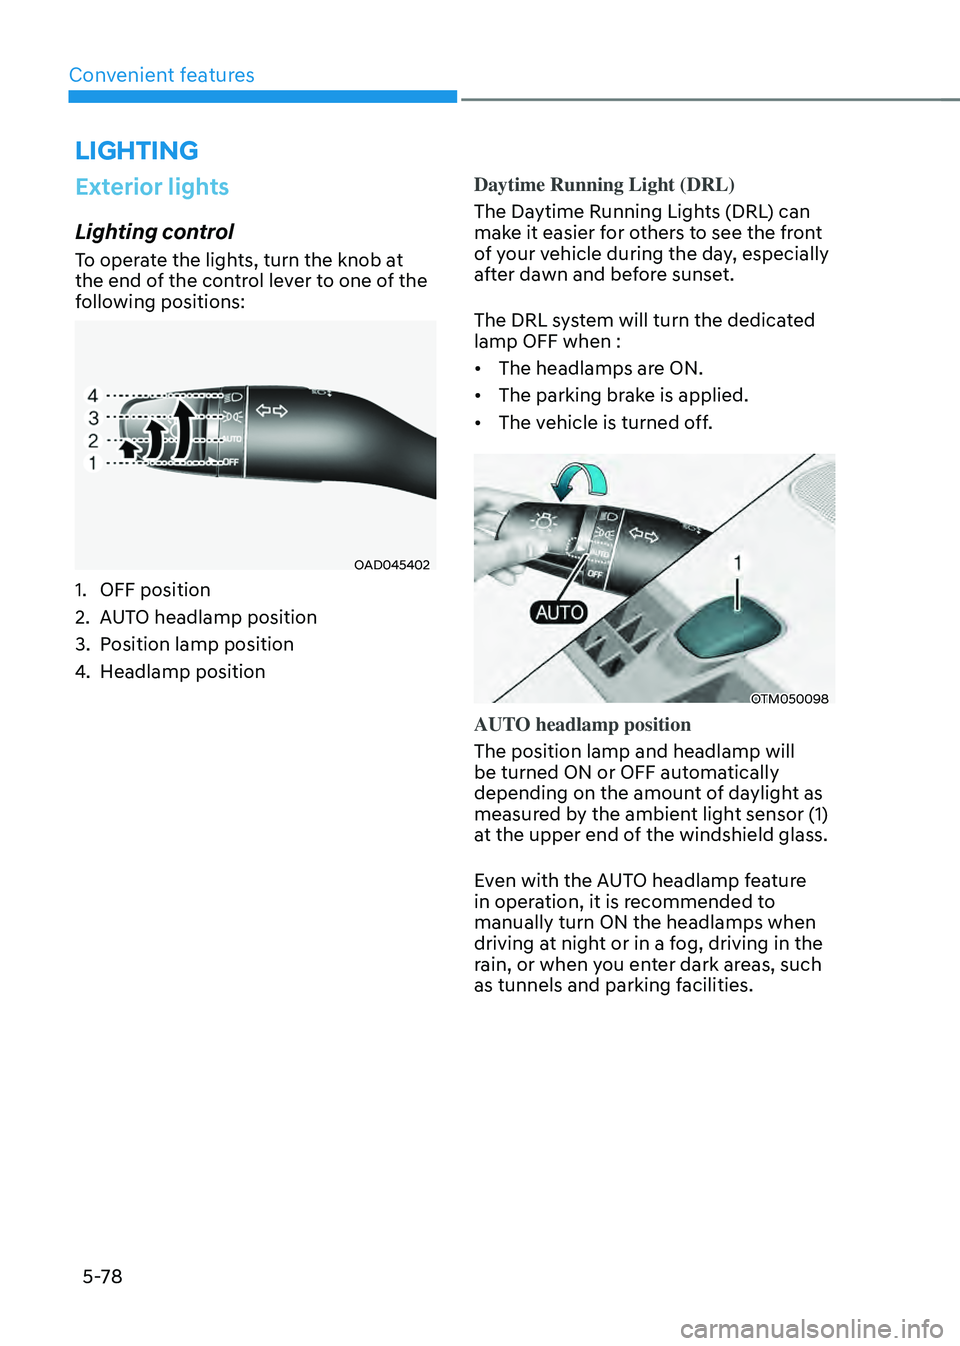
Lighting control
To operate the lights, turn the knob at
the end of the control lever to one of the
following positions:
OAD045402
1. OFF position
2. AUTO headlamp position
3. Position lamp position
4. Headlamp positionDaytime Running Light (DRL)
The Daytime Running Lights (DRL) can
make it easier for others to see the front
of your vehicle during the day, especially
after dawn and before sunset.
The DRL system will turn the dedicated
lamp OFF when :
• The headlamps are ON.
• The parking brake is applied.
• The vehicle is turned off.
OTM050098
AUTO headlamp position
The position lamp and headlamp will
be turned ON or OFF automatically
depending on the amount of daylight as
measured by the ambient light sensor (1)
at the upper end of the windshield glass.
Even with the AUTO headlamp feature
in operation, it is recommended to
manually turn ON the headlamps when
driving at night or in a fog, driving in the
rain, or when you enter dark areas, such
as tunnels and parking facilities.
Page 241 of 598
05
5-83
System operation
Display and control
• After selecting ‘High Beam Assist’
in the Settings menu, High Beam
Assist will operate by following the
procedure below.
-Place the headlamp switch in
the AUTO position and push
the headlamp lever towards the
instrument cluster. The High Beam
Assist (
) indicator light will
illuminate on the cluster and the
system will be enabled.
- When the system is enabled, high
beam will turn on when vehicle
speed is above 25 mph (40 km/h).
When vehicle speed is below 15
mph (25 km/h), high beam will not
turn on.
-The High Beam () indicator light
will illuminate on the cluster when
high beam is on.
• When High Beam Assist is operating, if
the headlamp lever or switch is used,
the system operates as follow:
- If the headlamp lever is pulled
towards you when the high beam
is off, the high beam will turn on
without High Beam Assist canceled.
When you let go of the headlamp
lever, the lever will move to the
middle and the high beam will turn
off.
-If the headlamp lever is pulled
towards you when the high beam is
on by High Beam Assist, low beam
will be on and the system will turn
off.
-If the headlamp switch is placed
from AUTO to another position
(headlamp/position/off), High
Beam Assist will turn off and the
corresponding lamp will turn on.
• When High Beam Assist is operating,
high beam switches to low beam if
any of the following conditions occur:
-When the headlamp of an
oncoming vehicle is detected.
-When the tail lamp of a vehicle in
front is detected.
-When the headlamp or tail lamp of a
motorcycle or a bicycle is detected.
-When the surrounding ambient light
is bright enough that high beams
are not required.
-When streetlights or other lights are
detected.
System malfunction and
limitations
System malfunction
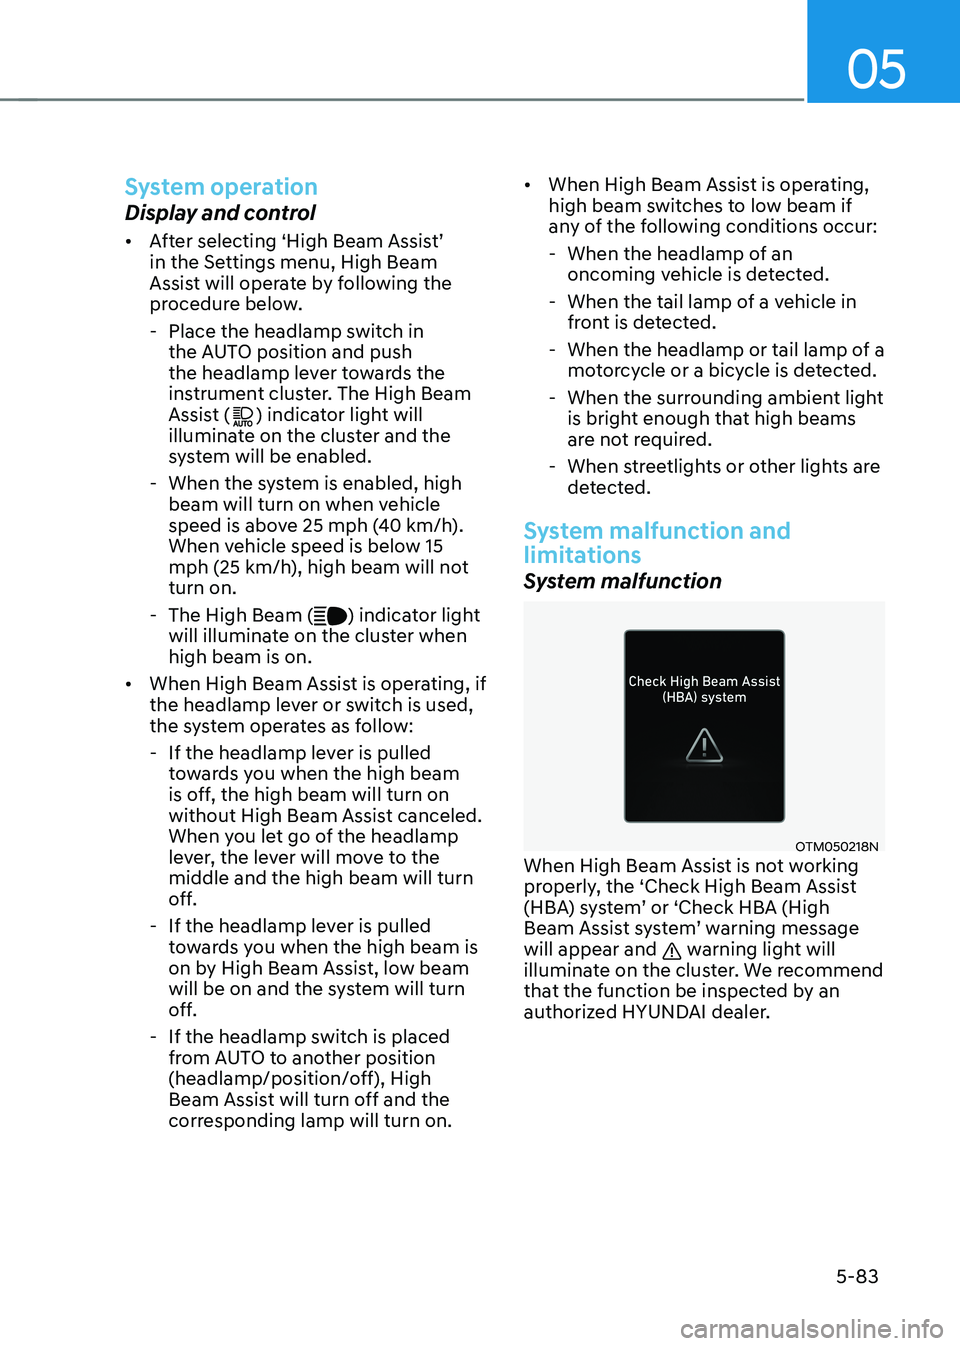
OTM050218NWhen High Beam Assist is not working
properly, the ‘Check High Beam Assist
(HBA) system’ or ‘Check HBA (High
Beam Assist system’ warning message
will appear and
warning light will
illuminate on the cluster. We recommend
that the function be inspected by an
authorized HYUNDAI dealer.
Page 242 of 598
Convenient features
5-84
Limitations of the system
High Beam Assist may not work properly
in the following situations:
• Light from a vehicle is not detected
because of lamp damage, or because
it is hidden from sight, etc.
• Headlamp of a vehicle is covered with
dust, snow or water.
• A vehicle’s headlamps are off but the
fog lamps are on and etc.
• There is a lamp that has a similar
shape as a vehicle’s lamp.
• Headlamps have been damaged or
not repaired properly.
• Headlamps are not aimed properly.
• Driving on a narrow curved road,
rough road, uphill or downhill.
• Vehicle in front is partially visible on a
crossroad or curved road.
• There is a traffic light, reflecting sign,
flashing sign or mirror ahead.
• There is a temporary reflector or flash
ahead (construction area).
• The road conditions are bad such as
being wet, iced or covered with snow.
• A vehicle suddenly appears from a
curve.
• The vehicle is tilted from a flat tire or
is being towed.
• Light from a vehicle is not detected
because of exhaust fume, smoke, fog,
snow, etc.
For more details on the limitations
of the front view camera, refer to
“Forward Collision-Avoidance Assist
(FCA)” section in chapter 7.
WARNING
• At times, High Beam Assist may not
work properly. It is the responsibility
of the driver for safe driving
practices and always check the road
conditions for your safety.
• When High Beam Assist does
not operate normally, change
the headlamp position manually
between high beam and low beam.
Page 261 of 598
05
5-103
WINDSHIELD DEFROSTING AND DEFOGGING
WARNING
Windshield heating
Do not use the
position during cooling operation in extremely humid
weather. The difference between the
temperature of the outside air and that
of the windshield could cause the outer
surface of the windshield to fog up,
causing loss of visibility could cause
an accident resulting in serious injury
or death. In this case, set the mode
selection button to the
position and fan speed control knob to a lower
speed.
• For maximum defrost performance,
set the temperature control to the
highest temperature setting and
the fan speed control to the highest
setting.
• If warm air to the floor is desired while
defrosting or defogging, set the mode
to the floor-defrost position.
• Before driving, clear all snow and ice
from the windshield, rear window,
side view mirrors, and all side
windows.
• Clear all snow and ice from the
hood and air inlet in the cowl grill
to improve heater and defroster
efficiency and to reduce the
probability of fogging up the inside of
the windshield.
NOTICE
If the engine temperature is still cold
after starting, then a brief engine warm
up period may be required for the
vented air flow to become warm or hot.
Automatic climate control
system
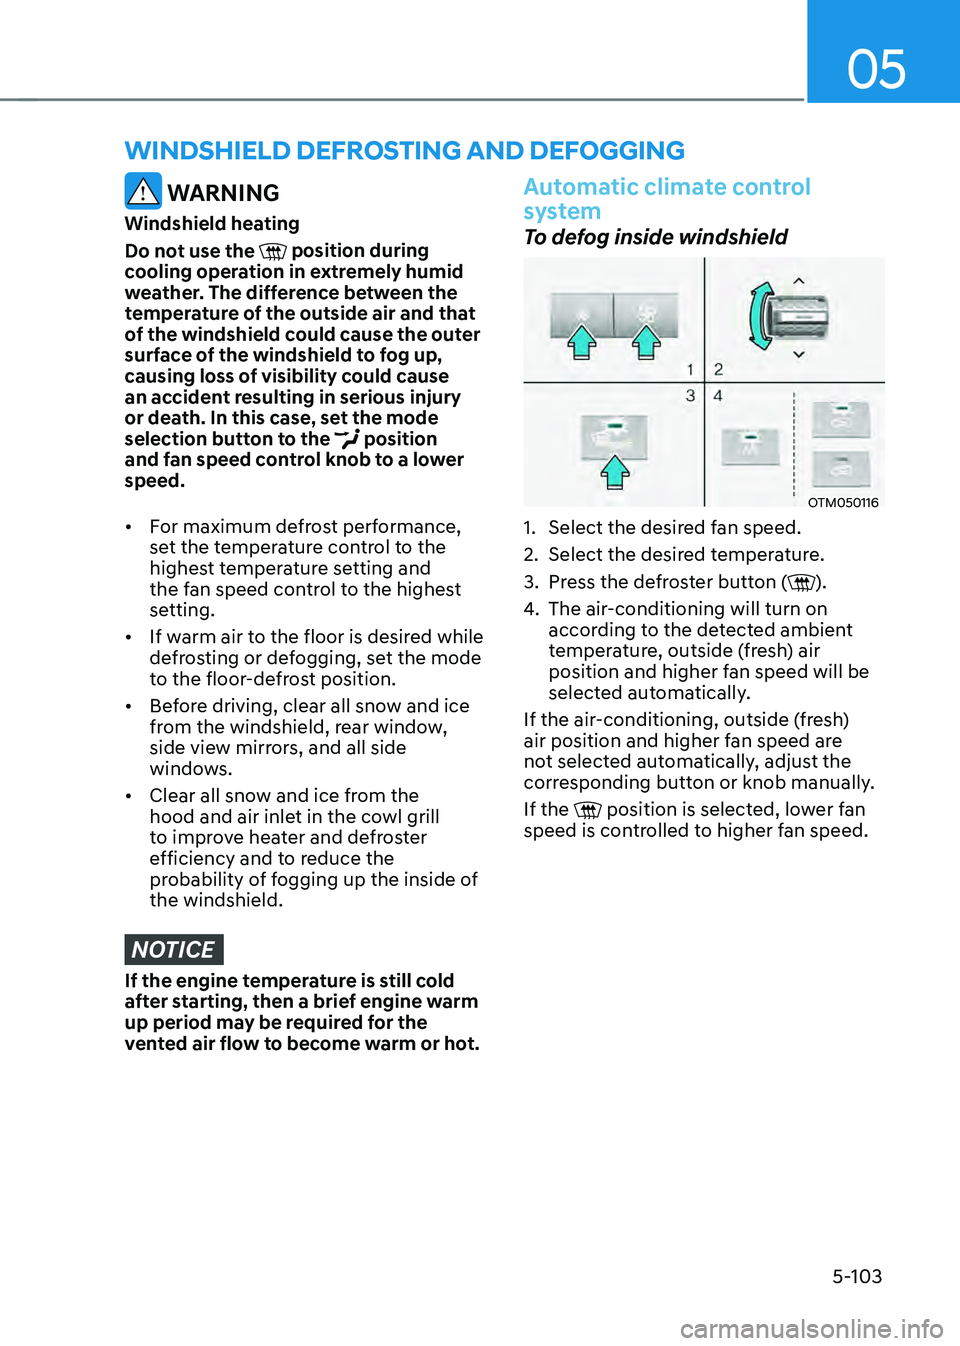
To defog inside windshield
OTM050116
1. Select the desired fan speed.
2. Select the desired temperature.
3. Press the defroster button ().
4. The air-conditioning will turn on
according to the detected ambient
temperature, outside (fresh) air
position and higher fan speed will be
selected automatically.
If the air-conditioning, outside (fresh)
air position and higher fan speed are
not selected automatically, adjust the
corresponding button or knob manually.
If the
position is selected, lower fan speed is controlled to higher fan speed.
Page 281 of 598
05
5-123
EXTERIOR FEATURES
Roof side rails
OTM050017
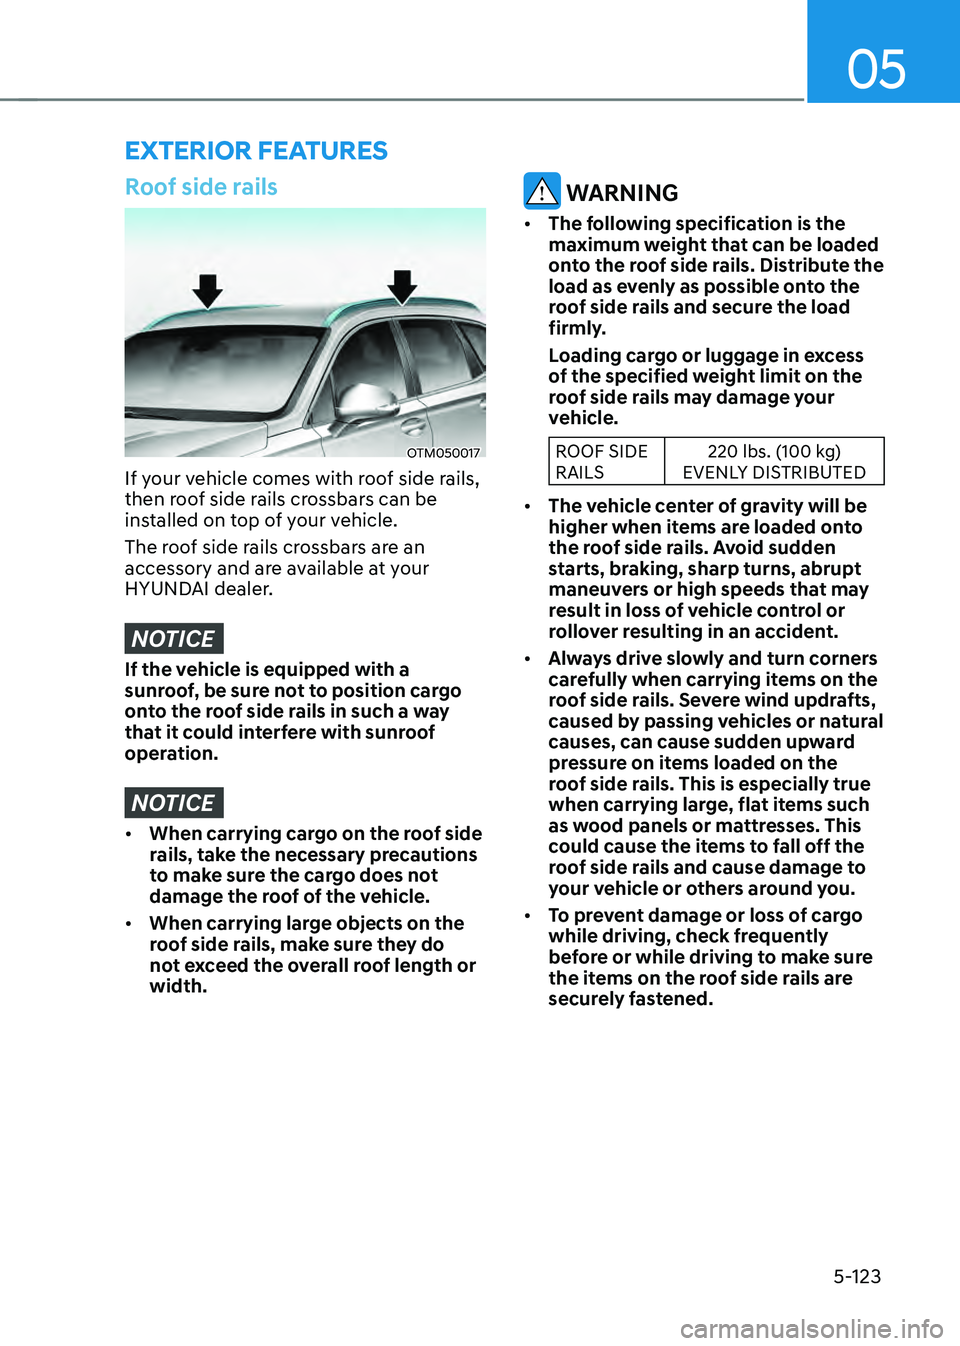
If your vehicle comes with roof side rails,
then roof side rails crossbars can be
installed on top of your vehicle.
The roof side rails crossbars are an
accessory and are available at your
HYUNDAI dealer.
NOTICE
If the vehicle is equipped with a
sunroof, be sure not to position cargo
onto the roof side rails in such a way
that it could interfere with sunroof
operation.
NOTICE
• When carrying cargo on the roof side
rails, take the necessary precautions
to make sure the cargo does not
damage the roof of the vehicle.
• When carrying large objects on the
roof side rails, make sure they do
not exceed the overall roof length or
width.
WARNING
• The following specification is the
maximum weight that can be loaded
onto the roof side rails. Distribute the
load as evenly as possible onto the
roof side rails and secure the load
firmly.
Loading cargo or luggage in excess
of the specified weight limit on the
roof side rails may damage your
vehicle.
ROOF SIDE
RAILS220 lbs. (100 kg)
EVENLY DISTRIBUTED
• The vehicle center of gravity will be
higher when items are loaded onto
the roof side rails. Avoid sudden
starts, braking, sharp turns, abrupt
maneuvers or high speeds that may
result in loss of vehicle control or
rollover resulting in an accident.
• Always drive slowly and turn corners
carefully when carrying items on the
roof side rails. Severe wind updrafts,
caused by passing vehicles or natural
causes, can cause sudden upward
pressure on items loaded on the
roof side rails. This is especially true
when carrying large, flat items such
as wood panels or mattresses. This
could cause the items to fall off the
roof side rails and cause damage to
your vehicle or others around you.
• To prevent damage or loss of cargo
while driving, check frequently
before or while driving to make sure
the items on the roof side rails are
securely fastened.
Page 288 of 598
Driving your vehicle
6-4
Before entering the vehicle
• Be sure all windows, outside mirror(s),
and outside lights are clean and
unobstructed.
• Remove frost, snow, or ice.
• Visually check the tires for uneven
wear and damage.
• Check under the vehicle for any sign
of leaks.
• Be sure there are no obstacles behind
you if you intend to back up.
Before starting
• Make sure the hood, the liftgate, and
the doors are securely closed and
locked.
• Adjust the position of the seat and
steering wheel.
• Adjust the inside and side view
mirrors.
• Verify all the lights work.
• Fasten your seat belt. Check that all
passengers have fastened their seat
belts.
• Check the gauges and indicators
in the instrument panel and the
messages on the instrument display
when the ignition switch is in the ON
position.
• Check that any items you are carrying
are stored properly or fastened down
securely.
WARNING
To reduce the risk of SERIOUS INJURY or
DEATH, take the following precautions:
• ALWAYS wear your seat belt. All
passengers must be properly belted
whenever the vehicle is moving.
For more information, refer to “Seat
Belts” section in chapter 3.
• Always drive defensively. Assume
other drivers or pedestrians may be
careless and make mistakes.
• Stay focused on the task of driving.
Driver distraction can cause
accidents.
• Leave plenty of space between you
and the vehicle in front of you.
WARNING
NEVER drink or take drugs and drive.
Drinking or taking drugs and driving
is dangerous and may result in an
accident and SERIOUS INJURY or
DEATH.
Drunk driving is the number one
contributor to the highway death
toll each year. Even a small amount
of alcohol will affect your reflexes,
perceptions and judgment. Just
one drink can reduce your ability to
respond to changing conditions and
emergencies and your reaction time
gets worse with each additional drink.
Driving while under the influence
of drugs is as dangerous or more
dangerous than driving under the
influence of alcohol.
You are much more likely to have a
serious accident if you drink or take
drugs and drive. If you are drinking or
taking drugs, don’t drive. Do not ride
with a driver who has been drinking
or taking drugs. Choose a designated
driver or call a taxi.
BEFORE DRIVING
Page 295 of 598
06
6-11
WARNING
To reduce the risk of serious injury or
death:
• ALWAYS check the surrounding
areas near your vehicle for people,
especially children, before shifting a
vehicle into D (Drive) or R (Reverse).
• Before leaving the driver’s seat,
always make sure the shift button
is in the P (Park) position, then set
the parking brake, and place the
ignition switch in the LOCK/OFF
position. Unexpected and sudden
vehicle movement can occur if these
precautions are not followed.
• When using the paddle shifters to
change gears, do not shift from a
high gear to lower gear on slippery
roads. The vehicle may slip causing
an accident.
P (Park)
Always come to a complete stop before
shifting into P (Park).
To shift from P (Park), you must depress
firmly on the brake pedal and make sure
your foot is off the accelerator pedal.
The shift button must be in P (Park)
before turning the engine off.
WARNING
• Shifting into P (Park) while the
vehicle is in motion may cause you to
lose control of the vehicle.
• After the vehicle has stopped, always
make sure the shift button is in P
(Park), apply the parking brake, and
turn the engine off.
• When parking on an incline with the
vehicle facing down the hill, turn
the steering wheel fully to the right
to prevent the vehicle from rolling
downhill. When parking with the
vehicle facing up the hill, turn the
steering wheel fully to the left.
• Do not use the P (Park) position in
place of the parking brake.
R (Reverse)
Use this position to drive the vehicle
backward.
NOTICE
Always come to a complete stop before
shifting into or out of R (Reverse); you
may damage the transmission if you
shift into R (Reverse) while the vehicle is
in motion.
When the vehicle is stopped in
R (Reverse) position, if you open
the driver’s door with the seat belt
unfastened, the gear is shifted to P (Park)
position automatically.
However when the vehicle moves
in R (Reverse) position, if you open
the driver’s door with the seat belt
unfastened, the gear may be not shifted
to P (Park) position automatically for
protecting the automatic transmission.
N (Neutral)
The wheels and transmission are not
engaged.
Use N (Neutral) if you need to restart a
stalled engine, or if it is necessary to stop
with the engine ON. Shift into P (Park)
if you need to leave your vehicle for any
reason.
Always depress the brake pedal when
you are shifting from N (Neutral) to
another gear.
WARNING
Do not shift into gear unless your foot is
firmly on the brake pedal. Shifting into
gear when the engine is running at high
speed can cause the vehicle to move
very rapidly. You could lose control of
the vehicle and hit people or objects.