buttons HYUNDAI SANTA FE HYBRID 2021 Owners Manual
[x] Cancel search | Manufacturer: HYUNDAI, Model Year: 2021, Model line: SANTA FE HYBRID, Model: HYUNDAI SANTA FE HYBRID 2021Pages: 598, PDF Size: 66.6 MB
Page 140 of 598
Instrument cluster
4-28
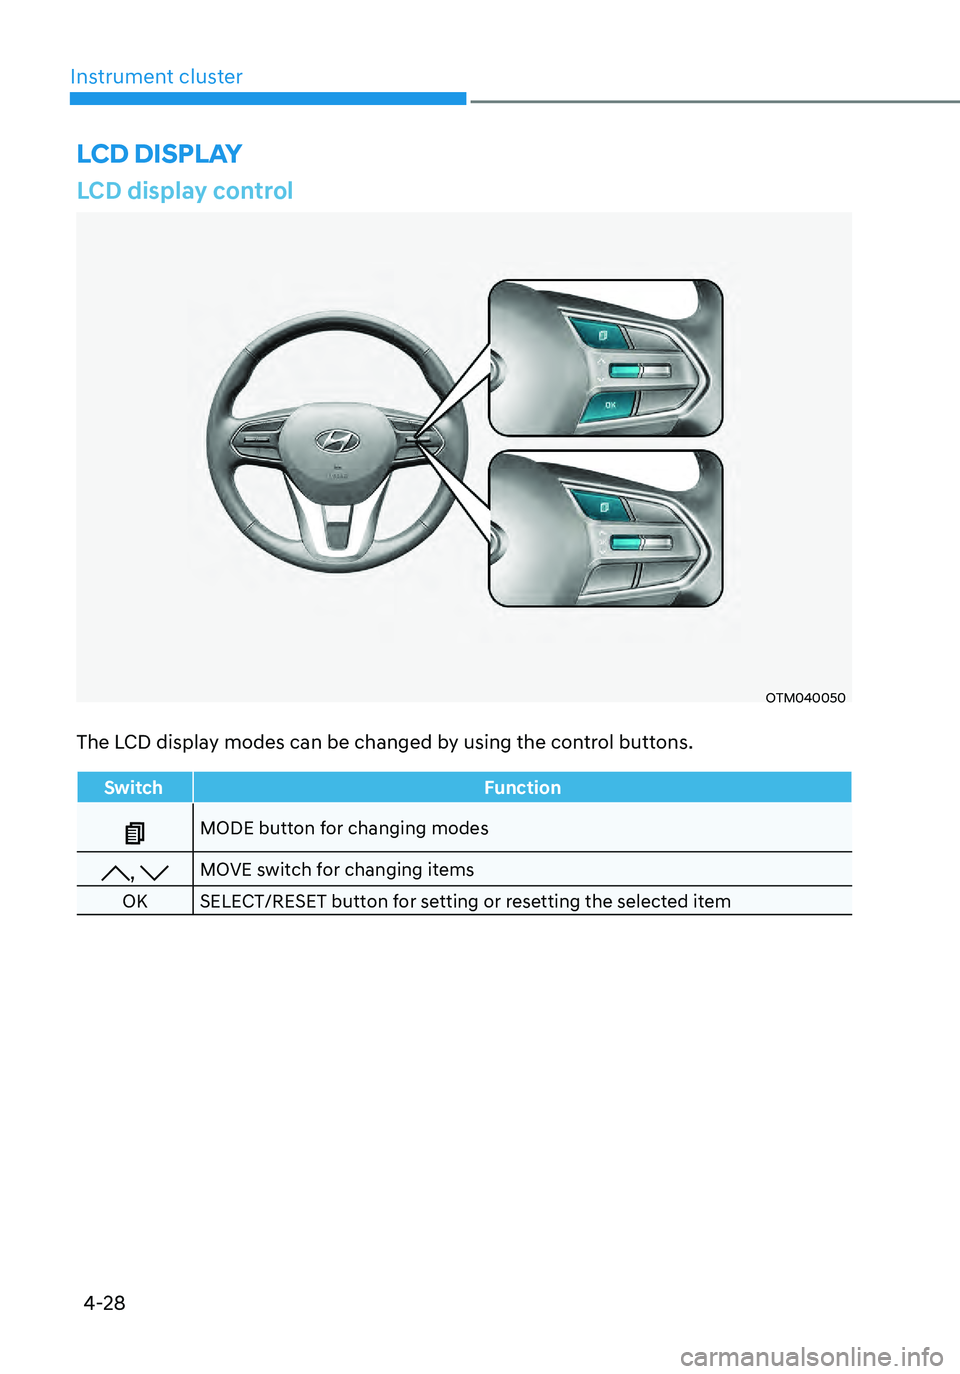
LCD display control
OTM040050
The LCD display modes can be changed by using the control buttons.
SwitchFunction
MODE button for changing modes
, MOVE switch for changing items
OK SELECT/RESET button for setting or resetting the selected item
LCD DISPLAY
Page 191 of 598
05
5-33
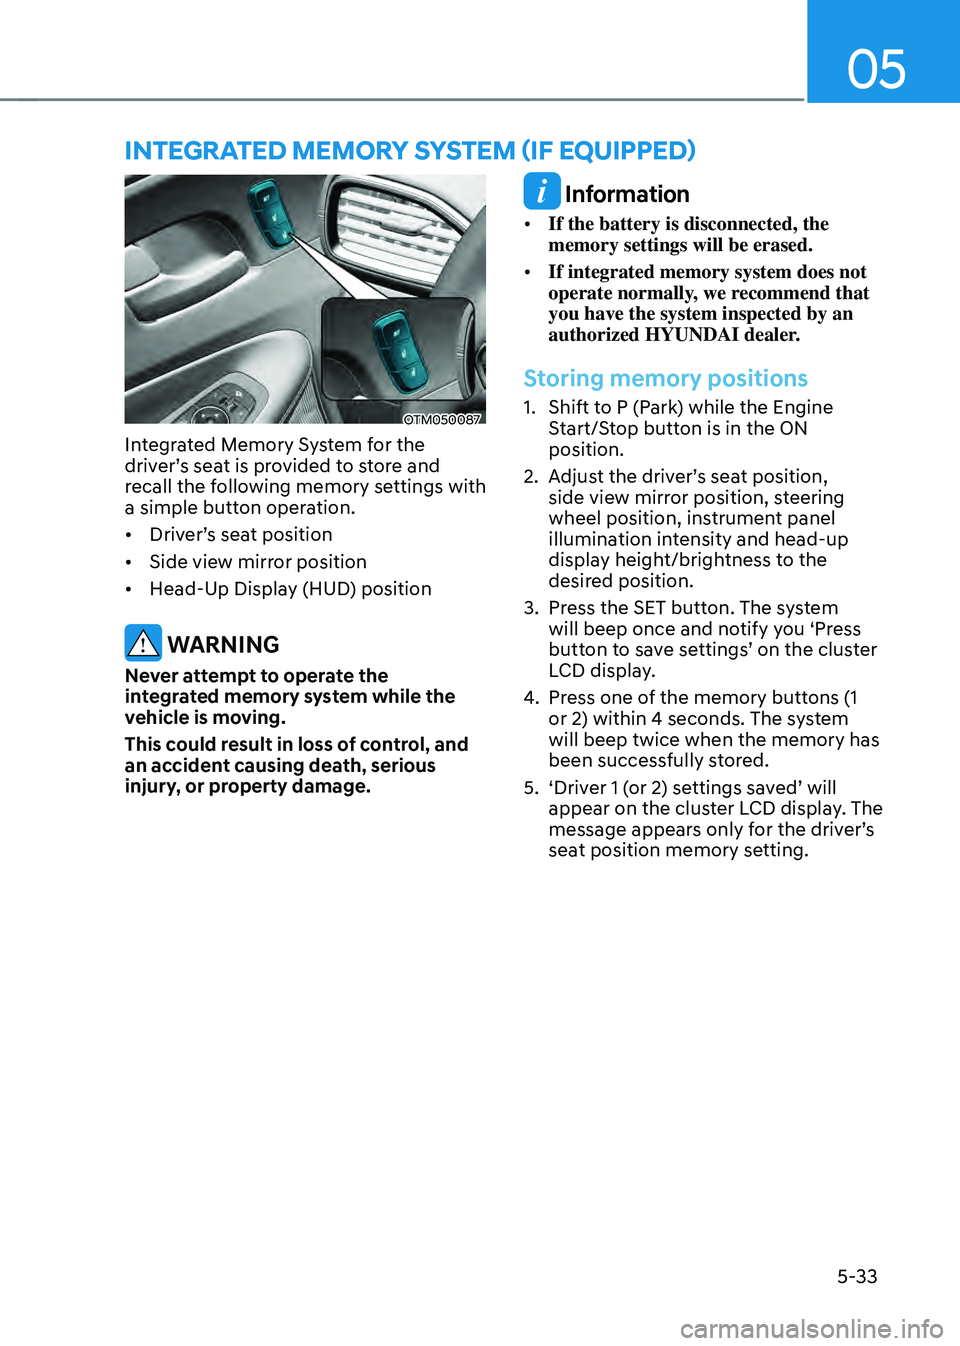
OTM050087
Integrated Memory System for the
driver’s seat is provided to store and
recall the following memory settings with
a simple button operation.
• Driver’s seat position
• Side view mirror position
• Head-Up Display (HUD) position
WARNING
Never attempt to operate the
integrated memory system while the
vehicle is moving.
This could result in loss of control, and
an accident causing death, serious
injury, or property damage.
Information
• If the battery is disconnected, the
memory settings will be erased.
• If integrated memory system does not
operate normally, we recommend that
you have the system inspected by an
authorized HYUNDAI dealer.
Storing memory positions
1. Shift to P (Park) while the Engine
Start/Stop button is in the ON
position.
2. Adjust the driver’s seat position,
side view mirror position, steering
wheel position, instrument panel
illumination intensity and head-up
display height/brightness to the
desired position.
3. Press the SET button. The system
will beep once and notify you ‘Press
button to save settings’ on the cluster
LCD display.
4. Press one of the memory buttons (1
or 2) within 4 seconds. The system
will beep twice when the memory has
been successfully stored.
5. ‘Driver 1 (or 2) settings saved’ will
appear on the cluster LCD display. The
message appears only for the driver’s
seat position memory setting.
INTEGRATED MEMORY SYSTEM (IF EQUIPPED)
Page 192 of 598
Convenient features
5-34
Recalling memory positions
1. Shift to P (Park) while the Engine
Start/Stop button is in the ON
position.
2. Press the desired memory button (1
or 2). The system will beep once, and
then the driver’s seat position, side
view mirror position, steering wheel
position, instrument panel illumination
intensity and head-up display height/
brightness will automatically adjust to
the stored positions.
3. ‘Driver 1 (or 2) settings applied’ will
appear on the cluster LCD display.
Information
• If you press the SET button or the
corresponding button which the
setting is being recalled, the setting will
temporarily deactivate. If you press the
other buttons, the setting of the pressed
button will activate.
For example, if you press the SET
button or number 1 button with the
number 1 setting in operation, the
setting will temporarily deactivate. If
you press the number 2 button, the
number 2 setting will activate.
• If you adjust the seat, rearview mirror,
steering wheel, instrument panel
illumination or head-up display while
recalling the stored positions, the pre-
set settings will become ineffective.
Resetting the system
Take the following procedures to reset
integrated memory system, when it does
not operate properly.
Resetting integrated memory
system
1. Stop the vehicle and open the driver’s
door with the Engine Start/Stop
button in the ON position and the
vehicle shifted to P (Park).
2. Adjust the driver’s seat and seatback
to the foremost position.
3. Press the SET button and push
forward the driver’s seat movement
switch over 2 seconds simultaneously.
Page 200 of 598
Convenient features
5-42
1. Programming HomeLink®
The following steps show how to
program HomeLink. If you have any
questions or are having difficulty
programming your HomeLink buttons,
refer to the HomeLink website or call the
HomeLink customer support toll-free
number. Do this before going back to the
dealer who sold you the car.
• Visit the HomeLink website at: www.
homelink.com. Then at the top of the
page, choose your vehicle make. Then
watch the You Tube video, and/or
access additional website information.
• If you choose to access the website
via your cell phone, scan the QR code.
• Or call HomeLink customer support
at 1-800-355-3515 (Please have the
vehicle make/model and the opener
device make/model readily available.)
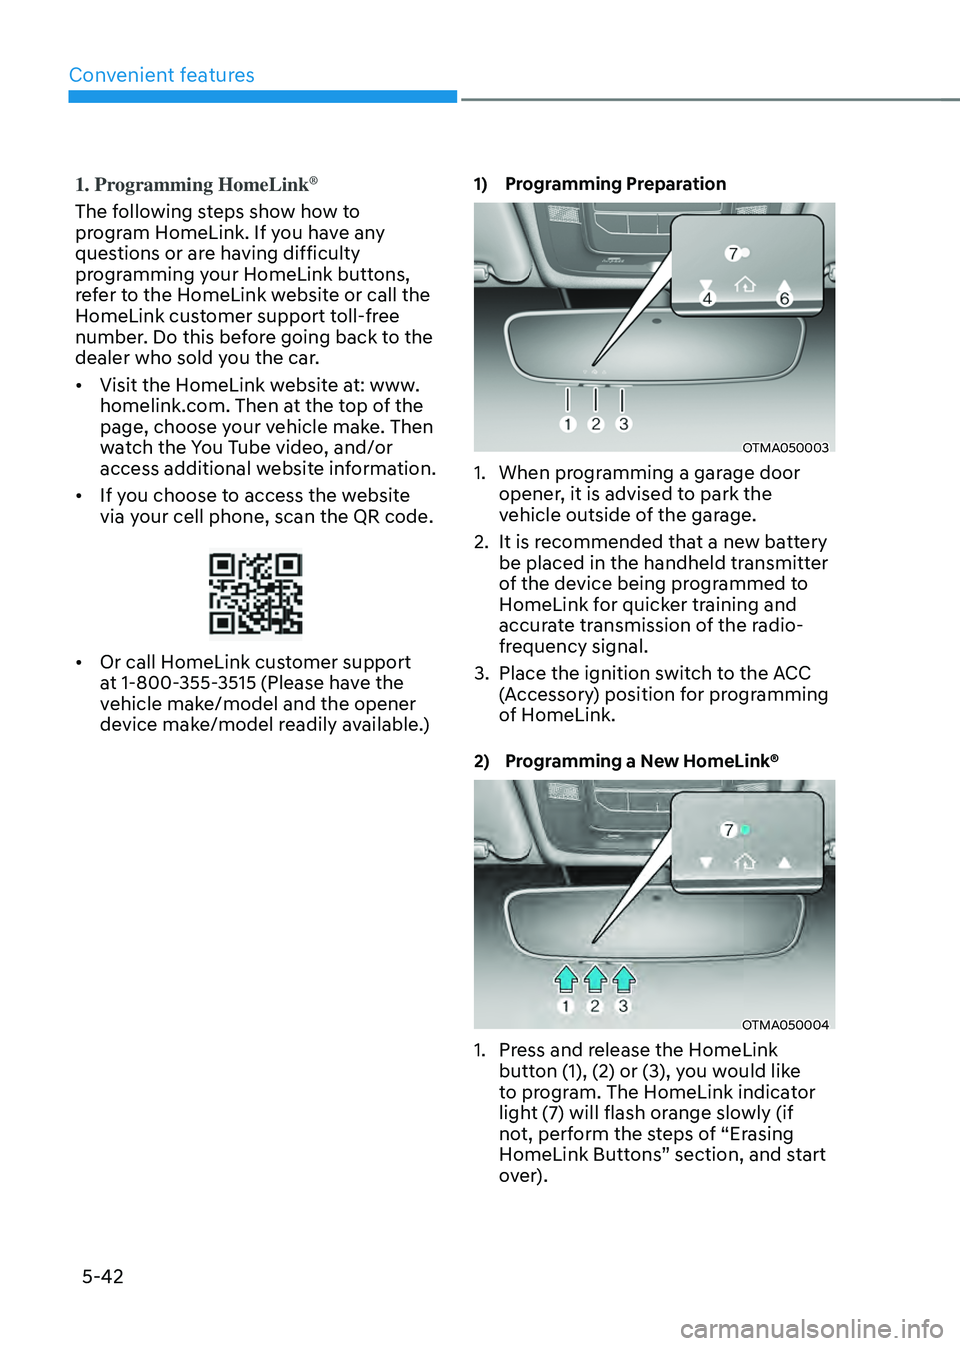
1) Programming Preparation
OTMA050003
1. When programming a garage door
opener, it is advised to park the
vehicle outside of the garage.
2. It is recommended that a new battery
be placed in the handheld transmitter
of the device being programmed to
HomeLink for quicker training and
accurate transmission of the radio-
frequency signal.
3. Place the ignition switch to the ACC
(Accessory) position for programming
of HomeLink.
2) Programming a New HomeLink®
OTMA050004
1. Press and release the HomeLink
button (1), (2) or (3), you would like
to program. The HomeLink indicator
light (7) will flash orange slowly (if
not, perform the steps of “Erasing
HomeLink Buttons” section, and start
over).
Page 201 of 598
05
5-43
OTMA050005
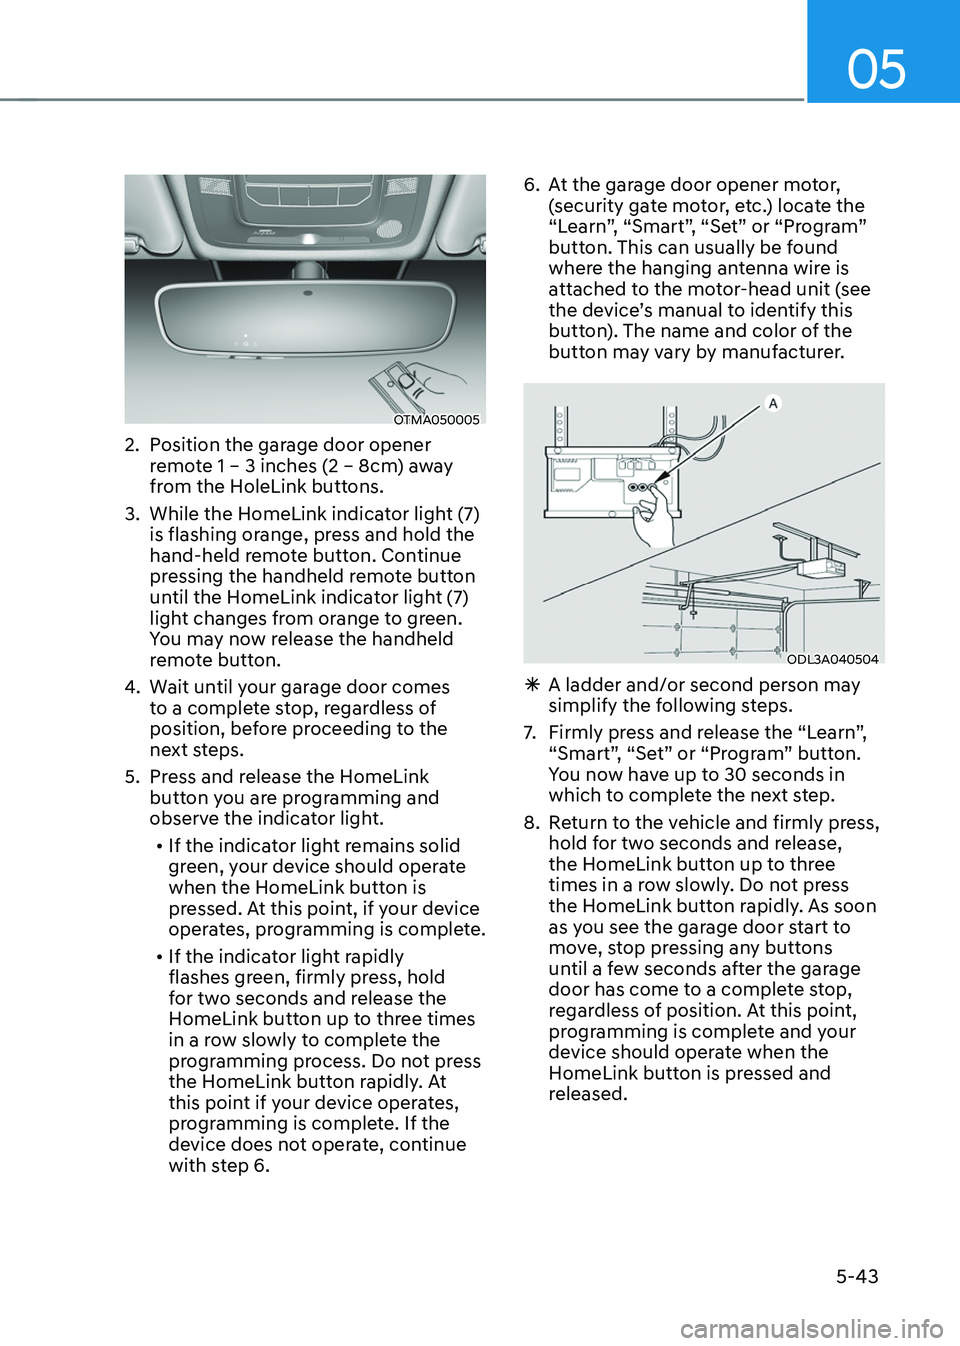
2. Position the garage door opener
remote 1 – 3 inches (2 – 8cm) away
from the HoleLink buttons.
3. While the HomeLink indicator light (7)
is flashing orange, press and hold the
hand-held remote button. Continue
pressing the handheld remote button
until the HomeLink indicator light (7)
light changes from orange to green.
You may now release the handheld
remote button.
4. Wait until your garage door comes
to a complete stop, regardless of
position, before proceeding to the
next steps.
5. Press and release the HomeLink
button you are programming and
observe the indicator light.
• If the indicator light remains solid
green, your device should operate
when the HomeLink button is
pressed. At this point, if your device
operates, programming is complete.
• If the indicator light rapidly
flashes green, firmly press, hold
for two seconds and release the
HomeLink button up to three times
in a row slowly to complete the
programming process. Do not press
the HomeLink button rapidly. At
this point if your device operates,
programming is complete. If the
device does not operate, continue
with step 6.
6. At the garage door opener motor,
(security gate motor, etc.) locate the
“Learn”, “Smart”, “Set” or “Program”
button. This can usually be found
where the hanging antenna wire is
attached to the motor-head unit (see
the device’s manual to identify this
button). The name and color of the
button may vary by manufacturer.
ODL3A040504
ÃA ladder and/or second person may
simplify the following steps.
7. Firmly press and release the “Learn”,
“Smart”, “Set” or “Program” button.
You now have up to 30 seconds in
which to complete the next step.
8. Return to the vehicle and firmly press,
hold for two seconds and release,
the HomeLink button up to three
times in a row slowly. Do not press
the HomeLink button rapidly. As soon
as you see the garage door start to
move, stop pressing any buttons
until a few seconds after the garage
door has come to a complete stop,
regardless of position. At this point,
programming is complete and your
device should operate when the
HomeLink button is pressed and
released.
Page 203 of 598
05
5-45
4) Canadian Programming
Canadian radio-frequency laws require
transmitter remote signals to “time-
out” (or quit) after a couple seconds of
transmission, which may not be long
enough for HomeLink to pick up the signal
during programming.
If you live in Canada or you are having
difficulties programming a gate operator
or garage door opener by using the
programming procedures, replace
“Programming a New HomeLink Button”
step 3 with the following:
While the HomeLink indicator light (7) is
flashing orange, press and release (“cycle”)
your device’s handheld remote every two
seconds until the HomeLink indicator light
(7) changes from orange to green. You may
now release the hand-held remote button.
Then proceed with “Programming a New
HomeLink Button” step 4.
2. Operating HomeLink®
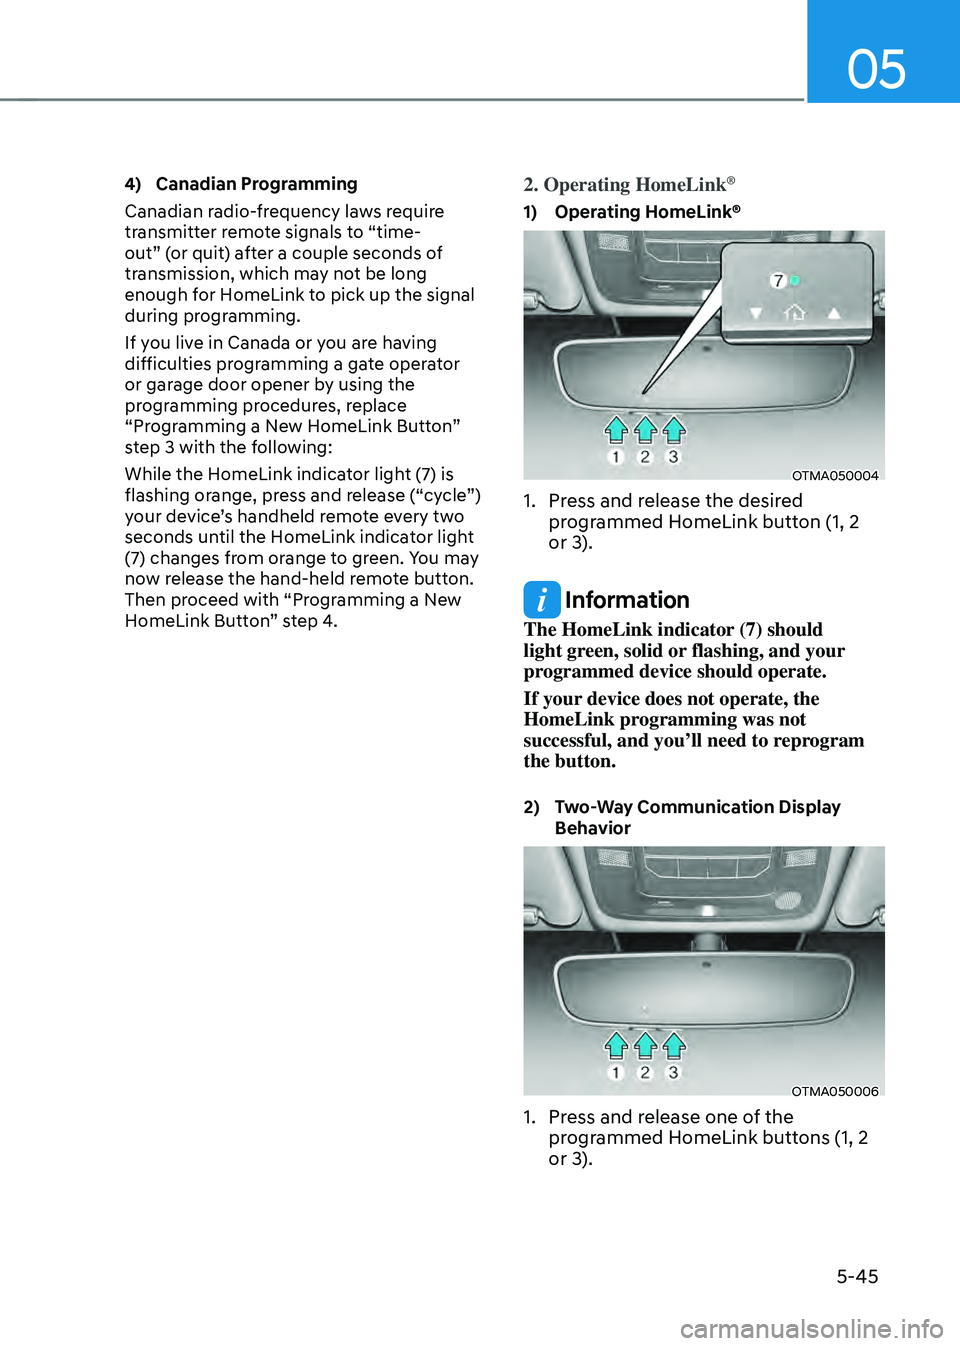
1) Operating HomeLink®
OTMA050004
1. Press and release the desired
programmed HomeLink button (1, 2
or 3).
Information
The HomeLink indicator (7) should
light green, solid or flashing, and your
programmed device should operate.
If your device does not operate, the
HomeLink programming was not
successful, and you’ll need to reprogram
the button.
2) Two-Way Communication Display Behavior
OTMA050006
1. Press and release one of the
programmed HomeLink buttons (1, 2
or 3).
Page 204 of 598
Convenient features
5-46
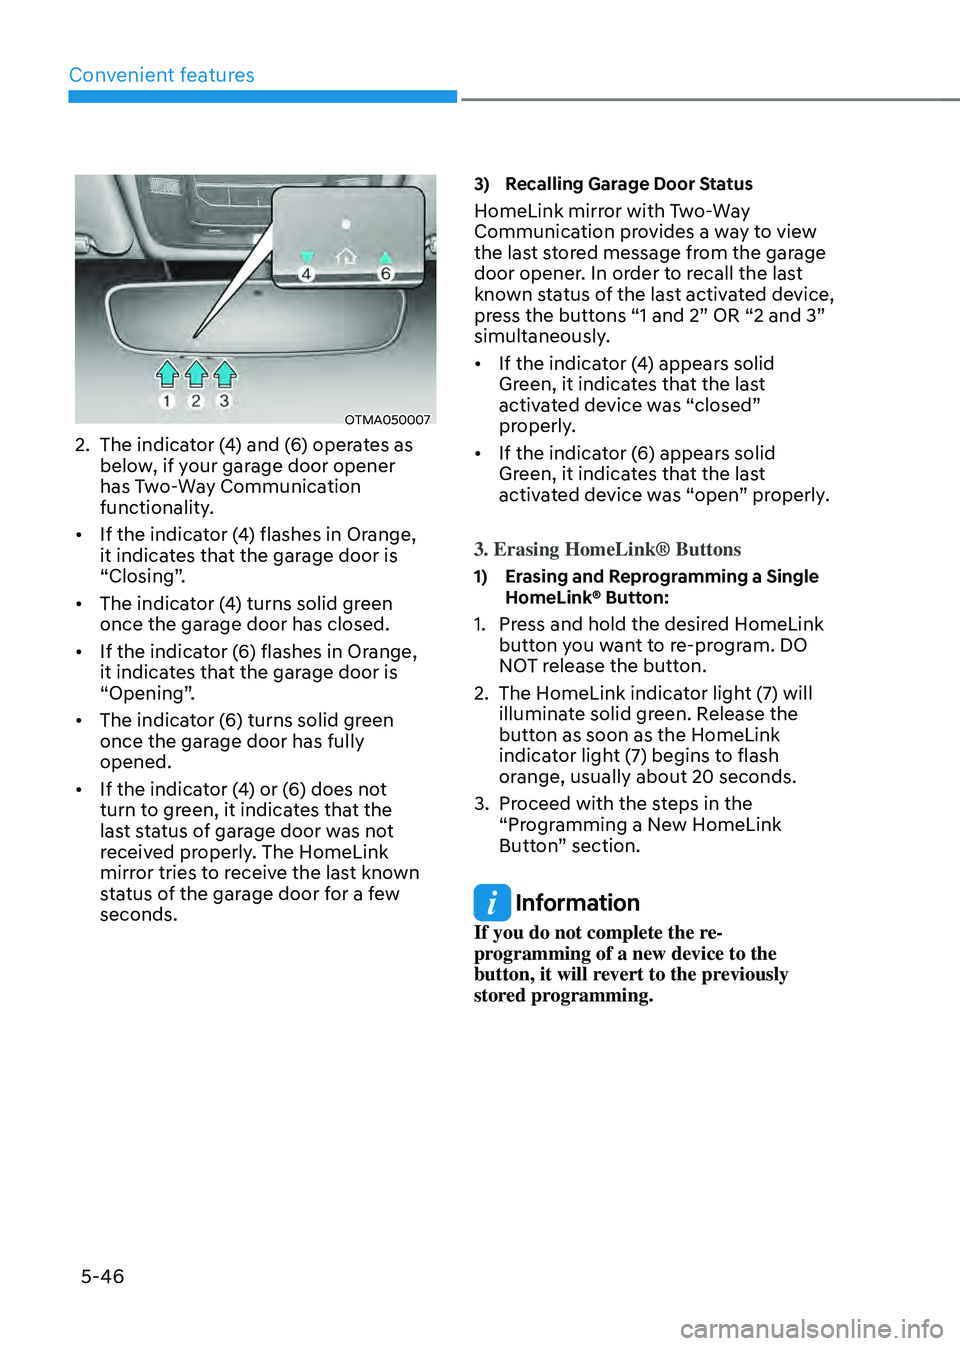
OTMA050007
2. The indicator (4) and (6) operates as
below, if your garage door opener
has Two-Way Communication
functionality.
• If the indicator (4) flashes in Orange,
it indicates that the garage door is
“Closing”.
• The indicator (4) turns solid green
once the garage door has closed.
• If the indicator (6) flashes in Orange,
it indicates that the garage door is
“Opening”.
• The indicator (6) turns solid green
once the garage door has fully
opened.
• If the indicator (4) or (6) does not
turn to green, it indicates that the
last status of garage door was not
received properly. The HomeLink
mirror tries to receive the last known
status of the garage door for a few
seconds.
3) Recalling Garage Door Status
HomeLink mirror with Two-Way
Communication provides a way to view
the last stored message from the garage
door opener. In order to recall the last
known status of the last activated device,
press the buttons “1 and 2” OR “2 and 3”
simultaneously.
• If the indicator (4) appears solid
Green, it indicates that the last
activated device was “closed”
properly.
• If the indicator (6) appears solid
Green, it indicates that the last
activated device was “open” properly.
3. Erasing HomeLink® Buttons
1) Erasing and Reprogramming a Single HomeLink® Button:
1. Press and hold the desired HomeLink
button you want to re-program. DO
NOT release the button.
2. The HomeLink indicator light (7) will
illuminate solid green. Release the
button as soon as the HomeLink
indicator light (7) begins to flash
orange, usually about 20 seconds.
3. Proceed with the steps in the
“Programming a New HomeLink
Button” section.
Information
If you do not complete the re-
programming of a new device to the
button, it will revert to the previously
stored programming.
Page 205 of 598
05
5-47
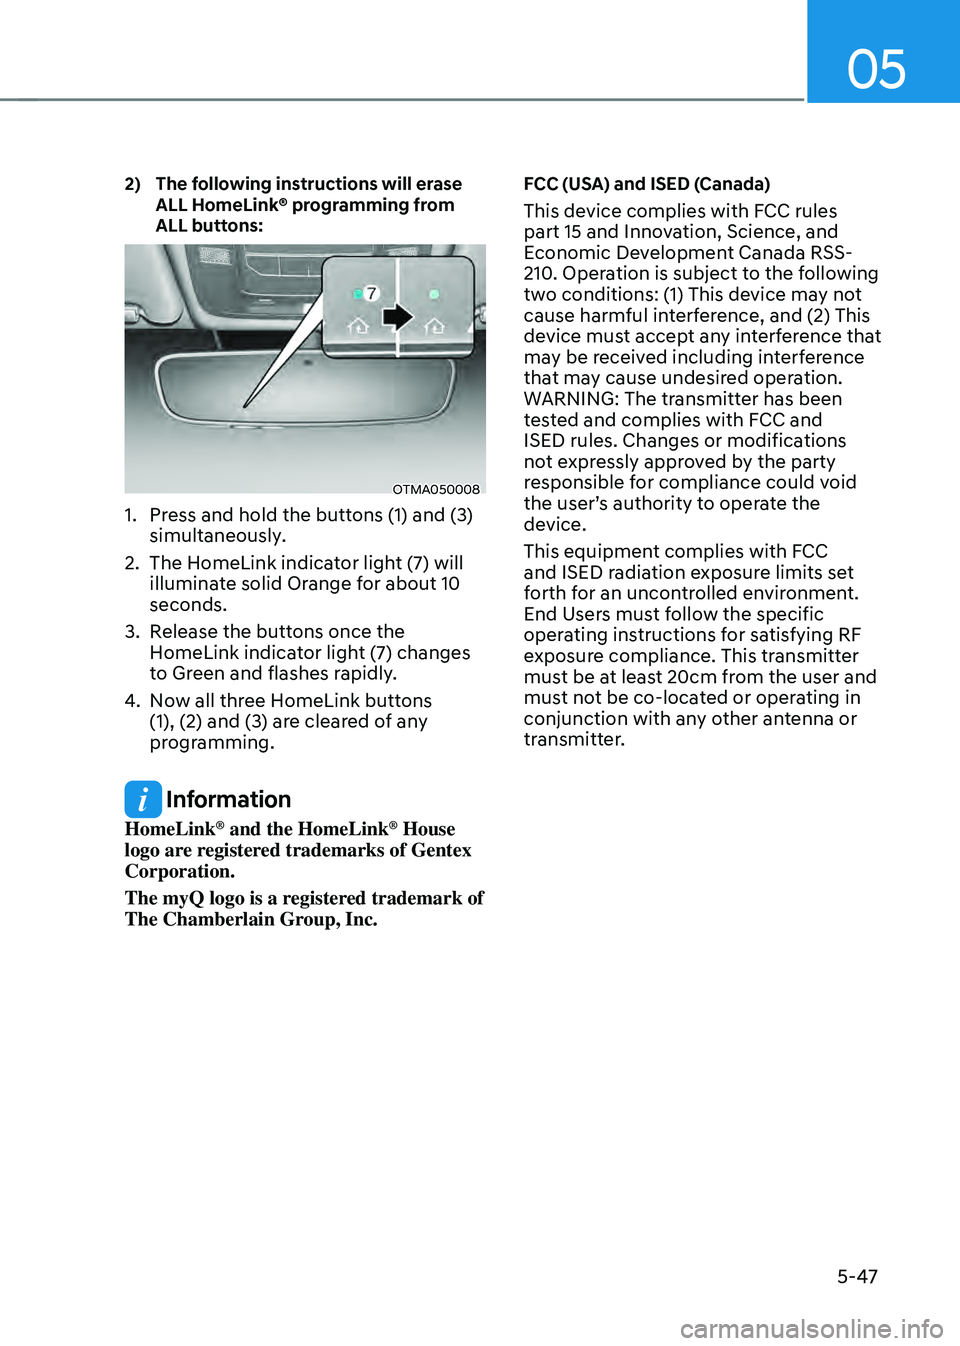
2) The following instructions will erase ALL HomeLink® programming from
ALL buttons:
OTMA050008
1. Press and hold the buttons (1) and (3)
simultaneously.
2. The HomeLink indicator light (7) will
illuminate solid Orange for about 10
seconds.
3. Release the buttons once the
HomeLink indicator light (7) changes
to Green and flashes rapidly.
4. Now all three HomeLink buttons
(1), (2) and (3) are cleared of any
programming.
Information
HomeLink® and the HomeLink® House
logo are registered trademarks of Gentex
Corporation.
The myQ logo is a registered trademark of
The Chamberlain Group, Inc.
FCC (USA) and ISED (Canada)
This device complies with FCC rules
part 15 and Innovation, Science, and
Economic Development Canada RSS-
210. Operation is subject to the following
two conditions: (1) This device may not
cause harmful interference, and (2) This
device must accept any interference that
may be received including interference
that may cause undesired operation.
WARNING: The transmitter has been
tested and complies with FCC and
ISED rules. Changes or modifications
not expressly approved by the party
responsible for compliance could void
the user’s authority to operate the
device.
This equipment complies with FCC
and ISED radiation exposure limits set
forth for an uncontrolled environment.
End Users must follow the specific
operating instructions for satisfying RF
exposure compliance. This transmitter
must be at least 20cm from the user and
must not be co-located or operating in
conjunction with any other antenna or
transmitter.
Page 226 of 598
Convenient features
5-68
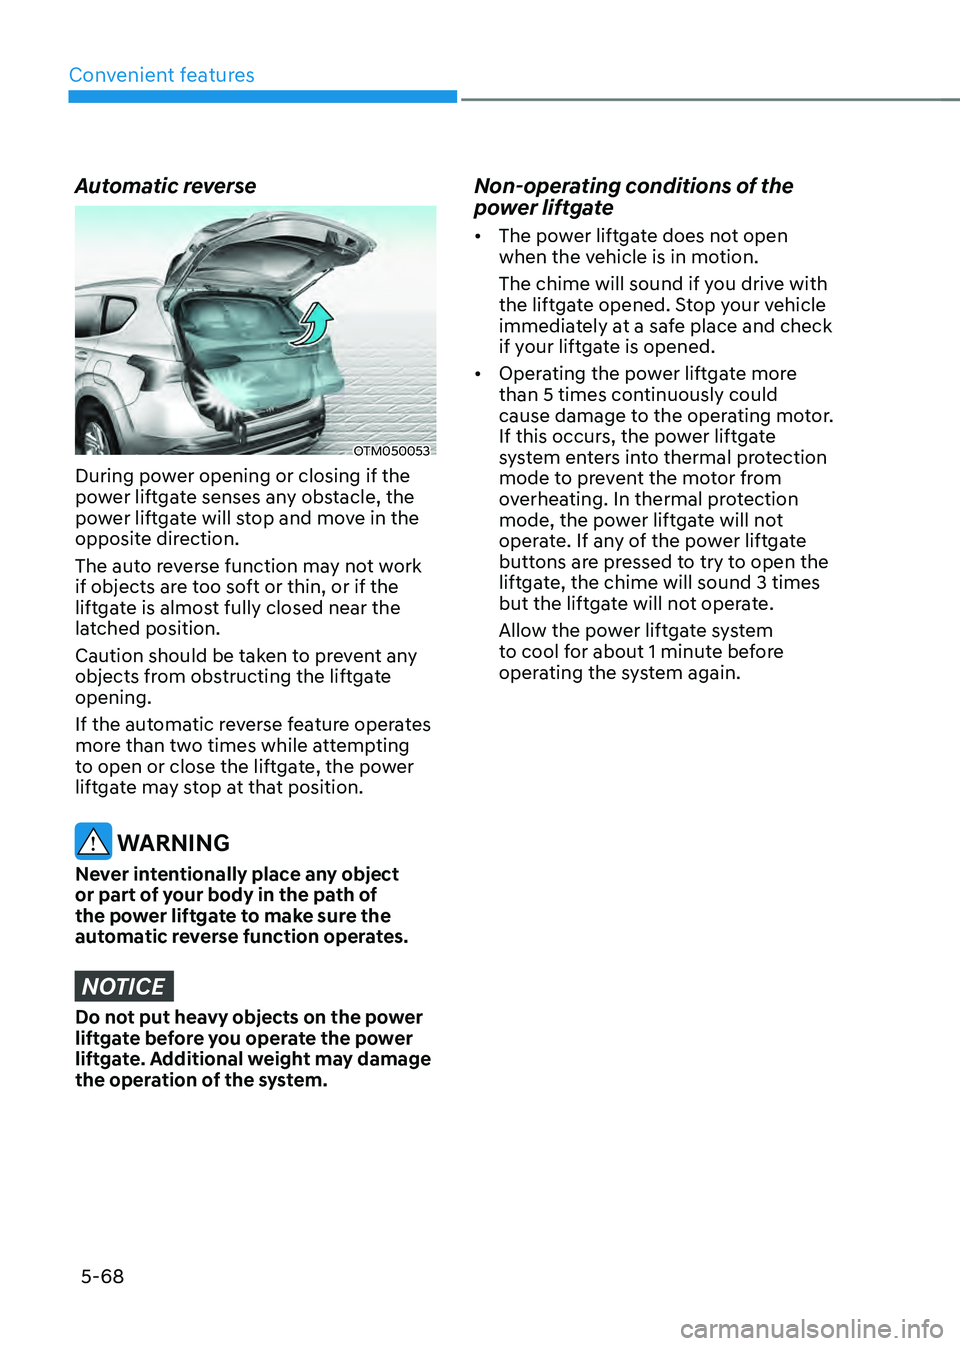
Automatic reverse
OTM050053
During power opening or closing if the
power liftgate senses any obstacle, the
power liftgate will stop and move in the
opposite direction.
The auto reverse function may not work
if objects are too soft or thin, or if the
liftgate is almost fully closed near the
latched position.
Caution should be taken to prevent any
objects from obstructing the liftgate
opening.
If the automatic reverse feature operates
more than two times while attempting
to open or close the liftgate, the power
liftgate may stop at that position.
WARNING
Never intentionally place any object
or part of your body in the path of
the power liftgate to make sure the
automatic reverse function operates.
NOTICE
Do not put heavy objects on the power
liftgate before you operate the power
liftgate. Additional weight may damage
the operation of the system.
Non-operating conditions of the
power liftgate
• The power liftgate does not open
when the vehicle is in motion.
The chime will sound if you drive with
the liftgate opened. Stop your vehicle
immediately at a safe place and check
if your liftgate is opened.
• Operating the power liftgate more
than 5 times continuously could
cause damage to the operating motor.
If this occurs, the power liftgate
system enters into thermal protection
mode to prevent the motor from
overheating. In thermal protection
mode, the power liftgate will not
operate. If any of the power liftgate
buttons are pressed to try to open the
liftgate, the chime will sound 3 times
but the liftgate will not operate.
Allow the power liftgate system
to cool for about 1 minute before
operating the system again.
Page 252 of 598
Convenient features
5-94
Automatic heating and air
conditioning
The Automatic Climate Control System
is controlled by setting the desired
temperature.
1. Press the AUTO button. (3)
The modes, fan speeds, air intake and
air-conditioning will be controlled
automatically by the temperature
setting you select.
2. Turn the temperature control knob
(1, 2) to the desired temperature. If
the temperature is set to the lowest
setting (Lo), the air conditioning
system will operate continuously.
After the interior has cooled
sufficiently, adjust the knob to
a higher temperature set point
whenever possible.
To turn the automatic operation off,
select any button of the following:
- Mode selection button
-Front windshield defroster button
(Press the button one more time
to deselect the front windshield
defroster function. The ‘AUTO’ sign
will illuminate on the information
display once again.)
-Fan speed control button
The selected function will be
controlled manually while other
functions operate automatically.
For your convenience and to improve
the effectiveness of the climate control,
use the AUTO button and set the
temperature to 73°F (23°C).
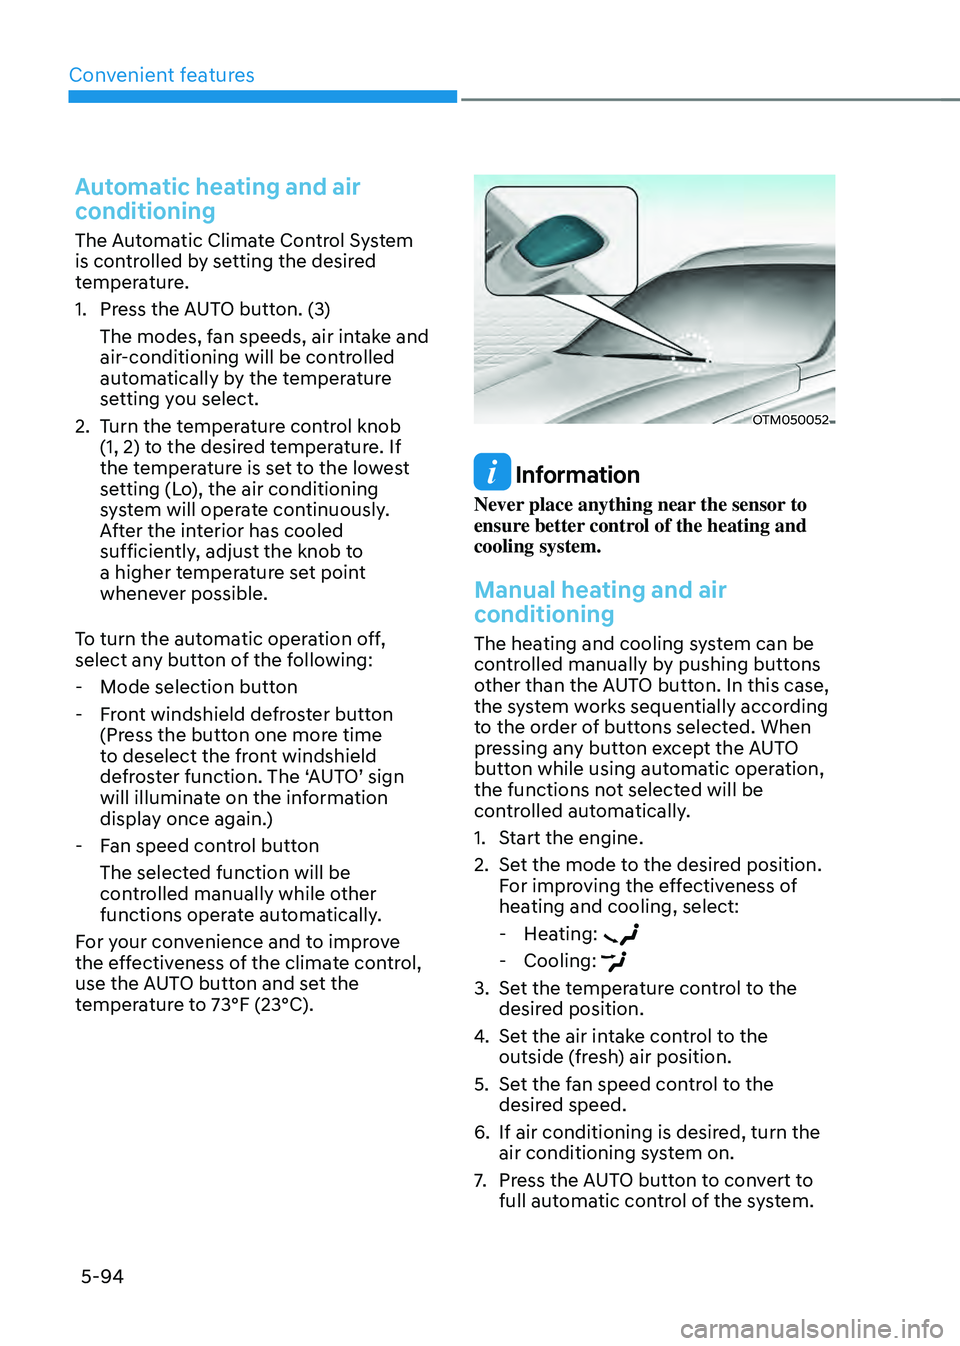
OTM050052
Information
Never place anything near the sensor to
ensure better control of the heating and
cooling system.
Manual heating and air
conditioning
The heating and cooling system can be
controlled manually by pushing buttons
other than the AUTO button. In this case,
the system works sequentially according
to the order of buttons selected. When
pressing any button except the AUTO
button while using automatic operation,
the functions not selected will be
controlled automatically.
1. Start the engine.
2. Set the mode to the desired position.
For improving the effectiveness of
heating and cooling, select:
- Heating:
-Cooling:
3. Set the temperature control to the
desired position.
4. Set the air intake control to the
outside (fresh) air position.
5. Set the fan speed control to the
desired speed.
6. If air conditioning is desired, turn the
air conditioning system on.
7. Press the AUTO button to convert to
full automatic control of the system.