stop start HYUNDAI SANTA FE LIMITED 2021 Workshop Manual
[x] Cancel search | Manufacturer: HYUNDAI, Model Year: 2021, Model line: SANTA FE LIMITED, Model: HYUNDAI SANTA FE LIMITED 2021Pages: 636, PDF Size: 81.2 MB
Page 235 of 636
05
5-91
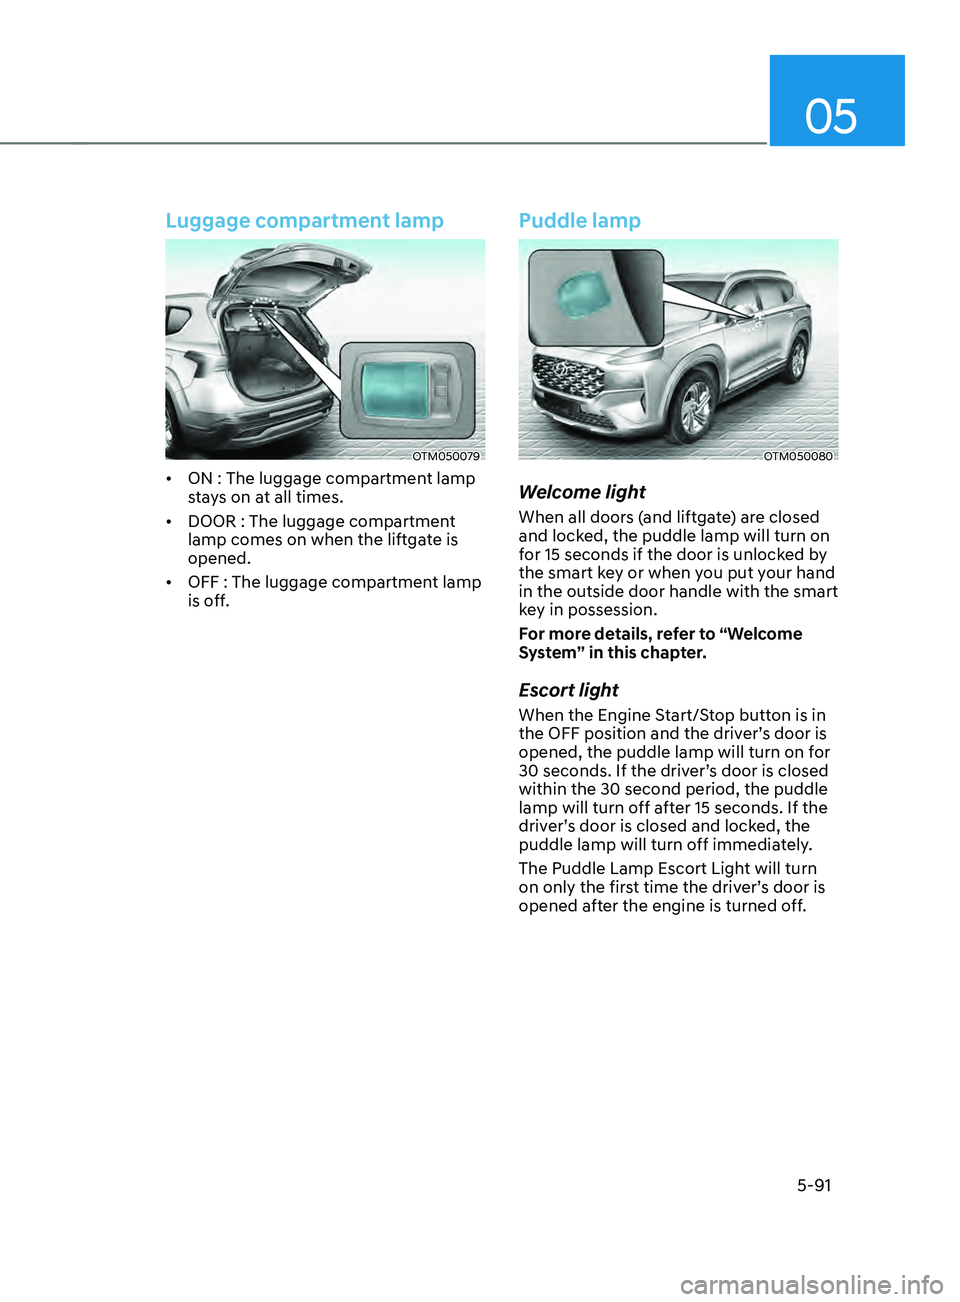
Luggage compartment lamp
OTM050079
• ON : The luggage compartment lamp
stays on at all times.
• DOOR : The luggage compartment
lamp comes on when the liftgate is
opened.
• OFF : The luggage compartment lamp
is off.
Puddle lamp
OTM050080
Welcome light
When all doors (and liftgate) are closed
and locked, the puddle lamp will turn on
for 15 seconds if the door is unlocked by
the smart key or when you put your hand
in the outside door handle with the smart
key in possession.
For more details, refer to “Welcome
System” in this chapter.
Escort light
When the Engine Start/Stop button is in
the OFF position and the driver’s door is
opened, the puddle lamp will turn on for
30 seconds. If the driver’s door is closed
within the 30 second period, the puddle
lamp will turn off after 15 seconds. If the
driver’s door is closed and locked, the
puddle lamp will turn off immediately.
The Puddle Lamp Escort Light will turn
on only the first time the driver’s door is
opened after the engine is turned off.
Page 238 of 636
Convenient features
5-94
AUTO (Automatic) control
(if equipped)
The rain sensor located on the upper
end of the windshield glass senses
the amount of rainfall and controls the
wiping cycle for the proper interval.
The wiper operation time will be
automatically controlled depends on
rainfall.
When the rain stops, the wiper stops.
To vary the sensitivity setting, turn the
sensitivity control knob.
If the wiper switch is set in AUTO mode
when the Engine Start/Stop button is in
the ON position, the wiper will operate
once to perform a self-check of the
system. Set the wiper to the OFF (O)
position when the wiper is not in use.
WARNING
To avoid personal injury from the
windshield wipers, when the engine
is running and the windshield wiper
switch is placed in the AUTO mode:
• Do not touch the upper end of the
windshield glass facing the rain
sensor.
• Do not wipe the upper end of the
windshield glass with a damp or wet
cloth.
• Do not put pressure on the
windshield glass.
NOTICE
• When washing the vehicle, set the
wiper switch in the OFF (O) position
to stop the auto wiper operation. The
wiper may operate and be damaged
if the switch is set in the AUTO mode
while washing the vehicle.
• Do not remove the sensor cover
located on the upper end of the
passenger side windshield glass.
Damage to system components
could occur and may not be covered
by your vehicle warranty.
• Because of using a photo sensor,
temporary malfunction could occur
according to sudden ambient light
change made by stone and dust
while driving.
Page 262 of 636
Convenient features5-118
Rear window defrosterNOTICE
To prevent damage to the rear window
defroster conducting elements bonded
to the inside surface of the rear window,
never use sharp instruments or window
cleaners containing abrasives to clean
the window.
The defroster heats the
window to remove frost, fog
and thin ice from the interior
and exterior of the rear
window, while the engine is
running.
• To activate the rear window defroster,
press the rear window defroster
button located in the center control
panel. The indicator on the rear
window defroster button illuminates
when the defroster is ON.
• To turn off the defroster, press the rear
window defroster button again.
Information
• If there is heavy accumulation of snow
on the rear window, brush it off before
operating the rear defroster.
• The rear window defroster
automatically turns off after
approximately 20 minutes or when the
Engine Start/Stop button is in the OFF
position.
Side view mirror defroster (if
equipped)
If your vehicle is equipped with the Side
view mirror defrosters, they will operate
at the same time you turn on the rear
window defroster.
Page 264 of 636
Convenient features
5-120
Turning the Auto Defogging System
ON or OFF
Climate control system
Press the front windshield defroster
button for 3 seconds when the Engine
Start/Stop button is in the ON position.
When the Auto Defogging System is
turned off, the ADS OFF symbol will blink
3 times and ADS OFF will be displayed on
the climate control information screen.
When the Auto Defogging System is
turned on, the ADS OFF symbol will blink
6 times without a signal.
Infotainment system
Auto Defogging System can be turned
on
and o
ff
b
y
selecting ‘Se
tup
→ Vehicle Se
ttings
→ Clima
te
→ De
fog/
Defrost
Op
tions
→ A
uto
De
fog’
fr
om
the inf
otainment system screen.
For detailed information, refer to the
separately supplied infotainment
system manual.
Information
• When the air conditioning is turned
on by Auto Defogging System, if you
try to turn off the air conditioning, the
indicator will blink 3 times and the air
conditioning will not be turned off.
• To maintain the effectiveness and
efficiency of the Auto Defogging
System, do not select Recirculation
mode while the system is operating.
• When Auto Defogging System is
operating, fan speed adjustment,
temperature adjustment, and air intake
control selection are all disabled.
NOTICE
Do not remove the sensor cover located
on the upper end of the windshield
glass.
Damage to system parts could occur
and may not be covered by your vehicle
warranty.
Auto dehumidify (if equipped)
To increase cabin air quality and reduce
windshield misting, recirculation mode
switches off automatically after about 5
to 30 minutes, depending on the outside
temperature, and the air intake will
change to fresh mode.
Turning Auto Dehumidify ON or OFF
Climate control system
To turn the Auto Dehumidify feature
on or off, select Face level (
) mode
and press the air intake control ()
button at least five times within three
seconds. When Auto Dehumidify is
turned on, the air intake control button
indicator will blink 6 times. When turned
off, the indicator will blink 3 times.
Infotainment system
Auto Dehumidify can be turned on and
off
b
y
selecting ‘Se
tup
→ V
ehicle
Se
ttings
→ Clima
te
→ A
utomatic
V
entilation
→ Aut
o Dehumidify’ from the infotainment
system screen.
For detailed information, refer to the
separately supplied infotainment
system manual.
Page 268 of 636
Convenient features
5-124
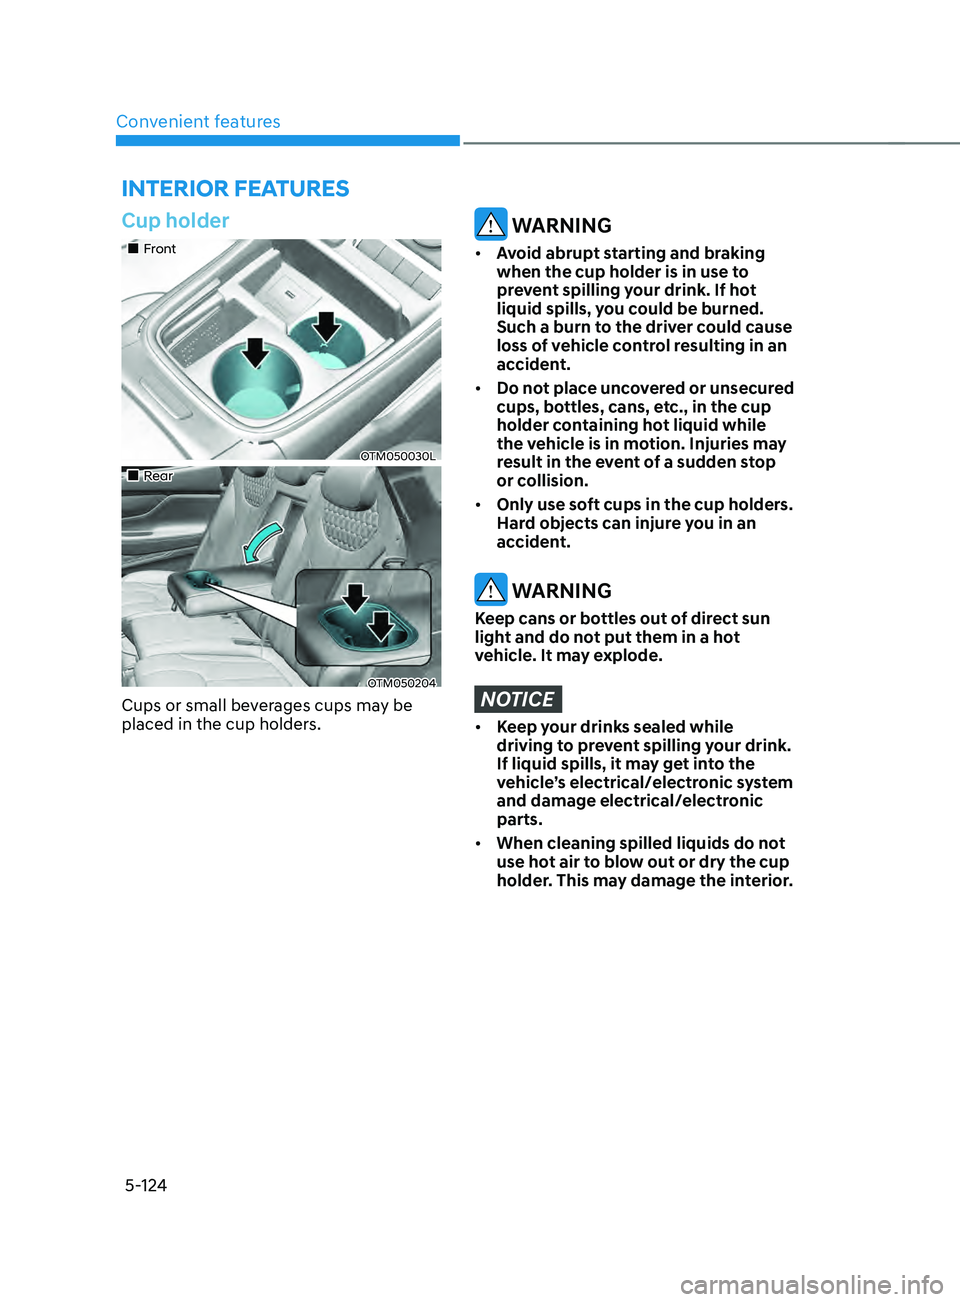
Cup holder
„„Front
OTM050030L
„„Rear
OTM050204
Cups or small beverages cups may be
placed in the cup holders.
WARNING
• Avoid abrupt starting and braking
when the cup holder is in use to
prevent spilling your drink. If hot
liquid spills, you could be burned.
Such a burn to the driver could cause
loss of vehicle control resulting in an
accident.
• Do not place uncovered or unsecured
cups, bottles, cans, etc., in the cup
holder containing hot liquid while
the vehicle is in motion. Injuries may
result in the event of a sudden stop
or collision.
• Only use soft cups in the cup holders.
Hard objects can injure you in an
accident.
WARNING
Keep cans or bottles out of direct sun
light and do not put them in a hot
vehicle. It may explode.
NOTICE
• Keep your drinks sealed while
driving to prevent spilling your drink.
If liquid spills, it may get into the
vehicle’s electrical/electronic system
and damage electrical/electronic
parts.
• When cleaning spilled liquids do not
use hot air to blow out or dry the cup
holder. This may damage the interior.
INTERIOR FEATURES
Page 271 of 636
05
5-127
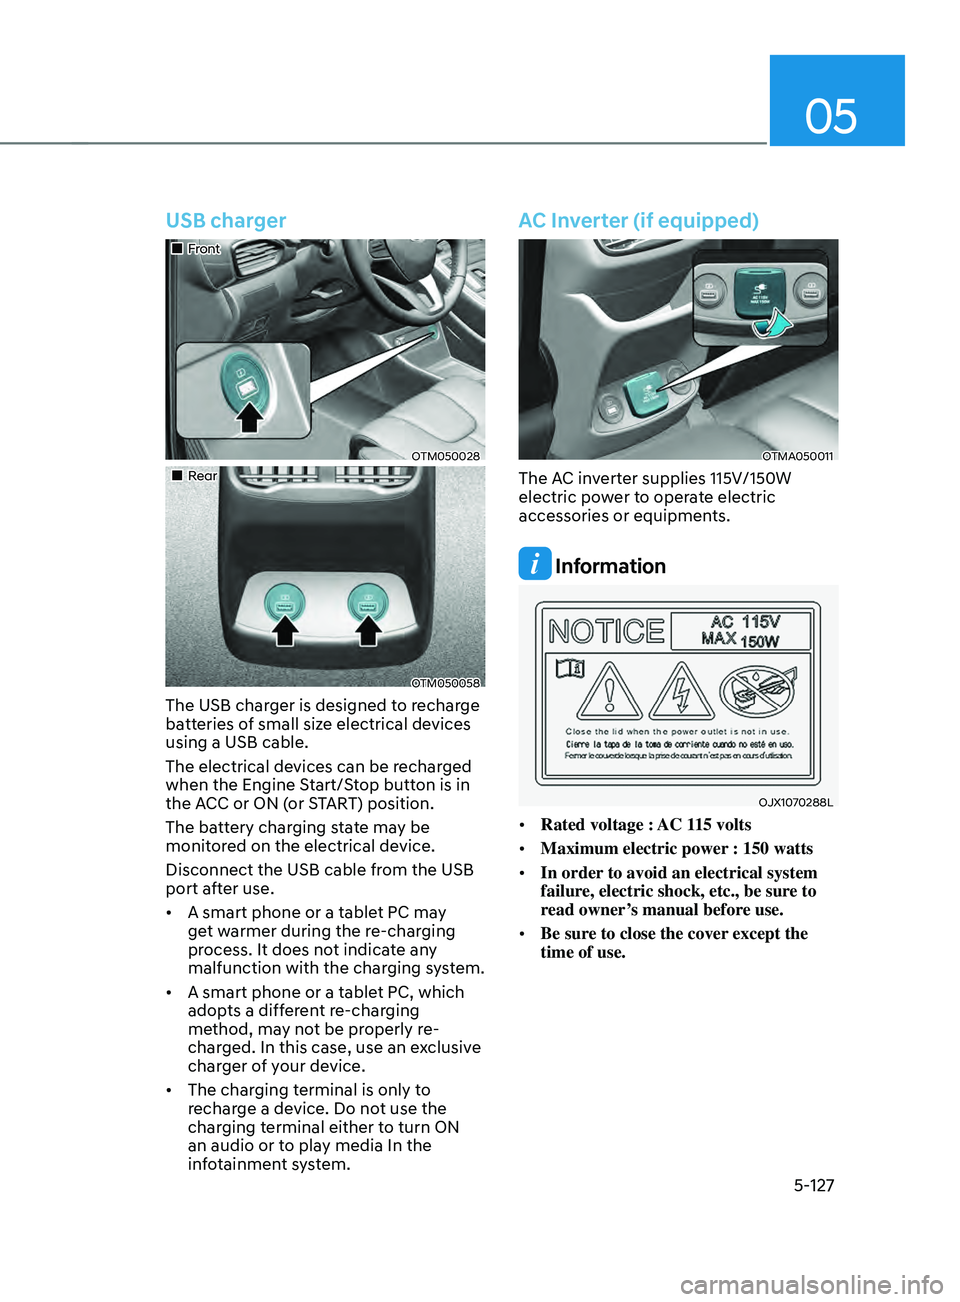
USB charger
„„Front
OTM050028
„„Rear
OTM050058
The USB charger is designed to recharge
batteries of small size electrical devices
using a USB cable.
The electrical devices can be recharged
when the Engine Start/Stop button is in
the ACC or ON (or START) position.
The battery charging state may be
monitored on the electrical device.
Disconnect the USB cable from the USB
port after use.
• A smart phone or a tablet PC may
get warmer during the re-charging
process. It does not indicate any
malfunction with the charging system.
• A smart phone or a tablet PC, which
adopts a different re-charging
method, may not be properly re-
charged. In this case, use an exclusive
charger of your device.
• The charging terminal is only to
recharge a device. Do not use the
charging terminal either to turn ON
an audio or to play media In the
infotainment system.
AC Inverter (if equipped)
OTMA050011
The AC inverter supplies 115V/150W
electric power to operate electric
accessories or equipments.
Information
OJX1070288L
• Rated voltage : AC 115 volts
• Maximum electric power : 150 watts
• In order to avoid an electrical system
failure, electric shock, etc., be sure to
read owner’s manual before use.
• Be sure to close the cover except the
time of use.
Page 273 of 636
![HYUNDAI SANTA FE LIMITED 2021 Workshop Manual 05
5-129
Wireless smart phone charging
system (if equipped)
OTM050022
[A] : Indicator light, [B] : Charging pad
On certain models, the vehicle comes
equipped with a wireless smart phone
charger.
Th HYUNDAI SANTA FE LIMITED 2021 Workshop Manual 05
5-129
Wireless smart phone charging
system (if equipped)
OTM050022
[A] : Indicator light, [B] : Charging pad
On certain models, the vehicle comes
equipped with a wireless smart phone
charger.
Th](/img/35/56182/w960_56182-272.png)
05
5-129
Wireless smart phone charging
system (if equipped)
OTM050022
[A] : Indicator light, [B] : Charging pad
On certain models, the vehicle comes
equipped with a wireless smart phone
charger.
The system is available when all doors
are closed, and when the Engine Start/
Stop button is in the ACC or ON (or
START) position.
To charge a cellular phone
The wireless smart phone charging
system charges only the Qi-enabled
smart phones (
). Read the label on
the smart phone accessory cover or
visit your smart phone manufacturer’s
website to check whether your smart
phone supports the Qi technology.
The wireless charging process starts
when you put a Qi-enabled smart phone
on the wireless charging unit.
1.
Remo
ve other items, including the
smart key, from the wireless charging
unit. If not, the wireless charging
process may be interrupted. Place
the smart phone on the center of the
charging pad.
2.
The indicat
or light is orange when the
smart phone is charging. The indicator
light will turn blue when phone
charging is complete.
3.
You can turn ON or OFF the wir
eless
charging function from the Settings
menu on the instrument cluster.
Select:
- Setup → U
ser
se
ttings
→ Conv
enience
→ Wir
eless
Char
ging
If your smart phone is no
t charging:
- Slightly change the position o
f the
smart phone on the charging pad.
- Make sur
e the indicator light is
orange.
Page 274 of 636
Convenient features
5-130
The indicator light will blink orange for 10
seconds if there is a malfunction in the
wireless charging system.
In this case, temporarily stop the
charging process, and re-attempt to
charge your smart phone again.
The system warns you with a message on
the LCD display if the smart phone is still
on the wireless charging unit after the
vehicle is turned OFF and the front door
is opened.
For some manufacturer’s smart phones,
the system may not warn you even
though the smart phone is left on the
wireless charging unit. This is due to the
particular characteristic of the smart
phone and not a malfunction of the
wireless charging.
Information
For some manufacturers’ cellular phones,
the system may not warn you even though
the cellular phone is left on the wireless
charging unit. This is due to the particular
characteristic of the cellular phone and
not a malfunction of the wireless charging.
NOTICE
• The wireless smart phone charging
system may not support certain
smart phones, which are not verified
for the Qi specification (
).
• When placing your smart phone on
the charging pad, position the phone
in the middle of the mat for optimal
charging performance. If your smart
phone is off to the side, the charging
rate may be less and in some cases
the smart phone may experience
higher heat conduction.
• In some cases, the wireless charging
may stop temporarily when the
smart key is used, either when
starting the vehicle or locking/
unlocking the doors, etc.
• When charging certain smart
phones, the charging indicator may
not change to blue when the smart
phone is fully charged.
• The wireless charging process may
temporarily stop, when temperature
abnormally increases inside the
wireless smart phone charging
system. The wireless charging
process restarts, when temperature
falls to a certain level.
• The wireless charging process may
temporarily stop when there is
any metallic item, such as a coin,
between the wireless smart phone
charging system and smart phone.
Page 289 of 636
Before driving ........................................................................\
............................6-4Before entering the vehicle ........................................................................\
................6-4
Bef ore starting ........................................................................\
..................................... 6-4
Ignition switch ........................................................................\
...........................6-5Key ignition switch ........................................................................\
............................... 6-5
Ke y ignition switch positions ........................................................................\
.............. 6-6
S
tarting the engine
........................................................................\
............................... 6
-7
Engine Start/Stop button ........................................................................\
.........6-9Engine Stop/Start button positions ........................................................................\
..6-10
S tarting the engine ........................................................................\
.............................. 6-
11
Turning off the engine
........................................................................\
........................ 6-
12
Remote start
........................................................................\
....................................... 6-
13
Automatic transmission ........................................................................\
..........6-14Automatic transmission operation ........................................................................\
....6-14
L CD display message (button type) ........................................................................\
.. 6-19
P
addle shifter (Manual shift mode)
........................................................................\
.. 6-20
Good driving pr
actices
........................................................................\
....................... 6-
21
Dual clutch transmission ........................................................................\
........6-23Dual clutch transmission operation ........................................................................\
..6-23
P arking ........................................................................\
............................................... 6-
30
LCD display message (button type)
........................................................................\
. 6-30
P
addle shifter (Manual shifter mode)
....................................................................... 6-32
Good driving pr
actices
........................................................................\
...................... 6-
33
Braking system ........................................................................\
........................6-34Power-assist brakes ........................................................................\
...........................6-34
Disc br akes wear indicator ........................................................................\
................ 6-34
Electronic Parking Brake (EPB)
........................................................................\
......... 6-35
A
uto Hold (if equipped)
........................................................................\
..................... 6-
39
Anti-lock Brake System (ABS)
........................................................................\
........... 6-43
Electronic S
tability Control (ESC)
........................................................................\
.... 6-44
V
ehicle Stability Management (VSM)
...................................................................... 6-4
7
Hill-Start Assist Control (HAC)
........................................................................\
......... 6-48
Do
wnhill Brake Control (DBC)
........................................................................\
......... 6-48
Good br
aking practices
........................................................................\
...................... 6-51
Four wheel drive (4WD) ........................................................................\
..........6-52Four Wheel Drive (4WD) operation ........................................................................\
...6-53
Emer gency precautions ........................................................................\
.................... 6-58
R
educing the risk of a rollover
........................................................................\
.......... 6-59
6. Driving your vehicle
Driving your vehicle
6
Page 290 of 636
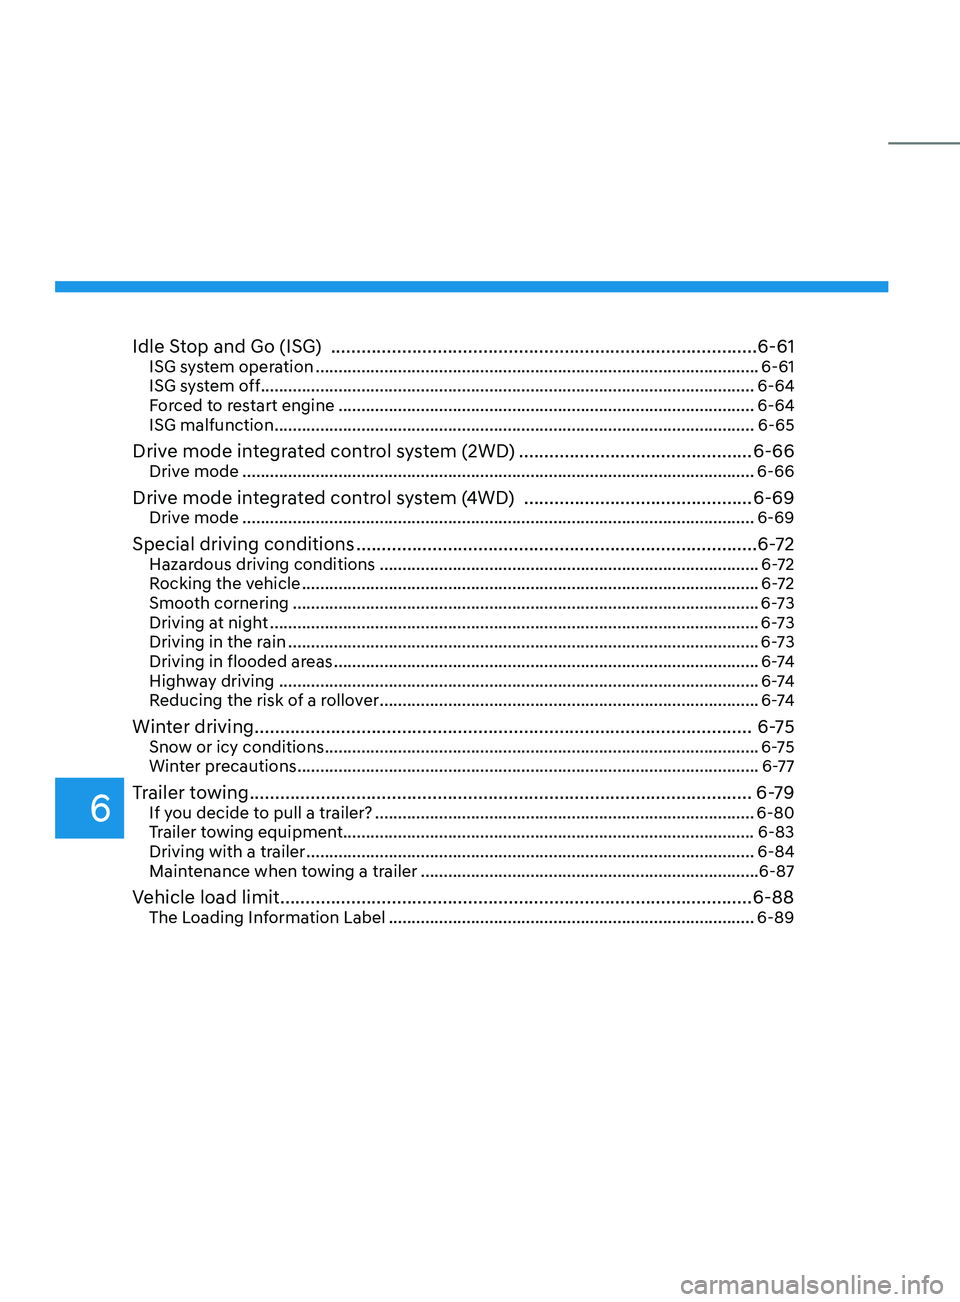
Idle Stop and Go (ISG) ........................................................................\
............6-61ISG system operation ........................................................................\
......................... 6-61
ISG sy stem off ........................................................................\
.................................... 6-64
F
orced to restart engine
........................................................................\
................... 6-64
ISG malfunction ........................................................................\
................................. 6-65
Drive mode integrated control system (2WD) ..............................................6-66Drive mode ........................................................................\
........................................ 6-66
Drive mode integrated control system (4WD) .............................................6-69Drive mode ........................................................................\
........................................ 6-69
Special driving conditions ........................................................................\
.......6-72Hazardous driving conditions ........................................................................\
........... 6-72
R ocking the vehicle ........................................................................\
............................ 6-
72
Smooth cornering
........................................................................\
.............................. 6-
73
Driving at night
........................................................................\
................................... 6-
73
Driving in the rain
........................................................................\
............................... 6-
73
Driving in flooded areas
........................................................................\
..................... 6
-74
Highway driving
........................................................................\
................................. 6
-74
Reducing the risk of a rollover
........................................................................\
........... 6
-74
Winter driving ........................................................................\
..........................6-75Snow or icy conditions ........................................................................\
.......................6-75
Win ter precautions ........................................................................\
............................. 6-
77
Trailer towing ........................................................................\
...........................6-79If you decide to pull a trailer? ........................................................................\
...........6-80
Tr ailer towing equipment........................................................................\
.................. 6-83
Driving with a trailer
........................................................................\
.......................... 6-84
Main
tenance when towing a trailer
........................................................................\
.. 6-87
Vehicle load limit........................................................................\
.....................6-88The Loading Information Label ........................................................................\
........ 6-89
6