air conditioning Hyundai Santa Fe Sport 2015 User Guide
[x] Cancel search | Manufacturer: HYUNDAI, Model Year: 2015, Model line: Santa Fe Sport, Model: Hyundai Santa Fe Sport 2015Pages: 785, PDF Size: 13.38 MB
Page 242 of 785

4 149
Features of your vehicle
Automatic heating and air con-
ditioning
1. Press the AUTO button.
The modes, fan speeds, air intake
and air-conditioning will be controlled
automatically according to the tem-
perature setting.2. Set the driver’s temperature con-
trol switch to set the desired tem-
perature.
✽NOTICE
• To turn the automatic operation
off, select any button or knob of
the following:
- Mode selection button
- Front windshield defrost button
(Press the button one more time
to deselect the front windshield
defroster function. The 'AUTO'
sign will illuminate on the infor-
mation display once again.)
- Fan speed control knob
The selected function will be con-
trolled manually while other func-
tions operate automatically.
• For your convenience and to
improve the effectiveness of the
climate control, use the AUTO
button and set the temperature to
23°C (73°F).
ODM042287
ODM042290
Page 243 of 785

Features of your vehicle
150 4
✽NOTICE
Never place anything over the sen-
sor located on the instrument panel
to ensure better control of the heat-
ing and cooling system.
Manual heating and air condi-
tioning
The heating and cooling system can
be controlled manually by pressing
buttons or turning knob(s) other than
the AUTO button. In this case, the
system works sequentially according
to the order of buttons or knob(s)
selected.
1. Start the engine.
2. Set the mode to the desired posi-
tion.
For improving the effectiveness of
heating and cooling;
- Heating:
- Cooling:
3. Set the temperature control to the
desired position.
4. Set the air intake control to the
outside (fresh) air position.
5. Set the fan speed control to the
desired speed.
6. If air conditioning is desired, turn
the air conditioning system on.
Press the AUTO button in order to
convert to full automatic control of
the system.
Mode selection
The mode selection button controls
the direction of the air flow through
the ventilation system.
The air flow outlet port is converted
as follows:
Refer to the illustration in the
“Manual climate control system”.
ODM042336
ODM042288
Page 245 of 785

Features of your vehicle
152 4
Temperature control
The temperature will increase by
pushing the up button. Each push of
the button will cause the temperature
to increase by 0.5°C/1°F.
The temperature will decrease by
pushing the down button. Each push
of the button will cause the tempera-
ture to decrease by 0.5°C/1°F. When
set to the lowest temperature setting,
the air conditioning will operate con-
tinuously.Adjusting the driver and passenger
side temperature individually
1. Press the DUAL button to operate
the driver and passenger side
temperature individually. Pressing
the right temperature control but-
ton will automatically switch to the
DUAL mode as well.
2. Press the left temperature control
button to adjust the driver side
temperature. Press the right tem-
perature control button to adjust
the passenger side temperature.
When the driver side temperature is
set to the highest or lowest tempera-
ture setting, the DUAL mode is deacti-
vated for maximum heating or cooling.Adjusting the driver and passenger
side temperature equally
1. Press the DUAL button again to
deactivate DUAL mode. The pas-
senger side temperature will be
set to the same temperature as
the driver side temperature.
2. Press the left temperature control
button. The driver and passenger
side temperature will be adjusted
equally.
Temperature conversion
If the battery has been discharged or
disconnected, the temperature mode
display will reset to Fahrenheit.
This is a normal condition. You can
switch the temperature mode between
Fahrenheit to Celsius as follows;
While pressing the OFF button,
depress the AUTO button for 3 sec-
onds or more. The display will
change from Fahrenheit to Celsius,
or from Celsius to Fahrenheit.
ODMECL2003
■Driver’s side■Passenger’s side
ODM042291
■Type A■Type B
Page 246 of 785

4153
Features of your vehicle
Air intake control
This is used to select the outside
(fresh) air position or recirculated air
position.
To change the air intake control posi-
tion, push the control button.Recirculated air position
The indicator light on the
button illuminates when
the recirculated air posi-
tion is selected.
With the recirculated air
position selected, air
from the passenger
compartment will be
drawn through the heat-
ing system and heated
or cooled according to
the function selected.
Outside (fresh) air position
With the outside (fresh)
air position selected, air
enters the vehicle from
outside and is heated or
cooled according to the
function selected.
✽NOTICE
Prolonged operation of the heater in
the recirculated air position (with-
out air conditioning selected) may
cause fogging of the windshield and
side windows and the air within the
passenger compartment may
become stale.
In addition, prolonged use of the air
conditioning with the recirculated
air position selected will result in
excessively dry air in the passenger
compartment.
OANNMM2003
■ Type A, B
■ Type A ■ Type A■ Type B
■ Type B
Page 247 of 785

Features of your vehicle
154 4
Fan speed control
The fan speed can be set to the
desired speed by turning the fan
speed control knob.
The higher the fan speed is, the
more air is delivered.
To turn off the fan speed, press the
OFF button.
Air conditioning
Push the A/C button to turn the air
conditioning system on (indicator
light will illuminate).
Push the button again to turn the air
conditioning system off.
WARNING
• Continued use of the climate
control system operation in
the recirculated air position
may allow humidity to
increase inside the vehicle
which may fog the glass and
obscure visibility.
• Do not sleep in a vehicle with
the air conditioning or heating
system on. This may cause
serious harm or death due to
a drop in the oxygen level
and/or body temperature.
• Continued use of the climate
control system operation in
the recirculated air position
may cause drowsiness or
sleepiness and loss of vehicle
control. Set the air intake con-
trol to the outside (fresh) air
position as much as possible
while driving.
ODM042293OANNMM2004 ■ Type A■ Type B
Page 251 of 785
Features of your vehicle
158 4
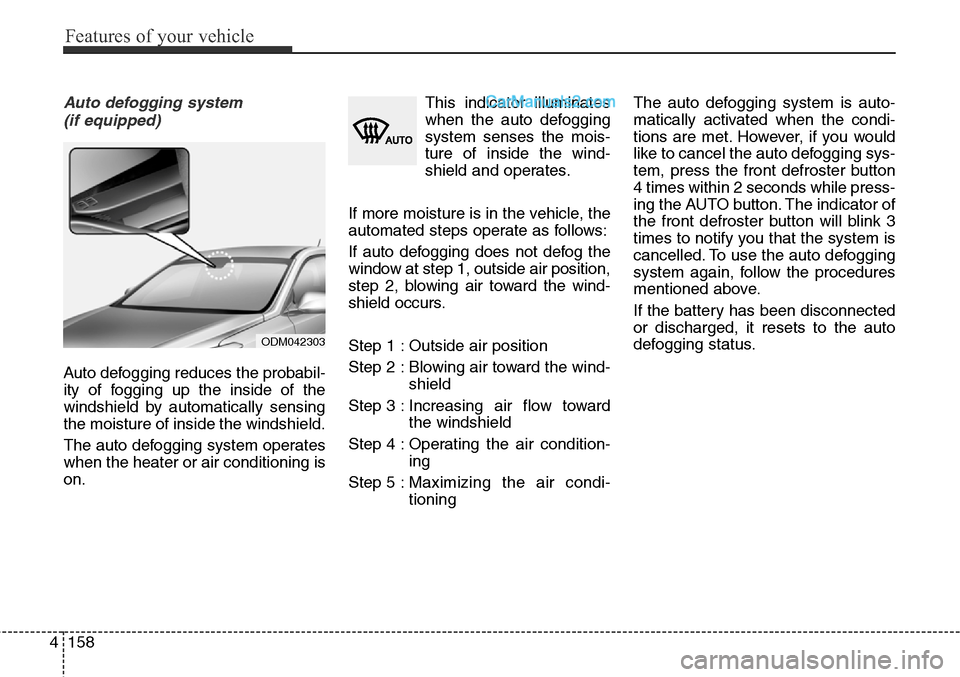
Auto defogging system
(if equipped)
Auto defogging reduces the probabil-
ity of fogging up the inside of the
windshield by automatically sensing
the moisture of inside the windshield.
The auto defogging system operates
when the heater or air conditioning is
on.This indicator illuminates
when the auto defogging
system senses the mois-
ture of inside the wind-
shield and operates.
If more moisture is in the vehicle, the
automated steps operate as follows:
If auto defogging does not defog the
window at step 1, outside air position,
step 2, blowing air toward the wind-
shield occurs.
Step 1 : Outside air position
Step 2 : Blowing air toward the wind-
shield
Step 3 : Increasing air flow toward
the windshield
Step 4 : Operating the air condition-
ing
Step 5 :Maximizing the air condi-
tioningThe auto defogging system is auto-
matically activated when the condi-
tions are met. However, if you would
like to cancel the auto defogging sys-
tem, press the front defroster button
4 times within 2 seconds while press-
ing the AUTO button. The indicator of
the front defroster button will blink 3
times to notify you that the system is
cancelled. To use the auto defogging
system again, follow the procedures
mentioned above.
If the battery has been disconnected
or discharged, it resets to the auto
defogging status.
ODM042303
Page 252 of 785
4159
Features of your vehicle
✽NOTICE
• When the air conditioning is
turned on by Auto defogging sys-
tem, if you try to turn off the air
conditioning, the indicator will
blink 3 times and the air condi-
tioning will not be turned off.
• For efficiency, do not select recir-
culated air position while Auto
defogging system is operating.
CAUTION
Do not remove the sensor cover
located on the upper end of the
driver side windshield glass.
Damage to system parts could
occur and may not be covered
by your vehicle warranty.
Page 627 of 785

Driving your vehicle
58 5
• Remember, your vehicle does not
require extended warm-up. After
the engine has started, allow the
engine to run for 10 to 20 seconds
prior to placing the vehicle in gear.
In very cold weather, however, give
your engine a slightly longer warm-
up period.
• Don't "lug" or "over-rev" the engine.
Lugging is driving too slowly in too
high a gear resulting engine buck-
ing. If this happens, shift to a lower
gear. Over-revving is racing the
engine beyond its safe limit. This
can be avoided by shifting at the
recommended speeds.
• Use your air conditioning sparingly.
The air conditioning system is
operated by engine power so your
fuel economy is reduced when you
use it.
• Open windows at high speeds can
reduce fuel economy.
• Fuel economy is less in crosswinds
and headwinds. To help offset
some of this loss, slow down when
driving in these conditions.Keeping a vehicle in good operating
condition is important both for econ-
omy and safety. Therefore, have an
authorized HYUNDAI dealer perform
scheduled inspections and mainte-
nance.
WARNING - Engine off
during
motion
Never turn the engine off to
coast down hills or anytime the
vehicle is in motion. The power
steering and power brakes will
not function properly without the
engine running. Instead, keep
the engine on and downshift to
an appropriate gear for engine
braking effect. In addition, turn-
ing off the ignition while driving
could engage the steering wheel
lock resulting in loss of vehicle
steering which could cause
serious injury or death.
Page 682 of 785

77
Maintenance
• Check for fluid leaks under your
vehicle (water dripping from the air
conditioning system during or after
use is normal).
At least monthly:
• Check coolant level in the engine
coolant reservoir.
• Check the operation of all exterior
lights, including the stoplights, turn
signals and hazard warning flash-
ers.
• Check the inflation pressures of all
tires including the spare.
At least twice a year
(i.e., every Spring and Fall) :
• Check radiator, heater and air con-
ditioning hoses for leaks or dam-
age.
• Check windshield washer spray
and wiper operation. Clean wiper
blades with clean cloth dampened
with washer fluid.
• Check headlight alignment.
• Check muffler, exhaust pipes,
shields and clamps.
• Check the lap/shoulder belts for
wear and function.
• Check for worn tires and loose
wheel lug nuts.
At least once a year :
• Clean body and door drain holes.
• Lubricate door hinges and checks,
and hood hinges.
• Lubricate door and hood locks and
latches.
• Lubricate door rubber weather-
strips.
• Check the air conditioning system.
• Inspect and lubricate automatic
transaxle linkage and controls.
• Clean battery and terminals.
• Check the brake fluid level.
Page 685 of 785

Maintenance
10 7
24,000 km (15,000 miles) or 12 months
❑Inspect air cleaner filter
❑Inspect vacuum hose
❑Inspect air conditioning refrigerant
❑Inspect brake hoses and lines
❑Inspect drive shafts and boots
❑Inspect exhaust pipe and muffler
❑Inspect front brake disc/pads, calipers
❑Inspect propeller shaft (AWD)
❑Inspect rear brake disc/pads
❑Inspect steering gear box, linkage & boots/lower arm ball
joint, upper arm ball joint
❑Inspect suspension mounting bolts
❑Replace climate control air filter
(for evaporator and blower unit)
❑Replace engine oil and filter (2.4 GDI) *
6
(24,000 km (15,000 miles) or 24 months)
❑Add fuel additive *1
(24,000 km (15,000 miles) or 24 months)
❑Rotate tires
(Continued)
NORMAL MAINTENANCE SCHEDULE (CONT.)
❈Inspect : Inspect and if necessary, adjust, correct, clean or replace.
*1: If TOP TIER Detergent Gasoline is not available, one bottle of addi-
tive is recommended. Additives are available from your authorized
HYUNDAI dealer along with information on how to use them. Do not
mix other additives.
*
6:Engine oil (2.0 TGDI)At first, replace at 5,000 km (3,000 miles) or
6 months, after that, every 8,000 km (5,000 miles) or 6 months.
(Continued)
❑Inspect battery condition
❑Inspect cooling system hoses and connections
❑Inspect brake pedal free play
❑Inspect all latch, hinges and locks