ECO mode Hyundai Santa Fe Sport 2015 Owner's Manual
[x] Cancel search | Manufacturer: HYUNDAI, Model Year: 2015, Model line: Santa Fe Sport, Model: Hyundai Santa Fe Sport 2015Pages: 785, PDF Size: 13.38 MB
Page 48 of 785
327
Safety features of your vehicle
Seat belts - Front passenger and
rear seat 3-point system with
combination locking retractor
To fasten your seat belt:
Combination retractor type seat belts
are installed in the rear seat positions
to help accommodate the installation
of child restraint systems. Although a
combination retractor is also installed
in the front passenger seat position, it
is strongly recommended that children
always be seated in the rear seat.
NEVER place any infant restraint sys-
tem in the front seat of the vehicle.
This type of seat belt combines the
features of both an emergency lock-
ing retractor seat belt and an auto-
matic locking retractor seat belt. To
fasten your seat belt, pull it out of the
retractor and insert the metal tab into
the buckle. There will be an audible
"click" when the tab locks into the
buckle. When not securing a child
restraint, the seat belt operates in the
same way as the driver's seat belt
(Emergency Locking Retractor Type).
It automatically adjusts to the proper
length only after the lap belt portion of
the seat belt is adjusted manually so
that it fits snugly around your hips.When the seat belt is fully extended
from the retractor to allow the instal-
lation of a child restraint system, the
seat belt operation changes to allow
the belt to retract, but not to extend
(Automatic Locking Retractor Type).
Refer to “Using a child restraint sys-
tem” in this section.
To convert from the automatic lock-
ing feature to the emergency locking
operation mode, allow the unbuckled
seat belt to fully retract.
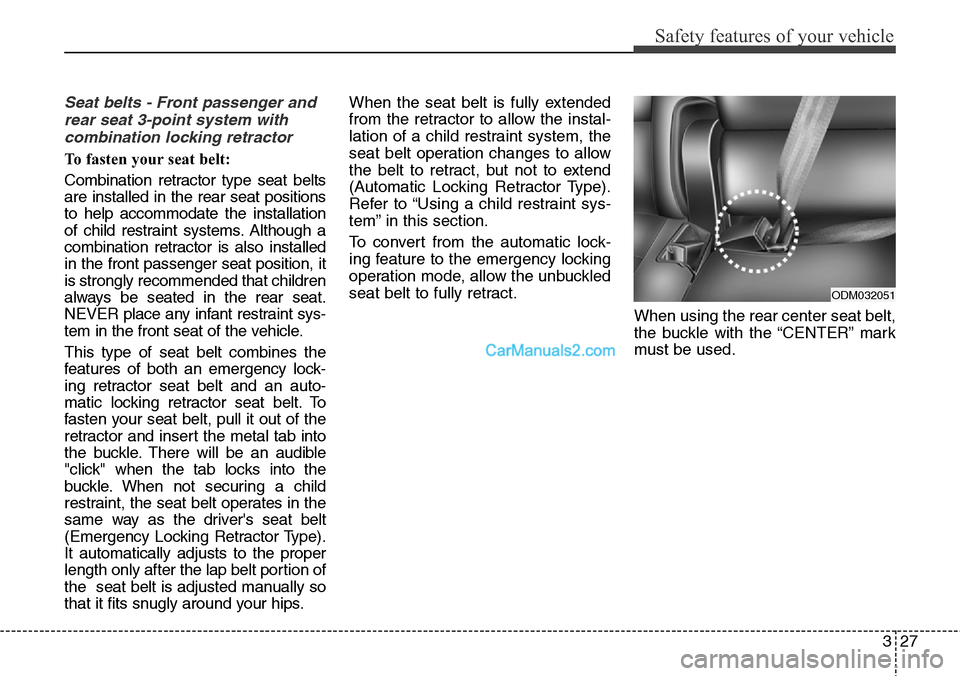
When using the rear center seat belt,
the buckle with the “CENTER” mark
must be used.
ODM032051
Page 58 of 785
337
Safety features of your vehicle
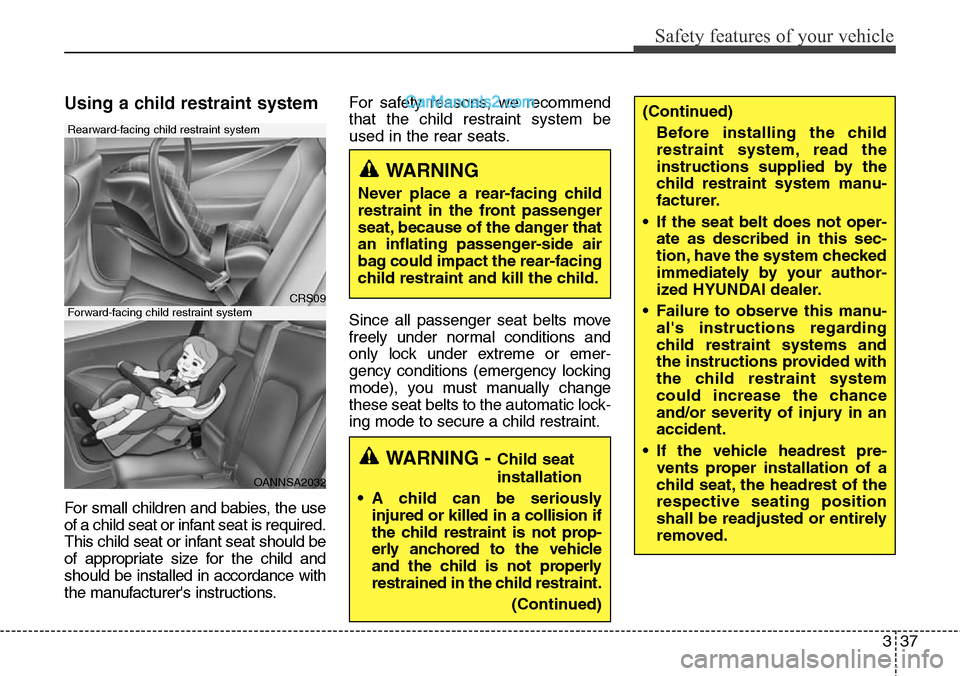
Using a child restraint system
For small children and babies, the use
of a child seat or infant seat is required.
This child seat or infant seat should be
of appropriate size for the child and
should be installed in accordance with
the manufacturer's instructions.For safety reasons, we recommend
that the child restraint system be
used in the rear seats.
Since all passenger seat belts move
freely under normal conditions and
only lock under extreme or emer-
gency conditions (emergency locking
mode), you must manually change
these seat belts to the automatic lock-
ing mode to secure a child restraint.
WARNING - Child seat
installation
• A child can be seriously
injured or killed in a collision if
the child restraint is not prop-
erly anchored to the vehicle
and the child is not properly
restrained in the child restraint.
(Continued)
(Continued)
Before installing the child
restraint system, read the
instructions supplied by the
child restraint system manu-
facturer.
• If the seat belt does not oper-
ate as described in this sec-
tion, have the system checked
immediately by your author-
ized HYUNDAI dealer.
• Failure to observe this manu-
al's instructions regarding
child restraint systems and
the instructions provided with
the child restraint system
could increase the chance
and/or severity of injury in an
accident.
• If the vehicle headrest pre-
vents proper installation of a
child seat, the headrest of the
respective seating position
shall be readjusted or entirely
removed.
WARNING
Never place a rear-facing child
restraint in the front passenger
seat, because of the danger that
an inflating passenger-side air
bag could impact the rear-facing
child restraint and kill the child.
CRS09
OANNSA2032
Forward-facing child restraint system
Rearward-facing child restraint system
Page 79 of 785
Safety features of your vehicle
58 3
Your vehicle is equipped with a
Supplemental Restraint (Air Bag)
System and the lap/shoulder belts at
both the driver and passenger seat-
ing positions.
The indications of the system's pres-
ence are the letters "SRS AIR BAG"
embossed on the air bag pad cover
in the steering wheel, on the knee
bolster below the steering wheel col-
umn and the passenger's side front
panel pad above the glove box.
The SRS consists of air bags
installed under the pad covers in the
center of the steering wheel , in the
knee bolster below the steering
wheel column and the passenger's
side front panel above the glove box.
The purpose of the SRS is to provide
the vehicle's driver and/or the front
passenger with additional protection
than that offered by the seat belt sys-
tem alone in case of a frontal impact
of sufficient severity.The seat belt buckle sensors deter-
mine if the driver and front passen-
ger's seat belts are fastened. These
sensors provide the ability to control
the SRS deployment based on
whether or not the seat belts are fas-
tened, and how severe the impact is.
The advanced SRS offers the ability
to control the air bag inflation within
two levels. A first stage level is pro-
vided for moderate-severity impacts.
A second stage level is provided for
more severe impacts.
According to the impact severity and
seat belt usage, the SRSCM (SRS
Control Module) controls the air bag
inflation. Failure to properly wear
seat belts can increase the risk or
severity of injury in an accident.Additionally, your vehicle is equipped
with an occupant classification sys-
tem in the front passenger's seat.
The occupant classification system
detects the presence of a passenger
in the front passenger's seat and will
turn off the front passenger's air bag
under certain conditions. For more
detail, see "Occupant classification
system" in this section.
Page 94 of 785
Features of your vehicle
Folding key . . . . . . . . . . . . . . . . . . . . . . . . . . . . . . . . 4-4
• Record your key number . . . . . . . . . . . . . . . . . . . . . . . 4-4
• Key operations . . . . . . . . . . . . . . . . . . . . . . . . . . . . . . . . 4-4
• Precautions . . . . . . . . . . . . . . . . . . . . . . . . . . . . . . . . . . . 4-6
• Battery replacement . . . . . . . . . . . . . . . . . . . . . . . . . . . 4-7
• Immobilizer system . . . . . . . . . . . . . . . . . . . . . . . . . . . . 4-8
Smart key . . . . . . . . . . . . . . . . . . . . . . . . . . . . . . . . 4-11
• Record your key number . . . . . . . . . . . . . . . . . . . . . . 4-11
• Smart key function . . . . . . . . . . . . . . . . . . . . . . . . . . . 4-11
• Loss of the smart key . . . . . . . . . . . . . . . . . . . . . . . . . 4-14
• Precautions . . . . . . . . . . . . . . . . . . . . . . . . . . . . . . . . . . 4-15
• Smart key immobilizer system . . . . . . . . . . . . . . . . . . 4-15
• Battery replacement . . . . . . . . . . . . . . . . . . . . . . . . . . 4-17
Theft-alarm system . . . . . . . . . . . . . . . . . . . . . . . . 4-19
• Armed stage . . . . . . . . . . . . . . . . . . . . . . . . . . . . . . . . . 4-19
• Theft-alarm stage . . . . . . . . . . . . . . . . . . . . . . . . . . . . 4-21
• Disarmed stage. . . . . . . . . . . . . . . . . . . . . . . . . . . . . . . 4-21
Door locks . . . . . . . . . . . . . . . . . . . . . . . . . . . . . . . . 4-23
• From outside . . . . . . . . . . . . . . . . . . . . . . . . . . . . . . . . 4-23
• From inside . . . . . . . . . . . . . . . . . . . . . . . . . . . . . . . . . 4-25
• Impact sensing door unlock system . . . . . . . . . . . . . . 4-27
• Child-protector rear door lock. . . . . . . . . . . . . . . . . . 4-27
Tailgate . . . . . . . . . . . . . . . . . . . . . . . . . . . . . . . . . . 4-28
• Non-powered tailgate . . . . . . . . . . . . . . . . . . . . . . . . . 4-28
• Power tailgate . . . . . . . . . . . . . . . . . . . . . . . . . . . . . . . 4-30• Smart Tailgate . . . . . . . . . . . . . . . . . . . . . . . . . . . . . . . 4-35
• Emergency tailgate safety release . . . . . . . . . . . . . . . 4-38
Windows . . . . . . . . . . . . . . . . . . . . . . . . . . . . . . . . . 4-39
• Power windows . . . . . . . . . . . . . . . . . . . . . . . . . . . . . . 4-40
Hood. . . . . . . . . . . . . . . . . . . . . . . . . . . . . . . . . . . . . 4-44
• Opening the hood . . . . . . . . . . . . . . . . . . . . . . . . . . . . 4-44
• Closing the hood . . . . . . . . . . . . . . . . . . . . . . . . . . . . . 4-45
Fuel filler lid . . . . . . . . . . . . . . . . . . . . . . . . . . . . . . 4-46
• Opening the fuel filler lid . . . . . . . . . . . . . . . . . . . . . . 4-46
• Closing the fuel filler lid . . . . . . . . . . . . . . . . . . . . . . . 4-46
• Emergency fuel filler lid release . . . . . . . . . . . . . . . . 4-49
Panoramic sunroof . . . . . . . . . . . . . . . . . . . . . . . . . 4-50
• Sunroof open warning. . . . . . . . . . . . . . . . . . . . . . . . . 4-51
• Sunshade . . . . . . . . . . . . . . . . . . . . . . . . . . . . . . . . . . . 4-52
• Sliding the sunroof . . . . . . . . . . . . . . . . . . . . . . . . . . . 4-52
• Tilting the sunroof . . . . . . . . . . . . . . . . . . . . . . . . . . . . 4-53
• Closing the sunroof . . . . . . . . . . . . . . . . . . . . . . . . . . . 4-53
• Resetting the sunroof . . . . . . . . . . . . . . . . . . . . . . . . . 4-55
Steering wheel . . . . . . . . . . . . . . . . . . . . . . . . . . . . . 4-56
• Electronic power steering . . . . . . . . . . . . . . . . . . . . . . 4-56
• Tilt & telescopic steering . . . . . . . . . . . . . . . . . . . . . . 4-57
• Heated steering wheel . . . . . . . . . . . . . . . . . . . . . . . . . 4-58
• Horn . . . . . . . . . . . . . . . . . . . . . . . . . . . . . . . . . . . . . . . 4-58
• Driver selectable steering mode . . . . . . . . . . . . . . . . . 4-59
4
Page 95 of 785
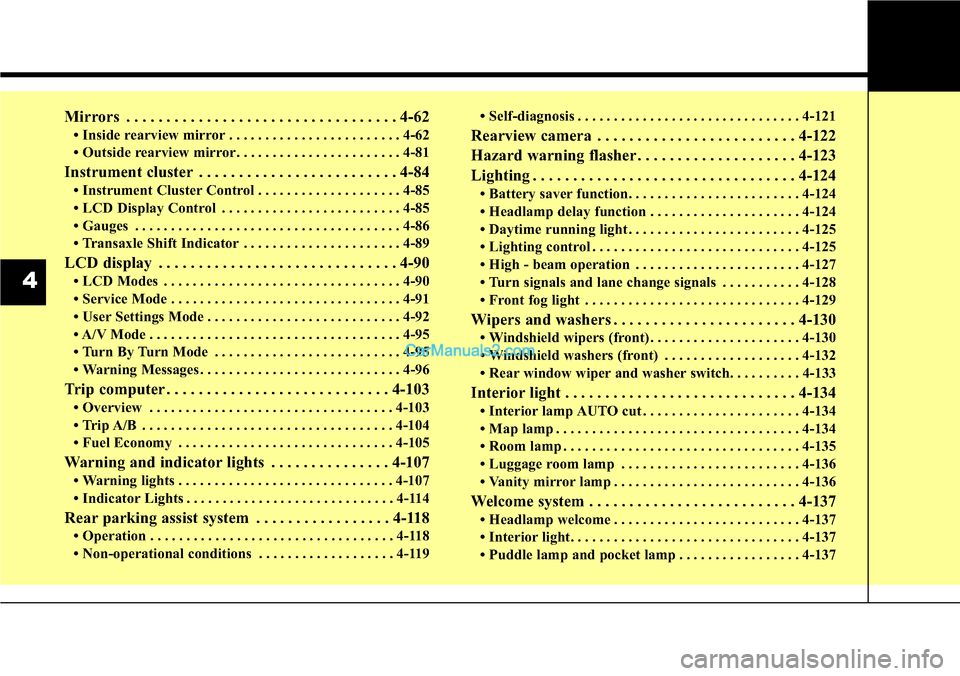
Mirrors . . . . . . . . . . . . . . . . . . . . . . . . . . . . . . . . . . 4-62
• Inside rearview mirror . . . . . . . . . . . . . . . . . . . . . . . . 4-62
• Outside rearview mirror. . . . . . . . . . . . . . . . . . . . . . . 4-81
Instrument cluster . . . . . . . . . . . . . . . . . . . . . . . . . 4-84
• Instrument Cluster Control . . . . . . . . . . . . . . . . . . . . 4-85
• LCD Display Control . . . . . . . . . . . . . . . . . . . . . . . . . 4-85
• Gauges . . . . . . . . . . . . . . . . . . . . . . . . . . . . . . . . . . . . . 4-86
• Transaxle Shift Indicator . . . . . . . . . . . . . . . . . . . . . . 4-89
LCD display . . . . . . . . . . . . . . . . . . . . . . . . . . . . . . 4-90
• LCD Modes . . . . . . . . . . . . . . . . . . . . . . . . . . . . . . . . . 4-90
• Service Mode . . . . . . . . . . . . . . . . . . . . . . . . . . . . . . . . 4-91
• User Settings Mode . . . . . . . . . . . . . . . . . . . . . . . . . . . 4-92
• A/V Mode . . . . . . . . . . . . . . . . . . . . . . . . . . . . . . . . . . . 4-95
• Turn By Turn Mode . . . . . . . . . . . . . . . . . . . . . . . . . . 4-95
• Warning Messages . . . . . . . . . . . . . . . . . . . . . . . . . . . . 4-96
Trip computer . . . . . . . . . . . . . . . . . . . . . . . . . . . . 4-103
• Overview . . . . . . . . . . . . . . . . . . . . . . . . . . . . . . . . . . 4-103
• Trip A/B . . . . . . . . . . . . . . . . . . . . . . . . . . . . . . . . . . . 4-104
• Fuel Economy . . . . . . . . . . . . . . . . . . . . . . . . . . . . . . 4-105
Warning and indicator lights . . . . . . . . . . . . . . . 4-107
• Warning lights . . . . . . . . . . . . . . . . . . . . . . . . . . . . . . 4-107
• Indicator Lights . . . . . . . . . . . . . . . . . . . . . . . . . . . . . 4-114
Rear parking assist system . . . . . . . . . . . . . . . . . 4-118
• Operation . . . . . . . . . . . . . . . . . . . . . . . . . . . . . . . . . . 4-118
• Non-operational conditions . . . . . . . . . . . . . . . . . . . 4-119• Self-diagnosis . . . . . . . . . . . . . . . . . . . . . . . . . . . . . . . 4-121
Rearview camera . . . . . . . . . . . . . . . . . . . . . . . . . 4-122
Hazard warning flasher . . . . . . . . . . . . . . . . . . . . 4-123
Lighting . . . . . . . . . . . . . . . . . . . . . . . . . . . . . . . . . 4-124
• Battery saver function. . . . . . . . . . . . . . . . . . . . . . . . 4-124
• Headlamp delay function . . . . . . . . . . . . . . . . . . . . . 4-124
• Daytime running light . . . . . . . . . . . . . . . . . . . . . . . . 4-125
• Lighting control . . . . . . . . . . . . . . . . . . . . . . . . . . . . . 4-125
• High - beam operation . . . . . . . . . . . . . . . . . . . . . . . 4-127
• Turn signals and lane change signals . . . . . . . . . . . 4-128
• Front fog light . . . . . . . . . . . . . . . . . . . . . . . . . . . . . . 4-129
Wipers and washers . . . . . . . . . . . . . . . . . . . . . . . 4-130
• Windshield wipers (front) . . . . . . . . . . . . . . . . . . . . . 4-130
• Windshield washers (front) . . . . . . . . . . . . . . . . . . . 4-132
• Rear window wiper and washer switch. . . . . . . . . . 4-133
Interior light . . . . . . . . . . . . . . . . . . . . . . . . . . . . . 4-134
• Interior lamp AUTO cut . . . . . . . . . . . . . . . . . . . . . . 4-134
• Map lamp . . . . . . . . . . . . . . . . . . . . . . . . . . . . . . . . . . 4-134
• Room lamp . . . . . . . . . . . . . . . . . . . . . . . . . . . . . . . . . 4-135
• Luggage room lamp . . . . . . . . . . . . . . . . . . . . . . . . . 4-136
• Vanity mirror lamp . . . . . . . . . . . . . . . . . . . . . . . . . . 4-136
Welcome system . . . . . . . . . . . . . . . . . . . . . . . . . . 4-137
• Headlamp welcome . . . . . . . . . . . . . . . . . . . . . . . . . . 4-137
• Interior light. . . . . . . . . . . . . . . . . . . . . . . . . . . . . . . . 4-137
• Puddle lamp and pocket lamp . . . . . . . . . . . . . . . . . 4-137
4
Page 102 of 785
49
Features of your vehicle
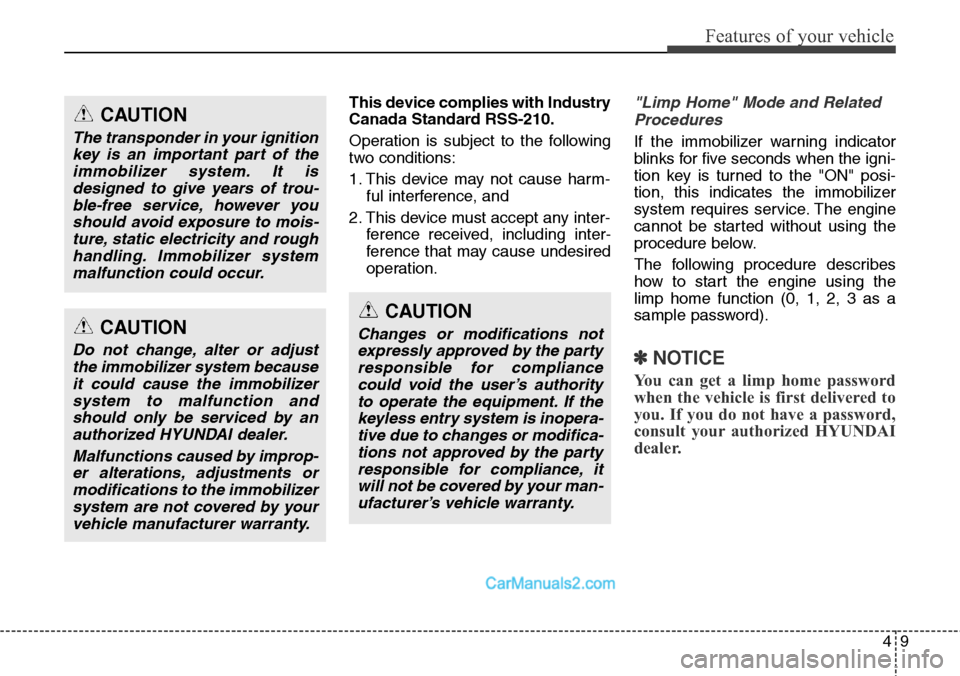
This device complies with Industry
Canada Standard RSS-210.
Operation is subject to the following
two conditions:
1. This device may not cause harm-
ful interference, and
2. This device must accept any inter-
ference received, including inter-
ference that may cause undesired
operation."Limp Home" Mode and Related
Procedures
If the immobilizer warning indicator
blinks for five seconds when the igni-
tion key is turned to the "ON" posi-
tion, this indicates the immobilizer
system requires service. The engine
cannot be started without using the
procedure below.
The following procedure describes
how to start the engine using the
limp home function (0, 1, 2, 3 as a
sample password).
✽NOTICE
You can get a limp home password
when the vehicle is first delivered to
you. If you do not have a password,
consult your authorized HYUNDAI
dealer.
CAUTION
Changes or modifications not
expressly approved by the party
responsible for compliance
could void the user’s authority
to operate the equipment. If the
keyless entry system is inopera-
tive due to changes or modifica-
tions not approved by the party
responsible for compliance, it
will not be covered by your man-
ufacturer’s vehicle warranty.
CAUTION
The transponder in your ignition
key is an important part of the
immobilizer system. It is
designed to give years of trou-
ble-free service, however you
should avoid exposure to mois-
ture, static electricity and rough
handling. Immobilizer system
malfunction could occur.
CAUTION
Do not change, alter or adjust
the immobilizer system because
it could cause the immobilizer
system to malfunction and
should only be serviced by an
authorized HYUNDAI dealer.
Malfunctions caused by improp-
er alterations, adjustments or
modifications to the immobilizer
system are not covered by your
vehicle manufacturer warranty.
Page 103 of 785
Features of your vehicle
10 4
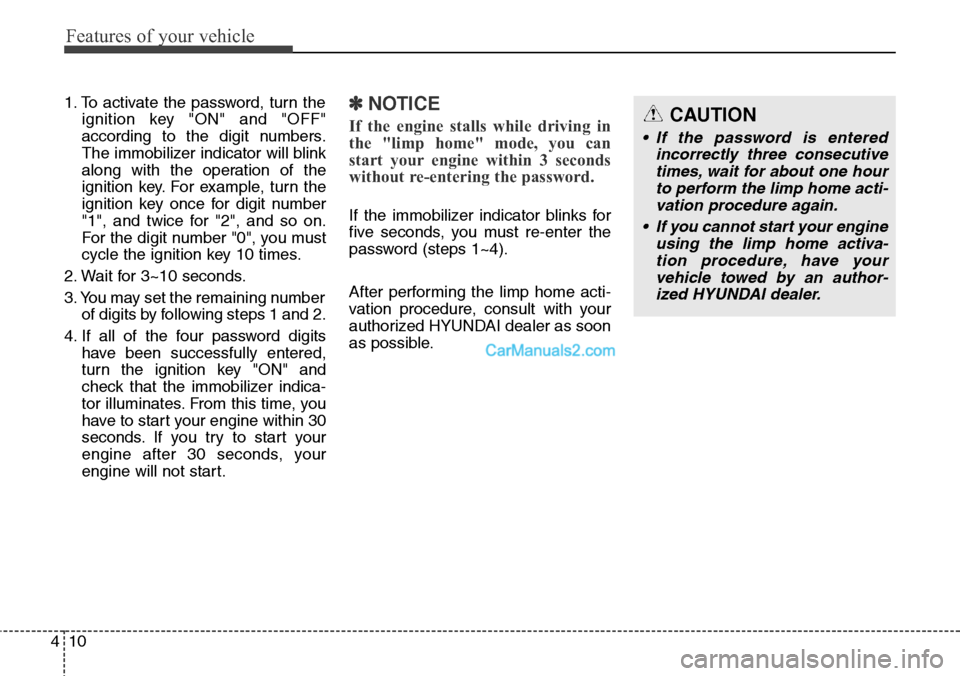
1. To activate the password, turn the
ignition key "ON" and "OFF"
according to the digit numbers.
The immobilizer indicator will blink
along with the operation of the
ignition key. For example, turn the
ignition key once for digit number
"1", and twice for "2", and so on.
For the digit number "0", you must
cycle the ignition key 10 times.
2. Wait for 3~10 seconds.
3. You may set the remaining number
of digits by following steps 1 and 2.
4. If all of the four password digits
have been successfully entered,
turn the ignition key "ON" and
check that the immobilizer indica-
tor illuminates. From this time, you
have to start your engine within 30
seconds. If you try to start your
engine after 30 seconds, your
engine will not start.✽NOTICE
If the engine stalls while driving in
the "limp home" mode, you can
start your engine within 3 seconds
without re-entering the password.
If the immobilizer indicator blinks for
five seconds, you must re-enter the
password (steps 1~4).
After performing the limp home acti-
vation procedure, consult with your
authorized HYUNDAI dealer as soon
as possible.
CAUTION
• If the password is entered
incorrectly three consecutive
times, wait for about one hour
to perform the limp home acti-
vation procedure again.
• If you cannot start your engine
using the limp home activa-
tion procedure, have your
vehicle towed by an author-
ized HYUNDAI dealer.
Page 125 of 785
Features of your vehicle
32 4
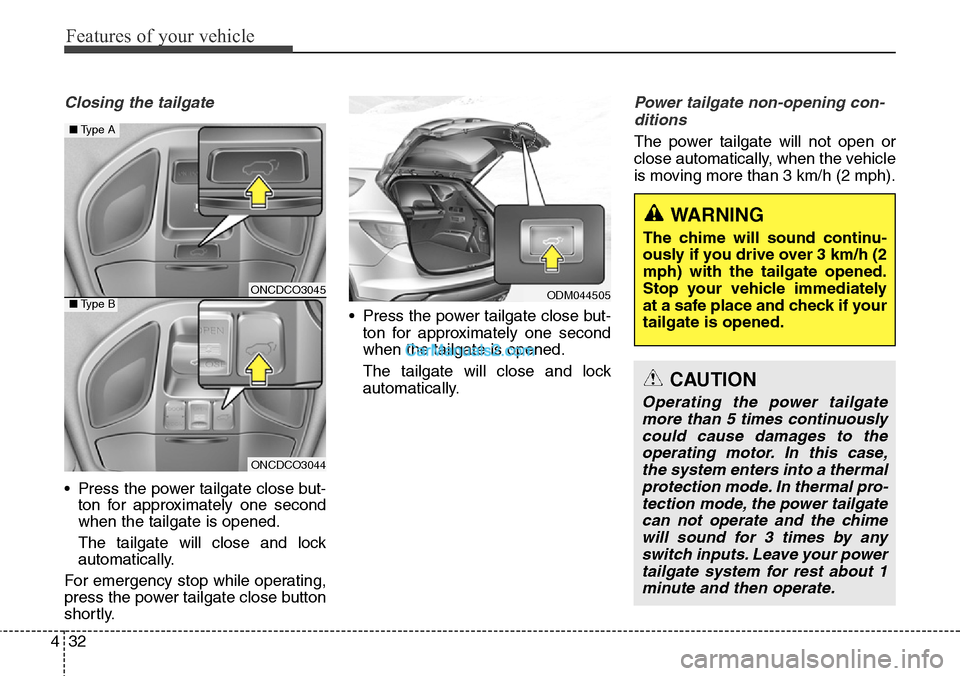
Closing the tailgate
• Press the power tailgate close but-
ton for approximately one second
when the tailgate is opened.
The tailgate will close and lock
automatically.
For emergency stop while operating,
press the power tailgate close button
shortly.• Press the power tailgate close but-
ton for approximately one second
when the tailgate is opened.
The tailgate will close and lock
automatically.
Power tailgate non-opening con-
ditions
The power tailgate will not open or
close automatically, when the vehicle
is moving more than 3 km/h (2 mph).
ONCDCO3045
ONCDCO3044
■Type A
■Type BODM044505
WARNING
The chime will sound continu-
ously if you drive over 3 km/h (2
mph) with the tailgate opened.
Stop your vehicle immediately
at a safe place and check if your
tailgate is opened.
CAUTION
Operating the power tailgate
more than 5 times continuously
could cause damages to the
operating motor. In this case,
the system enters into a thermal
protection mode. In thermal pro-
tection mode, the power tailgate
can not operate and the chime
will sound for 3 times by any
switch inputs. Leave your power
tailgate system for rest about 1
minute and then operate.
Page 128 of 785
435
Features of your vehicle
Smart Tailgate (if equipped)
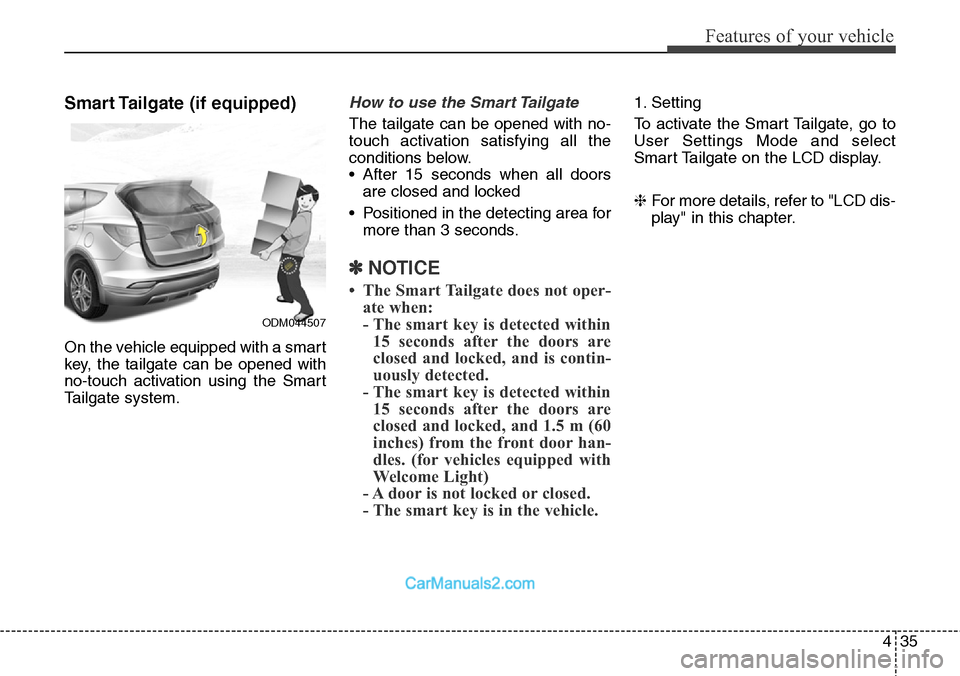
On the vehicle equipped with a smart
key, the tailgate can be opened with
no-touch activation using the Smart
Tailgate system.
How to use the Smart Tailgate
The tailgate can be opened with no-
touch activation satisfying all the
conditions below.
• After 15 seconds when all doors
are closed and locked
• Positioned in the detecting area for
more than 3 seconds.
✽NOTICE
• The Smart Tailgate does not oper-
ate when:
- The smart key is detected within
15 seconds after the doors are
closed and locked, and is contin-
uously detected.
- The smart key is detected within
15 seconds after the doors are
closed and locked, and 1.5 m (60
inches) from the front door han-
dles. (for vehicles equipped with
Welcome Light)
- A door is not locked or closed.
- The smart key is in the vehicle.
1. Setting
To activate the Smart Tailgate, go to
User Settings Mode and select
Smart Tailgate on the LCD display.
❈For more details, refer to "LCD dis-
play" in this chapter.
ODM044507
Page 152 of 785
459
Features of your vehicle
Driver selectable steering
mode (if equipped)
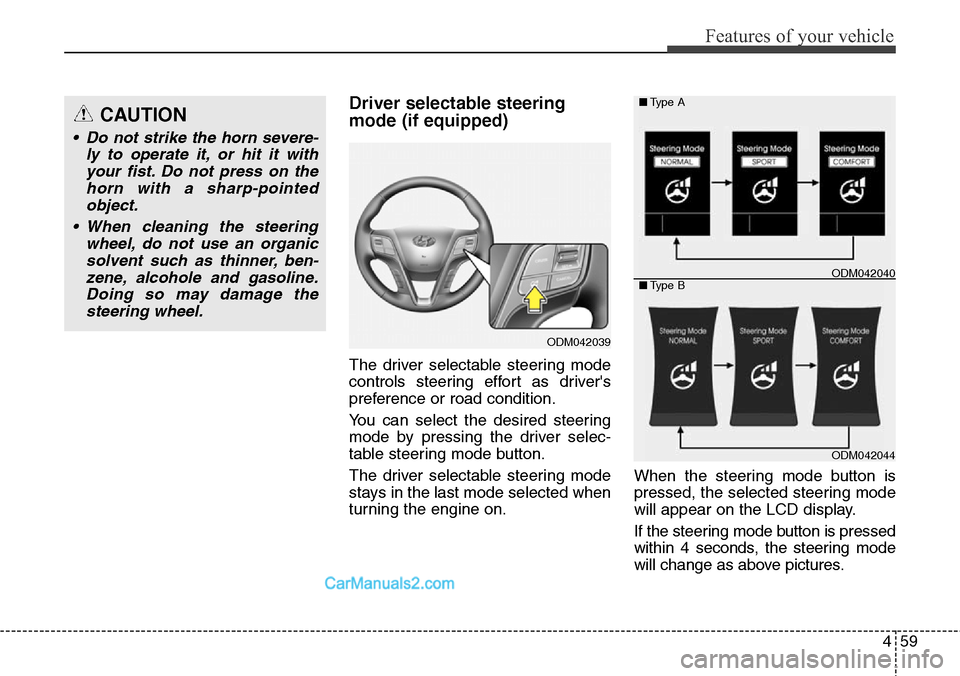
The driver selectable steering mode
controls steering effort as driver's
preference or road condition.
You can select the desired steering
mode by pressing the driver selec-
table steering mode button.
The driver selectable steering mode
stays in the last mode selected when
turning the engine on.When the steering mode button is
pressed, the selected steering mode
will appear on the LCD display.
If the steering mode button is pressed
within 4 seconds, the steering mode
will change as above pictures.
ODM042039
ODM042044 ■Type A
■Type B
ODM042040
CAUTION
• Do not strike the horn severe-
ly to operate it, or hit it with
your fist. Do not press on the
horn with a sharp-pointed
object.
• When cleaning the steering
wheel, do not use an organic
solvent such as thinner, ben-
zene, alcohole and gasoline.
Doing so may damage the
steering wheel.