low oil pressure Hyundai Santa Fe Sport 2015 Owner's Manual
[x] Cancel search | Manufacturer: HYUNDAI, Model Year: 2015, Model line: Santa Fe Sport, Model: Hyundai Santa Fe Sport 2015Pages: 785, PDF Size: 13.38 MB
Page 205 of 785
Features of your vehicle
112 4
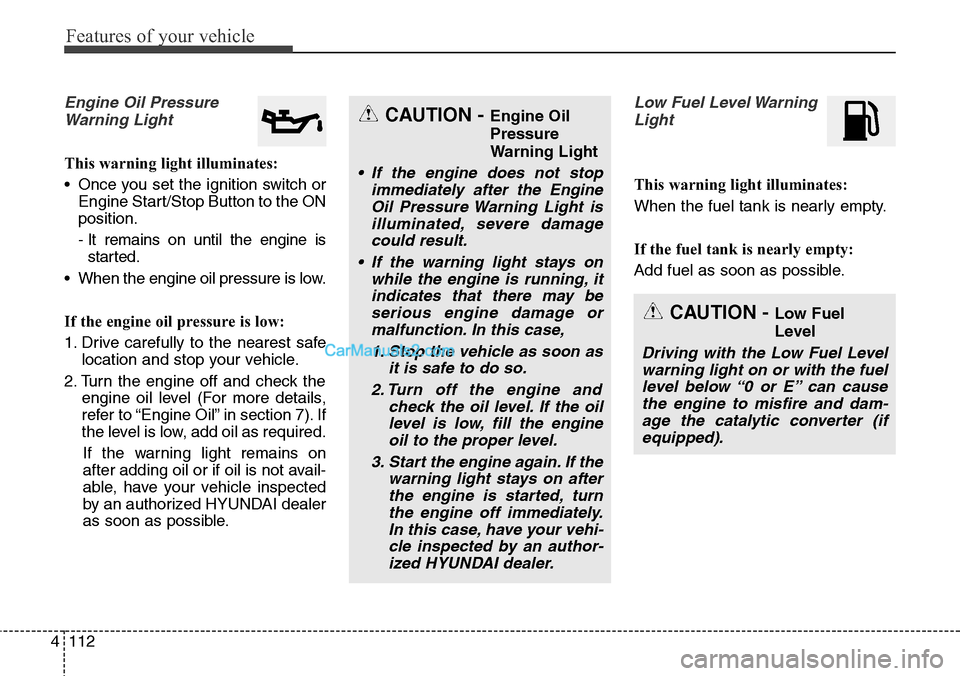
Engine Oil Pressure
Warning Light
This warning light illuminates:
• Once you set the ignition switch or
Engine Start/Stop Button to the ON
position.
- It remains on until the engine is
started.
• When the engine oil pressure is low.
If the engine oil pressure is low:
1. Drive carefully to the nearest safe
location and stop your vehicle.
2. Turn the engine off and check the
engine oil level (For more details,
refer to “Engine Oil” in section 7). If
the level is low, add oil as required.
If the warning light remains on
after adding oil or if oil is not avail-
able, have your vehicle inspected
by an authorized HYUNDAI dealer
as soon as possible.
Low Fuel Level Warning
Light
This warning light illuminates:
When the fuel tank is nearly empty.
If the fuel tank is nearly empty:
Add fuel as soon as possible.
CAUTION - Engine Oil
Pressure
Warning Light
• If the engine does not stop
immediately after the Engine
Oil Pressure Warning Light is
illuminated, severe damage
could result.
• If the warning light stays on
while the engine is running, it
indicates that there may be
serious engine damage or
malfunction. In this case,
1. Stop the vehicle as soon as
it is safe to do so.
2. Turn off the engine and
check the oil level. If the oil
level is low, fill the engine
oil to the proper level.
3. Start the engine again. If the
warning light stays on after
the engine is started, turn
the engine off immediately.
In this case, have your vehi-
cle inspected by an author-
ized HYUNDAI dealer.
CAUTION - Low Fuel
Level
Driving with the Low Fuel Level
warning light on or with the fuel
level below “0 or E” can cause
the engine to misfire and dam-
age the catalytic converter (if
equipped).
Page 240 of 785
4147
Features of your vehicle
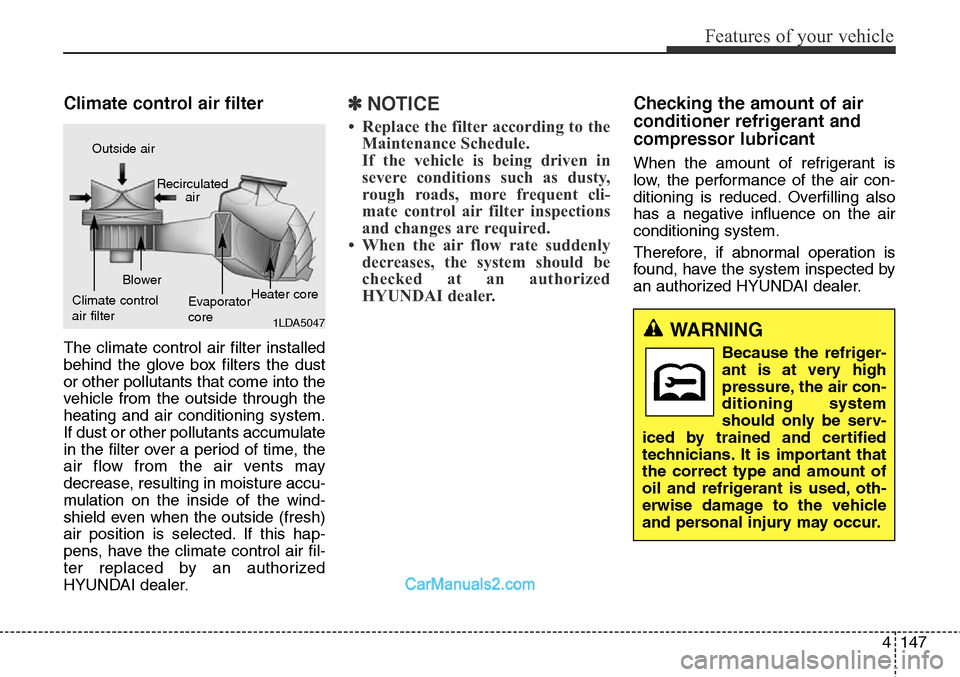
Climate control air filter
The climate control air filter installed
behind the glove box filters the dust
or other pollutants that come into the
vehicle from the outside through the
heating and air conditioning system.
If dust or other pollutants accumulate
in the filter over a period of time, the
air flow from the air vents may
decrease, resulting in moisture accu-
mulation on the inside of the wind-
shield even when the outside (fresh)
air position is selected. If this hap-
pens, have the climate control air fil-
ter replaced by an authorized
HYUNDAI dealer.
✽NOTICE
• Replace the filter according to the
Maintenance Schedule.
If the vehicle is being driven in
severe conditions such as dusty,
rough roads, more frequent cli-
mate control air filter inspections
and changes are required.
• When the air flow rate suddenly
decreases, the system should be
checked at an authorized
HYUNDAI dealer.
Checking the amount of air
conditioner refrigerant and
compressor lubricant
When the amount of refrigerant is
low, the performance of the air con-
ditioning is reduced. Overfilling also
has a negative influence on the air
conditioning system.
Therefore, if abnormal operation is
found, have the system inspected by
an authorized HYUNDAI dealer.
1LDA5047
Outside air
Recirculated
air
Climate control
air filterBlower
Evaporator
coreHeater core
WARNING
Because the refriger-
ant is at very high
pressure, the air con-
ditioning system
should only be serv-
iced by trained and certified
technicians. It is important that
the correct type and amount of
oil and refrigerant is used, oth-
erwise damage to the vehicle
and personal injury may occur.
Page 271 of 785
Features of your vehicle
178 4
(Continued)
• Turn on the car ignition before
using this device. Do not oper-
ate the audio system for long
periods of time with the ignition
turned off as such operations
may lead to battery discharge.
• Do not subject the device to
severe shock or impact. Direct
pressure onto the front side of
the monitor may cause dam-
age to the LCD or touch
screen.
• When cleaning the device,
make sure to turn off the
device and use a dry and
smooth cloth. Never use
tough materials, chemical
cloths, or solvents (alcohol,
benzene, thinners, etc.) as
such materials may damage
the device panel or cause
color/quality deterioration.
(Continued)(Continued)
• Do not place beverages close
to the audio system. Spilling
beverages may lead to system
malfunction.
• In case of product malfunc-
tion, please contact your place
of purchase or After Service
center.
• Placing the audio system
within an electromagnetic
environment may result in
noise interference.
• Prevent caustic solutions such
as perfume and cosmetic oil
from contacting the dashboard
because they may cause dam-
age or discoloration.CAUTION
• Operating the device while
driving could lead to accidents
due to a lack of attention to
external surroundings. First
park the vehicle before operat-
ing the device.
• Adjust the volume to levels that
allow the driver to hear sounds
from outside of the vehicle.
Driving in a state where exter-
nal sounds cannot be heard
may lead to accidents.
• Pay attention to the volume set-
ting when turning the device
on. A sudden output of extreme
volume upon turning the
device on could lead to hearing
impairment. (Adjust the volume
to a suitable levels before turn-
ing off the device.)
(Continued)
Page 675 of 785
Ignition circuit faultyOO
Ignition coil or condensor faultyOOO
Distributor faultyO
Alternator belt looseOOOOO
Check fuses, bulbs or wiringO
Clutch slipO
Clutch pedal not depressed fullyO
Brake draggingOO
Shift lever not positioned in "P" or "N" range (auto T/A)O
Frequent driving in lower gearO
Air intrusion into brake linesO
Brake fluid insufficientO
Brake drum and pads wetOO
Brake pad/lining wearOO
Wheel alignment incorrectOOOOOO
Wheel balance incorrectOO
Tire pressure incorrect (too low or high)OOOO
Tire size incorrectO
Starter won't function
Engine turns over but
will not start
Engine misfires
Engine overheats
Engine stops while
driving
Fuel consumption is
excessive
Brake pedal is spongy
Braking power is
insufficient
Steering wheel is heavy
Steering wheel shakesSteering wheel pulls to
one side while drivingVehicle pulls to one
side while braking
Tire wear is abnormalCharge warning light\
comes on while drivingWipers, horn or lights
won't funciton
Battery discharge is
excessive
SYMPTOM
PROBABLE CAUSE
624
What to do in an emergency
Page 676 of 785
Maintenance
Engine compartment . . . . . . . . . . . . . . . . . . . . . . . . 7-3
Maintenance services . . . . . . . . . . . . . . . . . . . . . . . . 7-4
• Owner’s responsibility . . . . . . . . . . . . . . . . . . . . . . . . . 7-4
• Owner maintenance precautions . . . . . . . . . . . . . . . . . 7-5
Owner maintenance . . . . . . . . . . . . . . . . . . . . . . . . . 7-6
• Owner maintenance schedule. . . . . . . . . . . . . . . . . . . . 7-6
Scheduled maintenance service. . . . . . . . . . . . . . . . 7-8
Explanation of scheduled maintenance items . . . 7-32
Engine oil. . . . . . . . . . . . . . . . . . . . . . . . . . . . . . . . . 7-35
• Checking the engine oil level . . . . . . . . . . . . . . . . . . . 7-35
• Changing the engine oil and filter . . . . . . . . . . . . . . . 7-36
Engine coolant . . . . . . . . . . . . . . . . . . . . . . . . . . . . 7-37
• Checking the coolant level . . . . . . . . . . . . . . . . . . . . . 7-37
• Changing the coolant . . . . . . . . . . . . . . . . . . . . . . . . . 7-39
Brake fluid . . . . . . . . . . . . . . . . . . . . . . . . . . . . . . . 7-40
• Checking the brake fluid level . . . . . . . . . . . . . . . . . . 7-40
Washer fluid . . . . . . . . . . . . . . . . . . . . . . . . . . . . . . 7-42
• Checking the washer fluid level . . . . . . . . . . . . . . . . . 7-42
Parking brake . . . . . . . . . . . . . . . . . . . . . . . . . . . . . 7-42
• Checking the parking brake. . . . . . . . . . . . . . . . . . . . 7-42
Air cleaner. . . . . . . . . . . . . . . . . . . . . . . . . . . . . . . . 7-43
• Filter replacement . . . . . . . . . . . . . . . . . . . . . . . . . . . . 7-43
Climate control air filter . . . . . . . . . . . . . . . . . . . . 7-45
• Filter inspection . . . . . . . . . . . . . . . . . . . . . . . . . . . . . . 7-45
• Filter replacement . . . . . . . . . . . . . . . . . . . . . . . . . . . . 7-45
Wiper blades . . . . . . . . . . . . . . . . . . . . . . . . . . . . . . 7-47
• Blade inspection . . . . . . . . . . . . . . . . . . . . . . . . . . . . . . 7-47
• Blade replacement . . . . . . . . . . . . . . . . . . . . . . . . . . . . 7-47
Battery . . . . . . . . . . . . . . . . . . . . . . . . . . . . . . . . . . . 7-50
• For best battery service . . . . . . . . . . . . . . . . . . . . . . . 7-50
• Battery recharging . . . . . . . . . . . . . . . . . . . . . . . . . . . 7-51
• Reset items . . . . . . . . . . . . . . . . . . . . . . . . . . . . . . . . . . 7-52
Tires and wheels . . . . . . . . . . . . . . . . . . . . . . . . . . . 7-53
• Tire care . . . . . . . . . . . . . . . . . . . . . . . . . . . . . . . . . . . . 7-53
• Recommended cold tire inflation pressures . . . . . . . 7-53
• Checking tire inflation pressure. . . . . . . . . . . . . . . . . 7-54
• Tire rotation . . . . . . . . . . . . . . . . . . . . . . . . . . . . . . . . . 7-55
• Wheel alignment and tire balance . . . . . . . . . . . . . . . 7-56
• Tire replacement . . . . . . . . . . . . . . . . . . . . . . . . . . . . . 7-57
• Wheel replacement . . . . . . . . . . . . . . . . . . . . . . . . . . . 7-58
• Tire traction . . . . . . . . . . . . . . . . . . . . . . . . . . . . . . . . . 7-58
• Tire maintenance . . . . . . . . . . . . . . . . . . . . . . . . . . . . . 7-59
• Tire sidewall labeling . . . . . . . . . . . . . . . . . . . . . . . . . 7-59
• Low aspect ratio tire . . . . . . . . . . . . . . . . . . . . . . . . . . 7-63
Fuses . . . . . . . . . . . . . . . . . . . . . . . . . . . . . . . . . . . . 7-68
• Fuse/relay panel description. . . . . . . . . . . . . . . . . . . . 7-72
Light bulbs . . . . . . . . . . . . . . . . . . . . . . . . . . . . . . . 7-80
• Front light replacement . . . . . . . . . . . . . . . . . . . . . . . 7-81
• Side repeater light bulb replacement . . . . . . . . . . . . 7-84
• Rear combination light bulb replacement . . . . . . . . 7-85
7
Page 681 of 785
Maintenance
6 7
OWNER MAINTENANCE
The following lists are vehicle checks
and inspections that should be per-
formed by the owner or an author-
ized HYUNDAI dealer at the frequen-
cies indicated to help ensure safe,
dependable operation of your vehi-
cle.
Any adverse conditions should be
brought to the attention of your deal-
er as soon as possible.
These Owner Maintenance Checks
are generally not covered by war-
ranties and you may be charged for
labor, parts and lubricants used.Owner maintenance schedule
When you stop for fuel:
• Check the engine oil level.
• Check coolant level in coolant
reservoir.
• Check the windshield washer fluid
level.
• Look for low or under-inflated tires.
While operating your vehicle:
• Note any changes in the sound of
the exhaust or any smell of
exhaust fumes in the vehicle.
• Check for vibrations in the steering
wheel. Notice any increased steer-
ing effort or looseness in the steer-
ing wheel, or change in its straight-
ahead position.
• Notice if your vehicle constantly
turns slightly or “pulls” to one side
when traveling on smooth, level
road.
• When stopping, listen and check
for unusual sounds, pulling to one
side, increased brake pedal travel
or “hard-to-push” brake pedal.
• If any slipping or changes in the
operation of your transaxle occurs,
check the transaxle fluid level.
• Check automatic transaxle P
(Park) function.
• Check parking brake.
WARNING
Be careful when checking your
engine coolant level when the
engine is hot. Scalding hot
coolant and steam may blow
out under pressure. This could
cause burns or other serious
injury.
Page 766 of 785
791
Maintenance
Waxing
Wax the vehicle when water will no
longer bead on the paint.
Always wash and dry the vehicle
before waxing. Use a good quality
liquid or paste wax, and follow the
manufacturer’s instructions. Wax all
metal trim to protect it and to main-
tain its luster.
Removing oil, tar, and similar materi-
als with a spot remover will usually
strip the wax from the finish. Be sure
to re-wax these areas even if the rest
of the vehicle does not yet need wax-
ing.CAUTION
• Wiping dust or dirt off the
body with a dry cloth will
scratch the finish.
• Do not use steel wool, abra-
sive cleaners, or strong deter-
gents containing highly alka-
line or caustic agents on
chrome-plated or anodized
aluminum parts. This may
result in damage to the pro-
tective coating and cause dis-
coloration or paint deteriora-
tion.
CAUTION
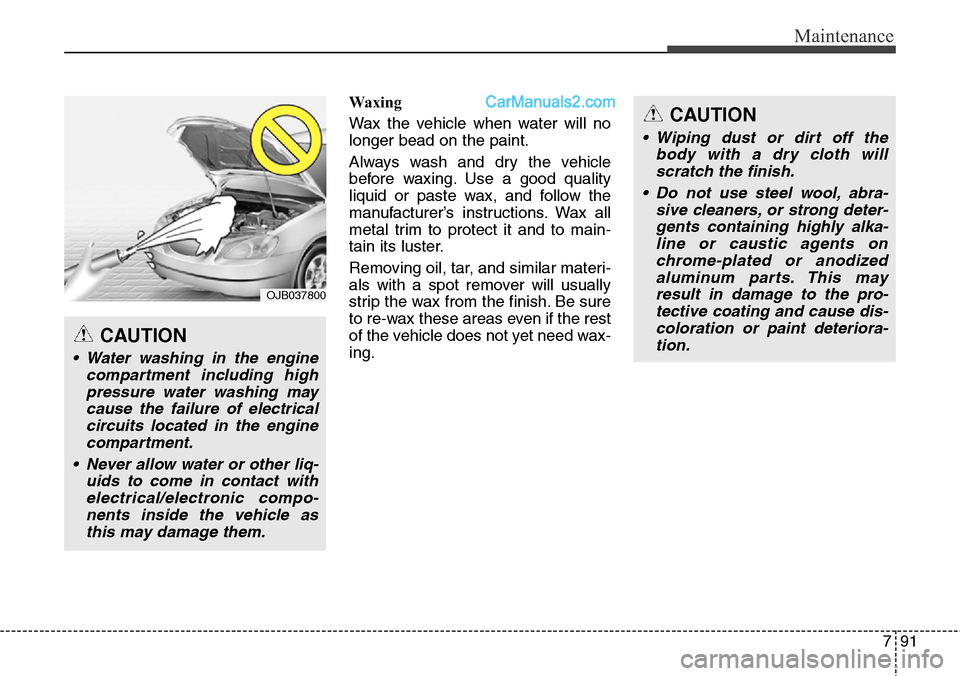
• Water washing in the engine
compartment including high
pressure water washing may
cause the failure of electrical
circuits located in the engine
compartment.
• Never allow water or other liq-
uids to come in contact with
electrical/electronic compo-
nents inside the vehicle as
this may damage them.
OJB037800