trip computer Hyundai Santa Fe Sport 2015 Owner's Manual
[x] Cancel search | Manufacturer: HYUNDAI, Model Year: 2015, Model line: Santa Fe Sport, Model: Hyundai Santa Fe Sport 2015Pages: 785, PDF Size: 13.38 MB
Page 95 of 785
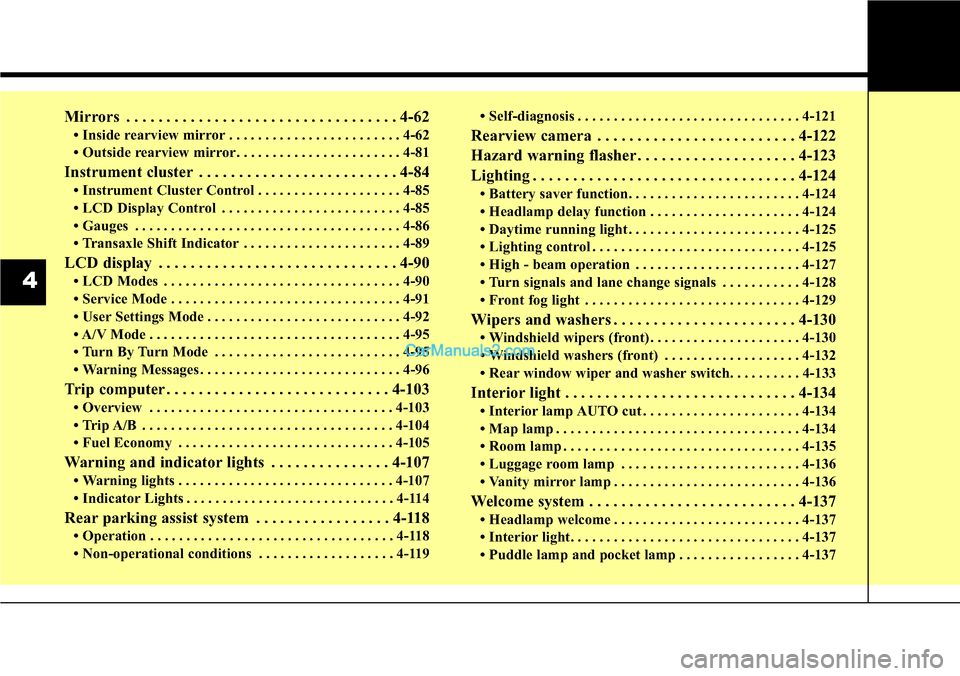
Mirrors . . . . . . . . . . . . . . . . . . . . . . . . . . . . . . . . . . 4-62
• Inside rearview mirror . . . . . . . . . . . . . . . . . . . . . . . . 4-62
• Outside rearview mirror. . . . . . . . . . . . . . . . . . . . . . . 4-81
Instrument cluster . . . . . . . . . . . . . . . . . . . . . . . . . 4-84
• Instrument Cluster Control . . . . . . . . . . . . . . . . . . . . 4-85
• LCD Display Control . . . . . . . . . . . . . . . . . . . . . . . . . 4-85
• Gauges . . . . . . . . . . . . . . . . . . . . . . . . . . . . . . . . . . . . . 4-86
• Transaxle Shift Indicator . . . . . . . . . . . . . . . . . . . . . . 4-89
LCD display . . . . . . . . . . . . . . . . . . . . . . . . . . . . . . 4-90
• LCD Modes . . . . . . . . . . . . . . . . . . . . . . . . . . . . . . . . . 4-90
• Service Mode . . . . . . . . . . . . . . . . . . . . . . . . . . . . . . . . 4-91
• User Settings Mode . . . . . . . . . . . . . . . . . . . . . . . . . . . 4-92
• A/V Mode . . . . . . . . . . . . . . . . . . . . . . . . . . . . . . . . . . . 4-95
• Turn By Turn Mode . . . . . . . . . . . . . . . . . . . . . . . . . . 4-95
• Warning Messages . . . . . . . . . . . . . . . . . . . . . . . . . . . . 4-96
Trip computer . . . . . . . . . . . . . . . . . . . . . . . . . . . . 4-103
• Overview . . . . . . . . . . . . . . . . . . . . . . . . . . . . . . . . . . 4-103
• Trip A/B . . . . . . . . . . . . . . . . . . . . . . . . . . . . . . . . . . . 4-104
• Fuel Economy . . . . . . . . . . . . . . . . . . . . . . . . . . . . . . 4-105
Warning and indicator lights . . . . . . . . . . . . . . . 4-107
• Warning lights . . . . . . . . . . . . . . . . . . . . . . . . . . . . . . 4-107
• Indicator Lights . . . . . . . . . . . . . . . . . . . . . . . . . . . . . 4-114
Rear parking assist system . . . . . . . . . . . . . . . . . 4-118
• Operation . . . . . . . . . . . . . . . . . . . . . . . . . . . . . . . . . . 4-118
• Non-operational conditions . . . . . . . . . . . . . . . . . . . 4-119• Self-diagnosis . . . . . . . . . . . . . . . . . . . . . . . . . . . . . . . 4-121
Rearview camera . . . . . . . . . . . . . . . . . . . . . . . . . 4-122
Hazard warning flasher . . . . . . . . . . . . . . . . . . . . 4-123
Lighting . . . . . . . . . . . . . . . . . . . . . . . . . . . . . . . . . 4-124
• Battery saver function. . . . . . . . . . . . . . . . . . . . . . . . 4-124
• Headlamp delay function . . . . . . . . . . . . . . . . . . . . . 4-124
• Daytime running light . . . . . . . . . . . . . . . . . . . . . . . . 4-125
• Lighting control . . . . . . . . . . . . . . . . . . . . . . . . . . . . . 4-125
• High - beam operation . . . . . . . . . . . . . . . . . . . . . . . 4-127
• Turn signals and lane change signals . . . . . . . . . . . 4-128
• Front fog light . . . . . . . . . . . . . . . . . . . . . . . . . . . . . . 4-129
Wipers and washers . . . . . . . . . . . . . . . . . . . . . . . 4-130
• Windshield wipers (front) . . . . . . . . . . . . . . . . . . . . . 4-130
• Windshield washers (front) . . . . . . . . . . . . . . . . . . . 4-132
• Rear window wiper and washer switch. . . . . . . . . . 4-133
Interior light . . . . . . . . . . . . . . . . . . . . . . . . . . . . . 4-134
• Interior lamp AUTO cut . . . . . . . . . . . . . . . . . . . . . . 4-134
• Map lamp . . . . . . . . . . . . . . . . . . . . . . . . . . . . . . . . . . 4-134
• Room lamp . . . . . . . . . . . . . . . . . . . . . . . . . . . . . . . . . 4-135
• Luggage room lamp . . . . . . . . . . . . . . . . . . . . . . . . . 4-136
• Vanity mirror lamp . . . . . . . . . . . . . . . . . . . . . . . . . . 4-136
Welcome system . . . . . . . . . . . . . . . . . . . . . . . . . . 4-137
• Headlamp welcome . . . . . . . . . . . . . . . . . . . . . . . . . . 4-137
• Interior light. . . . . . . . . . . . . . . . . . . . . . . . . . . . . . . . 4-137
• Puddle lamp and pocket lamp . . . . . . . . . . . . . . . . . 4-137
4
Page 183 of 785
Features of your vehicle
90 4
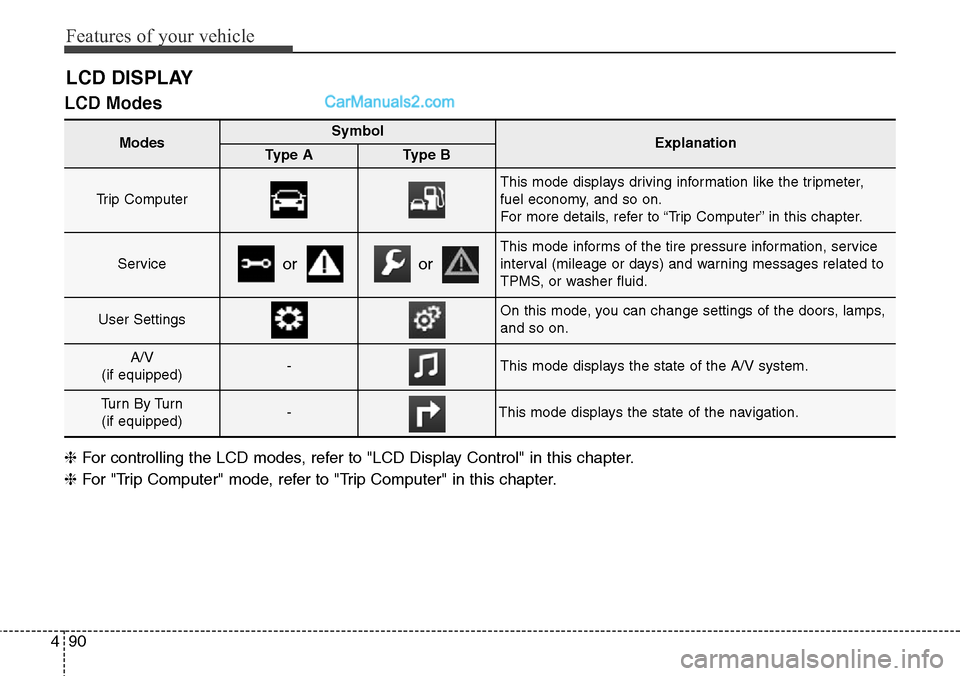
LCD Modes
LCD DISPLAY
Modes SymbolExplanationType AType B
Trip Computer
This mode displays driving information like the tripmeter,
fuel economy, and so on.
For more details, refer to “Trip Computer” in this chapter.
Service
This mode informs of the tire pressure information, service
interval (mileage or days) and warning messages related to
TPMS, or washer fluid.
User SettingsOn this mode, you can change settings of the doors, lamps,
and so on.
A/V
(if equipped)-This mode displays the state of the A/V system.
Tu r n B y Tu r n
(if equipped)-This mode displays the state of the navigation.
oror
❈For controlling the LCD modes, refer to "LCD Display Control" in this chapter.
❈For "Trip Computer" mode, refer to "Trip Computer" in this chapter.
Page 187 of 785
Features of your vehicle
94 4
Settings
Temperature Unit
Convert the temperature unit from °C
to °F or from °F to °C.
Welcome Sound
If this item is checked, the welcome
sound function will be activated.
Shift Indicator (if equipped)
If this item is checked, the shift indi-
cator function will be activated.
For more details, refer to “Instrument
Cluster” in this chapter.
Seat Easy Access (if equipped)
If this item is checked, the driver’s
seat will automatically move forward
or rearward for the driver to enter or
exit the vehicle comfortably.AVG Fuel Eco Reset
• Auto Reset:
The average fuel economy will
reset automatically when refueling.
• Manual Reset:
The average fuel economy will not
reset automatically whenever refu-
eling.
For more details, refer to “Trip
Computer” in this chapter.
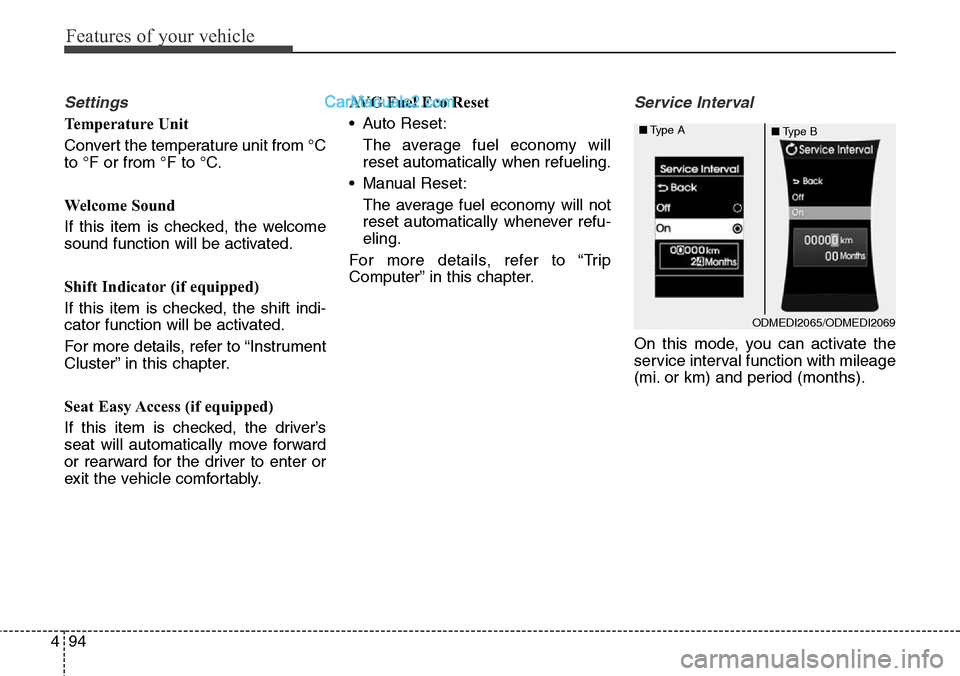
Service Interval
On this mode, you can activate the
service interval function with mileage
(mi. or km) and period (months).
ODMEDI2065/ODMEDI2069 ■Type A
■Type B
Page 196 of 785
4103
Features of your vehicle
Overview
Description
The trip computer is a microcomput-
er-controlled driver information sys-
tem that displays information related
to driving.
✽NOTICE
Some driving information stored in
the trip computer (for example
Average Vehicle Speed) resets if the
battery is disconnected.
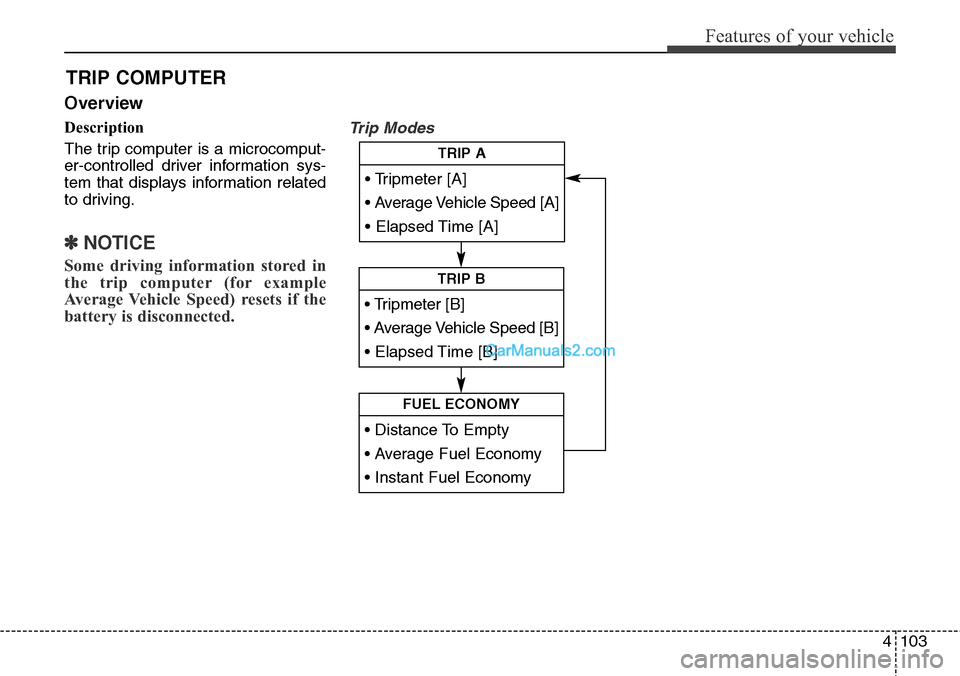
Trip Modes
TRIP COMPUTER
• Tripmeter [A]
• Average Vehicle Speed [A]
• Elapsed Time [A]
TRIP A
• Tripmeter [B]
• Average Vehicle Speed [B]
• Elapsed Time [B]
TRIP B
• Distance To Empty
• Average Fuel Economy
• Instant Fuel Economy
FUEL ECONOMY
Page 198 of 785
4105
Features of your vehicle
Fuel Economy
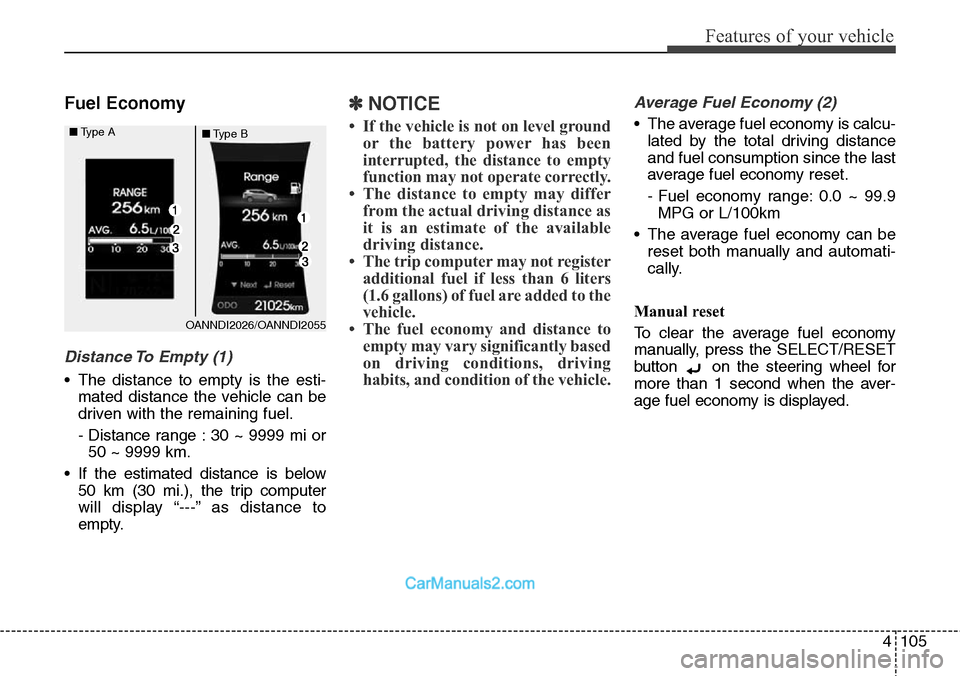
Distance To Empty (1)
• The distance to empty is the esti-
mated distance the vehicle can be
driven with the remaining fuel.
- Distance range : 30 ~ 9999 mi or
50 ~ 9999 km.
• If the estimated distance is below
50 km (30 mi.), the trip computer
will display “---” as distance to
empty.
✽NOTICE
• If the vehicle is not on level ground
or the battery power has been
interrupted, the distance to empty
function may not operate correctly.
• The distance to empty may differ
from the actual driving distance as
it is an estimate of the available
driving distance.
• The trip computer may not register
additional fuel if less than 6 liters
(1.6 gallons) of fuel are added to the
vehicle.
• The fuel economy and distance to
empty may vary significantly based
on driving conditions, driving
habits, and condition of the vehicle.
Average Fuel Economy (2)
• The average fuel economy is calcu-
lated by the total driving distance
and fuel consumption since the last
average fuel economy reset.
- Fuel economy range: 0.0 ~ 99.9
MPG or L/100km
• The average fuel economy can be
reset both manually and automati-
cally.
Manual reset
To clear the average fuel economy
manually, press the SELECT/RESET
button on the steering wheel for
more than 1 second when the aver-
age fuel economy is displayed.
OANNDI2026/OANNDI2055 ■Type A
■Type B
Page 727 of 785
Maintenance
52 7
Reset items
Items should be reset after the bat-
tery has been discharged or the bat-
tery has been disconnected.
• Auto up/down window
(See section 4)
• Sunroof (See section 4)
• Trip computer (See section 4)
• Climate control system
(See section 4)
• Clock (See section 4)
• Audio (See section 4)(Continued)
1. Turn off the battery charger
main switch.
2. Unhook the negative clamp
from the negative battery
terminal.
3. Unhook the positive clamp
from the positive battery
terminal.
• Before performing mainte-
nance or recharging the bat-
tery, turn off all accessories
and stop the engine.
• The negative battery cable
must be removed first and
installed last when the battery
is disconnected.WARNING- Recharging
battery
When recharging the battery,
observe the following precau-
tions:
• The battery must be removed
from the vehicle and placed in
an area with good ventilation.
• Do not allow cigarettes, sparks,
or flame near the battery.
• Watch the battery during
charging, and stop or reduce
the charging rate if the battery
cells begin gassing (boiling)
violently or if the temperature
of the electrolyte of any cell
exceeds 49°C (120°F).
• Wear eye protection when
checking the battery during
charging.
• Disconnect the battery charg-
er in the following order.
(Continued)