hood open Hyundai Santa Fe Sport 2016 Owner's Manual
[x] Cancel search | Manufacturer: HYUNDAI, Model Year: 2016, Model line: Santa Fe Sport, Model: Hyundai Santa Fe Sport 2016Pages: 763, PDF Size: 37.75 MB
Page 17 of 763
Your vehicle at a glance
42
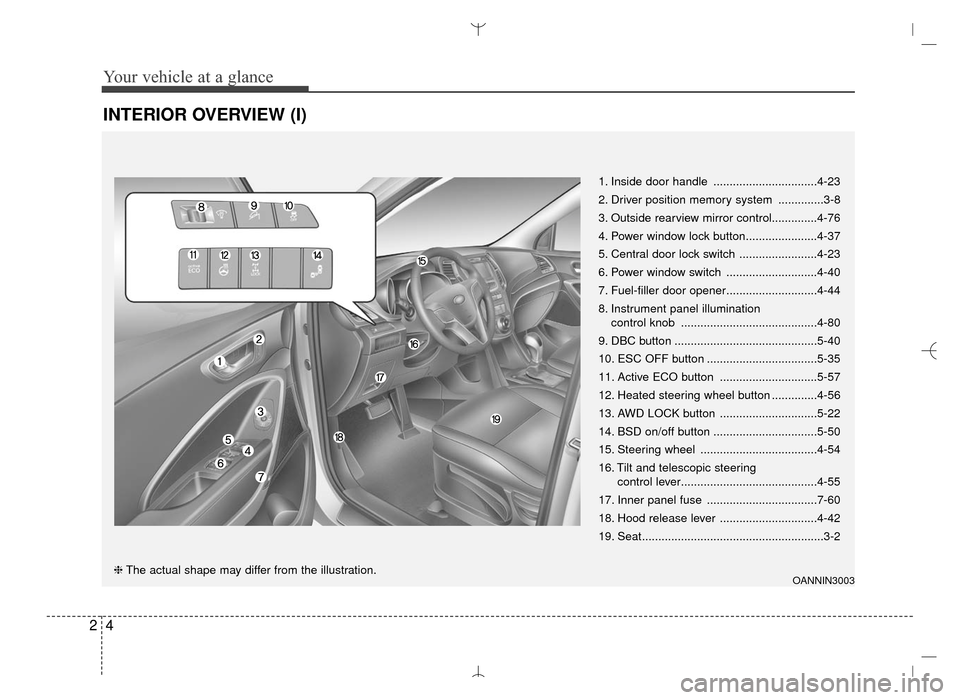
INTERIOR OVERVIEW (I)
1. Inside door handle ................................4-23
2. Driver position memory system ..............3-8
3. Outside rearview mirror control..............4-76
4. Power window lock button......................4-37
5. Central door lock switch ........................4-23
6. Power window switch ............................4-40
7. Fuel-filler door opener............................4-44
8. Instrument panel illumination control knob ..........................................4-80
9. DBC button ............................................5-40
10. ESC OFF button ..................................5-35
11. Active ECO button ..............................5-57
12. Heated steering wheel button ..............4-56
13. AWD LOCK button ..............................5-22
14. BSD on/off button ................................5-50
15. Steering wheel ....................................4-54
16. Tilt and telescopic steering control lever..........................................4-55
17. Inner panel fuse ..................................7-60
18. Hood release lever ..............................4-42
19. Seat........................................................3-2
OANNIN3003❈ The actual shape may differ from the illustration.
AN HMA 2.QXP 6/10/2015 11:21 AM Page 4
Page 93 of 763
Features of your vehicle
Folding key . . . . . . . . . . . . . . . . . . . . . . . . . . . . . . . . 4-4
• Record your key number . . . . . . . . . . . . . . . . . . . . . . . 4-4
• Key operations . . . . . . . . . . . . . . . . . . . . . . . . . . . . . . . . 4-4
• Precautions . . . . . . . . . . . . . . . . . . . . . . . . . . . . . . . . . . . 4-\
6
• Battery replacement . . . . . . . . . . . . . . . . . . . . . . . . . . . 4-7
• Immobilizer system . . . . . . . . . . . . . . . . . . . . . . . . . . . . 4-7
Smart key . . . . . . . . . . . . . . . . . . . . . . . . . . . . . . . . 4-10
• Record your key number . . . . . . . . . . . . . . . . . . . . . . 4-10
• Smart key function . . . . . . . . . . . . . . . . . . . . . . . . . . . 4-10
• Loss of the smart key . . . . . . . . . . . . . . . . . . . . . . . . . 4-13
• Precautions . . . . . . . . . . . . . . . . . . . . . . . . . . . . . . . . . . 4-14\
• Smart key immobilizer system . . . . . . . . . . . . . . . . . . 4-14
• Battery replacement . . . . . . . . . . . . . . . . . . . . . . . . . . 4-16
Theft-alarm system . . . . . . . . . . . . . . . . . . . . . . . . 4-17
• Armed stage . . . . . . . . . . . . . . . . . . . . . . . . . . . . . . . . . 4-17
• Theft-alarm stage . . . . . . . . . . . . . . . . . . . . . . . . . . . . 4-19
• Disarmed stage. . . . . . . . . . . . . . . . . . . . . . . . . . . . . . . 4-19
Door locks . . . . . . . . . . . . . . . . . . . . . . . . . . . . . . . . 4-21
• From outside . . . . . . . . . . . . . . . . . . . . . . . . . . . . . . . . 4-21
• From inside . . . . . . . . . . . . . . . . . . . . . . . . . . . . . . . . . 4-23
• Impact sensing door unlock system . . . . . . . . . . . . . . 4-25
• Child-protector rear door lock. . . . . . . . . . . . . . . . . . 4-25
Liftgate (Tailgate) . . . . . . . . . . . . . . . . . . . . . . . . . . 4-26
• Non - powered liftgate (tailgate) . . . . . . . . . . . . . . . . 4-26
• Power liftgate (Power tailgate) . . . . . . . . . . . . . . . . . . 4-28 • Smart liftgate (Smart tailgate) . . . . . . . . . . . . . . . . . . 4-33
• Emergency liftgate (tailgate) safety release . . . . . . . 4-36
Windows . . . . . . . . . . . . . . . . . . . . . . . . . . . . . . . . . 4-37
• Power windows . . . . . . . . . . . . . . . . . . . . . . . . . . . . . . 4-38
Hood. . . . . . . . . . . . . . . . . . . . . . . . . . . . . . . . . . . . \
. 4-42
• Opening the hood . . . . . . . . . . . . . . . . . . . . . . . . . . . . 4-42
• Closing the hood . . . . . . . . . . . . . . . . . . . . . . . . . . . . . 4-43
Fuel filler door . . . . . . . . . . . . . . . . . . . . . . . . . . . . 4-44
• Opening the fuel filler door . . . . . . . . . . . . . . . . . . . . 4-44
• Closing the fuel filler door . . . . . . . . . . . . . . . . . . . . . 4-44
• Emergency fuel filler door release . . . . . . . . . . . . . . . 4-47
Panoramic sunroof . . . . . . . . . . . . . . . . . . . . . . . . . 4-48
• Sunroof open warning. . . . . . . . . . . . . . . . . . . . . . . . . 4-49
• Sunshade . . . . . . . . . . . . . . . . . . . . . . . . . . . . . . . . . . . 4-\
50
• Sliding the sunroof . . . . . . . . . . . . . . . . . . . . . . . . . . . 4-51
• Tilting the sunroof . . . . . . . . . . . . . . . . . . . . . . . . . . . . 4-51
• Closing the sunroof . . . . . . . . . . . . . . . . . . . . . . . . . . . 4-52
• Resetting the sunroof . . . . . . . . . . . . . . . . . . . . . . . . . 4-53
Steering wheel . . . . . . . . . . . . . . . . . . . . . . . . . . . . . 4-54
• Electronic power steering . . . . . . . . . . . . . . . . . . . . . . 4-54
• Tilt & telescopic steering . . . . . . . . . . . . . . . . . . . . . . 4-55
• Heated steering wheel . . . . . . . . . . . . . . . . . . . . . . . . . 4-56
• Horn . . . . . . . . . . . . . . . . . . . . . . . . . . . . . . . . . . . . \
. . . 4-56
• Driver selectable steering mode . . . . . . . . . . . . . . . . . 4-57
4
AN HMA 4A.QXP 3/5/2015 3:17 PM Page 1
Page 103 of 763
411
Features of your vehicle
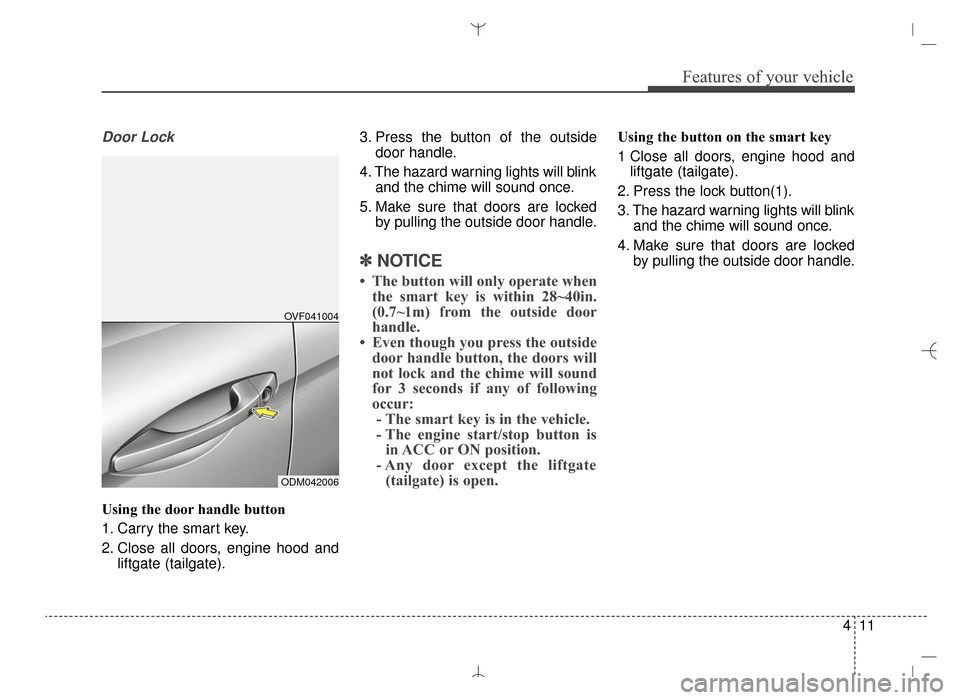
Door Lock
Using the door handle button
1. Carry the smart key.
2. Close all doors, engine hood andliftgate (tailgate). 3. Press the button of the outside
door handle.
4. The hazard warning lights will blink and the chime will sound once.
5. Make sure that doors are locked by pulling the outside door handle.
✽ ✽NOTICE
• The button will only operate when
the smart key is within 28~40in.
(0.7~1m) from the outside door
handle.
• Even though you press the outside door handle button, the doors will
not lock and the chime will sound
for 3 seconds if any of following
occur:- The smart key is in the vehicle.
- The engine start/stop button is in ACC or ON position.
- Any door except the liftgate (tailgate) is open.
Using the button on the smart key
1 Close all doors, engine hood and
liftgate (tailgate).
2. Press the lock button(1).
3. The hazard warning lights will blink and the chime will sound once.
4. Make sure that doors are locked by pulling the outside door handle.
ODM042006OVF041004
AN HMA 4A.QXP 3/5/2015 3:17 PM Page 11
Page 109 of 763
417
Features of your vehicle
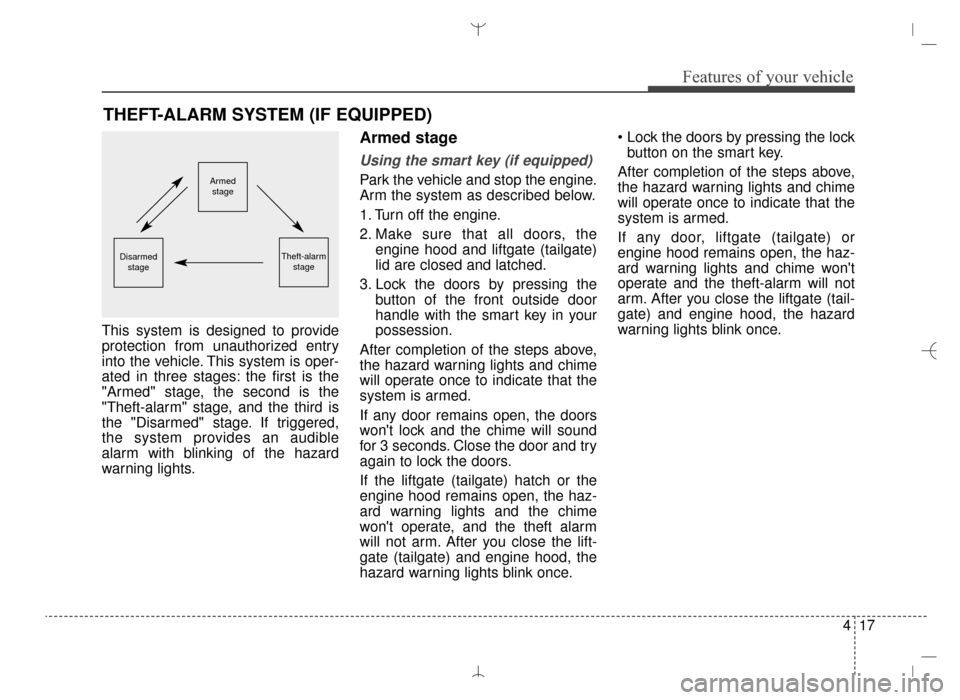
This system is designed to provide
protection from unauthorized entry
into the vehicle. This system is oper-
ated in three stages: the first is the
"Armed" stage, the second is the
"Theft-alarm" stage, and the third is
the "Disarmed" stage. If triggered,
the system provides an audible
alarm with blinking of the hazard
warning lights.
Armed stage
Using the smart key (if equipped)
Park the vehicle and stop the engine.
Arm the system as described below.
1. Turn off the engine.
2. Make sure that all doors, theengine hood and liftgate (tailgate)
lid are closed and latched.
3. Lock the doors by pressing the button of the front outside door
handle with the smart key in your
possession.
After completion of the steps above,
the hazard warning lights and chime
will operate once to indicate that the
system is armed.
If any door remains open, the doors
won't lock and the chime will sound
for 3 seconds. Close the door and try
again to lock the doors.
If the liftgate (tailgate) hatch or the
engine hood remains open, the haz-
ard warning lights and the chime
won't operate, and the theft alarm
will not arm. After you close the lift-
gate (tailgate) and engine hood, the
hazard warning lights blink once.
button on the smart key.
After completion of the steps above,
the hazard warning lights and chime
will operate once to indicate that the
system is armed.
If any door, liftgate (tailgate) or
engine hood remains open, the haz-
ard warning lights and chime won't
operate and the theft-alarm will not
arm. After you close the liftgate (tail-
gate) and engine hood, the hazard
warning lights blink once.
THEFT-ALARM SYSTEM (IF EQUIPPED)
Armed stage
Theft-alarm stageDisarmedstage
AN HMA 4A.QXP 3/5/2015 3:18 PM Page 17
Page 110 of 763
Features of your vehicle
18
4
Using the transmitter (if equipped)
Park the vehicle and stop the engine.
Arm the system as described below.
1. Turn off the engine and remove
the ignition key from the ignition
switch.
2. Make sure that all doors, the engine hood and liftgate (tailgate)
are closed and latched.
3. Lock the doors by pressing the lock button on the transmitter.
After completion of the steps above,
the hazard warning lights will blink
once to indicate that the system is
armed.
If any door, liftgate (tailgate) or
engine hood remains open, the haz-
ard warning lights won't operate and
theft-alarm will not arm. After you
close all doors, liftgate (tailgate) and
engine hood, the hazard warning
lights blink once.
Using the mechanical key
Park the vehicle and stop the engine.
Arm the system as described below.
1. Turn off the engine and remove the key from the ignition switch(if
equipped).
2. Make sure that all doors, the engine hood and liftgate (tailgate)
are closed and latched.
3. Lock the doors by inserting the key into the key hole on the front out-
side door handle and turning the
key toward the rear of the vehicle.
If any door, liftgate (tailgate) or
engine hood remains open, the theft-
alarm will not arm.
✽ ✽ NOTICE
If you lock or unlock the doors by
using the mechanical key, the haz-
ard warning light won't operate.
Do not arm the system until all
passengers have left the vehicle. If
the system is armed while a pas-
senger(s) remains in the vehicle,
the alarm may be activated when
the remaining passenger(s) leave
the vehicle. If any door (or trunk)
or engine hood is opened within
30 seconds after the system
enters the armed stage, the sys-
tem is disarmed to prevent an
unnecessary alarm.
AN HMA 4A.QXP 3/5/2015 3:18 PM Page 18
Page 134 of 763
Features of your vehicle
42
4
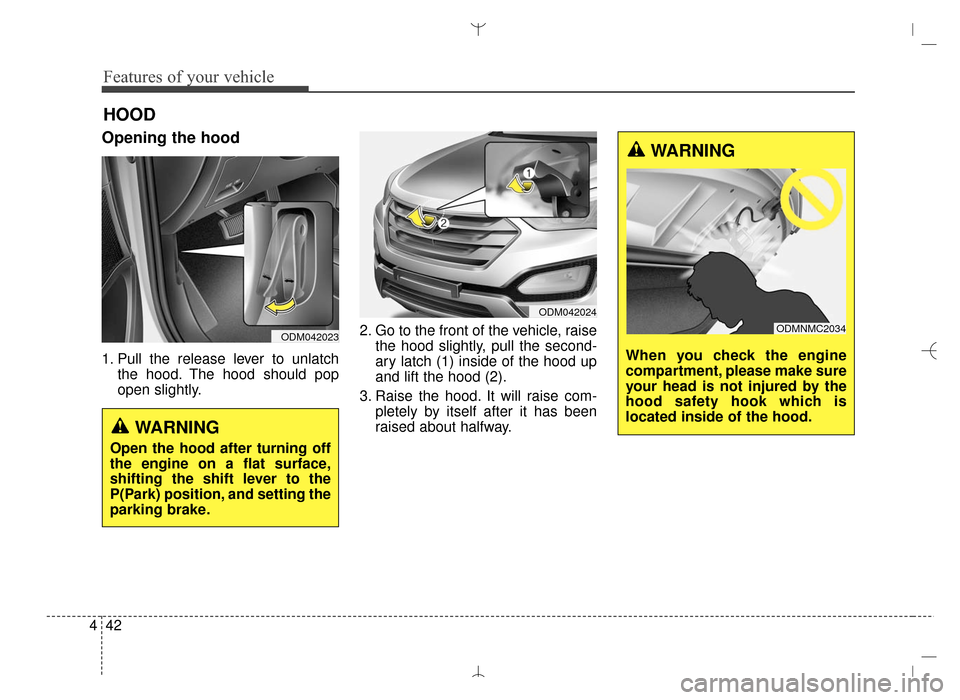
Opening the hood
1. Pull the release lever to unlatch
the hood. The hood should pop
open slightly. 2. Go to the front of the vehicle, raise
the hood slightly, pull the second-
ary latch (1) inside of the hood up
and lift the hood (2).
3. Raise the hood. It will raise com- pletely by itself after it has been
raised about halfway.
HOOD
WARNING
Open the hood after turning off
the engine on a flat surface,
shifting the shift lever to the
P(Park) position, and setting the
parking brake.
ODM042023
ODM042024
WARNING
When you check the engine
compartment, please make sure
your head is not injured by the
hood safety hook which is
located inside of the hood.
ODMNMC2034
AN HMA 4A.QXP 3/5/2015 3:18 PM Page 42
Page 135 of 763
443
Features of your vehicle
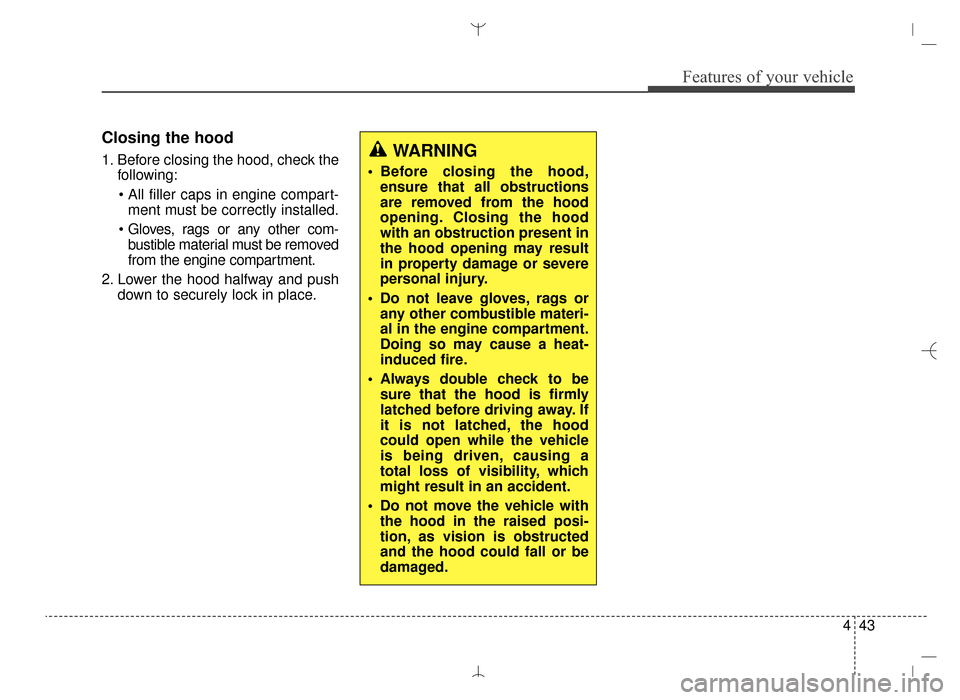
Closing the hood
1. Before closing the hood, check thefollowing:
ment must be correctly installed.
bustible material must be removed
from the engine compartment.
2. Lower the hood halfway and push down to securely lock in place.WARNING
Before closing the hood,ensure that all obstructions
are removed from the hood
opening. Closing the hood
with an obstruction present in
the hood opening may result
in property damage or severe
personal injury.
Do not leave gloves, rags or any other combustible materi-
al in the engine compartment.
Doing so may cause a heat-
induced fire.
Always double check to be sure that the hood is firmly
latched before driving away. If
it is not latched, the hood
could open while the vehicle
is being driven, causing a
total loss of visibility, which
might result in an accident.
Do not move the vehicle with the hood in the raised posi-
tion, as vision is obstructed
and the hood could fall or be
damaged.
AN HMA 4A.QXP 3/5/2015 3:18 PM Page 43
Page 623 of 763
What to do in an emergency
86
IF THE ENGINE OVERHEATS
If your temperature gauge indicates
overheating, you experience a loss
of power, or hear loud pinging or
knocking, the engine is probably too
hot. If this happens, you should:
1. Pull off the road and stop as soonas it is safe to do so.
2. Place the shift lever in P and set the parking brake. If the air condi-
tioning is on, turn it off.
3. If engine coolant is running out under the car or steam is coming
out from the hood, stop the
engine. Do not open the hood until
the coolant has stopped running
or the steaming has stopped. If
there is no visible loss of engine
coolant and no steam, leave the
engine running and check to be
sure the engine cooling fan is
operating. If the fan is not running,
turn the engine off. 4. Check to see if the water pump
drive belt is missing. If it is not
missing, check to see that it is
tight. If the drive belt seems to be
satisfactory, check for coolant
leaking from the radiator, hoses or
under the car. (If the air condition-
ing had been in use, it is normal
for cold water to be draining from it
when you stop.)
5. If the water pump drive belt is bro- ken or engine coolant is leaking
out, stop the engine immediately
and call the nearest authorized
HYUNDAI dealer for assistance. 6. If you cannot find the cause of the
overheating, wait until the engine
temperature has returned to nor-
mal. Then, if coolant has been lost,
carefully add coolant to the reser-
voir to bring the fluid level in the
reservoir up to the halfway mark.
7. Proceed with caution, keeping alert for further signs of overheat-
ing. If overheating happens again,
call an authorized HYUNDAI deal-
er for assistance.
WARNING
While the engine is running,
keep hair, hands and clothing
away from moving parts such
as the fan and drive belts to pre-
vent injury.
CAUTION
Serious loss of coolant indi-cates there is a leak in the cool-ing system and this should bechecked as soon as possible byan authorized HYUNDAI dealer.
WARNING
Do not remove the radiator cap
when the engine is hot. This
may result in coolant being
blown out of the opening and
cause serious burns.
AN HMA 6.QXP 2015-02-03 ¿ ¨˜ 1:36 Page 8
Page 721 of 763
773
Maintenance
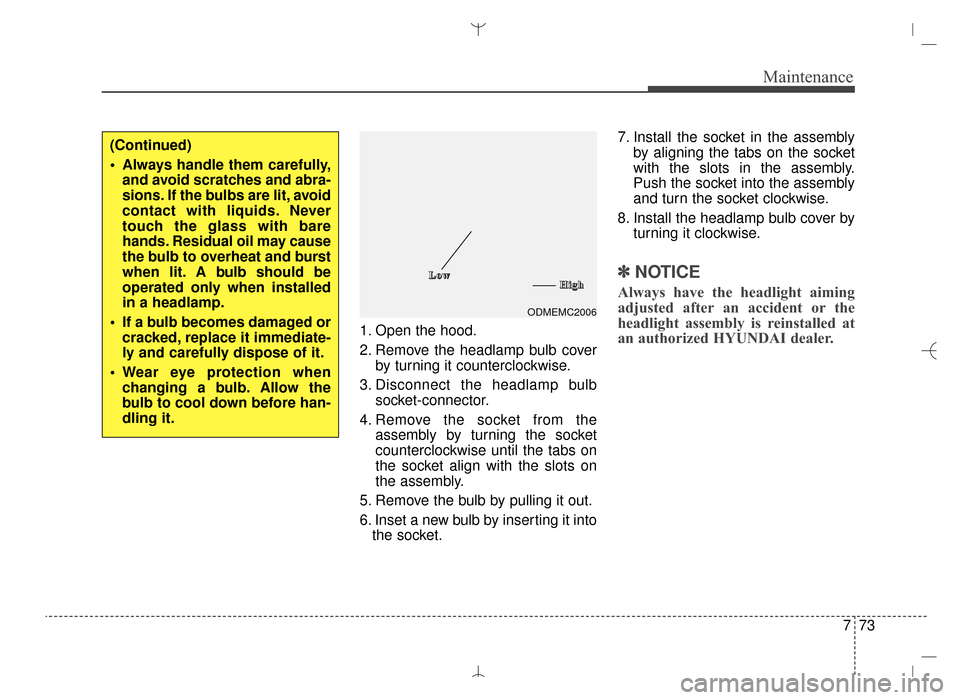
1. Open the hood.
2. Remove the headlamp bulb coverby turning it counterclockwise.
3. Disconnect the headlamp bulb socket-connector.
4. Remove the socket from the assembly by turning the socket
counterclockwise until the tabs on
the socket align with the slots on
the assembly.
5. Remove the bulb by pulling it out.
6. Inset a new bulb by inserting it into the socket. 7. Install the socket in the assembly
by aligning the tabs on the socket
with the slots in the assembly.
Push the socket into the assembly
and turn the socket clockwise.
8. Install the headlamp bulb cover by turning it clockwise.
✽ ✽NOTICE
Always have the headlight aiming
adjusted after an accident or the
headlight assembly is reinstalled at
an authorized HYUNDAI dealer.
(Continued)
Always handle them carefully,
and avoid scratches and abra-
sions. If the bulbs are lit, avoid
contact with liquids. Never
touch the glass with bare
hands. Residual oil may cause
the bulb to overheat and burst
when lit. A bulb should be
operated only when installed
in a headlamp.
If a bulb becomes damaged or cracked, replace it immediate-
ly and carefully dispose of it.
Wear eye protection when changing a bulb. Allow the
bulb to cool down before han-
dling it.
ODMEMC2006
L
L
L
L
o
o
o
o
w
w
w
wH
H
H
H
i
i
i
i
g
g
g
g
h
h
h
h
AN HMA 7.QXP 3/5/2015 3:25 PM Page 73