change time Hyundai Santa Fe XL 2019 Owner's Manual
[x] Cancel search | Manufacturer: HYUNDAI, Model Year: 2019, Model line: Santa Fe XL, Model: Hyundai Santa Fe XL 2019Pages: 570, PDF Size: 16.74 MB
Page 1 of 570
All information in this Owner's Manual is current at the time of pub-
lication. However, HYUNDAI reserves the right to make changes at
any time so that our policy of continual product improvement may
be carried out.
This manual applies to all of this vehicle and includes descriptions
and explanations of optional as well as standard equipment. As a
result, you may find material in this manual that does not apply to
your specific vehicle.
O
OW
W N
NE
ER
R '
'S
S M
M A
AN
N U
UA
A L
L
Operation
Maintenance
Specifications
Page 28 of 570
37
Safety features of your vehicle
Front seat adjustment - Manual
(if equipped)
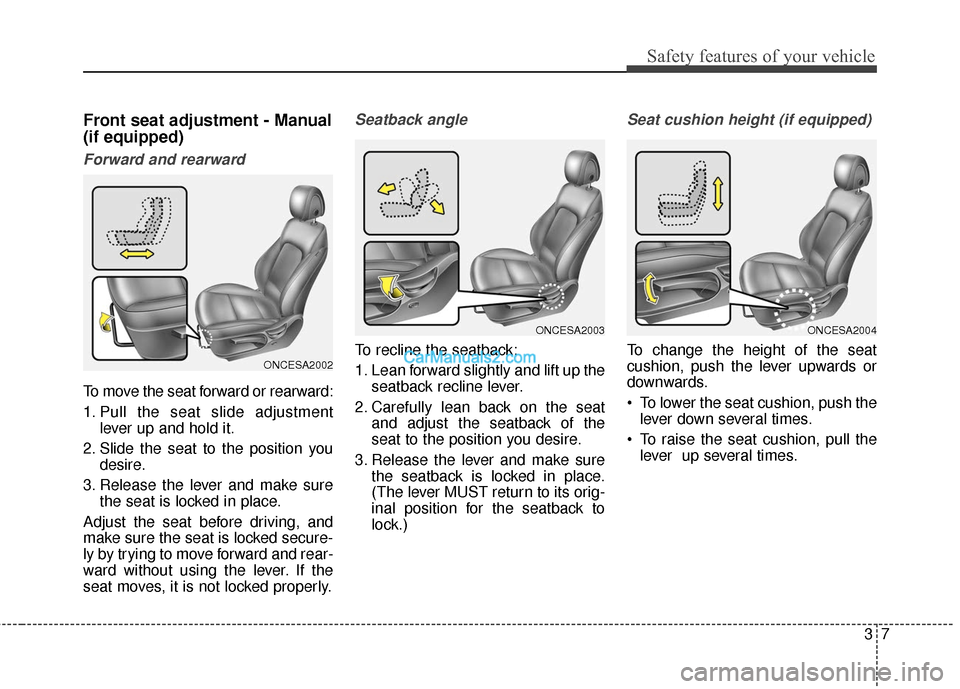
Forward and rearward
To move the seat forward or rearward:
1. Pull the seat slide adjustmentlever up and hold it.
2. Slide the seat to the position you desire.
3. Release the lever and make sure the seat is locked in place.
Adjust the seat before driving, and
make sure the seat is locked secure-
ly by trying to move forward and rear-
ward without using the lever. If the
seat moves, it is not locked properly.
Seatback angle
To recline the seatback:
1. Lean forward slightly and lift up the seatback recline lever.
2. Carefully lean back on the seat and adjust the seatback of the
seat to the position you desire.
3. Release the lever and make sure the seatback is locked in place.
(The lever MUST return to its orig-
inal position for the seatback to
lock.)
Seat cushion height (if equipped)
To change the height of the seat
cushion, push the lever upwards or
downwards.
To lower the seat cushion, push thelever down several times.
To raise the seat cushion, pull the lever up several times.ONCESA2002
ONCESA2003ONCESA2004
Page 34 of 570
313
Safety features of your vehicle
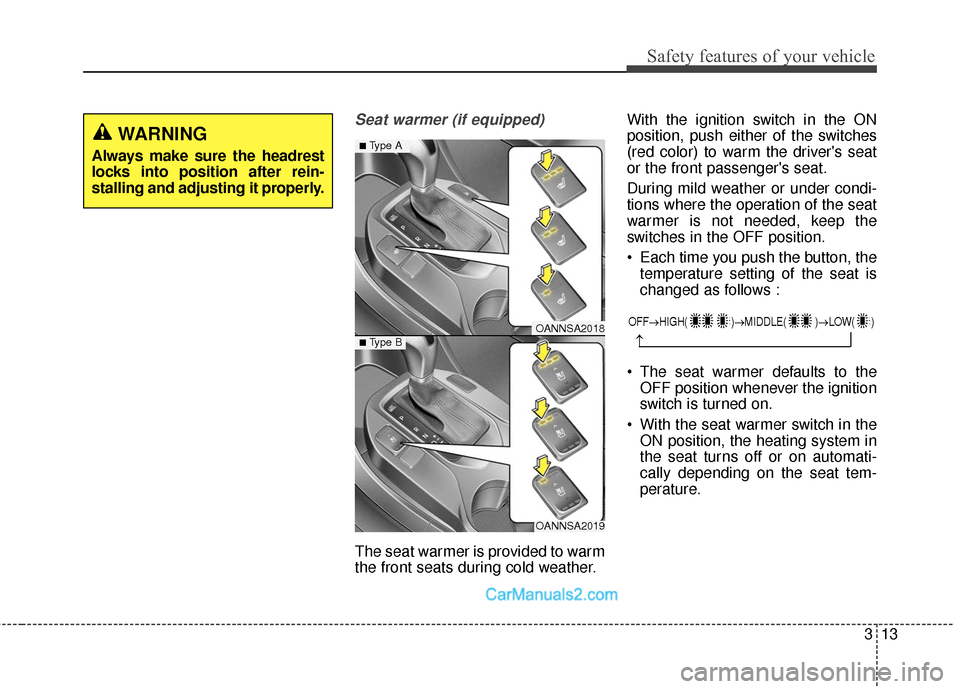
Seat warmer (if equipped)
The seat warmer is provided to warm
the front seats during cold weather.With the ignition switch in the ON
position, push either of the switches
(red color) to warm the driver's seat
or the front passenger's seat.
During mild weather or under condi-
tions where the operation of the seat
warmer is not needed, keep the
switches in the OFF position.
Each time you push the button, the
temperature setting of the seat is
changed as follows :
The seat warmer defaults to the OFF position whenever the ignition
switch is turned on.
With the seat warmer switch in the ON position, the heating system in
the seat turns off or on automati-
cally depending on the seat tem-
perature.
WARNING
Always make sure the headrest
locks into position after rein-
stalling and adjusting it properly.
OANNSA2018
OANNSA2019
■Type A
■ Type B
OFF→ HIGH( )→ MIDDLE( )→LOW( )
→
Page 35 of 570
Safety features of your vehicle
14
3
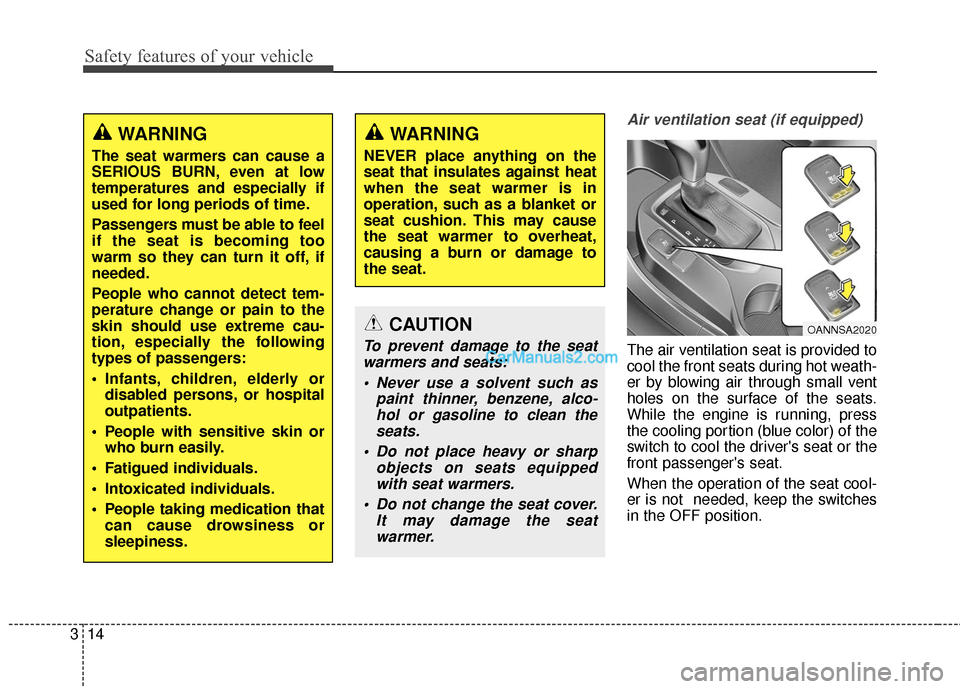
Air ventilation seat (if equipped)
The air ventilation seat is provided to
cool the front seats during hot weath-
er by blowing air through small vent
holes on the surface of the seats.
While the engine is running, press
the cooling portion (blue color) of the
switch to cool the driver's seat or the
front passenger's seat.
When the operation of the seat cool-
er is not needed, keep the switches
in the OFF position.
WARNING
The seat warmers can cause a
SERIOUS BURN, even at low
temperatures and especially if
used for long periods of time.
Passengers must be able to feel
if the seat is becoming too
warm so they can turn it off, if
needed.
People who cannot detect tem-
perature change or pain to the
skin should use extreme cau-
tion, especially the following
types of passengers:
Infants, children, elderly or
disabled persons, or hospital
outpatients.
People with sensitive skin or who burn easily.
Fatigued individuals.
Intoxicated individuals.
People taking medication that can cause drowsiness or
sleepiness.
WARNING
NEVER place anything on the
seat that insulates against heat
when the seat warmer is in
operation, such as a blanket or
seat cushion. This may cause
the seat warmer to overheat,
causing a burn or damage to
the seat.
OANNSA2020CAUTION
To prevent damage to the seatwarmers and seats:
Never use a solvent such as paint thinner, benzene, alco-hol or gasoline to clean theseats.
Do not place heavy or sharp objects on seats equippedwith seat warmers.
Do not change the seat cover. It may damage the seatwarmer.
Page 36 of 570
315
Safety features of your vehicle
airflow will change as follows:
the OFF position whenever the igni-
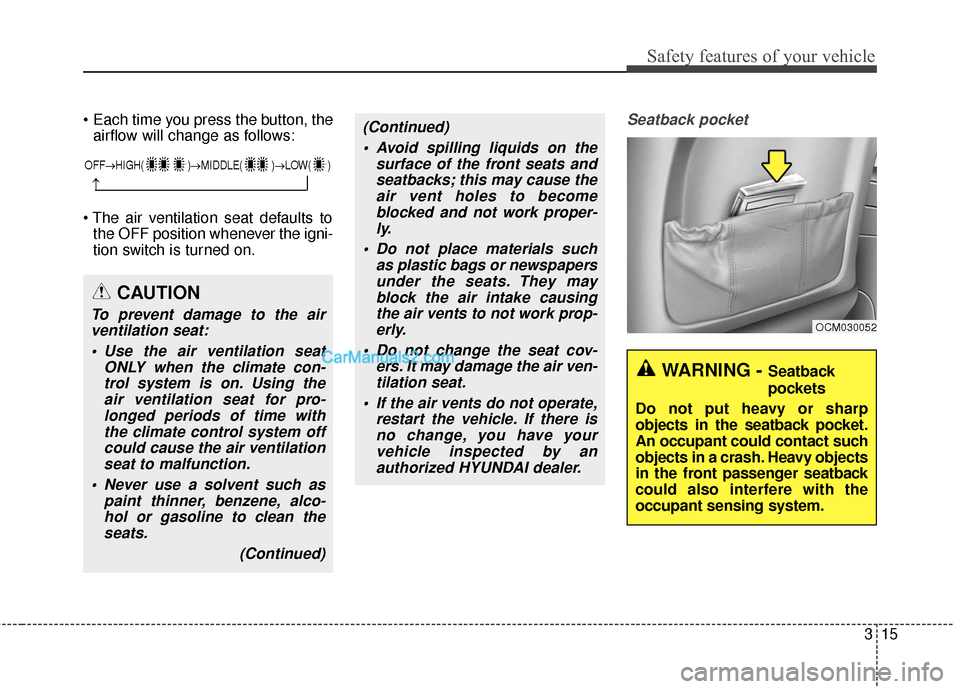
tion switch is turned on.Seatback pocket
CAUTION
To prevent damage to the airventilation seat:
Use the air ventilation seat ONLY when the climate con-trol system is on. Using theair ventilation seat for pro-longed periods of time withthe climate control system offcould cause the air ventilationseat to malfunction.
Never use a solvent such as paint thinner, benzene, alco-hol or gasoline to clean theseats.
(Continued)
(Continued) Avoid spilling liquids on the surface of the front seats andseatbacks; this may cause theair vent holes to becomeblocked and not work proper-ly.
Do not place materials such as plastic bags or newspapersunder the seats. They mayblock the air intake causingthe air vents to not work prop-erly.
Do not change the seat cov- ers. It may damage the air ven-tilation seat.
If the air vents do not operate, restart the vehicle. If there isno change, you have yourvehicle inspected by anauthorized HYUNDAI dealer.
OCM030052
WARNING - Seatback
pockets
Do not put heavy or sharp
objects in the seatback pocket.
An occupant could contact such
objects in a crash. Heavy objects
in the front passenger seatback
could also interfere with the
occupant sensing system.
OFF→ HIGH( )→ MIDDLE( )→LOW( )
→
Page 44 of 570
323
Safety features of your vehicle
Each time you push the button, thetemperature setting of the seat is
changed as follows :
The seat warmer defaults to the OFF position whenever the ignition
switch is turned on.
With the seat warmer switch in the ON position, the heating system in
the seat turns off or on automati-
cally depending on the seat tem-
perature.
OFF → HIGH( ) → LOW( )
→
WARNING
The seat warmers can cause a
SERIOUS BURN, even at low
temperatures and especially if
used for long periods of time.
Passengers must be able to feel
if the seat is becoming too
warm so they can turn it off, if
needed.
People who cannot detect tem-
perature change or pain to the
skin should use extreme cau-
tion, especially the following
types of passengers:
Infants, children, elderly ordisabled persons, or hospital
outpatients.
People with sensitive skin or who burn easily.
Fatigued individuals.
Intoxicated individuals.
People taking medication that can cause drowsiness or
sleepiness.
WARNING
NEVER place anything on the
seat that insulates against heat
when the seat warmer is in
operation, such as a blanket or
seat cushion. This may cause
the seat warmer to overheat,
causing a burn or damage to
the seat.
CAUTION
To prevent damage to the seatwarmers and seats:
Never use a solvent such as paint thinner, benzene, alco-hol or gasoline to clean theseats.
Do not place heavy or sharp objects on seats equippedwith seat warmers.
Do not change the seat cover. It may damage the seatwarmer.
Page 135 of 570
Features of your vehicle
32
4
✽
✽
NOTICE
• The power liftgate (power tailgate)
can be operated when the engine is
not running. However the power
liftgate (power tailgate) operation
consumes large amounts of vehicle
electric power. To prevent the bat-
tery from being discharged, do not
operate it excessively.
• To prevent the battery from being discharged, do not leave the power
liftgate (power tailgate) in the
open position for a long time.
• Do not modify or repair any part of the power liftgate (power tail-
gate) by yourself. This must be
done by an authorized HYUNDAI
dealer.
• When jacking up the vehicle to change a tire or repair the vehicle,
do not operate the power liftgate
(power tailgate). This could cause
the power liftgate (power tailgate)
to operate improperly.
• In cold and wet climates, the power liftgate (power tailgate) may
not work properly due to freezing
conditions.
Automatic reversal
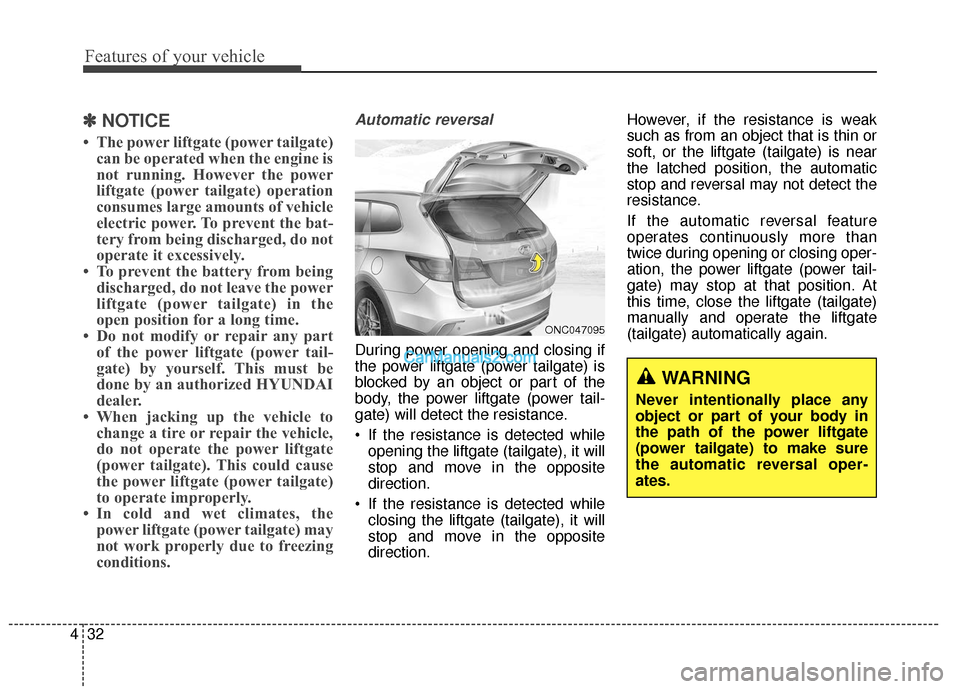
During power opening and closing if
the power liftgate (power tailgate) is
blocked by an object or part of the
body, the power liftgate (power tail-
gate) will detect the resistance.
If the resistance is detected while
opening the liftgate (tailgate), it will
stop and move in the opposite
direction.
If the resistance is detected while closing the liftgate (tailgate), it will
stop and move in the opposite
direction. However, if the resistance is weak
such as from an object that is thin or
soft, or the liftgate (tailgate) is near
the latched position, the automatic
stop and reversal may not detect the
resistance.
If the automatic reversal feature
operates continuously more than
twice during opening or closing oper-
ation, the power liftgate (power tail-
gate) may stop at that position. At
this time, close the liftgate (tailgate)
manually and operate the liftgate
(tailgate) automatically again.
WARNING
Never intentionally place any
object or part of your body in
the path of the power liftgate
(power tailgate) to make sure
the automatic reversal oper-
ates.
ONC047095
Page 168 of 570
465
Features of your vehicle
Programming
To train most devices, follow these
instructions:
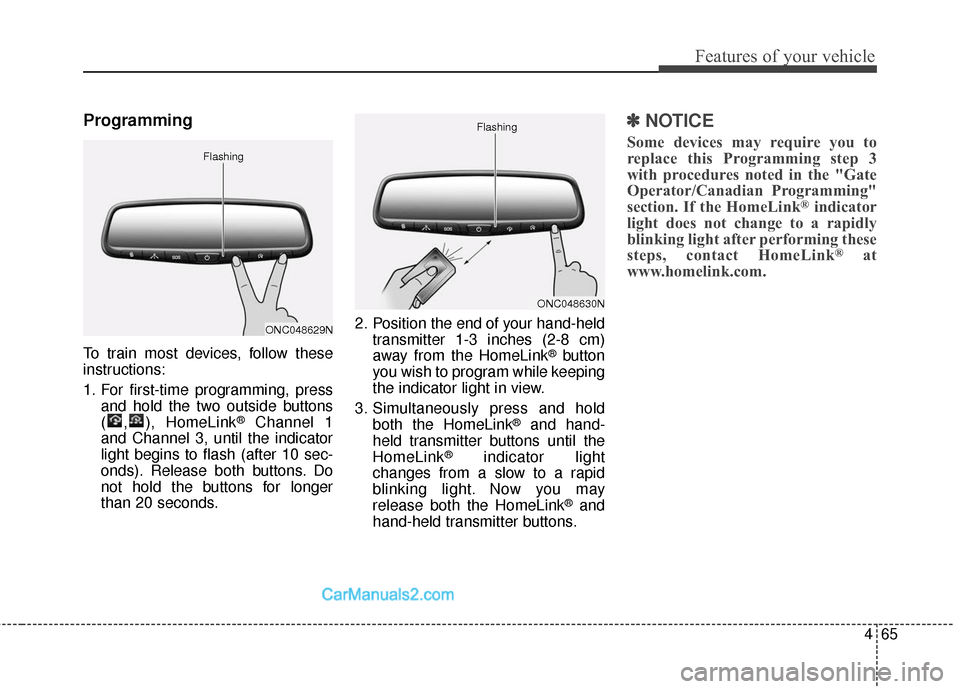
1. For first-time programming, pressand hold the two outside buttons
( , ), HomeLink
®Channel 1
and Channel 3, until the indicator
light begins to flash (after 10 sec-
onds). Release both buttons. Do
not hold the buttons for longer
than 20 seconds. 2. Position the end of your hand-held
transmitter 1-3 inches (2-8 cm)
away from the HomeLink
®button
you wish to program while keeping
the indicator light in view.
3. Simultaneously press and hold both the HomeLink
®and hand-
held transmitter buttons until the
HomeLink
®indicator light
changes from a slow to a rapid
blinking light. Now you may
release both the HomeLink
®and
hand-held transmitter buttons.
✽ ✽ NOTICE
Some devices may require you to
replace this Programming step 3
with procedures noted in the "Gate
Operator/Canadian Programming"
section. If the HomeLink
®indicator
light does not change to a rapidly
blinking light after performing these
steps, contact HomeLink
®at
www.homelink.com.
ONC048629N
Flashing
ONC048630N
Flashing
Page 170 of 570
467
Features of your vehicle
Reprogramming a single
HomeLink®button
To program a device to HomeLink
®
using a HomeLink®button previously
trained, follow these steps:
1. Press and hold the desired HomeLink
®button. DO NOT
release the button.
2. The indicator light will begin to flash after 20 seconds. Without
releasing the HomeLink
®button,
proceed with "Programming" step
2.
For questions or comments, contact
HomeLink
®at www.homelink.comor
1-800-355-3515. Erasing HomeLink
®buttons
Individual buttons cannot be erased.
However, to erase all three pro-
grammed buttons:
1. Press and hold the two outer HomeLink
®buttons until the indi-
cator light begins to flash after 10
seconds.
2. Release both buttons. Do not hold for longer than 20 seconds.
The Integrated HomeLink
®Wireless
Control System is now in the training
(learn) mode and can be pro-
grammed at any time following the
appropriate steps in the
Programming sections above. FCC ID: NZLTLMHL4
IC: 4112A-TLMHL4
This device complies with Part 15
of the FCC Rules.
Operation is subject to the following
two conditions:
1. This device may not cause harm-
ful interference, and
2. This device must accept any inter- ference received, including inter-
ference that may cause undesired
operation.
CAUTION
The transceiver has been testedand complies with FCC andIndustry Canada rules. Changesor modifications not expresslyapproved by the party responsi-ble for compliance could voidthe user's authority to operatethe device.
Page 182 of 570
479
Features of your vehicle
A/V Mode
This mode displays the state of the
A/V system.
Service Mode
Service Interval
Service in
It calculates and displays when you
need a scheduled maintenance
service (mileage or days).
If the remaining mileage or time
reaches 900 mi. (1,500 km) or 30
days, "Service in" message is dis-
played for several seconds each time
you set the ignition switch or Engine
Start/Stop Button to the ON position.Service required
If you do not have your vehicle serv-
iced according to the pre-selected
service interval, "Service required"
message is displayed for several
seconds each time you set the igni-
tion switch or Engine Start/Stop
Button to the ON position (The
mileage and time changes to "---").
To reset the service interval to the
mileage and days you inputted before:
- Press the SELECT/RESET button
for more than 1 second.
OTLA045181/OTLA045182
■
Type A
■Type B
ODM046128N/ODM046166N
■
Type A
■Type B
ODM046613/ODM046612
■Type A ■Type B