ECO mode Hyundai Sonata
[x] Cancel search | Manufacturer: HYUNDAI, Model Year: , Model line: , Model:Pages: 286, PDF Size: 9.58 MB
Page 16 of 286
1
FEATURES OF YOUR HYUNDAI
3
KEYS
BREAKING IN YOUR NEW
HYUNDAI
B010F01A-AATOperation in Foreign CountriesIf you are going to drive your Hyundai in
another country, be sure to:
o Observe all regulations regarding reg-
istration and insurance.
o Determine that acceptable fuel is
available.B010E01A-AATGasolines for Cleaner AirTo help contribute to cleaner air, Hyundai
recommends that you use gasolines
treated with detergent additives, which
help prevent deposit formation in the
engine. These gasolines will help the
engine run cleaner and enhance perfor-
mance of the Emission Control System.
B020A01S-AATDuring the First 1,200 Miles (2,000
Km)No formal "break-in" procedure is required
with your new Hyundai. However, you can
contribute to the economical operation
and durability of your Hyundai by observing
the following recommendations during the
first 1,200 miles (2,000 km).
o Don't drive faster than 55 MPH (88 km/
h).
o While driving, keep your engine speed
(rpm, or revolutions per minute) between
2,000 rpm and 4,000 rpm.
o Use moderate acceleration. Don't start
quickly or depress the accelerator pedal
fully.
o For the first 200 miles (300 km), try to
avoid hard stops.
o Don't lug the engine (in other words,
don't drive so slowly in too high a gear
that the engine "bucks":shift to a lower
gear).
o Whether going fast or slow, vary your
speed from time to time.
o Don't let the engine idle longer than 3
minutes at one time.
o Don't tow a trailer during the first 1,200
miles (2,000 km) of operation.
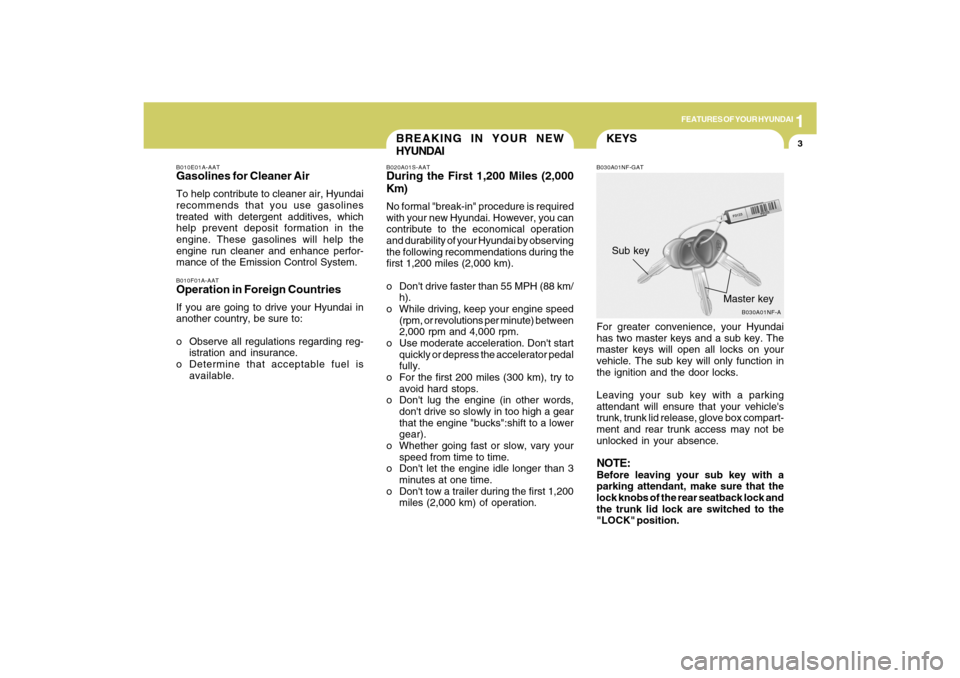
B030A01NF-GATFor greater convenience, your Hyundai
has two master keys and a sub key. The
master keys will open all locks on your
vehicle. The sub key will only function in
the ignition and the door locks.
Leaving your sub key with a parking
attendant will ensure that your vehicle's
trunk, trunk lid release, glove box compart-
ment and rear trunk access may not be
unlocked in your absence.NOTE:Before leaving your sub key with a
parking attendant, make sure that the
lock knobs of the rear seatback lock and
the trunk lid lock are switched to the
"LOCK" position.
B030A01NF-A
Master key Sub key
Page 38 of 286
1
FEATURES OF YOUR HYUNDAI
25
B190A02NF-AATSEAT BELTS-Front Passenger and
Rear Seat 3-Point System with
Combination Locking Retractor
To Fasten Your BeltCombination retractor type seat belts are
installed in the rear seat positions to help
accommodate the installation of child
restraint systems. Although a combination
retractor is also installed in the front
passenger seat position, Hyundai strongly
recommends that children always be seated
in the rear seat. NEVER place any infant
restraint system in the front seat of the
vehicle.
This type of seat belt combines the features
of both an emergency locking retractor seat
belt and an automatic locking retractor seat
belt. To fasten your seat belt, pull it out of the
retractor and insert the metal tab into the
buckle. There will be an audible "click"
when the tab locks into the buckle. When
not securing a child restraint, the seat belt
operates in the same way as the driver's
seat belt (Emergency Locking Retractor
Type). It automatically adjusts to the proper
length only after the lap belt portion of the
seat belt is adjusted manually so that it fits
snugly around your hips. When the seat belt
is fully extended from the retractor to allow
the installation of a child restraint system,
the seat belt operation changes to allow the
belt to retract, but not to extend (Automatic
Locking Retractor Type). See page 1-33.
NOTE:o Although the combination retractor
provides the same level of protection
for seated passengers in either
emergency or automatic locking
modes, it is recommended that seated
passengers use the emergency
locking feature for improved
convenience. The automatic locking
function is intended to facilitate child
restraint installation. To convert from
the automatic locking feature to the
emergency locking operation mode,
allow the unbuckled seat belt to fully
retract.
o The front passenger's seat belt
warning light on the center fascia
panel blinks until the front passenger's
seat belt is fastened to remind the
front passenger to fasten the front
passenger's seat belt, when the
ignition key is turned from the "OFF"
position to "the "ON" or "START"
position.
WARNING:
o For maximum restraint system pro-
tection, the seat belts must always be
used whenever the car is moving.
o Seat belts are most effective when
seatbacks are in the upright position.
o Children age 12 and younger must
always be properly restrained in the
rear seat. Never allow children to ride
in the front passenger seat. If a child
over 13 must be seated in the front
seat, he/she must be properly belted
and the seat should be moved as far
back as possible.
o Never wear the shoulder belt under
your arm or behind your back. An
improperly positioned shoulder belt
can cause serious injuries in a crash.
The shoulder belt should be positioned
midway over your shoulder across
your collarbone.
o Avoid wearing twisted seat belts. A
twisted belt can't do its job as well. In a
collision, it could even cut into you. Be
sure the belt webbing is straight and
not twisted.
o Be careful not to damage the belt web-
bing or hardware. If the belt webbing or
hardware is damaged, replace it.
!
Page 48 of 286
1
FEATURES OF YOUR HYUNDAI
35
The SRS uses sensors to gather
information about the driver's and front
passenger's seat position, the driver's and
front passenger's seat belt usage and
impact severity.
The driver's and front passenger's seat
track position sensors, which are installed
on the seat track, determine if the seats are
fore or aft of a reference position. The seat
belt buckle sensors determine if the driver
and front passenger's seat belts are
fastened. These sensors provide the ability
to control the SRS deployment based on
how close the driver's seat is to the steering
wheel, how close the passenger's seat is
to the instrument panel, whether or not the
seat belts are fastened, and how severe
the impact is.
The advanced SRS offers the ability to
control the airbag inflation with two levels.
A first stage level is provided for moderate-
severity impacts. A second stage level is
provided for more severe impacts.
According to the impact severity, seating
position and seat belt usage, the
SRSCM(SRS Control Module) controls the
airbag inflation. Failure to properly wear
seat belts can increase the risk or severity
of injury in an accident.
CAUTION:
If a seat track position sensor or an
occupant classification system is not
working properly, the SRS airbag warning
light
on the instrument panel will
illuminate because the SRS airbag
warning light is connected with the seat
track position sensor and the occupant
classification system. If the SRS airbag
warning light does not illuminate when
the ignition key is turned to the "ON"
position, remains illuminated after
approximately 6 seconds when the igni-
tion key is turned to the "ON" position, or
if it illuminates while the vehicle is being
driven, have an authorized Hyundai
dealer inspect the advanced SRS airbag
system as soon as possible.
!
Additionally, your Hyundai is equipped
with an occupant classification system in
the front passenger's seat. The occupant
classification system detects the presence
of a passenger in the front passenger's
seat and will turn off the front passenger's
airbag under certain conditions. For more
detail, see "Occupant Classification
System" later in this section.
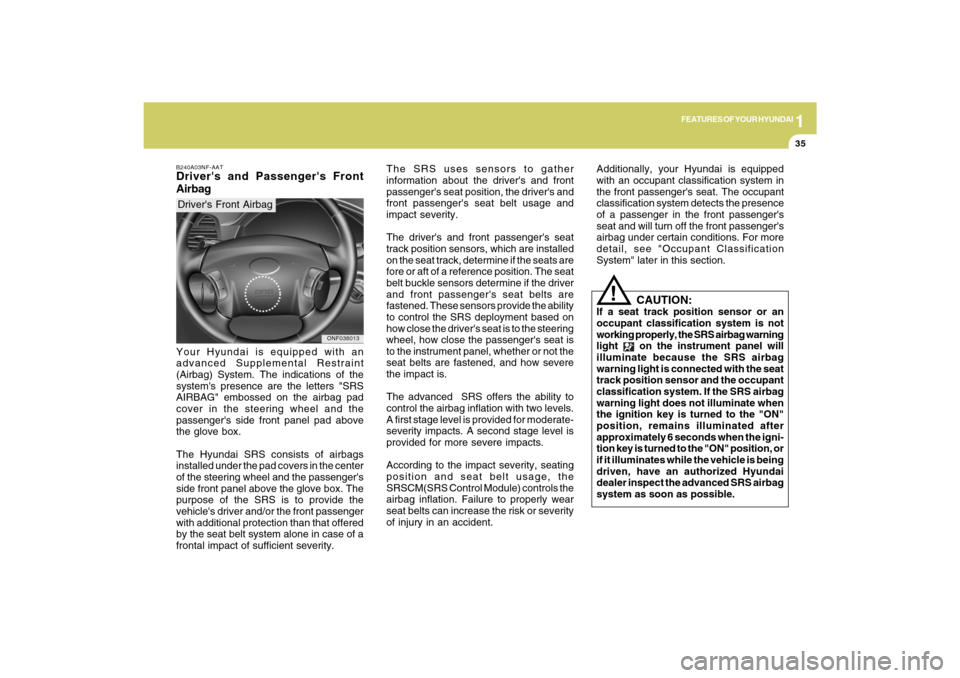
B240A03NF-AATDriver's and Passenger's Front
AirbagYour Hyundai is equipped with an
advanced Supplemental Restraint
(Airbag) System. The indications of the
system's presence are the letters "SRS
AIRBAG" embossed on the airbag pad
cover in the steering wheel and the
passenger's side front panel pad above
the glove box.
The Hyundai SRS consists of airbags
installed under the pad covers in the center
of the steering wheel and the passenger's
side front panel above the glove box. The
purpose of the SRS is to provide the
vehicle's driver and/or the front passenger
with additional protection than that offered
by the seat belt system alone in case of a
frontal impact of sufficient severity.Driver's Front Airbag
ONF038013
Page 72 of 286
1
FEATURES OF YOUR HYUNDAI
59
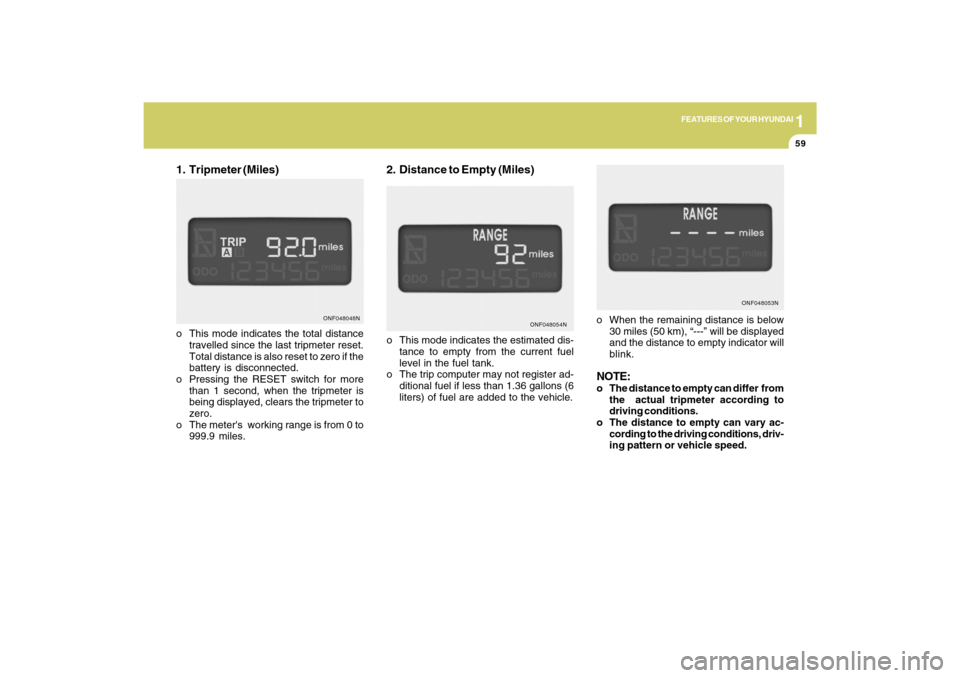
2. Distance to Empty (Miles)
o When the remaining distance is below
30 miles (50 km), “---” will be displayed
and the distance to empty indicator will
blink.NOTE:o The distance to empty can differ from
the actual tripmeter according to
driving conditions.
o The distance to empty can vary ac-
cording to the driving conditions, driv-
ing pattern or vehicle speed. o This mode indicates the estimated dis-
tance to empty from the current fuel
level in the fuel tank.
o The trip computer may not register ad-
ditional fuel if less than 1.36 gallons (6
liters) of fuel are added to the vehicle.
ONF048054NONF048053N
1. Tripmeter (Miles)o This mode indicates the total distance
travelled since the last tripmeter reset.
Total distance is also reset to zero if the
battery is disconnected.
o Pressing the RESET switch for more
than 1 second, when the tripmeter is
being displayed, clears the tripmeter to
zero.
o The meter's working range is from 0 to
999.9 miles.
ONF048048N
Page 73 of 286
1FEATURES OF YOUR HYUNDAI60
MULTI-FUNCTION LIGHT
SWITCHB340A01A-AATCOMBINATION TURN SIGNAL,
HEADLIGHT AND HIGH-BEAM
SWITCH
Turn Signal OperationPulling down on the lever causes the turn
signals on the left side of the car to blink.
Pushing upwards on the lever causes the
turn signals on the right side of the car to
blink. As the turn is completed, the lever
will automatically return to the center
position and turn off the turn signals at the
same time. If either turn signal indicator
light blinks more rapidly than usual, goes
on but does not blink, or does not go on at
all, there is a malfunction in the system.
Check for a burned-out fuse or bulb or see
your Hyundai dealer.
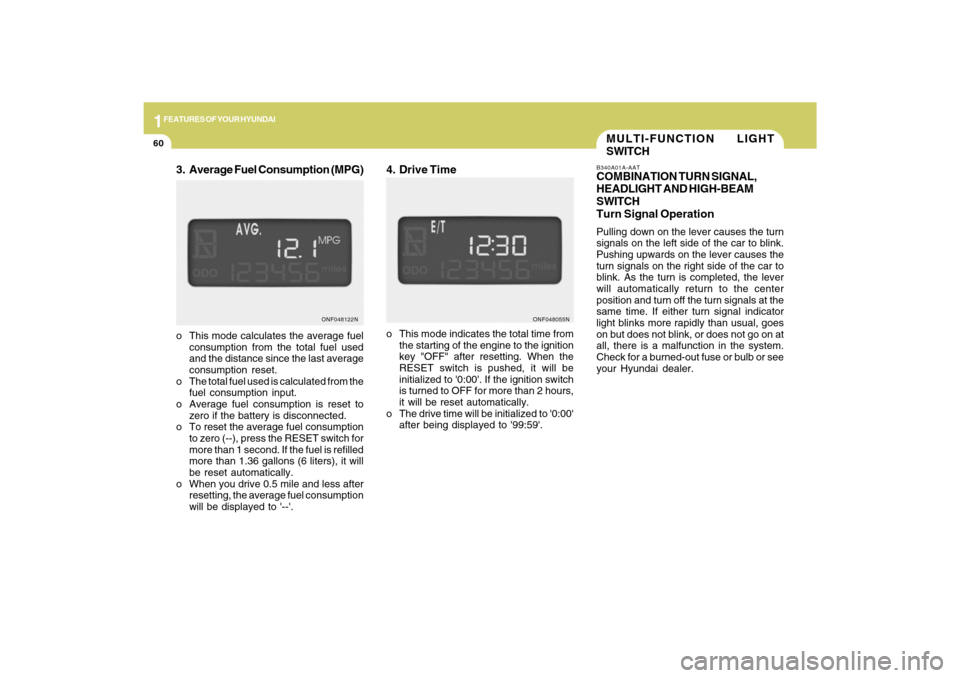
4. Drive Timeo This mode indicates the total time from
the starting of the engine to the ignition
key "OFF" after resetting. When the
RESET switch is pushed, it will be
initialized to '0:00'. If the ignition switch
is turned to OFF for more than 2 hours,
it will be reset automatically.
o The drive time will be initialized to '0:00'
after being displayed to '99:59'.
ONF048055N
3. Average Fuel Consumption (MPG)o This mode calculates the average fuel
consumption from the total fuel used
and the distance since the last average
consumption reset.
o The total fuel used is calculated from the
fuel consumption input.
o Average fuel consumption is reset to
zero if the battery is disconnected.
o To reset the average fuel consumption
to zero (--), press the RESET switch for
more than 1 second. If the fuel is refilled
more than 1.36 gallons (6 liters), it will
be reset automatically.
o When you drive 0.5 mile and less after
resetting, the average fuel consumption
will be displayed to '--'.
ONF048122N
Page 76 of 286
1
FEATURES OF YOUR HYUNDAI
63
WINDSHIELD WIPER AND
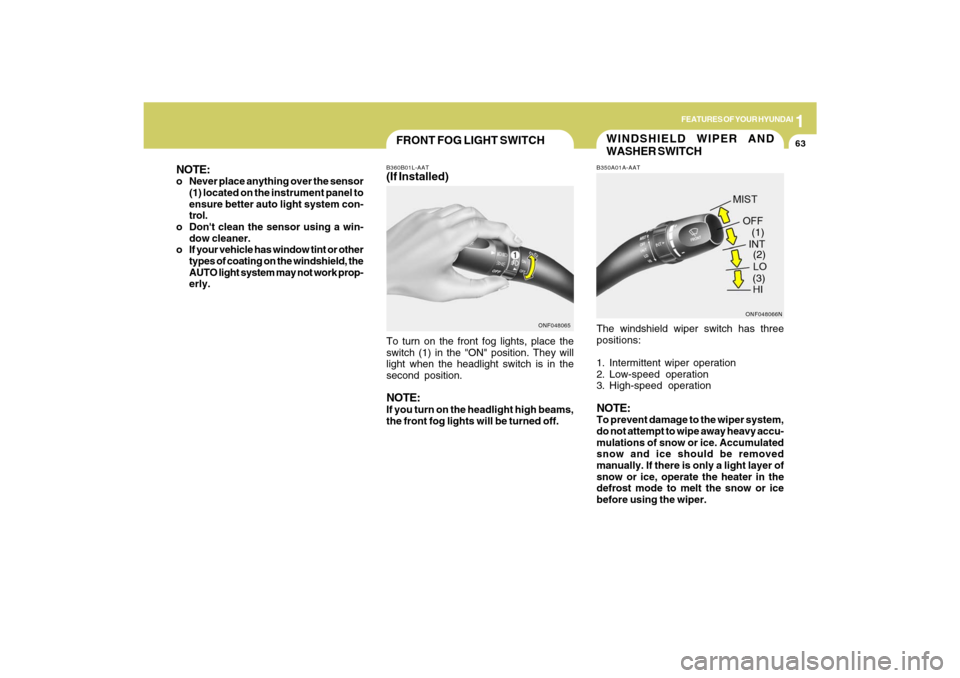
WASHER SWITCHB350A01A-AATThe windshield wiper switch has three
positions:
1. Intermittent wiper operation
2. Low-speed operation
3. High-speed operationNOTE:To prevent damage to the wiper system,
do not attempt to wipe away heavy accu-
mulations of snow or ice. Accumulated
snow and ice should be removed
manually. If there is only a light layer of
snow or ice, operate the heater in the
defrost mode to melt the snow or ice
before using the wiper.
ONF048066N(1)
(2)
(3)
FRONT FOG LIGHT SWITCHB360B01L-AAT(If Installed)To turn on the front fog lights, place the
switch (1) in the "ON" position. They will
light when the headlight switch is in the
second position.NOTE:If you turn on the headlight high beams,
the front fog lights will be turned off.
ONF048065
NOTE:o Never place anything over the sensor
(1) located on the instrument panel to
ensure better auto light system con-
trol.
o Don't clean the sensor using a win-
dow cleaner.
o If your vehicle has window tint or other
types of coating on the windshield, the
AUTO light system may not work prop-
erly.
Page 93 of 286
1FEATURES OF YOUR HYUNDAI80
!
Integrated HomeLink
® Wireless
Control System
The HomeLink
® Wireless Control System
provides a convenient way to replace up to
three hand-held radio-frequency (RF)
transmitters with a single built-in device.
This innovative feature will learn the radio
frequency codes of most current
transmitters to operate devices such as
gate operators, garage door openers, entry
door locks, security systems, even home
lighting. Both standard and rolling code-
equipped transmitters can be programmed
by following the outlined procedures.
Additional HomeLink
® information can be
found at: www.homelink.com or by calling
1-800-355-3515.
CAUTION:
Before programming HomeLink
® to a
garage door opener or gate operator,
make sure that people and objects are
out of the way of the device to prevent
potential harm or damage. Do not use
HomeLink
® with any garage door opener
that lacks the safety stop and reverse
features as required by U.S. federal
safety standards (this includes any
garage door opener model manufactured
before April 1, 1982). A garage door that
cannot detect an object - signaling the
door to stop and reverse - does not meet
current U.S. federal safety standards.
Using a garage door opener without these
features increases the risk of serious
injury or death.Programming HomeLink
®
NOTE:o When programming a garage door
opener, it is advised to park the vehicle
outside of the garage.
o It is recommended that a new battery
be placed in the hand-held transmitter
of the device being programmed to
HomeLink
® for quicker training and
accurate transmission of the radio-
frequency signal.
o Some vehicles may require the ignition
switch to be turned to the second (or
"accessories") position for program-
ming and/or operation of HomeLink.
o In the event that there are still pro-
gramming difficulties or questions
after following the programming steps
listed below, contact HomeLink
® at:
www.homelink.com or 1-800-355-
3515.
Retain the original transmitter of the RF
device you are programming for use in
other vehicles as well as for future
HomeLink
® programming. It is also
suggested that upon the sale of the vehicle,
the programmed HomeLink
® buttons be
erased for security purposes.
Page 95 of 286
1FEATURES OF YOUR HYUNDAI82
!
handheld transmitter every two seconds
until the frequency signal has been learned.
The indicator light will flash slowly and
then rapidly after several seconds upon
successful training.
Operating HomeLink
®
To operate, simply press and release the
programmed HomeLink
® button. Activation
will now occur for the trained device (i.e.
garage door opener, gate operator, security
system, entry door lock, home/office
lighting, etc.). For convenience, the hand-
held transmitter of the device may also be
used at any time.
Reprogramming a Single HomeLink
® But-
ton
To program a new device to a previously
trained HomeLink
® button, follow these
steps:
1. Press and hold the desired HomeLink
®
button. Do NOT release until step 4 has
been completed.
2. When the indicator light begins to flash
slowly (after 20 seconds), position the
handheld transmitter 1 to 3 inches away
from the HomeLink
® surface.
3. Press and hold the handheld transmitter
button. The HomeLink
® indicator light
will flash, first slowly and then rapidly.4. When the indicator light begins to flash
rapidly, release both buttons.
5. Press and hold the just-trained
HomeLink
® button and observe the red
Status Indicator LED. If the indicator
light stays on constantly, programming
is complete and your new device should
activate.
Erasing HomeLink
® Buttons
Individual buttons cannot be erased.
However, to erase all three programmed
buttons:
1. Press and hold the two outer HomeLink
®
buttons until the indicator light begins to
flash-after 20 seconds.
2. Release both buttons. Do not hold for
longer than 30 seconds.
The Integrated HomeLink
® Wireless
Control System is now in the training (learn)
mode and can be programmed at any time
following the appropriate steps in the
Programming sections above.
FCC ID: NZLZTVHL3
IC: 4112A-ZTVHL3This device complies with Part 15 FCC
Rules. Operation is subject to the following
two conditions: (1) this device may not
cause harmful interference, and (2) this
device must accept any interference
received, including interference that may
cause undesired operation.
WARNING:
The transceiver has been tested and
complies with FCC and Industry Canada
rules. Changes or modifications not
expressly approved by the party
responsible for compliance could void
the user's authority to operate the
device.
NVS
® is a registered trademark and Z-
Nav™ is a trademark of the Gentex
Corporation, Zeeland, Michigan.
HomeLink
® is a registered trademark
owned by Johnson Controls, Incorporated,
Milwaukee, Wisconsin.
Page 107 of 286
1FEATURES OF YOUR HYUNDAI94
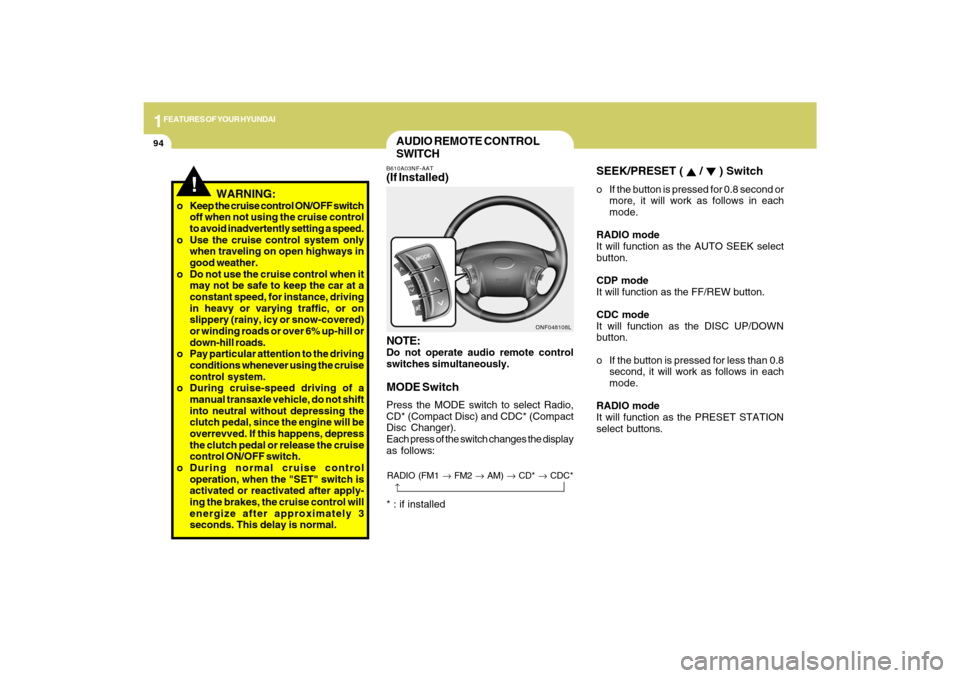
SEEK/PRESET (
/
) Switch
o If the button is pressed for 0.8 second or
more, it will work as follows in each
mode.
RADIO mode
It will function as the AUTO SEEK select
button.
CDP mode
It will function as the FF/REW button.
CDC mode
It will function as the DISC UP/DOWN
button.
o If the button is pressed for less than 0.8
second, it will work as follows in each
mode.
RADIO mode
It will function as the PRESET STATION
select buttons.
AUDIO REMOTE CONTROL
SWITCHB610A03NF-AAT(If Installed)
NOTE:Do not operate audio remote control
switches simultaneously.MODE SwitchPress the MODE switch to select Radio,
CD* (Compact Disc) and CDC* (Compact
Disc Changer).
Each press of the switch changes the display
as follows:
ONF048108L
!
WARNING:
o Keep the cruise control ON/OFF switch
off when not using the cruise control
to avoid inadvertently setting a speed.
o Use the cruise control system only
when traveling on open highways in
good weather.
o Do not use the cruise control when it
may not be safe to keep the car at a
constant speed, for instance, driving
in heavy or varying traffic, or on
slippery (rainy, icy or snow-covered)
or winding roads or over 6% up-hill or
down-hill roads.
o Pay particular attention to the driving
conditions whenever using the cruise
control system.
o During cruise-speed driving of a
manual transaxle vehicle, do not shift
into neutral without depressing the
clutch pedal, since the engine will be
overrevved. If this happens, depress
the clutch pedal or release the cruise
control ON/OFF switch.
o During normal cruise control
operation, when the "SET" switch is
activated or reactivated after apply-
ing the brakes, the cruise control will
energize after approximately 3
seconds. This delay is normal.* : if installed
RADIO (FM1 → FM2 → AM) → CD* → CDC*
→
Page 112 of 286
1
FEATURES OF YOUR HYUNDAI
9999
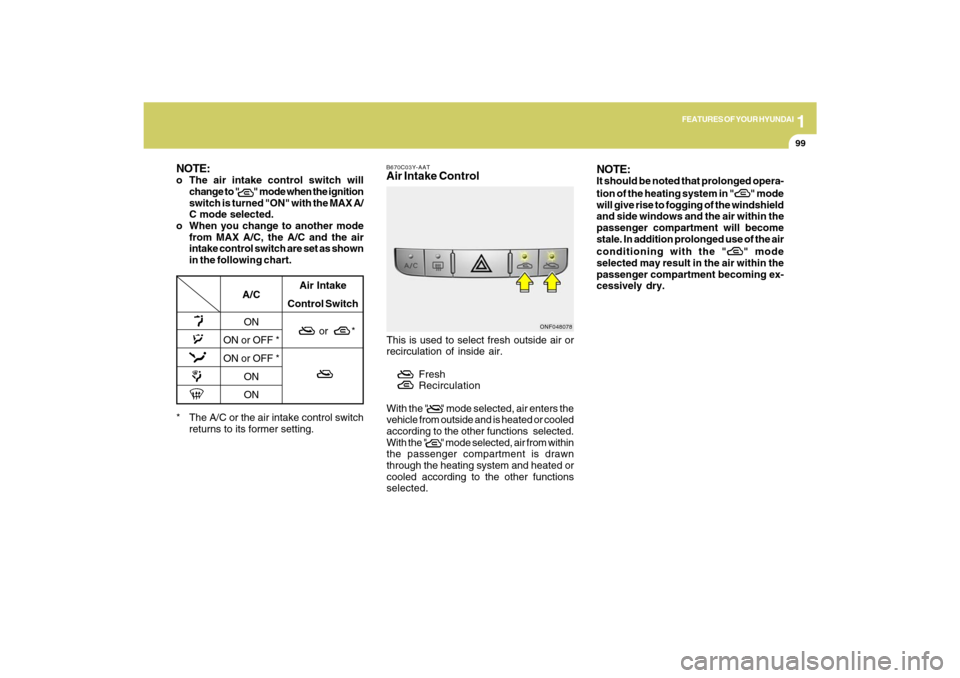
NOTE:o The air intake control switch will
change to " " mode when the ignition
switch is turned "ON" with the MAX A/
C mode selected.
o When you change to another mode
from MAX A/C, the A/C and the air
intake control switch are set as shown
in the following chart.
* The A/C or the air intake control switch
returns to its former setting.
A/C
ON
ON or OFF *
ON or OFF *
ON
ONAir Intake
Control Switch
or *
B670C03Y-AATAir Intake ControlThis is used to select fresh outside air or
recirculation of inside air.
Fresh
Recirculation
With the " " mode selected, air enters the
vehicle from outside and is heated or cooled
according to the other functions selected.
With the " " mode selected, air from within
the passenger compartment is drawn
through the heating system and heated or
cooled according to the other functions
selected.
ONF048078
NOTE:It should be noted that prolonged opera-
tion of the heating system in "
" mode
will give rise to fogging of the windshield
and side windows and the air within the
passenger compartment will become
stale. In addition prolonged use of the air
conditioning with the "" mode
selected may result in the air within the
passenger compartment becoming ex-
cessively dry.