ECO mode Hyundai Sonata 2011 Owner's Manual - RHD (UK, Australia)
[x] Cancel search | Manufacturer: HYUNDAI, Model Year: 2011, Model line: Sonata, Model: Hyundai Sonata 2011Pages: 358, PDF Size: 30.14 MB
Page 120 of 358
Features of your vehicle
48
4
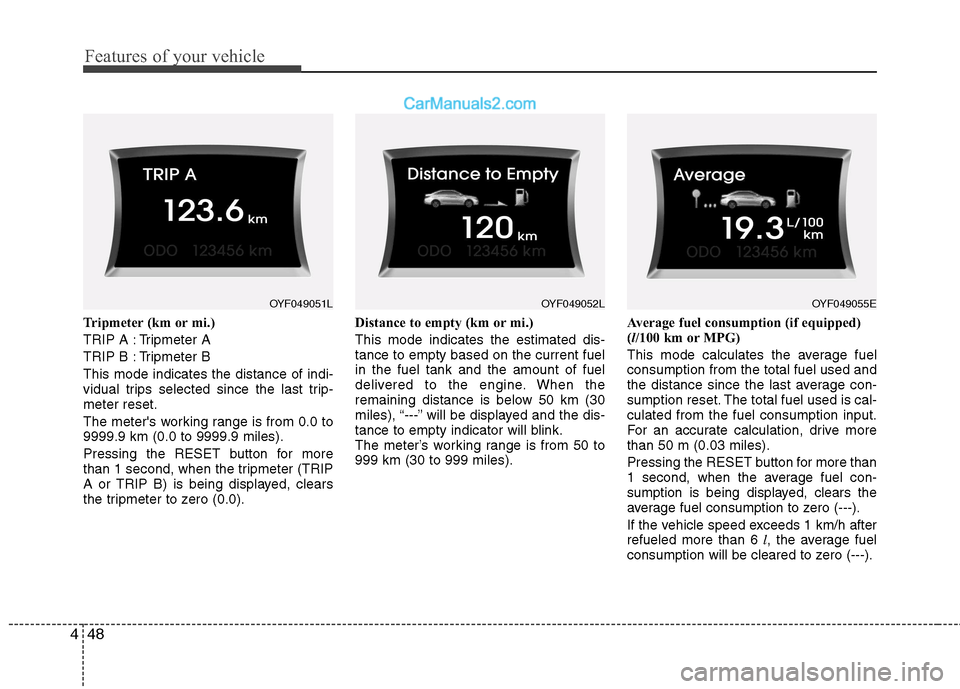
Tripmeter (km or mi.)
TRIP A : Tripmeter A
TRIP B : Tripmeter BThis mode indicates the distance of indi-
vidual trips selected since the last trip-meter reset.
The meter's working range is from 0.0 to 9999.9 km (0.0 to 9999.9 miles).
Pressing the RESET button for more
than 1 second, when the tripmeter (TRIP
A or TRIP B) is being displayed, clears
the tripmeter to zero (0.0). Distance to empty (km or mi.) This mode indicates the estimated dis- tance to empty based on the current fuelin the fuel tank and the amount of fuel
delivered to the engine. When the
remaining distance is below 50 km (30
miles), “---” will be displayed and the dis-
tance to empty indicator will blink.
The meter’s working range is from 50 to999 km (30 to 999 miles).
Average fuel consumption (if equipped)(
l/100 km or MPG)
This mode calculates the average fuelconsumption from the total fuel used and
the distance since the last average con-
sumption reset. The total fuel used is cal-culated from the fuel consumption input.
For an accurate calculation, drive morethan 50 m (0.03 miles). Pressing the RESET button for more than
1 second, when the average fuel con-
sumption is being displayed, clears the
average fuel consumption to zero (---).
If the vehicle speed exceeds 1 km/h after refueled more than 6 l, the average fuel
consumption will be cleared to zero (---).
OYF049051LOYF049055EOYF049052L
Page 121 of 358
449
Features of your vehicle
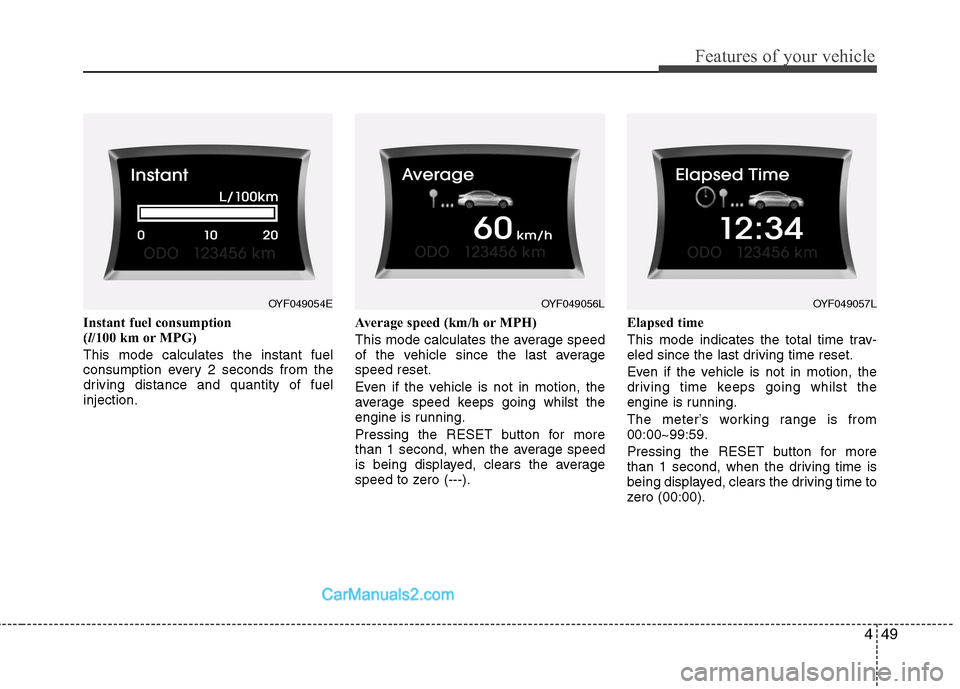
Instant fuel consumption (l/100 km or MPG)
This mode calculates the instant fuel
consumption every 2 seconds from the
driving distance and quantity of fuelinjection. Average speed (km/h or MPH)
This mode calculates the average speed
of the vehicle since the last averagespeed reset.
Even if the vehicle is not in motion, the
average speed keeps going whilst the
engine is running.
Pressing the RESET button for more
than 1 second, when the average speed
is being displayed, clears the average
speed to zero (---).Elapsed time
This mode indicates the total time trav-
eled since the last driving time reset.
Even if the vehicle is not in motion, the
driving time keeps going whilst the
engine is running.
The meter’s working range is from 00:00~99:59.
Pressing the RESET button for more
than 1 second, when the driving time is
being displayed, clears the driving time to
zero (00:00).
OYF049054EOYF049057LOYF049056L
Page 122 of 358
Features of your vehicle
50
4
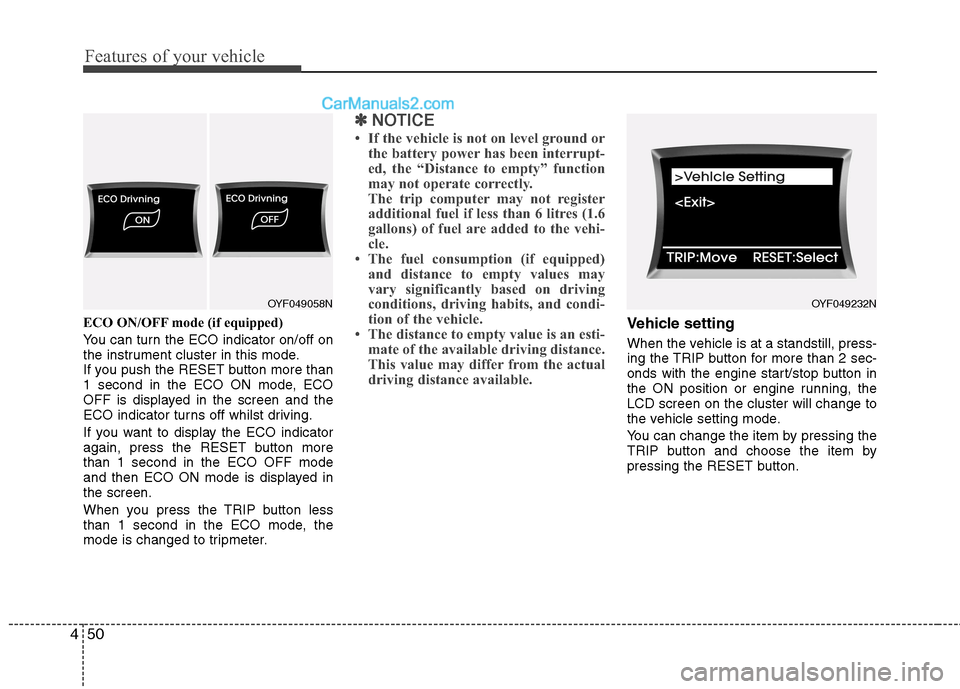
ECO ON/OFF mode (if equipped)
You can turn the ECO indicator on/off on
the instrument cluster in this mode.
If you push the RESET button more than
1 second in the ECO ON mode, ECO
OFF is displayed in the screen and the
ECO indicator turns off whilst driving.
If you want to display the ECO indicator
again, press the RESET button morethan 1 second in the ECO OFF mode
and then ECO ON mode is displayed inthe screen.
When you press the TRIP button less
than 1 second in the ECO mode, the
mode is changed to tripmeter.
✽✽
NOTICE
If the vehicle is not on level ground or the battery power has been interrupt-
ed, the “Distance to empty” function
may not operate correctly.
The trip computer may not register
additional fuel if less than 6 litres (1.6
gallons) of fuel are added to the vehi-
cle.
The fuel consumption (if equipped)
and distance to empty values may
vary significantly based on driving
conditions, driving habits, and condi-
tion of the vehicle.
The distance to empty value is an esti- mate of the available driving distance.
This value may differ from the actual
driving distance available.
Vehicle setting
When the vehicle is at a standstill, press-
ing the TRIP button for more than 2 sec-
onds with the engine start/stop button in
the ON position or engine running, theLCD screen on the cluster will change to
the vehicle setting mode.
You can change the item by pressing the
TRIP button and choose the item by
pressing the RESET button.
OYF049232NOYF049058N
Page 124 of 358
Features of your vehicle
52
4
Warnings and indicators
All warning lights are checked by turning
the ignition switch ON (do not start the
engine). Any light that does not illuminate
should be checked by an authorised
HYUNDAI dealer.
After starting the engine, check to make
sure that all warning lights are off. If anyare still on, this indicates a situation that
needs attention. When releasing the
parking brake, the brake system warning
light should go off. The fuel warning light
will stay on if the fuel level is low.ECO indicator
(if equipped)
The ECO indicator is a system that
informs you to drive economically.
It is displayed if you drive fuel efficiently
to help you improve fuel efficiency.
The ECO indicator (green) will turn on when you are driving fuel efficiently in
the ECO ON mode.
If you don't want the indicator dis-
played, you can turn the ECO ON
mode to OFF mode by pressing the
RESET button.
As per ECO ON/OFF Mode operation,
refer to the previous page.
The fuel-efficiency can be changed by the driver's driving habit and road con-dition.
It doesn't work at the condition which doesn't meet economical driving such
as P (Park), N (Neutral), R (Reverse)
or sports mode.
Whilst the instant fuel consumption mode is displayed on the LCD screen,
the ECO indicator turns off.
ECOWARNING
Don't keep watching the indicator
whilst driving. It will distract youwhilst driving and cause an acci-
dent that results in severe personal
injury.
Page 132 of 358
Features of your vehicle
60
4
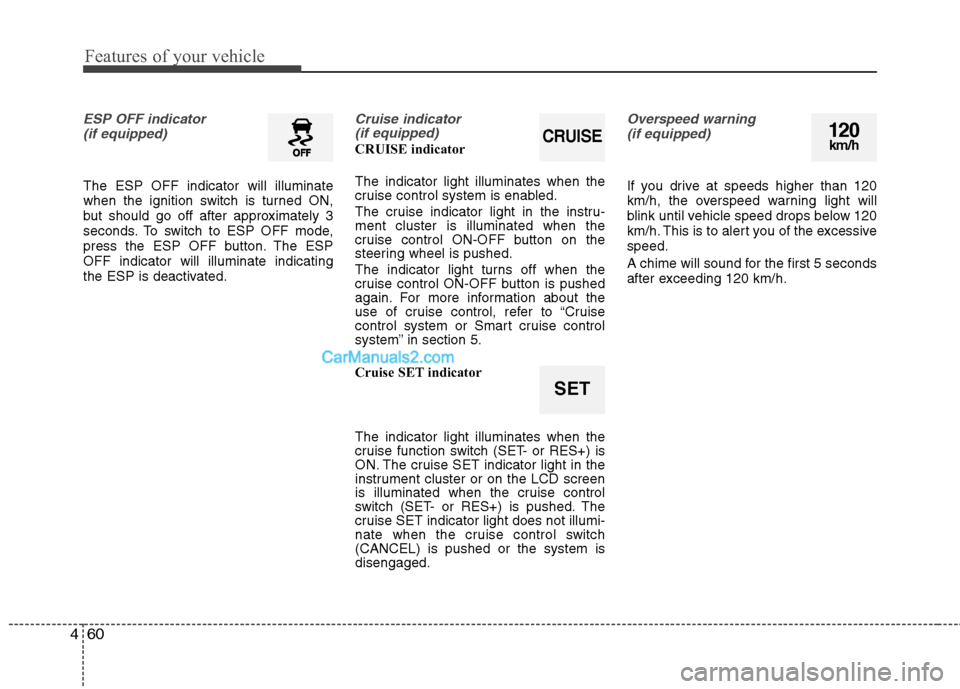
ESP OFF indicator
(if equipped)
The ESP OFF indicator will illuminate
when the ignition switch is turned ON,
but should go off after approximately 3
seconds. To switch to ESP OFF mode,
press the ESP OFF button. The ESPOFF indicator will illuminate indicating
the ESP is deactivated.
Cruise indicator (if equipped)
CRUISE indicator The indicator light illuminates when the
cruise control system is enabled.
The cruise indicator light in the instru- ment cluster is illuminated when the
cruise control ON-OFF button on the
steering wheel is pushed.
The indicator light turns off when the
cruise control ON-OFF button is pushed
again. For more information about the
use of cruise control, refer to “Cruise
control system or Smart cruise control
system” in section 5.
Cruise SET indicator The indicator light illuminates when the
cruise function switch (SET- or RES+) is
ON. The cruise SET indicator light in the
instrument cluster or on the LCD screen
is illuminated when the cruise control
switch (SET- or RES+) is pushed. The
cruise SET indicator light does not illumi-
nate when the cruise control switch(CANCEL) is pushed or the system isdisengaged.
Overspeed warning
(if equipped)
If you drive at speeds higher than 120
km/h, the overspeed warning light will
blink until vehicle speed drops below 120
km/h. This is to alert you of the excessivespeed.
A chime will sound for the first 5 seconds
after exceeding 120 km/h.
120km/h
SET
CRUISE
Page 155 of 358
483
Features of your vehicle
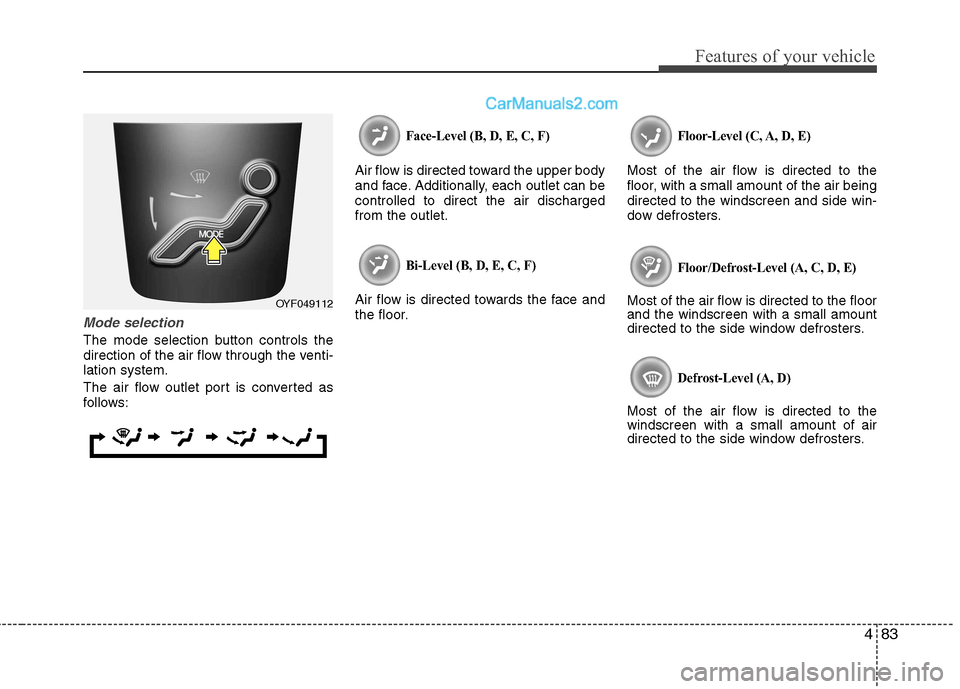
Mode selection
The mode selection button controls the
direction of the air flow through the venti-lation system.
The air flow outlet port is converted as
follows:
Face-Level (B, D, E, C, F)
Air flow is directed toward the upper body
and face. Additionally, each outlet can becontrolled to direct the air dischargedfrom the outlet.
Bi-Level (B, D, E, C, F)
Air flow is directed towards the face and
the floor.
Floor-Level (C, A, D, E)
Most of the air flow is directed to the
floor, with a small amount of the air beingdirected to the windscreen and side win-
dow defrosters.
Floor/Defrost-Level (A, C, D, E)
Most of the air flow is directed to the floor and the windscreen with a small amount
directed to the side window defrosters.
Defrost-Level (A, D)
Most of the air flow is directed to thewindscreen with a small amount of air
directed to the side window defrosters.
OYF049112
Page 160 of 358
Features of your vehicle
88
4
Air conditioning system operation tips
If the vehicle has been parked in direct
sunlight during hot weather, open the
windows for a short time to let the hot
air inside the vehicle escape.
To help reduce moisture inside of the windows on rainy or humid days,
decrease the humidity inside the vehi-
cle by operating the air conditioningsystem.
During air conditioning system opera- tion, you may occasionally notice aslight change in engine speed as the
air conditioning compressor cycles.
This is a normal system operation
characteristic.
Use the air conditioning system every month only for a few minutes to ensure
maximum system performance. When using the air conditioning sys-
tem, you may notice clear water drip-
ping (or even puddling) on the ground
under the passenger side of the vehi-
cle. This is a normal system operation
characteristic.
Operating the air conditioning system in the recirculated air position provides
maximum cooling, however, continual
operation in this mode may cause the
air inside the vehicle to become stale.
During cooling operation, you may occasionally notice a misty air flow
because of rapid cooling and humid air
intake. This is a normal system opera-
tion characteristic.
If you operate air conditioner exces- sively, the difference between the tem-
perature of the outside air and that ofthe windscreen could cause the outer
surface of the windscreen to fog up,
causing loss of visibility. In this case,
set the mode selection knob or button
to the position and fan speed con-
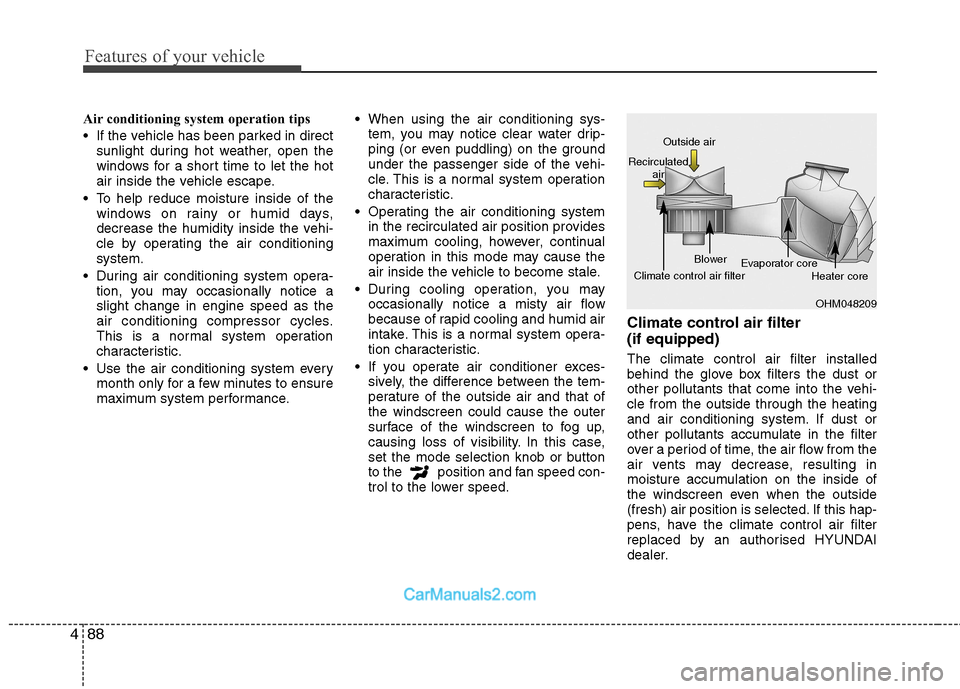
trol to the lower speed. Climate control air filter (if equipped) The climate control air filter installed
behind the glove box filters the dust or
other pollutants that come into the vehi-cle from the outside through the heating
and air conditioning system. If dust or
other pollutants accumulate in the filter
over a period of time, the air flow from the
air vents may decrease, resulting in
moisture accumulation on the inside of
the windscreen even when the outside
(fresh) air position is selected. If this hap-
pens, have the climate control air filter
replaced by an authorised HYUNDAI
dealer.
OHM048209
Outside air
Recirculated air
Climate control air filter Blower
Evaporator core
Heater core
Page 164 of 358
Features of your vehicle
92
4
Manual heating and air condition- ing The heating and cooling system can be
controlled manually by pushing buttons
other than the AUTO button. In this case,
the system works sequentially according
to the order of buttons selected.
When pressing any button except the
AUTO button whilst using automatic
operation, the functions not selected will
be controlled automatically.
1. Start the engine.
2. Set the mode to the desired position.
For improving the effectiveness of heating and cooling;- Heating: - Cooling:
3. Set the temperature control to the desired position.
4. Set the air intake control to the outside (fresh) air position.
5. Set the fan speed control to the desired speed.
6. If air conditioning is desired, turn the air conditioning system on.
Press the AUTO button in order to con-
vert to full automatic control of the sys-tem.
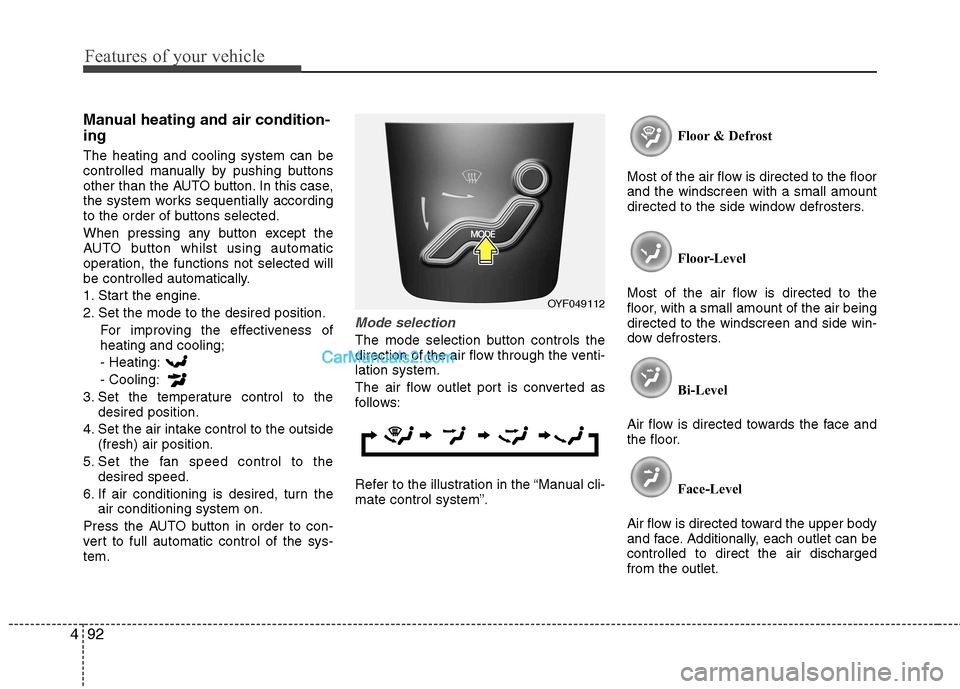
Mode selection
The mode selection button controls the
direction of the air flow through the venti-lation system.
The air flow outlet port is converted as
follows:
Refer to the illustration in the “Manual cli- mate control system”. Floor & Defrost
Most of the air flow is directed to the floorand the windscreen with a small amount
directed to the side window defrosters.
Floor-Level
Most of the air flow is directed to the
floor, with a small amount of the air beingdirected to the windscreen and side win-
dow defrosters.
Bi-Level
Air flow is directed towards the face and
the floor.
Face-Level
Air flow is directed toward the upper body
and face. Additionally, each outlet can becontrolled to direct the air dischargedfrom the outlet.
OYF049112
Page 180 of 358
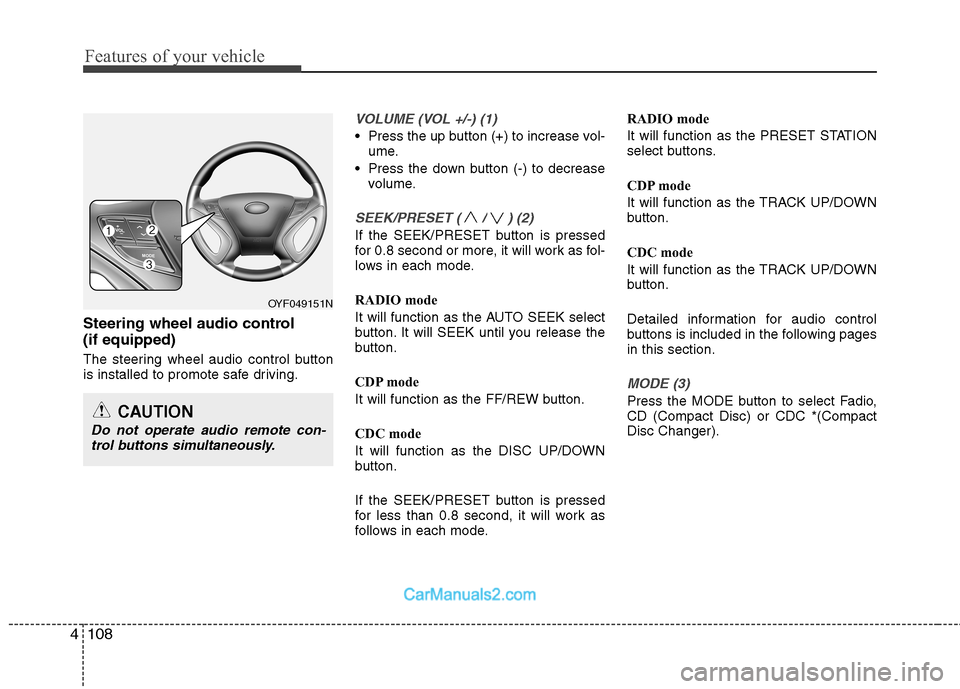
Features of your vehicle
108
4
Steering wheel audio control (if equipped)
The steering wheel audio control button
is installed to promote safe driving.
VOLUME (VOL +/-) (1)
Press the up button (+) to increase vol-
ume.
Press the down button (-) to decrease volume.
SEEK/PRESET ( / ) (2)
If the SEEK/PRESET button is pressed
for 0.8 second or more, it will work as fol-
lows in each mode.
RADIO mode
It will function as the AUTO SEEK select
button. It will SEEK until you release the
button.
CDP mode
It will function as the FF/REW button.
CDC mode
It will function as the DISC UP/DOWN
button.
If the SEEK/PRESET button is pressed
for less than 0.8 second, it will work as
follows in each mode. RADIO mode
It will function as the PRESET STATION
select buttons.
CDP mode
It will function as the TRACK UP/DOWN
button.
CDC mode
It will function as the TRACK UP/DOWN
button.
Detailed information for audio control
buttons is included in the following pagesin this section.
MODE (3)
Press the MODE button to select Fadio, CD (Compact Disc) or CDC *(CompactDisc Changer).
OYF049151N
CAUTION
Do not operate audio remote con-
trol buttons simultaneously.
Page 185 of 358
![Hyundai Sonata 2011 Owners Manual - RHD (UK, Australia) 4113
Features of your vehicle
1. AM Selection Button
Pressing the [AM] button selects the AM
band. AM Mode is displayed on the LCD.
2. FM Selection Button
Turns to FM mode and toggles FM1and
FM2 Hyundai Sonata 2011 Owners Manual - RHD (UK, Australia) 4113
Features of your vehicle
1. AM Selection Button
Pressing the [AM] button selects the AM
band. AM Mode is displayed on the LCD.
2. FM Selection Button
Turns to FM mode and toggles FM1and
FM2](/img/35/16818/w960_16818-184.png)
4113
Features of your vehicle
1. AM Selection Button
Pressing the [AM] button selects the AM
band. AM Mode is displayed on the LCD.
2. FM Selection Button
Turns to FM mode and toggles FM1and
FM2 when the button is pressed each
time.
3. Automatic Channel SelectionButton
When the [SEEK ] button is pressed, it increases the band fre- quency to automatically select chan-
nel. Stops at the previous frequency if
no channel is found.
When the [TRACK ] button is press- ed, it reduces the band frequency to
automatically select channel. Stops at
the previous frequency if no channel is
found. 4. Power ON/OFF Button &
Volume Control Button
Turns on/off the set when the IGNITION
SWITCH is on ACC or ON. If the button
is turned to the right, it increases the vol-
ume and left,decreases the volume.
Adjusts the volume of the car audio system. Rotate clockwise to increase
the volume or counterclockwise to
decrease.
5. Preset Button
Push [1]~[6] buttons less than 0.8 sec-
ond to play the channel saved in each
button. Push Preset button for 0.8 sec-
ond or longer to save current channel to
the respective button with a beep.
6. AST(AUTO STORE Button)
When the button is pressed, it automati-
cally selects and saves channels with
high reception rate to PRESET buttons
[1]~[6] and plays the channel saved in
PRESET1. If no channel is saved after
AST, it will play the previous channel. 7. SETUP Button ■
PA710YFG
Press this button to turn to the SCROLL
option and the other adjustment mode.
If no action is taken for 5 seconds after
pressing the button, it will return to the
play mode. (After entering SETUP mode,
move between items using the left, rightand PUSH functions of the [TUNE]
knob.) The setup changes in the order of
TEXT SCROLL ➟ AV C
■ PA760YFG
The setup Change in the order of TONE➟ POSITION ➟ AVC ➟ CLOCK ➟
SCROLL ➟ RETURN
This function is used to display charac-
ters longer than the LCD text display and
can be turned ON/OFF through the [
FOLDER ] button.
This function automatically adjusts the
volume level according to the speed of
the vehicle and can be turned ON/OFF
through the [ FOLDER ] button.