Hyundai Sonata 2014 Owner's Manual
Manufacturer: HYUNDAI, Model Year: 2014, Model line: Sonata, Model: Hyundai Sonata 2014Pages: 665, PDF Size: 17.43 MB
Page 251 of 665
3-155
Convenient features of your vehicle
3
Front
To open the cover:
Push the cover.
Rear
To open the cover:
Pull the armrest down to use the cup
holders.
•Keep your drinks sealed while
driving to prevent spilling your
drink. If liquid spills, it may get
into the vehicle's electrical/elec-
tronic system and damage elec-
trical/electronic parts.
•When cleaning spilled liquids,do
not dry the cup holder at high
temperature. This may damage
the cup holder.
NOTICE
•Avoid abrupt star ting and
braking when the cup holder
is in use to prevent spilling
your drink. If hot liquid spills,
you could be burned. Such a
burn to the driver could cause
loss of vehicle control result-
ing in an accident.
•Do not place uncovered or
unsecured cups, bottles,
cans, etc., in the cup holder
containing hot liquid while the
vehicle is in motion. Injuries
may result in the event of sud-
den stop or collision.
•Only use soft cups in the cup
holders. Hard objects can
injure you in an accident.
WARNING
Keep cans or bottles out of
direct sun light and do not put
them in a hot vehicle. It may
explode.
WARNING
Page 252 of 665
3-156
Convenient features of your vehicle
Sunvisor
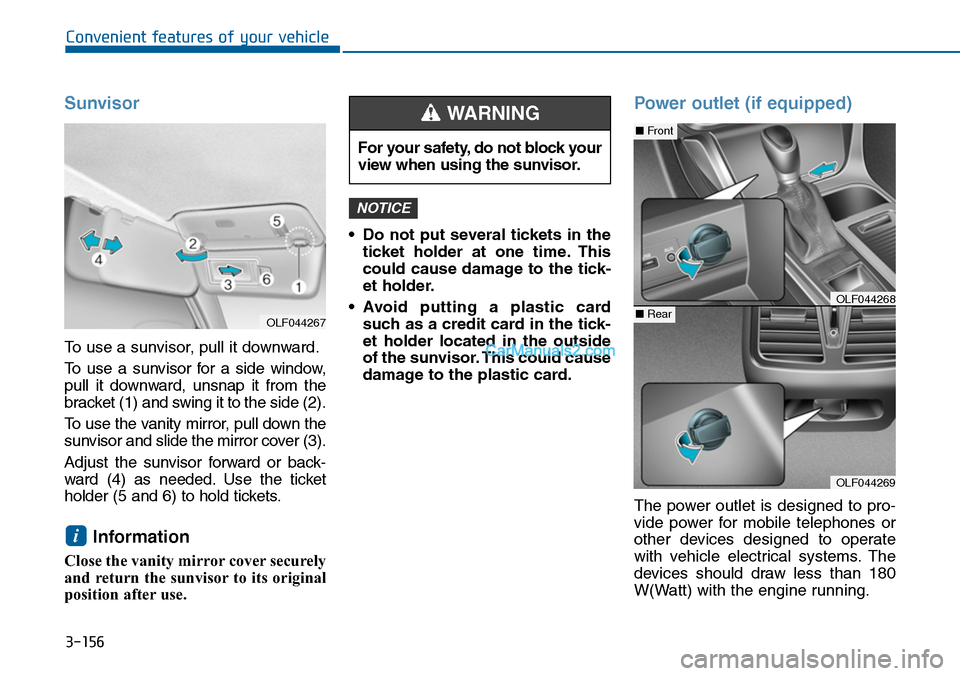
To use a sunvisor, pull it downward.
To u s e a s u n v i s o r f o r a s i d e w i n d o w ,
pull it downward, unsnap it from the
bracket (1) and swing it to the side (2).
To u s e t h e v a n i t y m i r r o r , p u l l d o w n t h e
sunvisor and slide the mirror cover (3).
Adjust the sunvisor forward or back-
ward (4) as needed. Use the ticket
holder (5 and 6) to hold tickets.
Information
Close the vanity mirror cover securely
and return the sunvisor to its original
position after use.
•Do not put several tickets in the
ticket holder at one time. This
could cause damage to the tick-
et holder.
•Avoid putting a plastic card
such as a credit card in the tick-
et holder located in the outside
of the sunvisor. This could cause
damage to the plastic card.
Power outlet (if equipped)
The power outlet is designed to pro-
vide power for mobile telephones or
other devices designed to operate
with vehicle electrical systems. The
devices should draw less than 180
W(Watt) with the engine running.
NOTICE
i
For your safety, do not block your
view when using the sunvisor.
WARNING
OLF044269
■Front
■RearOLF044268
OLF044267
Page 253 of 665
3-157
Convenient features of your vehicle
3
To prevent damage to the Power
Outlets :
•Use the power outlet only when
the engine is running and
remove the accessory plug after
use. Using the accessory plug
for prolonged periods of time
with the engine off could cause
the battery to discharge.
•Only use 12V electric acces-
sories which are less than 180
W(Watt) in electric capacity.
•Adjust the air-conditioner or
heater to the lowest operating
level when using the power out-
let.
•Close the cover when not in use.
(Continued)
(Continued)
•Some electronic devices can
cause electronic interference
when plugged into a vehicle’s
power outlet. These devices may
cause excessive audio static
and malfunctions in other elec-
tronic systems or devices used
in your vehicle.
•Push the plug in as far as it will
go. If good contact is not made,
the plug may overheat and the
fuse may open.
•Plug in battery equipped electri-
cal/electronic devices with
reverse current protection. The
current from the battery may
flow into the vehicle's electri-
cal/electronic system and cause
system malfunction.
NOTICE
Avoid electrical shocks. Do not
place your fingers or foreign
objects (pin, etc.) into a power
outlet or touch the power outlet
with a wet hand.
WARNING
Page 254 of 665
3-158
Convenient features of your vehicle
Cigarette lighter (if equipped)
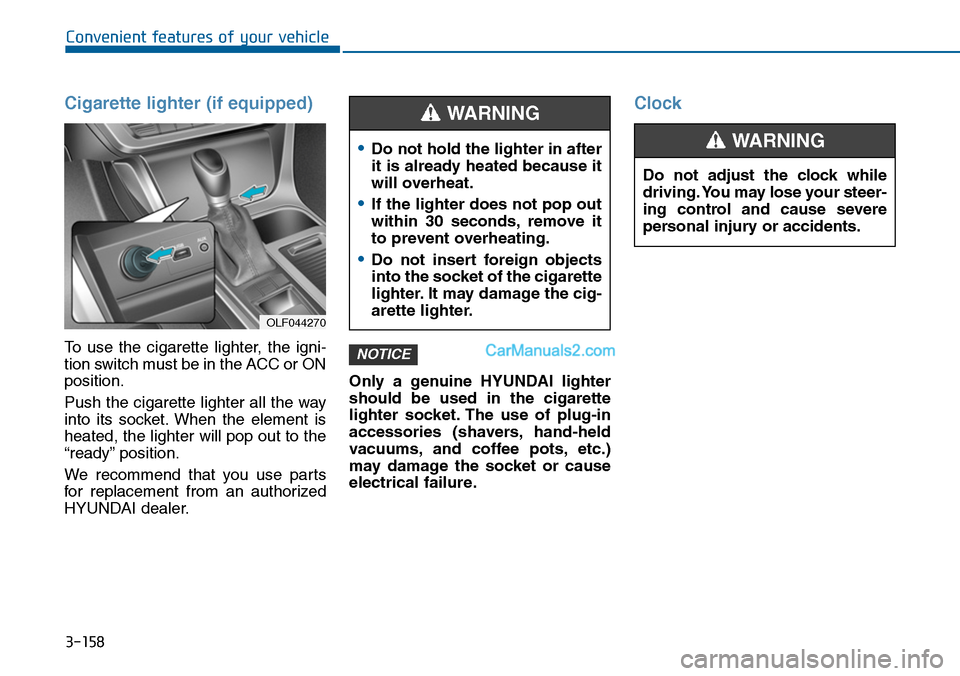
To use the cigarette lighter, the igni-
tion switch must be in the ACC or ON
position.
Push the cigarette lighter all the way
into its socket. When the element is
heated, the lighter will pop out to the
“ready” position.
We recommend that you use par ts
for replacement from an authorized
HYUNDAI dealer.
Only a genuine HYUNDAI lighter
should be used in the cigarette
lighter socket. The use of plug-in
accessories (shavers, hand-held
vacuums, and coffee pots, etc.)
may damage the socket or cause
electrical failure.
Clock
NOTICE
OLF044270
•Do not hold the lighter in after
it is already heated because it
will overheat.
•If the lighter does not pop out
within 30 seconds, remove it
to prevent overheating.
•Do not insert foreign objects
into the socket of the cigarette
lighter. It may damage the cig-
arette lighter.
WARNING
Do not adjust the clock while
driving. You may lose your steer-
ing control and cause severe
personal injury or accidents.
WARNING
Page 255 of 665
3-159
Convenient features of your vehicle
3
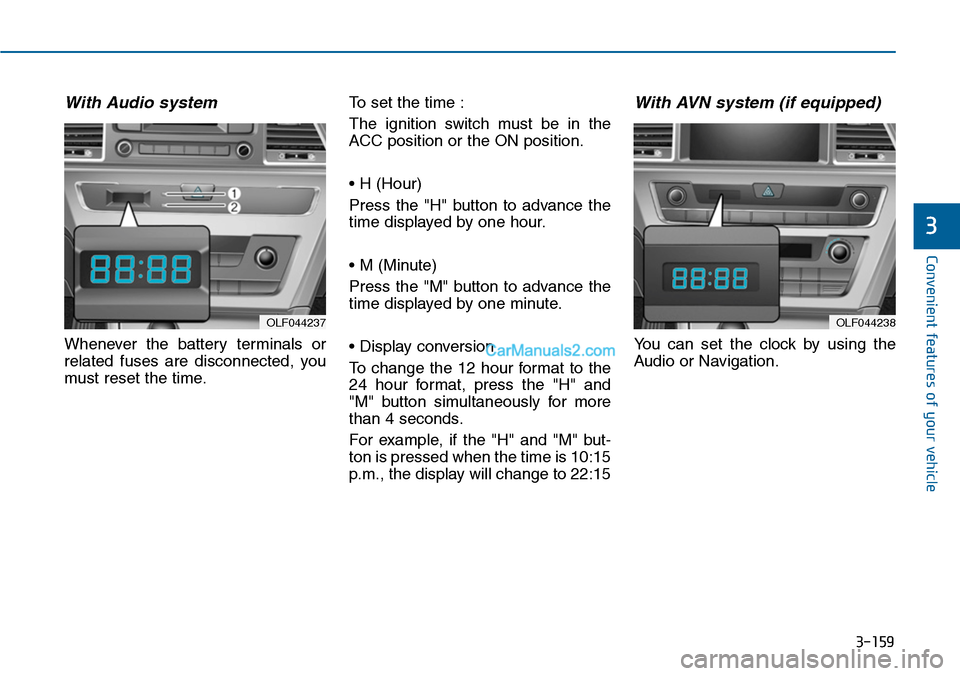
With Audio system
Whenever the battery terminals or
related fuses are disconnected, you
must reset the time.
To set the time :
The ignition switch must be in the
ACC position or the ON position.
• H (Hour)
Press the "H" button to advance the
time displayed by one hour.
• M (Minute)
Press the "M" button to advance the
time displayed by one minute.
• Display conversion
To change the 12 hour format to the
24 hour format, press the "H" and
"M" button simultaneously for more
than 4 seconds.
For example, if the "H" and "M" but-
ton is pressed when the time is 10:15
p.m., the display will change to 22:15
With AVN system (if equipped)
Yo u c a n s e t t h e c l o c k b y u s i n g t h e
Audio or Navigation.
OLF044237OLF044238
Page 256 of 665
3-160
Convenient features of your vehicle
GPS Time check
The clock is automatically updated
through the navigation system.
GPS Time non-check
The clock can be manually adjusted.
1. Select the "System Settings" on
the "INFO/Setup" screen.
2. Select the "Clock Settings".
3. Select the "Time Settings" by
rotating the controller on the cen-
ter console panel.
4. Select the "Time Format" to the 12
hour or 24 hour format.
For more details, please refer to
the manual that was supplied with
your vehicle.
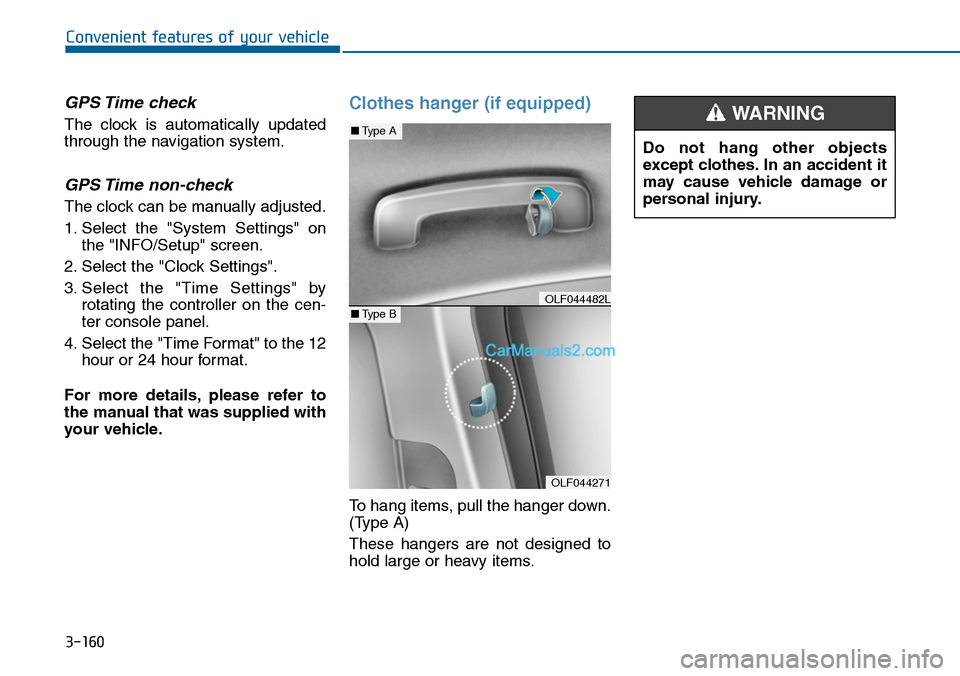
Clothes hanger (if equipped)
To hang items, pull the hanger down.
(Type A)
These hangers are not designed to
hold large or heavy items.
OLF044271
■Type A
■Type BOLF044482L
Do not hang other objects
except clothes. In an accident it
may cause vehicle damage or
personal injury.
WARNING
Page 257 of 665
3-161
Convenient features of your vehicle
3
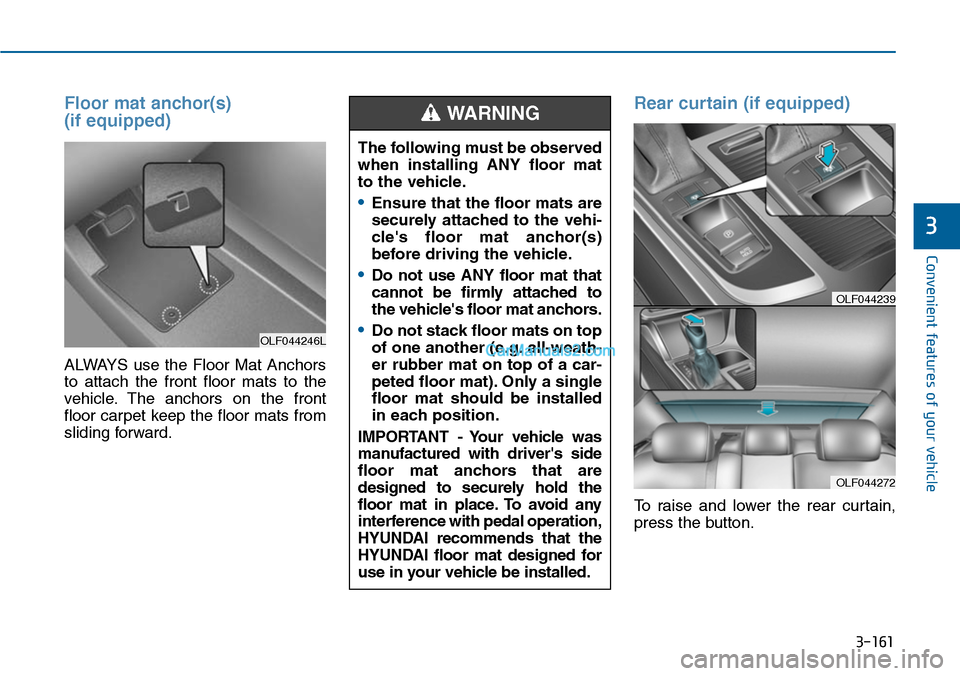
Floor mat anchor(s)
(if equipped)
ALWAYS use the Floor Mat Anchors
to attach the front floor mats to the
vehicle. The anchors on the front
floor carpet keep the floor mats from
sliding forward.
Rear curtain (if equipped)
To raise and lower the rear curtain,
press the button.
OLF044246L
The following must be observed
when installing ANY floor mat
to the vehicle.
•Ensure that the floor mats are
securely attached to the vehi-
cle's floor mat anchor(s)
before driving the vehicle.
•Do not use ANY floor mat that
cannot be firmly attached to
the vehicle's floor mat anchors.
•Do not stack floor mats on top
of one another (e.g. all-weath-
er rubber mat on top of a car-
peted floor mat). Only a single
floor mat should be installed
in each position.
IMPORTANT - Your vehicle was
manufactured with driver's side
floor mat anchors that are
designed to securely hold the
floor mat in place. To avoid any
interference with pedal operation,
HYUNDAI recommends that the
HYUNDAI floor mat designed for
use in your vehicle be installed.
WARNING
OLF044272
OLF044239
Page 258 of 665
3-162
Convenient features of your vehicle
The rear curtain will be lowered auto-
matically when you shift the shift
lever into R (Reverse) and raised
automatically when you shift the shift
lever from R (Reverse) into P (Park).
After the rear curtain is lowered by
shifting into R (Reverse), if you drive
more than 20 km/h (12 mph) with the
shift lever in D (Drive), the rear cur-
tain will be raised automatically.
Do not apply excessive force
while operating the rear curtain.
This could cause damage to the
rear curtain.
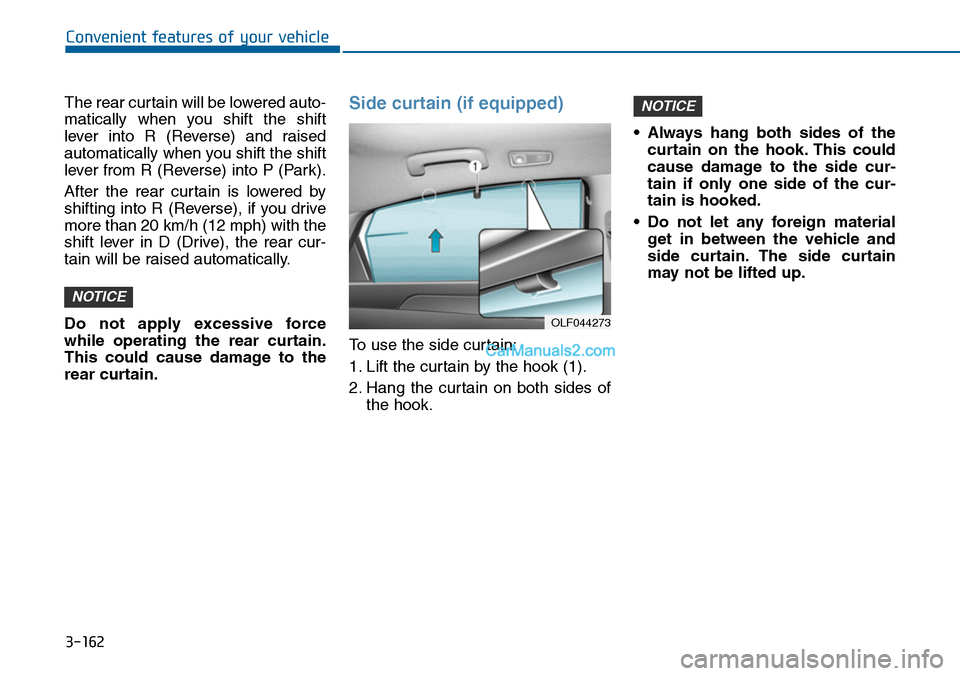
Side curtain (if equipped)
To use the side curtain:
1. Lift the curtain by the hook (1).
2. Hang the curtain on both sides of
the hook.
•Always hang both sides of the
curtain on the hook. This could
cause damage to the side cur-
tain if only one side of the cur-
tain is hooked.
•Do not let any foreign material
get in between the vehicle and
side curtain. The side curtain
may not be lifted up.
NOTICE
NOTICE
OLF044273
Page 259 of 665
Multimedia System
Multimedia system .................................................4-2
AUX, USB and iPod®port ...............................................4-2
Antenna ...............................................................................4-3
Steering wheel audio control ........................................4-4
Audio / Video / Navigation system (AVN) ..................4-5
Bluetooth®Wireless Technology hands-free ............4-5
How Vehicle Audio Works ...............................................4-6
System controllers and functions
- 3.8 inch MONO TFT (Except Europe)............4-20
Setup (for RDS model) ...................................................4-26
Phone setup (for RDS, Bluetooth®Wireless Technology
equipped model) ..................................................................4-28
System settings ...............................................................4-32
Setup ..................................................................................4-33
RADIO (for RDS model)..................................................4-40
RADIO .................................................................................4-42
System controllers and functions
- 4.3 inch COLOR TFT LCD (Except Europe) ...4-52
Radio mode(for RDS model) .........................................4-56
Radio mode .......................................................................4-60
Media mode ......................................................................4-62
Audio CD mode ................................................................4-63
MP3 CD mode ..................................................................4-66
USB mode ........................................................................4-69
iPod®mode .......................................................................4-72
AUX mode ........................................................................4-75
My music mode................................................................4-76
Bluetooth®Wireless Technology audio mode ..........4-79
Voice recognition ............................................................4-99
Ending voice recognition ............................................4-100
Setup (for RDS, Bluetooth®Wireless Technology
equipped model) ............................................................4-107
Setup (for Bluetooth® WirelessTechnology equipped
model) ..............................................................................4-114
Rear view camera .........................................................4-120
System controllers and functions
- 3.8 inch MONO TFT (For Europe)................4-126
Setup ................................................................................4-128
Radio ................................................................................4-131
Basic method of use : Audio CD / MP3 CD / USB /
iPod®/ My Music .........................................................4-132
System controllers and functions
- 4.3 inch COLOR TFT LCD (For Europe) .......4-139
Radio mode .....................................................................4-143
Media mode ....................................................................4-145
Audio CD mode ..............................................................4-146
MP3 CD mode ................................................................4-148
USB mode ......................................................................4-151
iPod®mode .....................................................................4-154
AUX mode ......................................................................4-156
My music mode .............................................................4-157
Bluetooth® Wireless Technology audio mode ........4-160
Voice recognition ..........................................................4-172
Setup (for Bluetooth®Wireless Technology equipped
model) ..............................................................................4-180
Rear view camera .........................................................4-186
4
Page 260 of 665
Information
•If you install an aftermarket HID
headlamp, your vehicle’s audio and
electronic device may malfunction.
•Prevent chemicals such as perfume,
cosmetic oil, sun cream, hand clean-
er, and air freshener from contacting
the interior parts because they may
cause damage or discoloration.
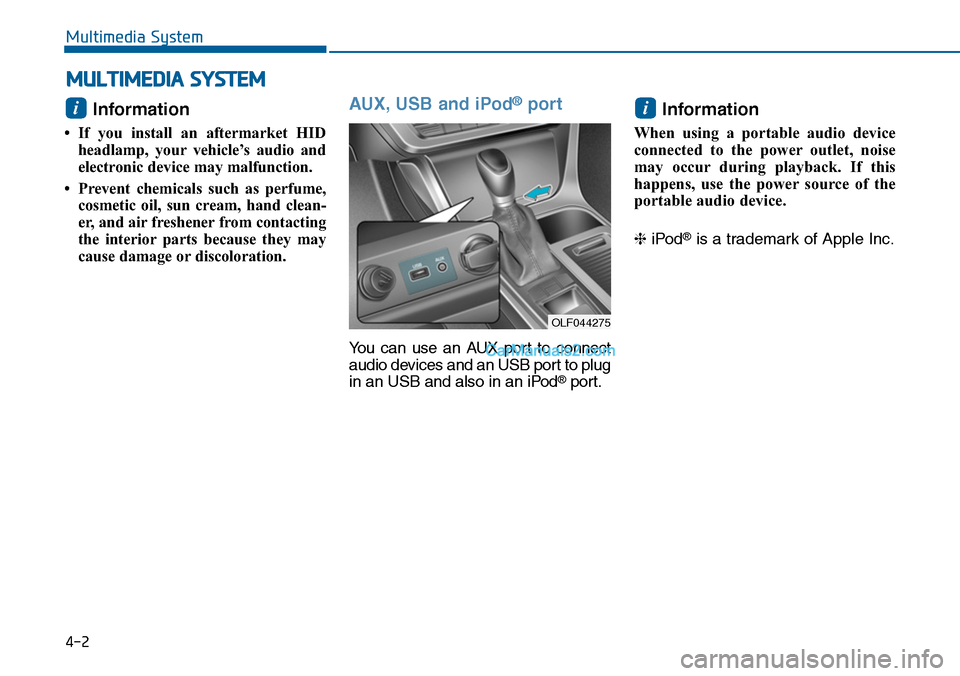
AUX, USB and iPod®port
Yo u c a n u s e a n A U X p o r t t o c o n n e c t
audio devices and an USB port to plug
in an USB and also in an iPod®port.
Information
When using a portable audio device
connected to the power outlet, noise
may occur during playback. If this
happens, use the power source of the
portable audio device.
❈iPod®is a trademark of Apple Inc.
ii
MULTIMEDIA SYSTEM
4-2
Multimedia System
OLF044275