tyre pressure Hyundai Sonata 2015 Owner's Manual - RHD (UK, Australia)
[x] Cancel search | Manufacturer: HYUNDAI, Model Year: 2015, Model line: Sonata, Model: Hyundai Sonata 2015Pages: 504, PDF Size: 10.88 MB
Page 20 of 504
2-3
Safety system of your vehicle
• NEVER let the use of a mobile
device distract you from driving. You
have a responsibility to your passen-
gers and others on the road to
always drive safely, with your hands
on the wheel as well as your eyes
and attention on the road.
Control your speed
Excessive speed is a major factor in
crash injuries and deaths. Generally,
the higher the speed, the greater the
risk, but serious injuries can also
occur at lower speeds. Never drive
faster than is safe for current condi-
tions, regardless of the maximum
speed posted.
Keep your vehicle in safe condi-
tion
Having a tyre blowout or a mechanical
failure can be extremely hazardous. To
reduce the possibility of such prob-
lems, check your tyre pressures and
condition frequently, and perform all
regularly scheduled maintenance.
2
Page 133 of 504
3-49
Convenient features of your vehicle
3
Information
• The Smart Boot function will not
work if any of the following occurs:
- The smart key is close to a radio
transmitter such as a radio station
or an airport which can interfere
with normal operation of the
transmitter.
- The smart key is near a mobile two
way radio system or a mobile
phone.
- Another vehicle's smart key is
being operated close to your vehi-
cle.
• The detecting range may decrease
or increase when :
- One side of the tyre is raised to
replace a tyre or to inspect the
vehicle.
- The vehicle is slantingly parked on
a slope or unpaved road, etc.
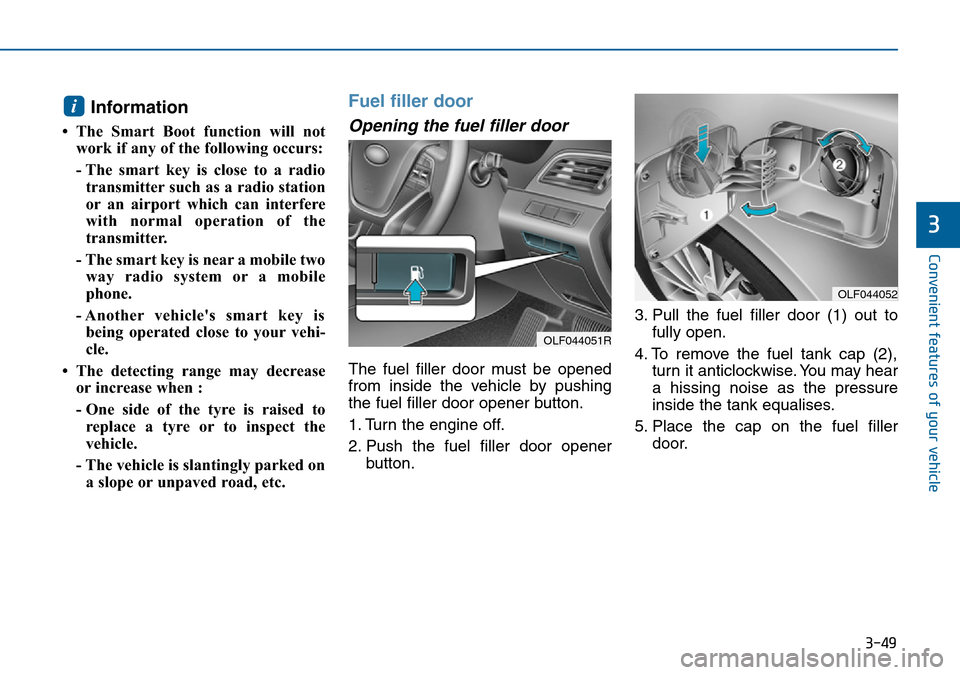
Fuel filler door
Opening the fuel filler door
The fuel filler door must be opened
from inside the vehicle by pushing
the fuel filler door opener button.
1. Turn the engine off.
2. Push the fuel filler door opener
button.3. Pull the fuel filler door (1) out to
fully open.
4. To remove the fuel tank cap (2),
turn it anticlockwise. You may hear
a hissing noise as the pressure
inside the tank equalises.
5. Place the cap on the fuel filler
door.
i
OLF044052
OLF044051R
Page 348 of 504
5-35
Driving your vehicle
5
Anti-lock Brake System (ABS)
ABS is an electronic braking system
that helps prevent a braking skid.
ABS allows the driver to steer and
brake at the same time.
Using ABS
To obtain the maximum benefit from
your ABS in an emergency situation,
do not attempt to modulate your
brake pressure and do not try to
pump your brakes. Depress your
brake pedal as hard as possible.
When you apply your brakes under
conditions which may lock the
wheels, you may hear sounds from
the brakes, or feel a corresponding
sensation in the brake pedal. This is
normal and it means your ABS is
active.
ABS does not reduce the time or dis-
tance it takes to stop the vehicle.
Always maintain a safe distance from
the vehicle in front of you.
ABS will not prevent a skid that
results from sudden changes in
direction, such as trying to take a
corner too fast or making a sudden
lane change. Always drive at a safe
speed for the road and weather con-
ditions. An Anti-lock Braking System
(ABS) or an Electronic Stability
Control (ESC) system will not
prevent accidents due to
improper or dangerous driving
manoeuvres. Even though vehi-
cle control is improved during
emergency braking, always
maintain a safe distance
between you and objects ahead
of you. Vehicle speeds should
always be reduced during
extreme road conditions. The
braking distance for vehicles
equipped with ABS or ESC may
be longer than for those without
these systems in particular
road conditions.
Drive your vehicle at reduced
speeds in the following condi-
tions:
•Rough, gravel or snow-cov-
ered roads.
(Continued)
WARNING
(Continued)
•On roads where the road sur-
face is pitted or uneven.
•Tyre chains are installed on
your vehicle.
The safety features of an ABS
or ESC equipped vehicle should
not be tested by high speed
driving or cornering. This could
endanger the safety of yourself
or others.
Page 371 of 504
5-58
Driving your vehicle
Non-operating condition
Outside rearview mirror may not
alert the driver when:
- The outside rearview mirror hous-
ing is damaged or covered with
debris.
- The window is covered with debris.
- The windows are severely tinted.
DRIVER'S ATTENTION
The driver must be cautious in the
below situations for the system
may not detect other vehicles or
objects in certain circumstances.
- Curved roads, tollgates, etc.
- The surrounding of the sensor is
polluted with rain, snow, mud,
etc
- The rear bumper near the sensor
is covered or hidden with foreign
matter such as a sticker, bumper
guard, bicycle stand etc.
- The rear bumper is damaged or
the sensor is out of place.
- The height of the vehicle is
altered such as when the boot is
loaded with heavy objects, or
there is low tyre pressure etc.
- Bad weather such as heavy rain
or snow.
- A fixed object is near such as a
guardrail, tunnel, person, animal
etc.
(Continued)(Continued)
- Metal substances are near the
vehicle such as in a construction
area.
- A big vehicle is near such as a
bus or truck.
- A motorcycle or bicycle is near.
- A flat trailer is near.
- If the vehicle has started at the
same time as the vehicle next to
you and has accelerated.
- When the other vehicle passes
by at a higher rate of speed.
- When changing lanes.
- When going down or up a steep
road where the height of the lane
is different.
- When the other vehicle drives
very close.
- When a trailer or carrier is
installed.
- When the temperature of the rear
bumper is high.
- When the sensors are covered
by a wall or a pillar of a parking
lot.
(Continued)
Page 406 of 504
6-15
What to do in an emergency
6
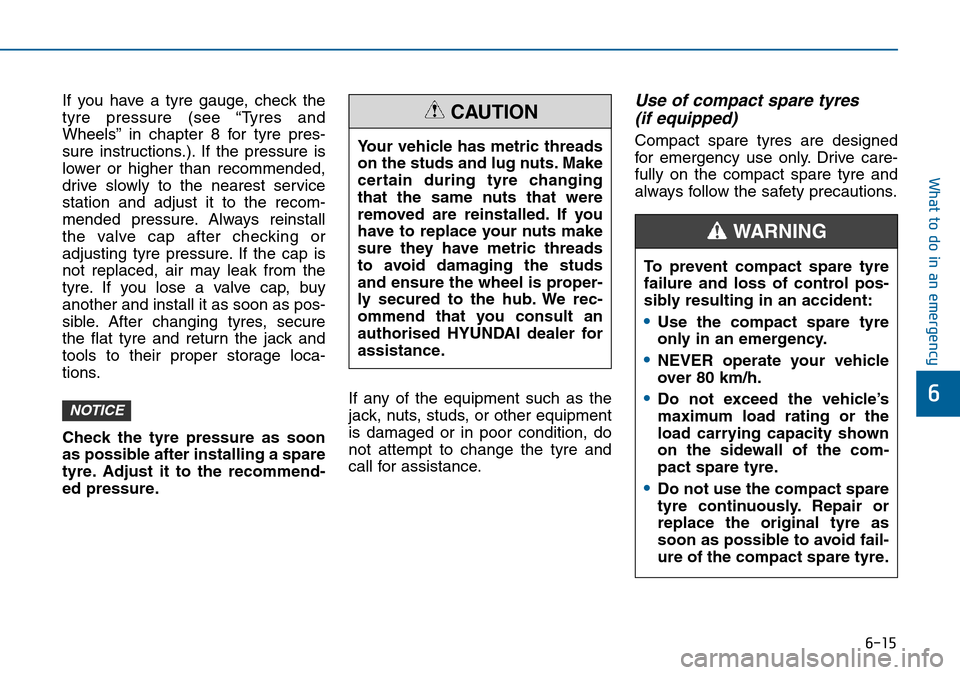
If you have a tyre gauge, check the
tyre pressure (see “Tyres and
Wheels” in chapter 8 for tyre pres-
sure instructions.). If the pressure is
lower or higher than recommended,
drive slowly to the nearest service
station and adjust it to the recom-
mended pressure. Always reinstall
the valve cap after checking or
adjusting tyre pressure. If the cap is
not replaced, air may leak from the
tyre. If you lose a valve cap, buy
another and install it as soon as pos-
sible. After changing tyres, secure
the flat tyre and return the jack and
tools to their proper storage loca-
tions.
Check the tyre pressure as soon
as possible after installing a spare
tyre. Adjust it to the recommend-
ed pressure.If any of the equipment such as the
jack, nuts, studs, or other equipment
is damaged or in poor condition, do
not attempt to change the tyre and
call for assistance.Use of compact spare tyres
(if equipped)
Compact spare tyres are designed
for emergency use only. Drive care-
fully on the compact spare tyre and
always follow the safety precautions.
NOTICE
Your vehicle has metric threads
on the studs and lug nuts. Make
certain during tyre changing
that the same nuts that were
removed are reinstalled. If you
have to replace your nuts make
sure they have metric threads
to avoid damaging the studs
and ensure the wheel is proper-
ly secured to the hub. We rec-
ommend that you consult an
authorised HYUNDAI dealer for
assistance.
CAUTION
To prevent compact spare tyre
failure and loss of control pos-
sibly resulting in an accident:
•Use the compact spare tyre
only in an emergency.
•NEVER operate your vehicle
over 80 km/h.
•Do not exceed the vehicle’s
maximum load rating or the
load carrying capacity shown
on the sidewall of the com-
pact spare tyre.
•Do not use the compact spare
tyre continuously. Repair or
replace the original tyre as
soon as possible to avoid fail-
ure of the compact spare tyre.
WARNING
Page 407 of 504
6-16
What to do in an emergency
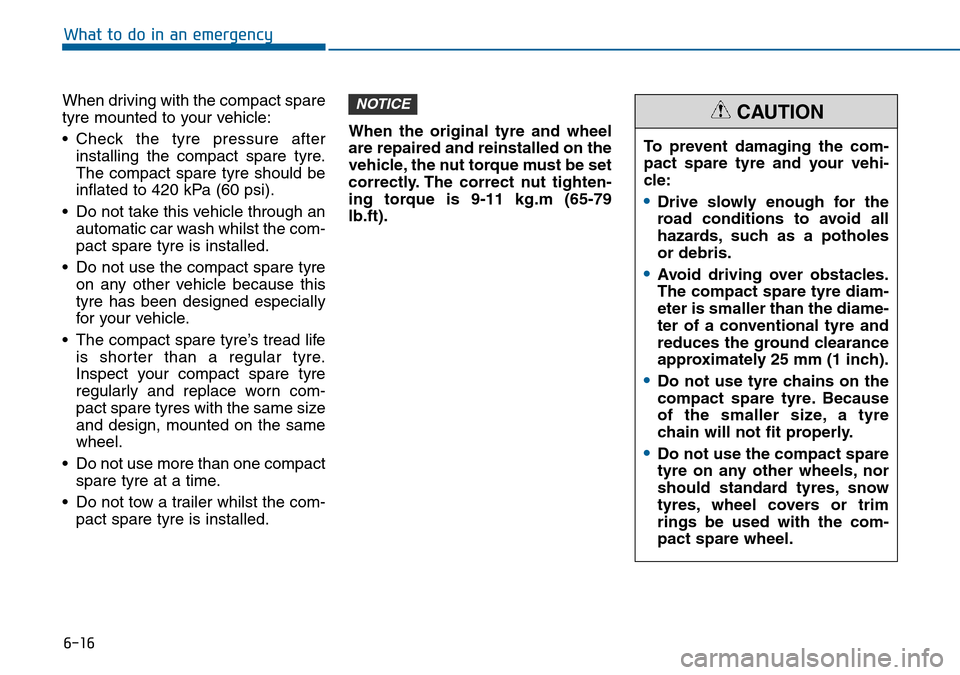
When driving with the compact spare
tyre mounted to your vehicle:
• Check the tyre pressure after
installing the compact spare tyre.
The compact spare tyre should be
inflated to 420 kPa (60 psi).
• Do not take this vehicle through an
automatic car wash whilst the com-
pact spare tyre is installed.
• Do not use the compact spare tyre
on any other vehicle because this
tyre has been designed especially
for your vehicle.
• The compact spare tyre’s tread life
is shorter than a regular tyre.
Inspect your compact spare tyre
regularly and replace worn com-
pact spare tyres with the same size
and design, mounted on the same
wheel.
• Do not use more than one compact
spare tyre at a time.
• Do not tow a trailer whilst the com-
pact spare tyre is installed.When the original tyre and wheel
are repaired and reinstalled on the
vehicle, the nut torque must be set
correctly. The correct nut tighten-
ing torque is 9-11 kg.m (65-79
lb.ft).
NOTICE
To prevent damaging the com-
pact spare tyre and your vehi-
cle:
•Drive slowly enough for the
road conditions to avoid all
hazards, such as a potholes
or debris.
•Avoid driving over obstacles.
The compact spare tyre diam-
eter is smaller than the diame-
ter of a conventional tyre and
reduces the ground clearance
approximately 25 mm (1 inch).
•Do not use tyre chains on the
compact spare tyre. Because
of the smaller size, a tyre
chain will not fit properly.
•Do not use the compact spare
tyre on any other wheels, nor
should standard tyres, snow
tyres, wheel covers or trim
rings be used with the com-
pact spare wheel.
CAUTION
Page 412 of 504
7
Maintenance
7
Maintenance
Engine compartment .............................................7-3
Maintenance services ...........................................7-5
Owner's responsibility ......................................................7-5
Owner maintenance precautions ..................................7-5
Owner maintenance ...............................................7-6
Owner maintenance schedule ........................................7-7
Scheduled maintenance services.........................7-9
Normal maintenance schedule.....................................7-10
Maintenance under severe usage conditions ..........7-14
Explanation of scheduled maintenance items ..7-16
Engine oil ..............................................................7-20
Checking the engine oil level ....................................7-20
Checking the engine oil and filter ..............................7-21
Engine coolant......................................................7-22
Checking the coolant level ...........................................7-22
Changing the coolant .....................................................7-24
Brake fluid ...........................................................7-25
Checking the brake fluid level .....................................7-25
Washer fluid .........................................................7-27
Checking the washer fluid level ...............................7-27
Parking brake .......................................................7-27
Checking the parking brake .........................................7-27
Air cleaner ............................................................7-28
Filter replacement ...........................................................7-28
Climate control air filter .....................................7-30
Filter inspection ...............................................................7-30
Filter replacement ...........................................................7-30
Wiper blades .........................................................7-31
Blade inspection ..............................................................7-31
Blade replacement ..........................................................7-31
Battery...................................................................7-33
For best battery service................................................7-33
Battery capacity label ...................................................7-34
Battery recharging .......................................................7-35
Reset items .......................................................................7-36
Tyres and wheels .................................................7-37
Tyre care ...........................................................................7-37
Recommended cold tyre inflation pressures ...........7-37
Checking tyre inflation pressure.................................7-39
Tyre rotation ...................................................................7-40
Wheel alignment and tyre balance.............................7-41
Tyre replacement ............................................................7-41
Wheel replacement ........................................................7-43
Tyre traction .....................................................................7-43
Tyre maintenance ..........................................................7-43
Tyre sidewall labelling ....................................................7-43
Low aspect ratio tyre.....................................................7-48
Fuses ......................................................................7-49
Fuse/Relay panel description ......................................7-55
7
Page 418 of 504
7-7
7
Maintenance
Owner maintenance schedule
When you stop for fuel:
• Check the engine oil level.
• Check coolant level in the engine
coolant reservoir.
• Check the windscreen washer fluid
level.
• Check for low or under-inflated
tyres.
Whilst operating your vehicle:
• Note any changes in the sound of
the exhaust or any smell of exhaust
fumes in the vehicle.
• Check for vibrations in the steering
wheel. Notice if there is any
increased steering effort or loose-
ness in the steering wheel, or
change in its straight-ahead position.
• Notice if your vehicle constantly
turns slightly or “pulls” to one side
when travelling on smooth, level
road.
• When stopping, listen and check for
unusual sounds, pulling to one side,
increased brake pedal travel or
“hard-to-push” brake pedal.
• If any slipping or changes in the
operation of your transaxle occurs,
check the transaxle fluid level.
• Check the automatic transaxle
P (Park) function.
• Check the parking brake.
• Check for fluid leaks under your vehi-
cle (water dripping from the air con-
ditioning system during or after use
is normal).
At least monthly:
• Check coolant level in the engine
coolant reservoir.
• Check the operation of all exterior
lights, including the stoplights, turn
signals and hazard warning flashers.
• Check the inflation pressures of all
tyres including the spare for tyres
that are worn, show uneven wear,
or are damaged.
• Check for loose wheel nuts.
Be careful when checking your
engine coolant level when the
engine is hot. This may result in
coolant being blown out of the
opening and cause serious
burns and other injuries.
WARNING
Page 424 of 504
7-13
7
Maintenance
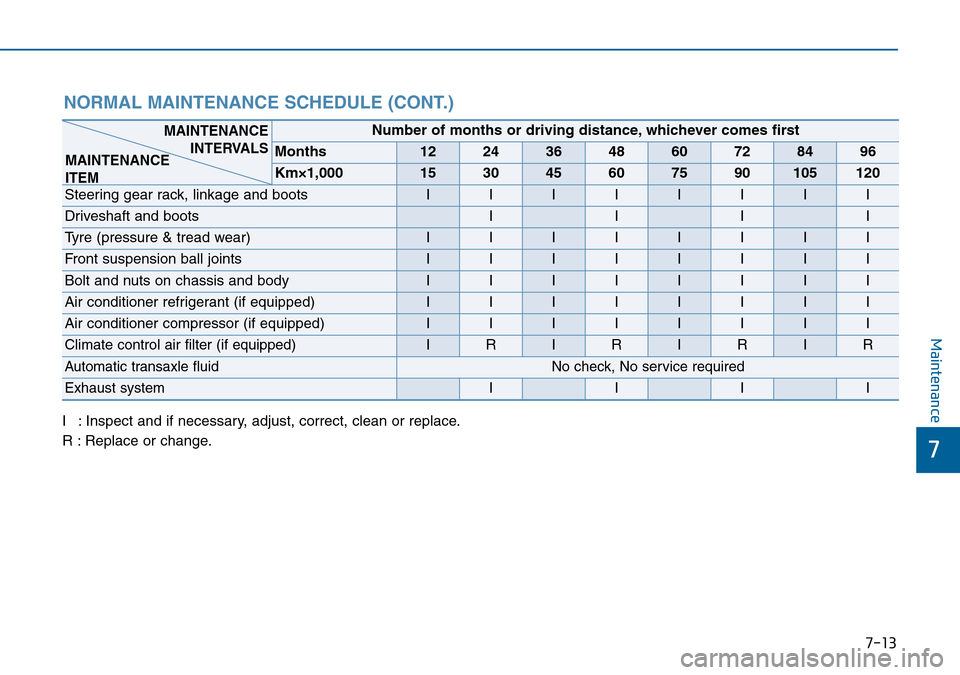
NORMAL MAINTENANCE SCHEDULE (CONT.)
I : Inspect and if necessary, adjust, correct, clean or replace.
R : Replace or change.
Number of months or driving distance, whichever comes first
Months1224364860728496
Km×1,000153045607590105120
Steering gear rack, linkage and bootsIIIIIIII
Driveshaft and bootsIIII
Tyre (pressure & tread wear) IIIIIIII
Front suspension ball jointsIIIIIIII
Bolt and nuts on chassis and bodyIIIIIIII
Air conditioner refrigerant (if equipped)IIIIIIII
Air conditioner compressor (if equipped)IIIIIIII
Climate control air filter (if equipped)IRIRIRIR
Automatic transaxle fluidNo check, No service required
Exhaust systemIIII
MAINTENANCE
INTERVALS
MAINTENANCE
ITEM
Page 448 of 504
7-37
7
Maintenance
TYRES AND WHEELS
Tyre care
For proper maintenance, safety, and
maximum fuel economy, you must
always maintain recommended tyre
inflation pressures and stay within
the load limits and weight distribution
recommended for your vehicle.
Recommended cold tyre infla-
tion pressures
All tyre pressures (including the
spare) should be checked when the
tyres are cold. “Cold Tyres” means the
vehicle has not been driven for at
least 3 hours or driven less than 1.6
km.
Recommended pressures must be
maintained for the best ride, top vehi-
cle handling, and minimum tyre wear.
For recommended inflation pressure
refer to “Tyre and wheels” in section
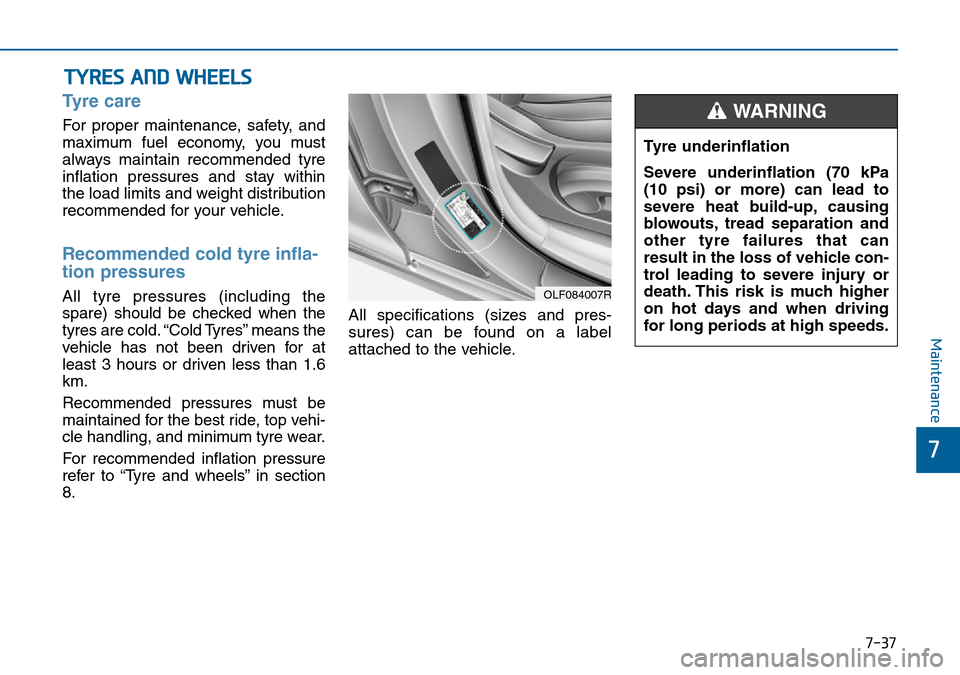
8.All specifications (sizes and pres-
sures) can be found on a label
attached to the vehicle.Tyre underinflation
Severe underinflation (70 kPa
(10 psi) or more) can lead to
severe heat build-up, causing
blowouts, tread separation and
other tyre failures that can
result in the loss of vehicle con-
trol leading to severe injury or
death. This risk is much higher
on hot days and when driving
for long periods at high speeds.
WARNING
OLF084007R