shift Hyundai Sonata 2015 Owner's Manual
[x] Cancel search | Manufacturer: HYUNDAI, Model Year: 2015, Model line: Sonata, Model: Hyundai Sonata 2015Pages: 603, PDF Size: 14.7 MB
Page 16 of 603
F16F16
System Controllers and Functions
- 5 Inch Color TFT LCD .......................................4-52
Audio Head Unit ..............................................................4-52
Steering-Wheel Mounted Controls ............................4-54
Radio Mode.......................................................................4\
-56
XM
TMRadio Mode ...........................................................4-58
Media Mode......................................................................4-\
60
Audio CD Mode ................................................................4-61
MP3 CD Mode ..................................................................4-63
USB Mode ........................................................................\
.4-66
iPod
®Mode ......................................................................4-\
69
AUX Mode ........................................................................\
.4-71
MY Music Mode ..............................................................4-72
Bluetooth®Wireless Technology Audio Mode ........4-75
Voice Recognition ...........................................................4-91
Setup ........................................................................\
..........4-97
Rear View Camera ........................................................4-102
Blue Link
®.......................................................................4\
-102
Before Driving ........................................................5-4
Before Entering the Vehicle ...........................................5-4
Before Starting ..................................................................5-4
Key Ignition Switch ...........................................................5-6
Ignition Switch ........................................................5-6
Engine Start/Stop Button................................................5-9
Transmission .........................................................5-14
Automatic Transmission .................................................5-14
Dual Clutch Transmission ..............................................5-18
Paddle Shifter .................................................................5-24
Shift-Lock System .........................................................5-25
Shift-Lock Override .......................................................5-25
Parking ........................................................................\
.......5-26
Good Driving Practices .................................................5-26
Braking System ....................................................5-28
Power Brakes ...................................................................5-28
Disc Brakes Wear Indicator ..........................................5-29
Foot Parking Brake.........................................................5-29
Electric Parking Brake (EPB) ......................................5-31
AUTO HOLD .....................................................................5-3\
7
5Driving your vehicle
Page 26 of 603
1-5
Your vehicle at a glance
1
I
IN
N S
ST
T R
R U
U M
M E
EN
N T
T
P
P A
A N
N E
EL
L
O
O V
VE
ER
R V
V I
IE
E W
W
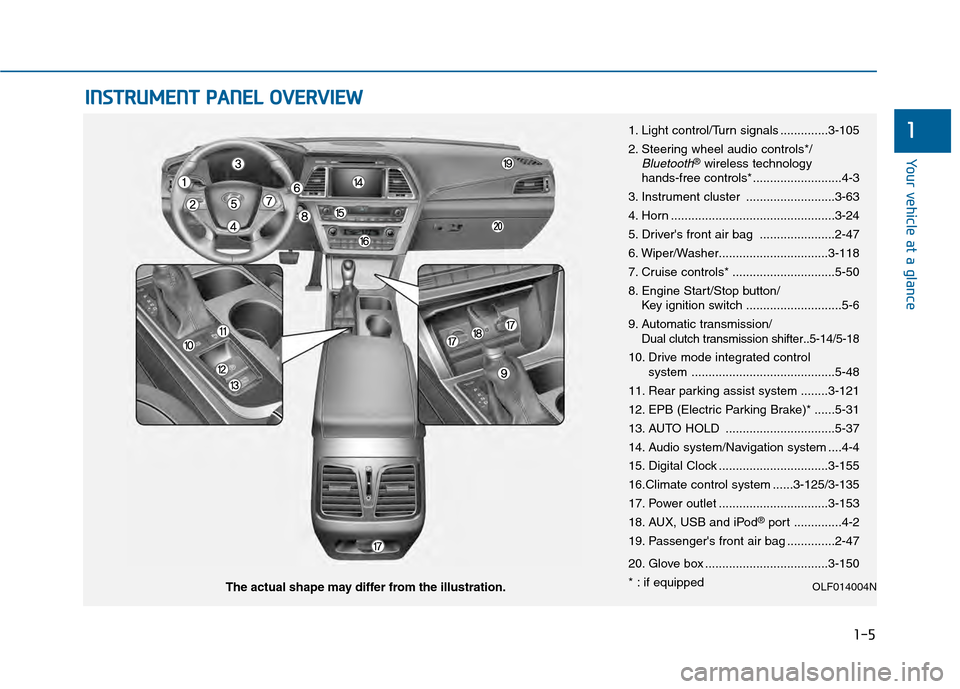
1. Light control/Turn signals ..............3-105
2. Steering wheel audio controls*/
Bluetooth®wireless technology
hands-free controls* ..........................4-3
3. Instrument cluster ..........................3-63
4. Horn ................................................3-24
5. Driver's front air bag ......................2-47
6. Wiper/Washer................................3-118
7. Cruise controls* ..............................5-50
8. Engine Start/Stop button/ Key ignition switch ............................5-6
9. Automatic transmission/
Dual clutch transmission shifter..5-14/5-18
10. Drive mode integrated control system ..........................................5-48
11. Rear parking assist system ........3-121
12. EPB (Electric Parking Brake)* ......5-31
13. AUTO HOLD ................................5-37
14. Audio system/Navigation system ....4-4
15. Digital Clock ................................3-155
16.Climate control system ......3-125/3-135
17. Power outlet ................................3-153
18. AUX, USB and iPod
®port ..............4-2
19. Passenger's front air bag ..............2-47
20. Glove box ....................................3-150
* : if equipped
OLF014004NThe actual shape may differ from the illustration.
Page 41 of 603
2-14
Safety system of your vehicle
Armrest
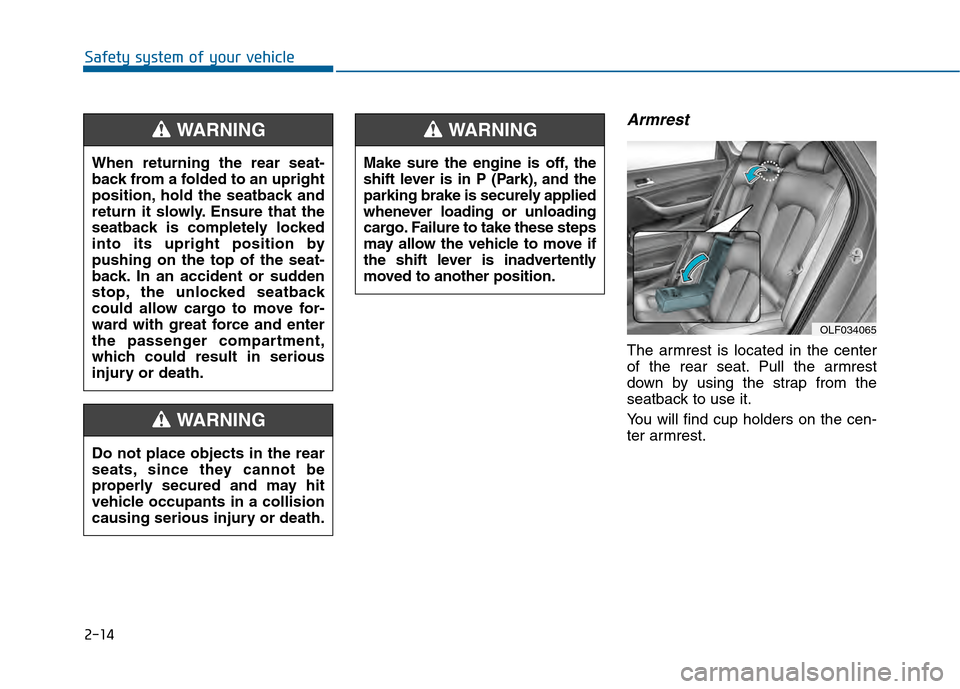
The armrest is located in the center
of the rear seat. Pull the armrest
down by using the strap from the
seatback to use it.
You will find cup holders on the cen-
ter armrest.
Do not place objects in the rear
seats, since they cannot be
properly secured and may hit
vehicle occupants in a collision
causing serious injury or death.
WARNING
Make sure the engine is off, the
shift lever is in P (Park), and the
parking brake is securely applied
whenever loading or unloading
cargo. Failure to take these steps
may allow the vehicle to move if
the shift lever is inadvertently
moved to another position.
WARNING
When returning the rear seat-
back from a folded to an upright
position, hold the seatback and
return it slowly. Ensure that the
seatback is completely locked
into its upright position by
pushing on the top of the seat-
back. In an accident or sudden
stop, the unlocked seatback
could allow cargo to move for-
ward with great force and enter
the passenger compartment,
which could result in serious
injury or death.
WARNING
OLF034065
Page 69 of 603
2-42
Safety system of your vehicle
Securing a child restraint witha lap belt or lap/shoulder belt
When not using the LATCH system,
all child restraints must be secured to
a vehicle rear seat with the lap part
of a lap/shoulder belt.
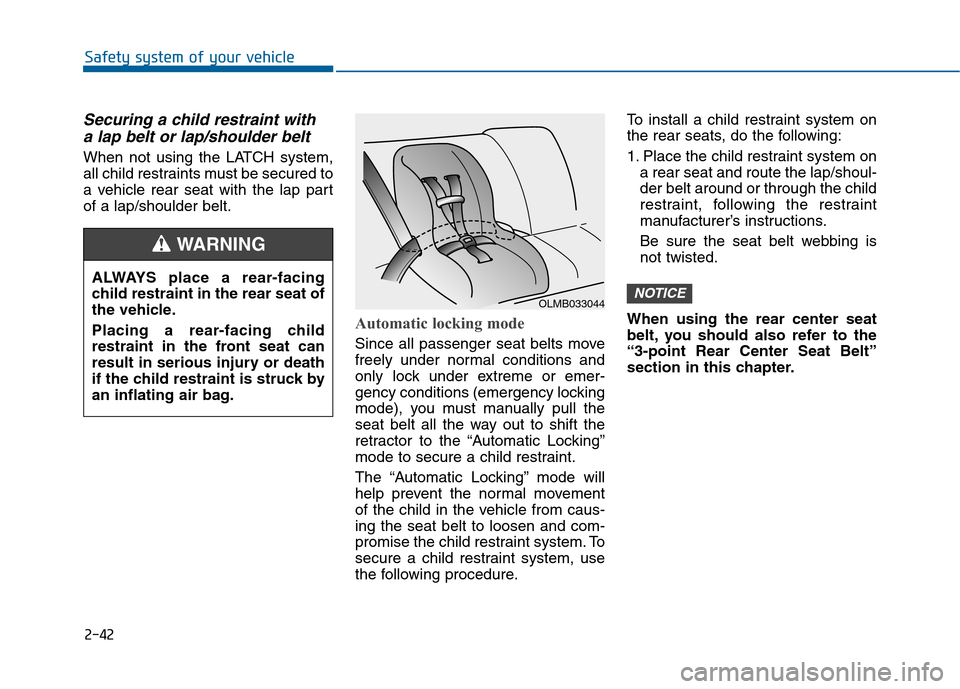
Automatic locking mode
Since all passenger seat belts move
freely under normal conditions and
only lock under extreme or emer-
gency conditions (emergency locking
mode), you must manually pull the
seat belt all the way out to shift the
retractor to the “Automatic Locking”
mode to secure a child restraint.
The “Automatic Locking” mode will
help prevent the normal movement
of the child in the vehicle from caus-
ing the seat belt to loosen and com-
promise the child restraint system. To
secure a child restraint system, use
the following procedure. To install a child restraint system on
the rear seats, do the following:
1. Place the child restraint system on
a rear seat and route the lap/shoul-
der belt around or through the child
restraint, following the restraint
manufacturer’s instructions.
Be sure the seat belt webbing is
not twisted.
When using the rear center seat
belt, you should also refer to the
“3-point Rear Center Seat Belt”
section in this chapter.
NOTICEALWAYS place a rear-facing
child restraint in the rear seat of
the vehicle.
Placing a rear-facing child
restraint in the front seat can
result in serious injury or death
if the child restraint is struck by
an inflating air bag.
WARNING
OLMB033044
Page 70 of 603
2-43
Safety system of your vehicle
2
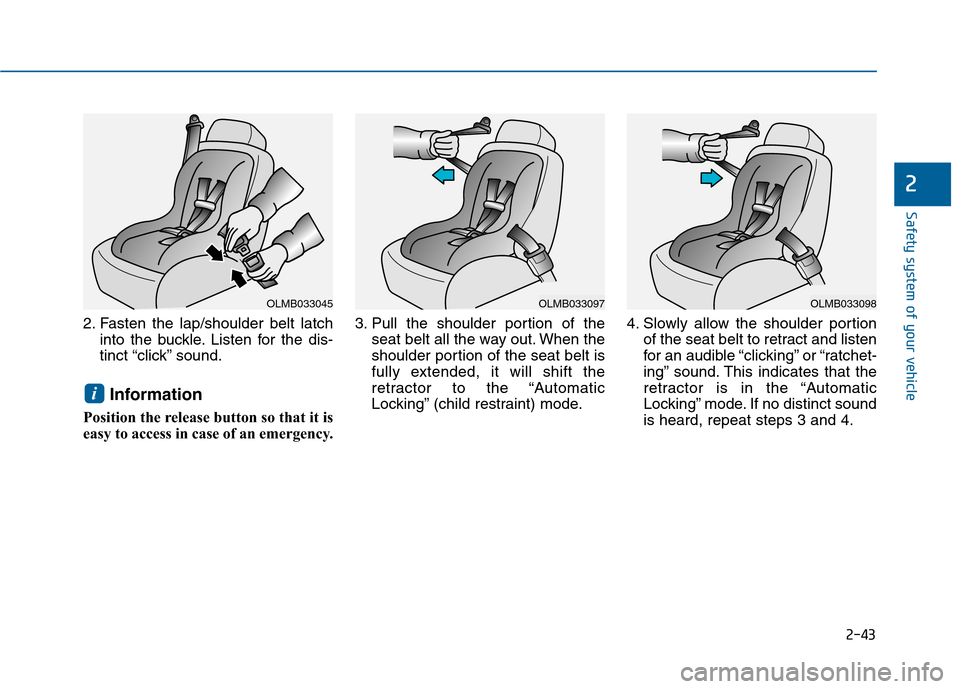
2. Fasten the lap/shoulder belt latchinto the buckle. Listen for the dis-
tinct “click” sound.
Information
Position the release button so that it is
easy to access in case of an emergency. 3. Pull the shoulder portion of the
seat belt all the way out. When the
shoulder portion of the seat belt is
fully extended, it will shift the
retractor to the “Automatic
Locking” (child restraint) mode. 4. Slowly allow the shoulder portion
of the seat belt to retract and listen
for an audible “clicking” or “ratchet-
ing” sound. This indicates that the
retractor is in the “Automatic
Locking” mode. If no distinct sound
is heard, repeat steps 3 and 4.
i
OLMB033045OLMB033097OLMB033098
Page 71 of 603
2-44
Safety system of your vehicle
5. Remove as much slack from the belt as possible by pushing down
on the child restraint system while
feeding the shoulder belt back into
the retractor.
6. Push and pull on the child restraint system to confirm that the seat
belt is holding it firmly in place. If it
is not, release the seat belt and
repeat steps 2 through 6.
7. Double check that the retractor is in the “Automatic Locking” mode
by attempting to pull more of the
seat belt out of the retractor. If you
cannot, the retractor is in the
“Automatic Locking” mode.
If your CRS manufacturer instructs or
recommends you to use a tether
anchor with the lap/shoulder belt,
refer to the previous pages for more
information. When the seat belt is allowed to
retract to its fully stowed position,
the retractor will automatically
switch from the “Automatic
Locking” mode to the emergency
lock mode for normal adult usage.
To remove the child restraint, press
the release button on the buckle and
then pull the lap/shoulder belt out of
the restraint and allow the seat belt
to retract fully.
NOTICE
If the retractor is not in the
“Automatic Locking” mode, the
child restraint can move when
your vehicle turns or stops sud-
denly. A child can be seriously
injured or killed if the child
restraint is not properly anchored
in the car, including manually
pulling the seat belt all the way
out to shift the rectractor to the
“Automatic Locking” mode.
WARNING
Page 85 of 603
2-58
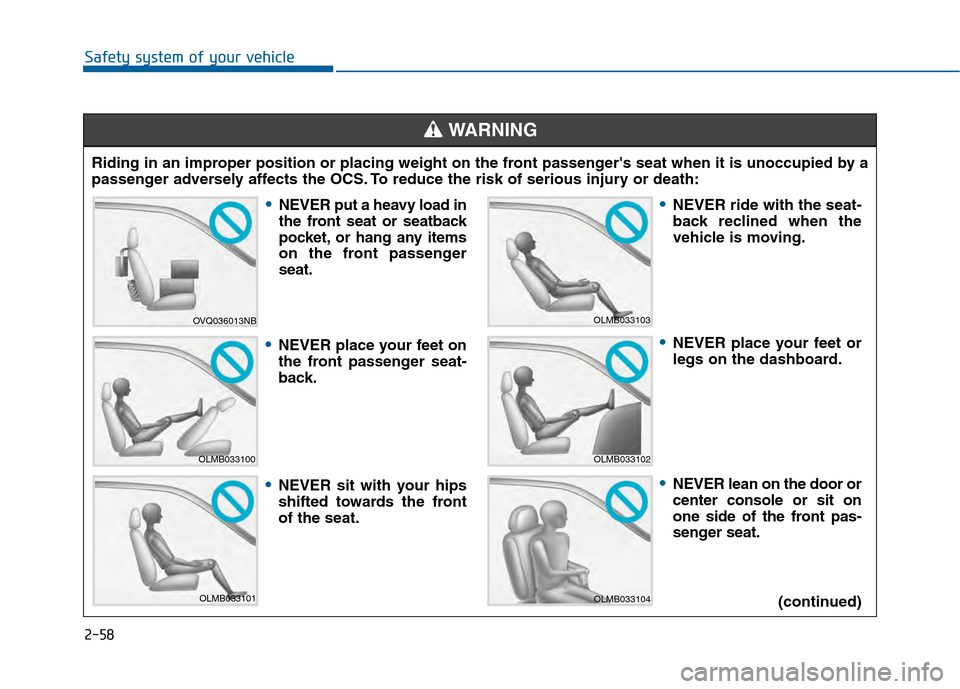
Safety system of your vehicleRiding in an improper position or placing weight on the front passenger's seat when it is unoccupied by a
passenger adversely affects the OCS. To reduce the risk of serious injury or death:
WARNING
OVQ036013NB
OLMB033100
OLMB033101
OLMB033103
OLMB033102
OLMB033104
NEVER put a heavy load in
the front seat or seatback
pocket, or hang any items
on the front passenger
seat.
NEVER place your feet on
the front passenger seat-
back.
NEVER sit with your hips
shifted towards the front
of the seat.
NEVER ride with the seat-
back reclined when the
vehicle is moving.
NEVER place your feet or
legs on the dashboard.
NEVER lean on the door or
center console or sit on
one side of the front pas-
senger seat. (continued)
Page 112 of 603
3-17
Convenient features of your vehicle
3
Auto Door Lock/Unlock Features
Impact sensing door unlocksystem
All doors will be automatically
unlocked when an impact causes the
air bags to deploy.
Speed sensing door lock system
All doors will be automatically locked
when vehicle speed exceeds 9 mph
(15 km/h).
All of the doors will be automatically
unlocked after the engine is turned off.
Shift lever auto door lock
All doors will be automatically locked
when shifting the shift lever out of P
(Park) with the engine running.
You can activate or deactivate the
Auto Door Lock/Unlock features from
the User Settings Mode on the LCD
display.
For more information, refer to the
"LCD Display" section in this
chapter.
Always secure your vehicle.
Leaving your vehicle unlocked
increases the potential risk to
you or others from someone
hiding in your vehicle.
To secure your vehicle, while
depressing the brake, move the
shift lever to the P (Park) posi-
tion, engage the parking brake,
and place the ignition switch in
the LOCK/OFF position, close
all windows, lock all doors, and
always take the key with you.WARNING
Opening a door when something
is approaching may cause dam-
age or injury. Be careful when
opening doors and watch for
vehicles, motorcycles, bicycles
or pedestrians approaching the
vehicle in the path of the door.
CAUTION
Page 115 of 603
3-20
Convenient features of your vehicle
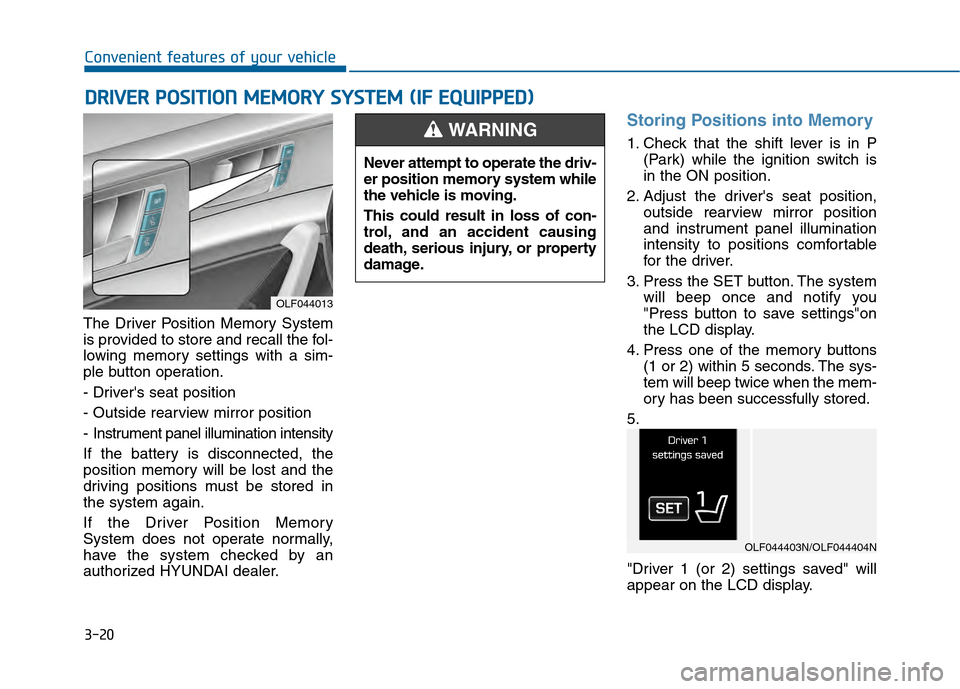
The Driver Position Memory System
is provided to store and recall the fol-
lowing memory settings with a sim-
ple button operation.
- Driver's seat position
- Outside rearview mirror position
- Instrument panel illumination intensity
If the battery is disconnected, the
position memory will be lost and the
driving positions must be stored in
the system again.
If the Driver Position Memory
System does not operate normally,
have the system checked by an
authorized HYUNDAI dealer.
Storing Positions into Memory
1. Check that the shift lever is in P (Park) while the ignition switch is
in the ON position.
2. Adjust the driver's seat position, outside rearview mirror position
and instrument panel illumination
intensity to positions comfortable
for the driver.
3. Press the SET button. The system will beep once and notify you
"Press button to save settings"on
the LCD display.
4. Press one of the memory buttons (1 or 2) within 5 seconds. The sys-
tem will beep twice when the mem-
ory has been successfully stored.
5.
"Driver 1 (or 2) settings saved" will
appear on the LCD display.
D D R
RI
IV
V E
ER
R
P
P O
O S
SI
IT
T I
IO
O N
N
M
M E
EM
M O
OR
RY
Y
S
S Y
Y S
ST
T E
EM
M
(
( I
IF
F
E
E Q
Q U
UI
IP
P P
PE
ED
D )
)
OLF044013
Never attempt to operate the driv-
er position memory system while
the vehicle is moving.
This could result in loss of con-
trol, and an accident causing
death, serious injury, or property
damage.
WARNING
OLF044403N/OLF044404N
Page 116 of 603
3-21
Convenient features of your vehicle
3
Recalling positions from memory
1. Check that the shift lever is in P(Park) while the ignition switch is
in the ON position.
2. Press the desired memory button (1 or 2). The system will beep once,
and then the driver's seat position,
outside rearview mirror position
and instrument panel illumination
intensity will automatically adjust to
the stored positions.
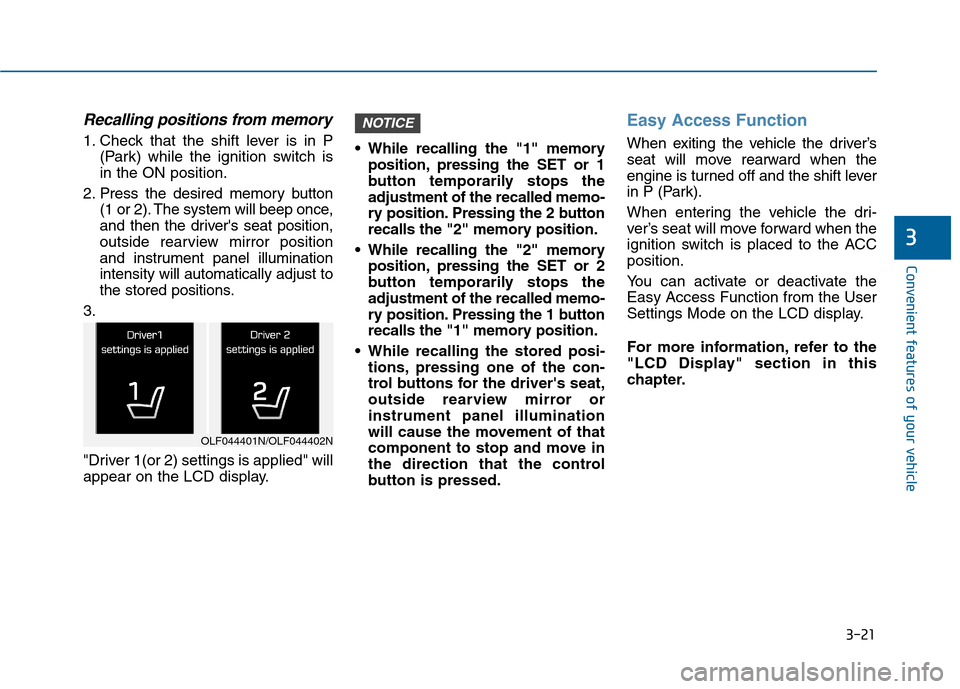
3.
"Driver 1(or 2) settings is applied" will
appear on the LCD display. While recalling the "1" memory
position, pressing the SET or 1
button temporarily stops the
adjustment of the recalled memo-
ry position. Pressing the 2 button
recalls the "2" memory position.
While recalling the "2" memory position, pressing the SET or 2
button temporarily stops the
adjustment of the recalled memo-
ry position. Pressing the 1 button
recalls the "1" memory position.
While recalling the stored posi- tions, pressing one of the con-
trol buttons for the driver's seat,
outside rearview mirror or
instrument panel illumination
will cause the movement of that
component to stop and move in
the direction that the control
button is pressed.
Easy Access Function
When exiting the vehicle the driver’s
seat will move rearward when the
engine is turned off and the shift lever
in P (Park).
When entering the vehicle the dri-
ver’s seat will move forward when the
ignition switch is placed to the ACC
position.
You can activate or deactivate the
Easy Access Function from the User
Settings Mode on the LCD display.
For more information, refer to the
"LCD Display" section in this
chapter.
NOTICE
OLF044401N/OLF044402N