CODE Hyundai Sonata 2017 Owner's Manual
[x] Cancel search | Manufacturer: HYUNDAI, Model Year: 2017, Model line: Sonata, Model: Hyundai Sonata 2017Pages: 563, PDF Size: 17.7 MB
Page 6 of 563
F6
Introduction
We want to help you get the greatest
possible driving pleasure from your
vehicle. Your Owner’s Manual can
assist you in many ways. To gain an
overview of the contents of your
Owner’s Manual, use the Table of
Contents in the front of the manual.
The first page of each Chapter
includes a detailed Table of Contents
of the Topics in that Chapter.
To quickly locate information about
your vehicle, use the Index in the
back of the manual. It is an alphabet-
ical list of what is in this manual and
the page number where it can be
found.
For your convenience, we have
incorporated tabs on the right-hand
page edges. These tabs are coded
with the Chapter titles to assist you
with navigating through the manual. Your safety, and the safety of others,
is very important. This Owner’s
Manual provides you with many safe-
ty precautions and operating proce-
dures. This information alerts you to
potential hazards that may hurt you
or others, as well as damage to your
vehicle.
Safety messages found on vehicle
labels and in this manual describe
these hazards and what to do to
avoid or reduce the risks.
Warnings and instructions contained
in this manual are for your safety.
Failure to follow safety warnings and
instructions can lead to serious injury
or death.
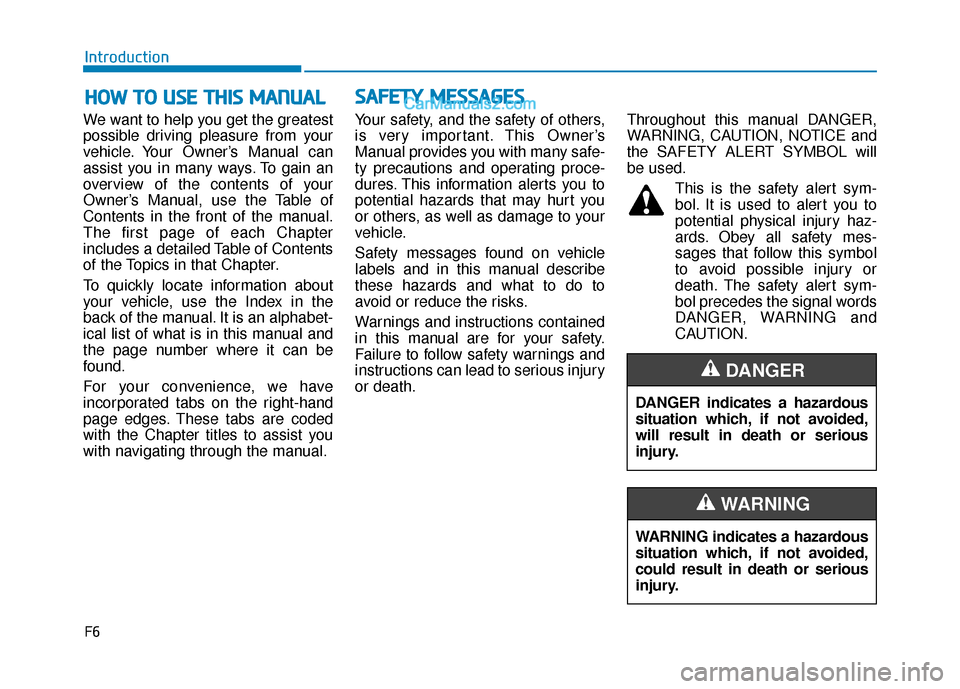
Throughout this manual DANGER,
WARNING, CAUTION, NOTICE and
the SAFETY ALERT SYMBOL will
be used.
This is the safety alert sym-bol. It is used to alert you to
potential physical injury haz-
ards. Obey all safety mes-
sages that follow this symbol
to avoid possible injury or
death. The safety alert sym-
bol precedes the signal words
DANGER, WARNING and
CAUTION.
H H O
O W
W
T
T O
O
U
U S
SE
E
T
T H
H I
IS
S
M
M A
AN
N U
U A
AL
L
DANGER indicates a hazardous
situation which, if not avoided,
will result in death or serious
injury.
DANGER
WARNING indicates a hazardous
situation which, if not avoided,
could result in death or serious
injury.
WARNING
S SA
A F
FE
E T
T Y
Y
M
M E
ES
SS
SA
A G
G E
ES
S
Page 97 of 563
3-12
Convenient features of your vehicle
Battery replacement
If the Smart Key is not working prop-
erly, try replacing the battery with a
new one.
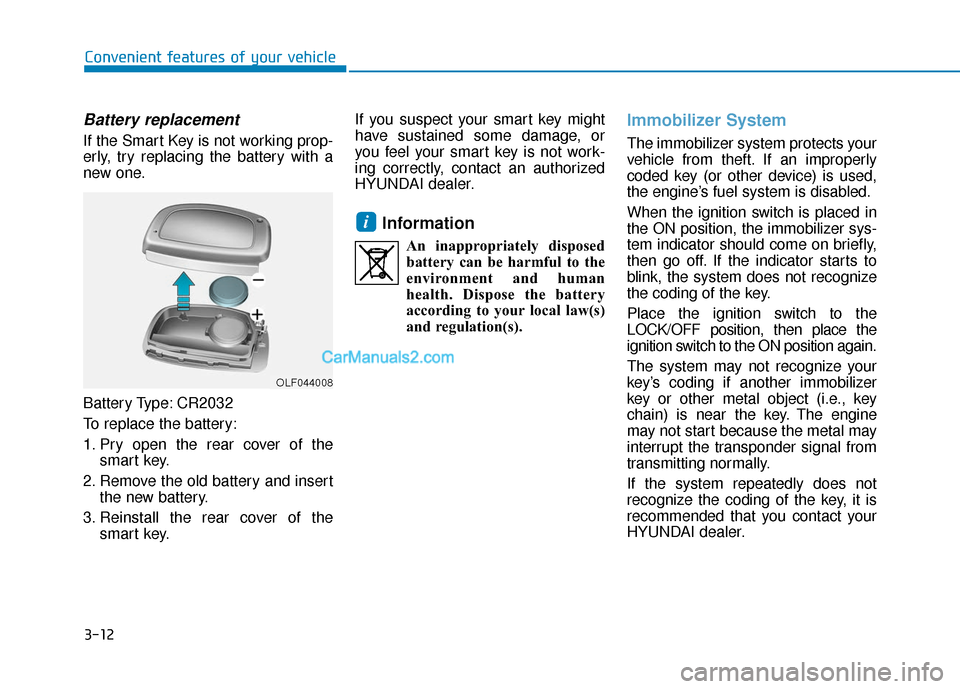
Battery Type: CR2032
To replace the battery:
1. Pry open the rear cover of thesmart key.
2. Remove the old battery and insert the new battery.
3. Reinstall the rear cover of the smart key. If you suspect your smart key might
have sustained some damage, or
you feel your smart key is not work-
ing correctly, contact an authorized
HYUNDAI dealer.
Information
An inappropriately disposed
battery can be harmful to the
environment and human
health. Dispose the battery
according to your local law(s)
and regulation(s).
Immobilizer System
The immobilizer system protects your
vehicle from theft. If an improperly
coded key (or other device) is used,
the engine’s fuel system is disabled.
When the ignition switch is placed in
the ON position, the immobilizer sys-
tem indicator should come on briefly,
then go off. If the indicator starts to
blink, the system does not recognize
the coding of the key.
Place the ignition switch to the
LOCK/OFF position, then place the
ignition switch to the ON position again.
The system may not recognize your
key’s coding if another immobilizer
key or other metal object (i.e., key
chain) is near the key. The engine
may not start because the metal may
interrupt the transponder signal from
transmitting normally.
If the system repeatedly does not
recognize the coding of the key, it is
recommended that you contact your
HYUNDAI dealer.
i
OLF044008
Page 114 of 563
3-29
Convenient features of your vehicle
3
To adjust the Zone setting:
1. Determine the desired ZoneNumber based upon your current
location on the Zone Map.
2. Press and hold the button for 6 seconds, the current Zone
Number will appear on the display.
3. Pressing and holding the button again will cause the numbers to
increment (Note: they will repeat
…13, 14, 15, 1, 2, …). Releasing
the button when the desired Zone
Number appears on the display
will set the new Zone.
4. Within about 5 seconds the com- pass will start displaying a com-
pass heading again.
There are some conditions that can
cause changes to the vehicle mag-
nets, such as installing a ski rack or
a CB antenna. Body repair work on
the vehicle can also cause changes
to the vehicle’s magnetic field. In
these situations, the compass will
need to be re-calibrated to quickly
correct these changes. If you need to recalibrate the com-
pass:
1. Press and hold the button for
more than 9 seconds. When the
compass memory is cleared a "C"
will appear in the display.
2. Drive the vehicle in 2 complete cir- cles at less than 5 mph (8 km/h).Integrated HomeLink®Wireless
Control System
The HomeLink®Wireless Control
System can replace up to three
hand-held radio-frequency (RF)
transmitters with a single built-in
device. This innovative feature will
learn the radio frequency codes of
most current transmitters to operate
devices such as gate operators,
garage door openers, entry door
locks, security systems, even home
lighting. Both standard and rolling
code-equipped transmitters can be
programmed by following the out-
lined procedures.
Additional HomeLink
®information
can be found at: www.homelink.com
or by calling 1-800-355-3515.
Retain the original transmitter of the
RF device you are programming for
use in other vehicles as well as for
future HomeLink
®programming. It is
also suggested that upon the sale of
the vehicle, the programmed
HomeLink
®buttons be erased for
security purposes.
Page 116 of 563
3-31
Convenient features of your vehicle
3
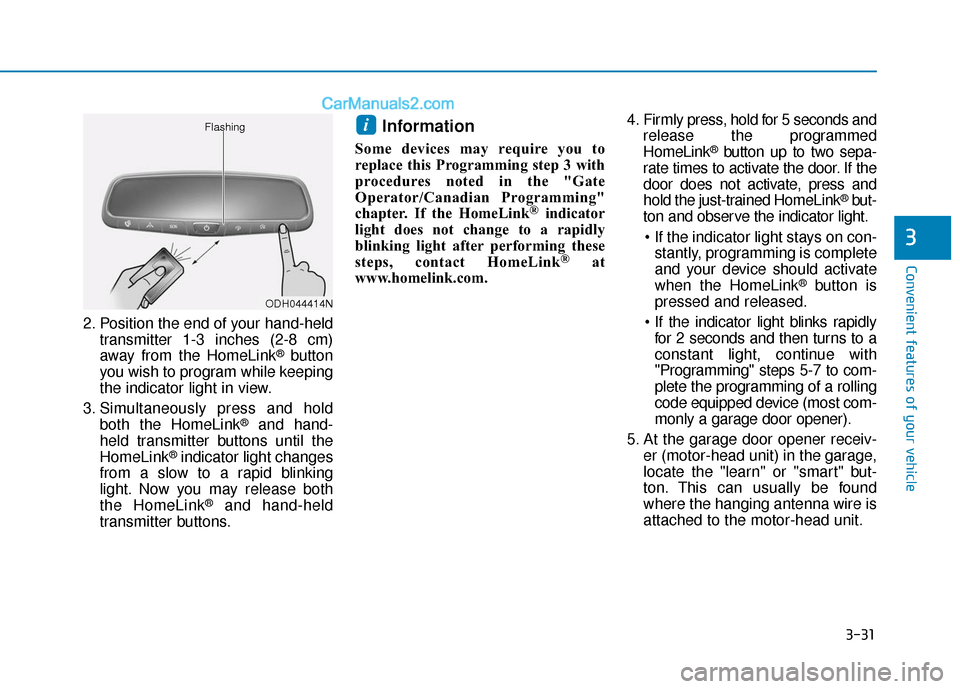
2. Position the end of your hand-heldtransmitter 1-3 inches (2-8 cm)
away from the HomeLink
®button
you wish to program while keeping
the indicator light in view.
3. Simultaneously press and hold both the HomeLink
®and hand-
held transmitter buttons until the
HomeLink
®indicator light changes
from a slow to a rapid blinking
light. Now you may release both
the HomeLink
®and hand-held
transmitter buttons.
Information
Some devices may require you to
replace this Programming step 3 with
procedures noted in the "Gate
Operator/Canadian Programming"
chapter. If the HomeLink
®indicator
light does not change to a rapidly
blinking light after performing these
steps, contact HomeLink
®at
www.homelink.com. 4. Firmly press, hold for 5 seconds and
release the programmed
HomeLink
®button up to two sepa-
rate times to activate the door. If the
door does not activate, press and
hold the just-trained HomeLink
®but-
ton and observe the indicator light.
stantly, programming is complete
and your device should activate
when the HomeLink
®button is
pressed and released.
for 2 seconds and then turns to a
constant light, continue with
"Programming" steps 5-7 to com-
plete the programming of a rolling
code equipped device (most com-
monly a garage door opener).
5. At the garage door opener receiv- er (motor-head unit) in the garage,
locate the "learn" or "smart" but-
ton. This can usually be found
where the hanging antenna wire is
attached to the motor-head unit.
i
ODH044414N
Flashing
Page 117 of 563
3-32
Convenient features of your vehicle
6. Firmly press and release the "learn" or "smart" button. (The
name and color of the button vary
by manufacturer). There are 30
seconds to initiate step 7.
7. Return to the vehicle and firmly press, hold for 2 seconds and
release the programmed
HomeLink
®button. Repeat the
"press/hold/release" sequence a
second time, and, depending on the
brand of the garage door opener (or
other rolling code equipped device),
repeat this sequence a third time to
complete the programming
process.
HomeLink
®should now activate your
rolling code equipped device.
Gate operator & Canadian program- ming
During programming, your handheld
transmitter may automatically stop
transmitting. Continue to press the
Integrated HomeLink
®Wireless
Control System button (note steps 2
through 3 in the Programming portion
of this document) while you press
and re-press ("cycle") your handheld
transmitter every two seconds until
the frequency signal has been
learned. The indicator light will flash
slowly and then rapidly after several
seconds upon successful training.
Operating HomeLink®
To operate, simply press and release
the programmed HomeLink®button.
Activation will now occur for the
trained device (i.e. garage door
opener, gate operator, security sys-
tem, entry door lock, home/office
lighting, etc.). For convenience, the
hand-held transmitter of the device
may also be used at any time.
Reprogramming a single HomeLink®
button
To program a device to HomeLink®
using a HomeLink®button previously
trained, follow these steps:
1.Press and hold the desired HomeLink
®button. DO NOT
release the button.
2.The indicator light will begin to flash after 20 seconds. Without releasing
the HomeLink
®button, proceed
with "Programming" step 2.
For questions or comments, contact
HomeLink
®at www.homelink.comor
1-800-355-3515.
Page 121 of 563
3-36
Convenient features of your vehicle
To adjust the Zone setting:
1. Determine the desired Zone Number based upon your current
location on the Zone Map.
2. Press and hold the button for more than 3 but less than 6 sec-
onds, the current Zone Number
will appear on the display.
3. Pressing and holding the button again will cause the numbers to
increment (Note: they will repeat
…13, 14, 15, 1, 2, …). Releasing
the button when the desired Zone
Number appears on the display
will set the new Zone.
4. Within about 5 seconds the com- pass will start displaying a com-
pass heading again.
There are some conditions that can
cause changes to the vehicle mag-
nets, such as installing a ski rack or
a CB antenna. Body repair work on
the vehicle can also cause changes
to the vehicle’s magnetic field. In
these situations, the compass will
need to be re-calibrated to quickly
correct these changes. If you need to recalibrate the com-
pass:
1. Press and hold the button for
more than 6 seconds. When the
compass memory is cleared a "C"
will appear in the display.
2. Drive the vehicle in 2 complete cir- cles at less than 5 mph (8 km/h).
Integrated HomeLink®Wireless
Control System
The HomeLink®Wireless Control
System can replace up to three hand-
held radio-frequency (RF) transmit-
ters with a single built-in device. This
innovative feature will learn the radio
frequency codes of most current
transmitters to operate devices such
as gate operators, garage door open-
ers, entry door locks, security sys-
tems, even home lighting. Both stan-
dard and rolling code-equipped trans-
mitters can be programmed by fol-
lowing the outlined procedures.
Additional HomeLink
®information
can be found at: www.homelink.com
or by calling 1-800-355-3515.
Retain the original transmitter of the
RF device you are programming for
use in other vehicles as well as for
future HomeLink
®programming. It is
also suggested that upon the sale of
the vehicle, the programmed
HomeLink
®buttons be erased for
security purposes.
Page 122 of 563
3-37
Convenient features of your vehicle
3
Programming HomeLink®
Please note the following:
When programming a garage dooropener, it is advised to park the
vehicle outside of the garage.
It is recommended that a new bat- tery be placed in the hand-held
transmitter of the device being pro-
grammed to HomeLink
®for quicker
training and accurate transmission
of the radio-frequency signal.
Some vehicles may require the ignition switch to be placed in the
ACC (or "Accessories") position for
programming and/or operation of
HomeLink
®.
In the event that there are still pro- gramming difficulties or questions
after following the programming
steps listed below, contact
HomeLink
®at: www.homelink.com
or by calling 1-800-355-3515.
Rolling code programming
Rolling code devices which are
"code-protected" and manufactured
after 1996 may be determined by the
following:
Reference the device owner’s manual for verification.
The handheld transmitter appears to program the HomeLink
®
Universal Transceiver but does not
activate the device.
Press and hold the trained HomeLink button. The device has
the rolling code feature if the indi-
cator light flashes rapidly and then
turns solid after 2 seconds.
Before programming HomeLink
®
to a garage door opener or gate
operator, make sure people and
objects are out of the way of the
device to prevent potential harm
or damage. Do not use the
HomeLink
®with any garage door
opener that lacks the safety stop
and reverse features required by
U.S. federal safety standards (this
includes any garage door opener
model manufactured before April
1, 1982). A garage door that can-
not detect an object - signaling
the door to stop and reverse -
does not meet current U.S. feder-
al safety standards. Using a
garage door opener without
these features increases the risk
of serious injury or death.
WARNING
Page 123 of 563
3-38
Convenient features of your vehicle
To train rolling code devices, follow
these instructions:
1. At the garage door opener receiv- er (motor-head unit) in the garage,
locate the "learn" or "smart" but-
ton. This can usually be found
where the hanging antenna wire is
attached to the motor-head unit.
Exact location and color of the but-
ton may vary by garage door
opener brand. If there is difficulty
locating the training button, refer-
ence the device owner’s manual or
please visit our Web site at
www.homelink.com.
2. Firmly press and release the "learn" or "smart" button (which
activates the "training light"). You
will have 30 seconds to initiate
step 3. 3. Return to the vehicle and firmly
press, hold for two seconds and
then release the desired
HomeLink
®button. Repeat the
"press/hold/release" sequence a
second time to complete the pro-
gramming. (Some devices may
require you to repeat this
sequence a third time to complete
the programming.)
4. Press and hold the just-trained HomeLink
®button and observe
the red Status Indicator LED. If the
indicator light stays on constantly,
programming is complete and
your device should activate.
5. To program the remaining two HomeLink
®buttons, follow either
steps 1 through 4 above for other
Rolling Code devices or steps 2
through 5 in Standard Programming
for standard devices.
Standard programming
To train most devices, follow these
instructions:
1. For first-time programming, press and hold the two outside buttons,
HomeLink
®Channel 1 and
Channel 3 Buttons, until the indi-
cator light begins to flash (after 20
seconds). Release both buttons.
Do not hold the buttons for longer
than 30 seconds.
2. Position the end of your hand-held transmitter 1-3 inches (2-8 cm)
away from the HomeLink
®buttons
while keeping the indicator light in
view.
3. Simultaneously press and hold both the HomeLink
®and hand-
held transmitter button. DO NOT
release the buttons until step 4
has been completed.
4. While continuing to hold the but- tons the red Indicator Status LED
will flash slowly and then rapidly
after HomeLink
®successfully
trains to the frequency signal from
the hand-held transmitter. Release
both buttons.
Page 259 of 563
4-11
Multimedia System
(Continued)
• Clean fingerprints and dust off thedisc surface (coated side) with a soft
cloth.
• The use of CD-R/CD-RW discs attached with labels may result in
disc slot jams or difficulties in disc
removal. Such discs may also result
in noise while playing.
• Some CD-R/CD-RW discs may not properly operate depending on the
disc manufacturer, production
method and the record method as
used by the user. If problems persist,
trying using a different CD as con-
tinued use may result in malfunc-
tions.
• The performance of this product may differ depending on the CD-
RW Drive Software.
• Copy-protected CDs such as S-type CDs may not function in the device.
DATA discs cannot be played.
(However, such discs may still oper-
ate but will do so abnormally.)
(Continued)(Continued)
• Do not use abnormally shaped discs
(8cm, heart-shaped, octagon-
shaped) as such discs could lead to
malfunctions.
• If the disc is straddled on the disc slot without removal for 10 seconds,
the disc will automatically be re-
inserted into the disc player.
• Only genuine audio CDs are sup- ported. Other discs may result in
recognition failure (e.g. copy CD-R,
CDs with labels)Information -Using the USB
device
• Connect the USB device after turn- ing on the engine. The USB device
may become damaged if it is already
connected when the ignition is
turned on.The USB device may not
operate properly if the car ignition
is turned on or off with the USB
device connected.
• Heed caution to static electricity when connecting/disconnecting USB
devices.
• Encoded MP3 Players will not be recognized when connected as an
external device.
• When connecting an external USB device, the device may not properly
recognize the USB is in some states.
• Only products formatted with byte/sectors under 64Kbyte will be
recognized.
• This device recognizes USB devices formatted in FAT 12/16/32 file for-
mats. This device does not recognize
files in NTFS file format.
(Continued)i
4
Page 492 of 563
7-47
7
Maintenance
Tire Maintenance
In addition to proper inflation, correct
wheel alignment helps to decrease
tire wear. If you find a tire is worn
unevenly, have your dealer check the
wheel alignment.
When you have new tires installed,
make sure they are balanced. This
will increase vehicle ride comfort and
tire life. Additionally, a tire should
always be rebalanced if it is removed
from the wheel.
Tire Sidewall Labeling
This information identifies and
describes the fundamental charac-
teristics of the tire and also provides
the tire identification number (TIN)
for safety standard certification. The
TIN can be used to identify the tire in
case of a recall.
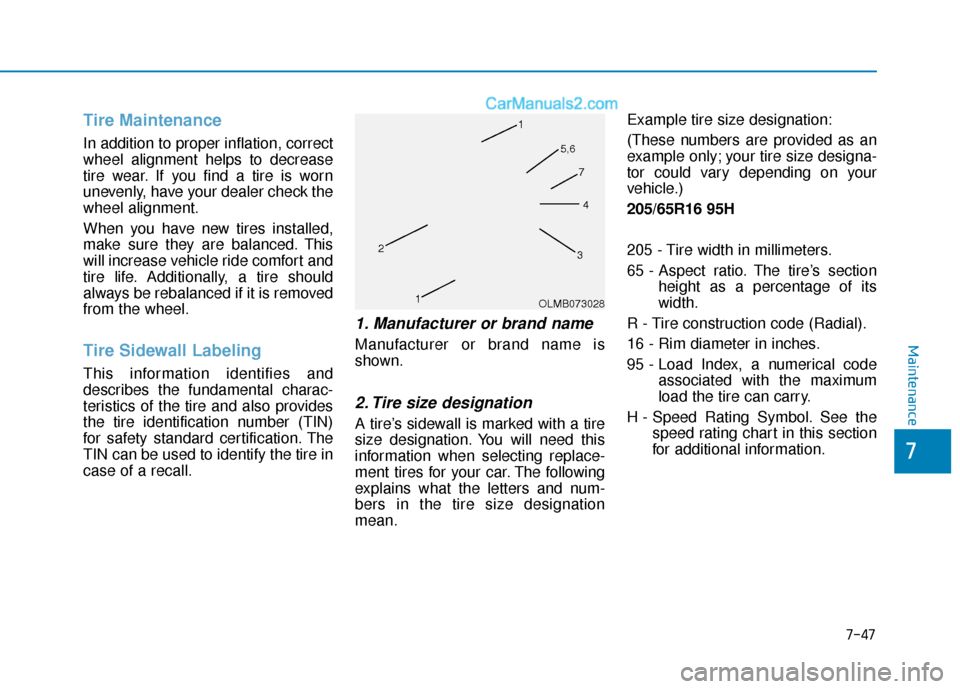
1. Manufacturer or brand name
Manufacturer or brand name is
shown.
2. Tire size designation
A tire’s sidewall is marked with a tire
size designation. You will need this
information when selecting replace-
ment tires for your car. The following
explains what the letters and num-
bers in the tire size designation
mean.Example tire size designation:
(These numbers are provided as an
example only; your tire size designa-
tor could vary depending on your
vehicle.)
205/65R16 95H
205 - Tire width in millimeters.
65 - Aspect ratio. The tire’s section
height as a percentage of its
width.
R - Tire construction code (Radial).
16 - Rim diameter in inches.
95 - Load Index, a numerical code associated with the maximum
load the tire can carry.
H - Speed Rating Symbol. See the speed rating chart in this section
for additional information.
OLMB073028
1
1
2
34
5,6
7