remote control Hyundai Sonata 2017 Owner's Manual
[x] Cancel search | Manufacturer: HYUNDAI, Model Year: 2017, Model line: Sonata, Model: Hyundai Sonata 2017Pages: 563, PDF Size: 17.7 MB
Page 86 of 563
Convenient features of your vehicle
Accessing your vehicle .........................................3-4
Remote Key........................................................................\
.3-4
Smart Key ........................................................................\
....3-8
Immobilizer System .........................................................3-12
Door locks .............................................................3-14
Outside the Vehicle.........................................................3-14
Inside the Vehicle ............................................................3-15
Auto Door Lock/Unlock Features ...............................3-17
Child-Protector Rear Door locks ................................3-18
Theft-alarm system.............................................3-19
Driver position memory system .........................3-20
Storing Positions into Memory ....................................3-20
Easy Access Function ....................................................3-21
Steering wheel......................................................3-22
Electric Power Steering (EPS) .....................................3-22
Tilt Steering / Telescope Steering ..............................3-23
Heated Steering Wheel ..................................................3-23
Horn ........................................................................\
............3-24
Mirrors ...................................................................3-25
Inside Rearview Mirror ..................................................3-25
Side view Mirrors ............................................................3-40
Reverse Parking Aid Function......................................3-43
Windows ................................................................3-44
Power Windows ...............................................................3-45
Sunroof..................................................................3-48
Sunroof opening and closing .......................................3-48
Sliding the sunroof .........................................................3-49
Tilting the sunroof ..........................................................3-49
Sunshade ........................................................................\
...3-50
Resetting the sunroof ....................................................3-51
Panoramic sunroof ..............................................3-52
Sunshade ........................................................................\
...3-52
Sliding the Sunroof .........................................................3-53
Tilting the Sunroof .........................................................3-53
Closing the Sunroof........................................................3-54
To Reset the Sunroof.....................................................3-55
Exterior features .................................................3-56
Hood ........................................................................\
...........3-56
Trunk ........................................................................\
..........3-57
Smart Trunk ......................................................................3-\
60
Fuel Filler Door ................................................................3-63
Instrument cluster................................................3-67
Instrument Cluster Control............................................3-69
LCD Display Control ........................................................3-70
3
Page 125 of 563
3-40
Convenient features of your vehicle
Erasing HomeLink®buttons
Individual buttons cannot be erased.
However, to erase all three pro-
grammed buttons:
1. Press and hold the two outerHomeLink
®buttons until the indi-
cator light begins to flash-after 20
seconds.
2. Release both buttons. Do not hold for longer than 30 seconds.
The Integrated HomeLink
®Wireless
Control System is now in the training
(learn) mode and can be pro-
grammed at any time following the
appropriate steps in the Programming
chapters above.
NVS
®is a registered trademark and
Z-Nav™ is a trademark of the Gentex
Corporation, Zeeland, Michigan.
HomeLink
®is a registered trademark
owned by Johnson Controls,
Incorporated, Milwaukee, Wisconsin.
FCC ID: NZLZTVHL3
IC: 4112A-ZTVHL3
Information
This device complies with Part 15 of
the FCC Rules.
Operation is subject to the following
three conditions:
1. This device may not cause harmful interference, and
2. This device must accept any interfer- ence received, including interference
that may cause undesired operation.
3. The transceiver has been tested and complies with FCC and Industry
Canada rules. Changes or modifica-
tions not expressly approved by the
party responsible for compliance
could void the user’s authority to
operate the device.
Side View Mirrors
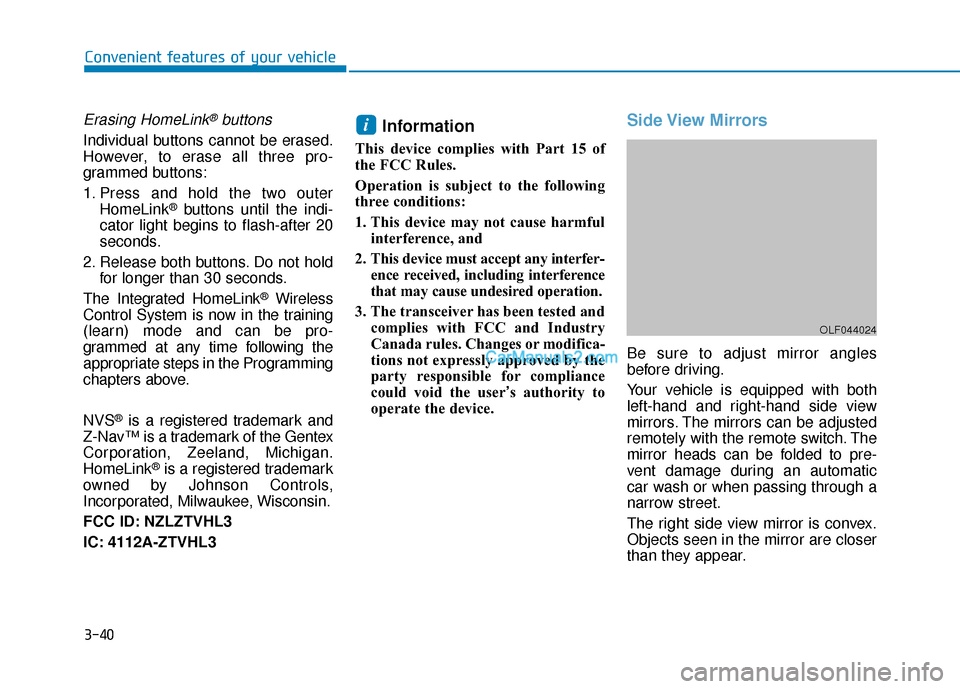
Be sure to adjust mirror angles
before driving.
Your vehicle is equipped with both
left-hand and right-hand side view
mirrors. The mirrors can be adjusted
remotely with the remote switch. The
mirror heads can be folded to pre-
vent damage during an automatic
car wash or when passing through a
narrow street.
The right side view mirror is convex.
Objects seen in the mirror are closer
than they appear.
i
OLF044024
Page 128 of 563
3-43
Convenient features of your vehicle
3
Reverse Parking Aid Function
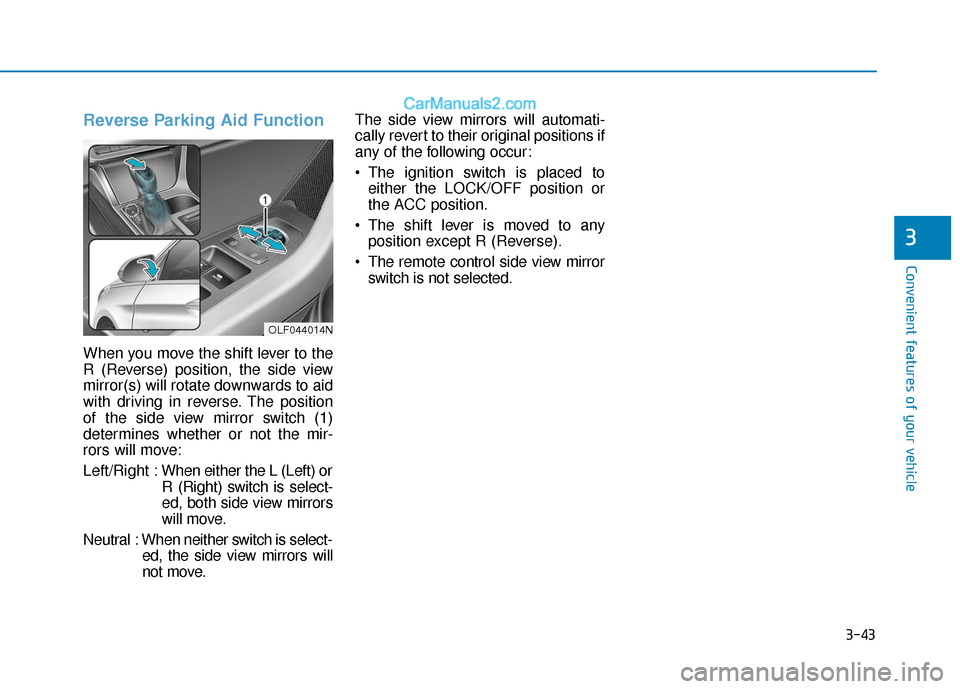
When you move the shift lever to the
R (Reverse) position, the side view
mirror(s) will rotate downwards to aid
with driving in reverse. The position
of the side view mirror switch (1)
determines whether or not the mir-
rors will move:
Left/Right :When either the L (Left) or
R (Right) switch is select-
ed, both side view mirrors
will move.
Neutral : When neither switch is select- ed, the side view mirrors will
not move. The side view mirrors will automati-
cally revert to their original positions if
any of the following occur:
The ignition switch is placed to
either the LOCK/OFF position or
the ACC position.
The shift lever is moved to any position except R (Reverse).
The remote control side view mirror switch is not selected.
OLF044014N
Page 144 of 563
3-59
Convenient features of your vehicle
Trunk lid control switch
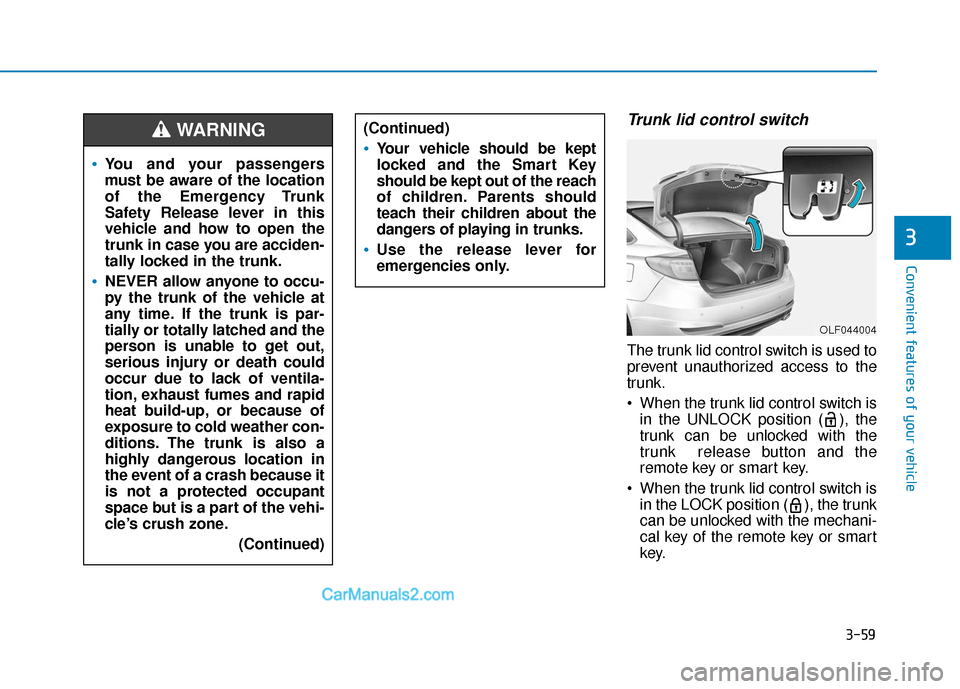
The trunk lid control switch is used to
prevent unauthorized access to the
trunk.
When the trunk lid control switch isin the UNLOCK position ( ), the
trunk can be unlocked with the
trunk release button and the
remote key or smart key.
When the trunk lid control switch is in the LOCK position ( ), the trunk
can be unlocked with the mechani-
cal key of the remote key or smart
key.
3
You and your passengers
must be aware of the location
of the Emergency Trunk
Safety Release lever in this
vehicle and how to open the
trunk in case you are acciden-
tally locked in the trunk.
NEVER allow anyone to occu-
py the trunk of the vehicle at
any time. If the trunk is par-
tially or totally latched and the
person is unable to get out,
serious injury or death could
occur due to lack of ventila-
tion, exhaust fumes and rapid
heat build-up, or because of
exposure to cold weather con-
ditions. The trunk is also a
highly dangerous location in
the event of a crash because it
is not a protected occupant
space but is a part of the vehi-
cle’s crush zone.
(Continued)
(Continued)
Your vehicle should be kept
locked and the Smart Key
should be kept out of the reach
of children. Parents should
teach their children about the
dangers of playing in trunks.
Use the release lever for
emergencies only.
WARNING
OLF044004
Page 151 of 563
3-66
Convenient features of your vehicle
Information
Make sure to refuel your vehicle
according to the "Fuel Requirements"
suggested in the Introduction chapter.
Do not spill fuel on the exteriorsurfaces of the vehicle. Any type
of fuel spilled on painted sur-
faces may damage the paint.
If the fuel filler cap requires replacement, use only a genuine
HYUNDAI cap or the equivalent
specified for your vehicle. An
incorrect fuel filler cap can
result in a serious malfunction
of the fuel system or emission
control system.
Emergency fuel filler door release
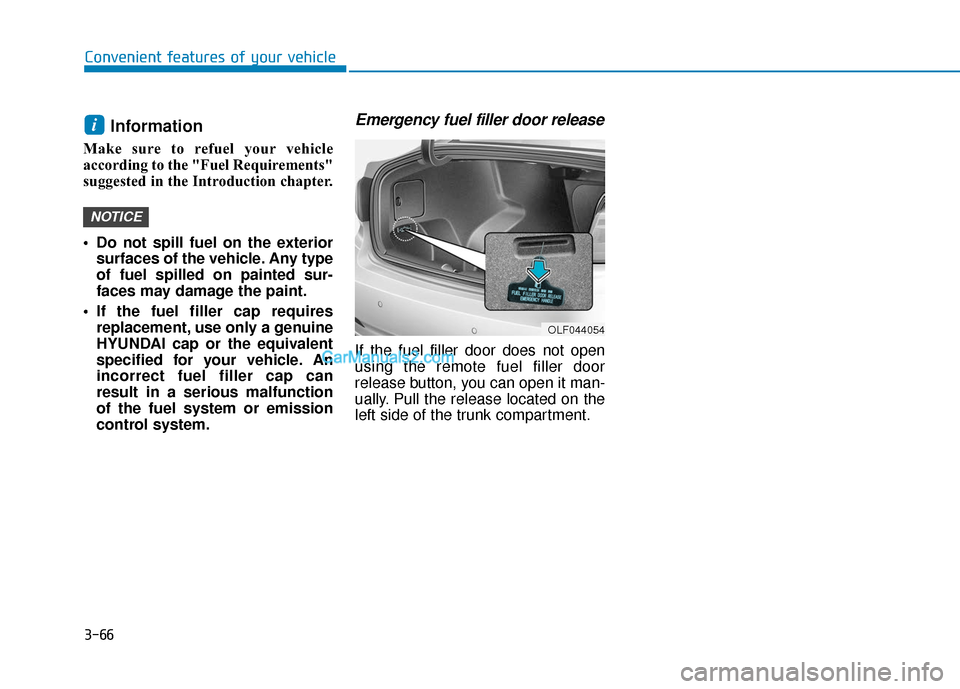
If the fuel filler door does not open
using the remote fuel filler door
release button, you can open it man-
ually. Pull the release located on the
left side of the trunk compartment.
NOTICE
i
OLF044054
Page 251 of 563
4-3
Multimedia System
Do not clean the inside of therear window glass with a cleaner
or scraper to remove foreign
deposits as this may cause dam-
age to the antenna elements.
Avoid adding metallic coatings such as Ni, Cd, and so on. These
can degrade the receiving AM
and FM broadcast signals.
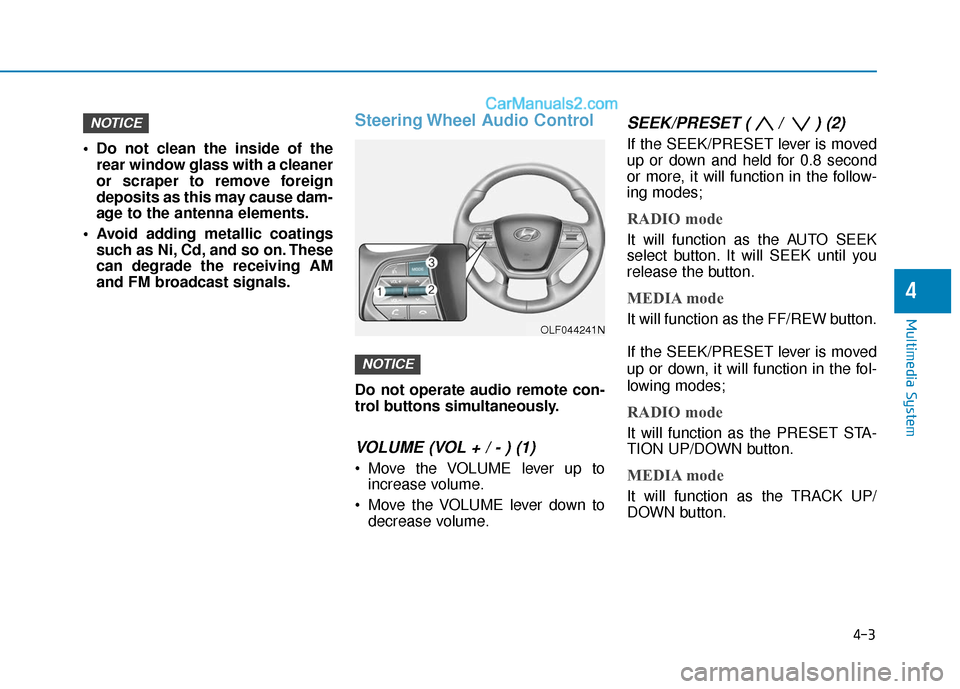
Steering Wheel Audio Control
Do not operate audio remote con-
trol buttons simultaneously.
VOLUME (VOL + / - ) (1)
Move the VOLUME lever up toincrease volume.
Move the VOLUME lever down to decrease volume.
SEEK/PRESET ( / ) (2)
If the SEEK/PRESET lever is moved
up or down and held for 0.8 second
or more, it will function in the follow-
ing modes;
RADIO mode
It will function as the AUTO SEEK
select button. It will SEEK until you
release the button.
MEDIA mode
It will function as the FF/REW button.
If the SEEK/PRESET lever is moved
up or down, it will function in the fol-
lowing modes;
RADIO mode
It will function as the PRESET STA-
TION UP/DOWN button.
MEDIA mode
It will function as the TRACK UP/
DOWN button.
NOTICE
NOTICE
4
OLF044241N
Page 282 of 563
4-34
Multimedia System
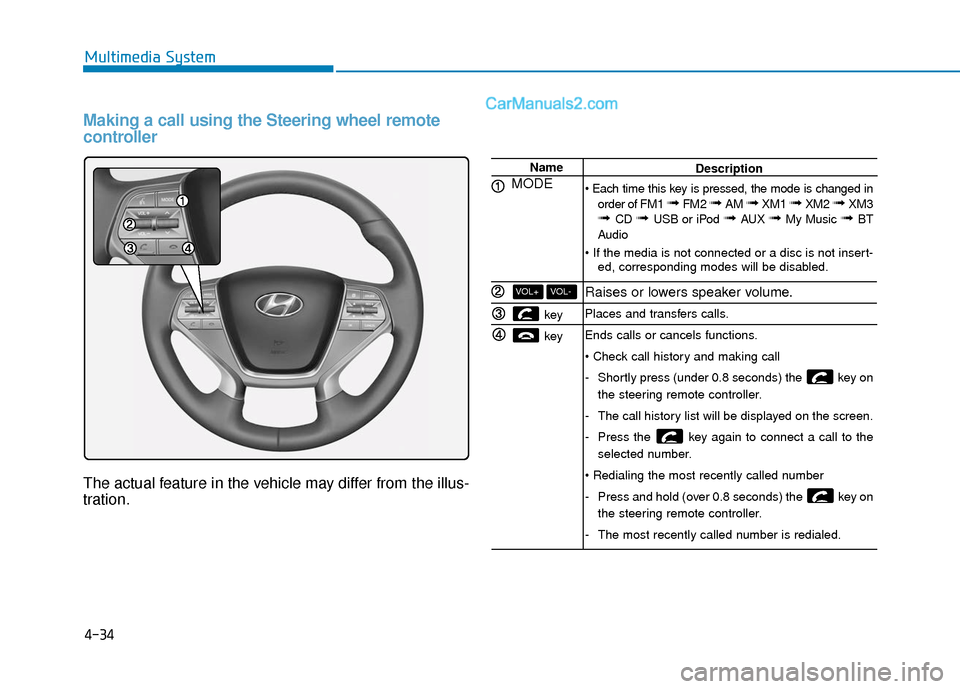
Making a call using the Steering wheel remote
controller
The actual feature in the vehicle may differ from the illus-
tration.
Name
MODE
key
key
VOL-VOL+
Description
order of FM1
➟ FM2 ➟ AM ➟ XM1 ➟ XM2 ➟ XM3➟ CD ➟ USB or iPod ➟ AUX ➟ My Music ➟ BT
Audio
ed, corresponding modes will be disabled.
Raises or lowers speaker volume.
Places and transfers calls.
Ends calls or cancels functions.
-Shortly press (under 0.8 seconds) the key on
the steering remote controller.
- The call history list will be displayed on the screen.
- Press the key again to connect a call to the
selected number.
- Press and hold (over 0.8 seconds) the key on
the steering remote controller.
- The most recently called number is redialed.
Page 284 of 563
4-36
Multimedia System
Pairing key / key
on the Steering Remote
Controller
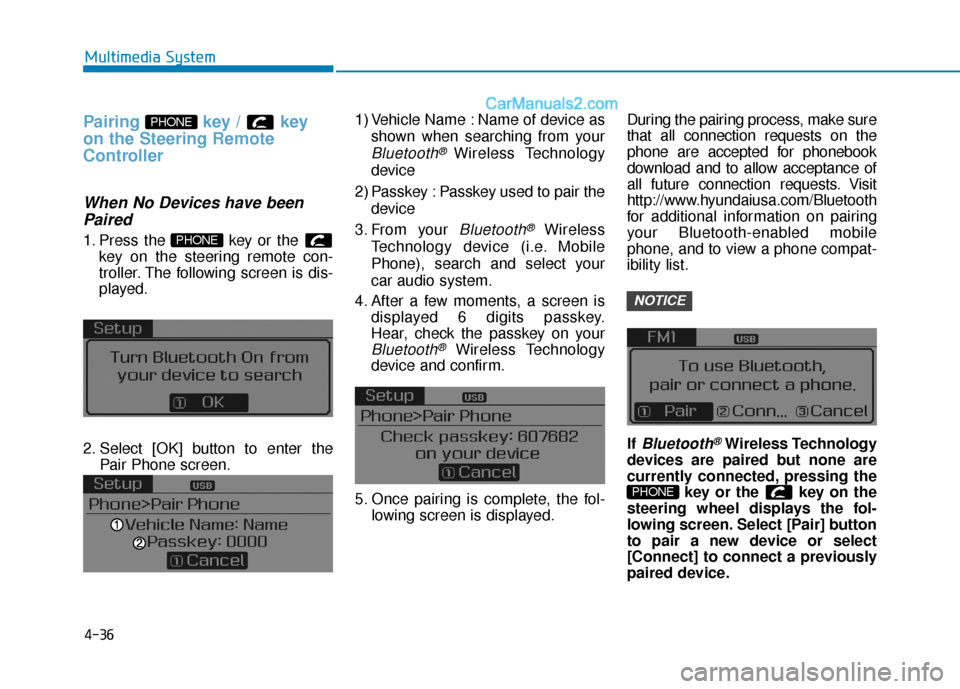
When No Devices have beenPaired
1. Press the key or the
key on the steering remote con-
troller. The following screen is dis-
played.
2. Select [OK] button to enter the Pair Phone screen. 1) Vehicle Name : Name of device as
shown when searching from your
Bluetooth® Wireless Technology
device
2) Passkey : Passkey used to pair the device
3. From your
Bluetooth®Wireless
Technology device (i.e. Mobile
Phone), search and select your
car audio system.
4. After a few moments, a screen is displayed 6 digits passkey.
Hear, check the passkey on your
Bluetooth®Wireless Technology
device and confirm.
5. Once pairing is complete, the fol- lowing screen is displayed. During the pairing process, make sure
that all connection requests on the
phone are accepted for phonebook
download and to allow acceptance of
all future connection requests. Visit
http://www.hyundaiusa.com/Bluetooth
for additional information on pairing
your Bluetooth-enabled mobile
phone, and to view a phone compat-
ibility list.
If
Bluetooth®Wireless Technology
devices are paired but none are
currently connected, pressing the key or the key on the
steering wheel displays the fol-
lowing screen. Select [Pair] button
to pair a new device or select
[Connect] to connect a previously
paired device.
PHONE
NOTICE
PHONE
PHONE
Page 294 of 563
4-46
Multimedia System
V
VO
O I
IC
C E
E
R
R E
EC
CO
O G
GN
N I
IT
T I
IO
O N
N
Using Voice Recognition
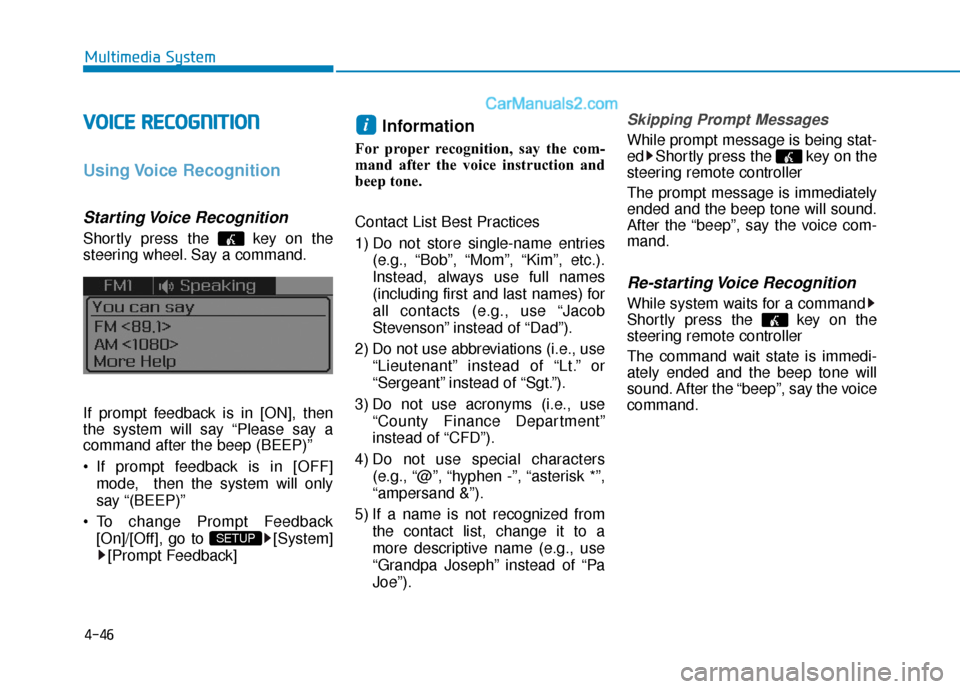
Starting Voice Recognition
Shortly press the key on the
steering wheel. Say a command.
If prompt feedback is in [ON], then
the system will say “Please say a
command after the beep (BEEP)”
If prompt feedback is in [OFF]
mode, then the system will only
say “(BEEP)”
To change Prompt Feedback [On]/[Off], go to [System][Prompt Feedback]
Information
For proper recognition, say the com-
mand after the voice instruction and
beep tone.
Contact List Best Practices
1) Do not store single-name entries (e.g., “Bob”, “Mom”, “Kim”, etc.).
Instead, always use full names
(including first and last names) for
all contacts (e.g., use “Jacob
Stevenson” instead of “Dad”).
2) Do not use abbreviations (i.e., use “Lieutenant” instead of “Lt.” or
“Sergeant” instead of “Sgt.”).
3) Do not use acronyms (i.e., use “County Finance Department”
instead of “CFD”).
4) Do not use special characters (e.g., “@”, “hyphen -”, “asterisk *”,
“ampersand &”).
5) If a name is not recognized from the contact list, change it to a
more descriptive name (e.g., use
“Grandpa Joseph” instead of “Pa
Joe”).
Skipping Prompt Messages
While prompt message is being stat-
ed Shortly press the key on the
steering remote controller
The prompt message is immediately
ended and the beep tone will sound.
After the “beep”, say the voice com-
mand.
Re-starting Voice Recognition
While system waits for a command
Shortly press the key on the
steering remote controller
The command wait state is immedi-
ately ended and the beep tone will
sound. After the “beep”, say the voice
command.
i
SETUP
Page 295 of 563
4-47
Multimedia System
4
E
EN
N D
DI
IN
N G
G
V
V O
O I
IC
C E
E
R
R E
EC
CO
O G
GN
N I
IT
T I
IO
O N
N
While Voice Recognition is operating
Press and hold the key on the
steering remote controller
Information
• While using voice command, press- ing any steering wheel control or a
different key will end voice com-
mand.
• When the system is waiting for a voice command, say "cancel" or
"end" to end voice command.
• When the system is waiting for a voice command, press and hold the key on the steering wheel to end
voice command.
Voice Recognition and Phone
Contact Tips:
The Hyundai Voice Recognition
System may have difficulty under-
standing some accents or uncom-
mon names.
When using Voice Recognition to
place a call, speak in a moderate
tone, with clear pronunciation To
maximize the use of Voice
Recognition, consider these guide-
lines when storing contacts:
Do not store single-name entries
(e.g., “Bob”, “Mom”, etc.). Instead,
always use full names (including first
and last names) for these contacts
Do not use special characters (e.g., '@', '-', '*', '&', etc.)
Do not use abbreviations (i.e., use "Lieutenant" instead of "Lt.") or
acronyms (i.e., use "County Finance
Department" instead of "C. F. D."; Be
sure to say the name exactly as it is
entered in the contacts list
i