Oul Hyundai Sonata 2019 Owner's Manual
[x] Cancel search | Manufacturer: HYUNDAI, Model Year: 2019, Model line: Sonata, Model: Hyundai Sonata 2019Pages: 522, PDF Size: 15.66 MB
Page 431 of 522
7-21
7
Maintenance
Valve Clearance (if equipped)
Inspect for excessive valve noise
and/or engine vibration and adjust if
necessary. Have an authorized
HYUNDAI dealer perform the opera-
tion.
Cooling System
Check cooling system components,
such as radiator, coolant reservoir,
hoses and connections for leakage
and damage. Replace any damaged
parts.
Engine Coolant
The coolant should be changed at
the intervals specified in the mainte-
nance schedule.
Automatic Transmission Fluid
Automatic transmission fluid should
not be checked under normal usage
conditions. But in severe conditions,
the fluid should be changed at an
authorized HYUNDAI dealer in accor-
dance to the scheduled maintenance
at the beginning of this chapter.
Automatic transmission fluid
color is basically red.
As the vehicle is driven, the auto-
matic transmission fluid will begin
to look darker. This is a normal
condition and you should not
judge the need to replace the fluid
based upon the changed color.
Ecoshift dual clutch transmis-
sion Fluid
Inspect the Ecoshift dual clutch
transmission fluid according to the
maintenance schedule.
NOTICE
The use of a non-specified fluid
could result in transmission
malfunction and failure. Use
only the specified automatic
transmission fluid (refer to
"Recommended Lubricants and
Capacities" in chapter 8).
CAUTION
Page 432 of 522
7-22
Maintenance
Brake Hoses and Lines
Visually check for proper installation,
chafing, cracks, deterioration and
any leakage. Replace any deteriorat-
ed or damaged parts immediately.
Brake Fluid
Check brake fluid level in the brake
fluid reservoir. The level should be
between the MIN and the MAX
marks on the side of the reservoir.
Use only hydraulic brake fluid con-
forming to DOT 3 or DOT 4 specifi-
cation.
Parking Brake
Inspect the parking brake system
including the parking brake pedal
and cables.
Brake Discs, Pads, Calipers
and Rotors
Check the pads for excessive wear,
discs for run out and wear, and
calipers for fluid leakage.
Exhaust Pipe and Muffler
Visually inspect the exhaust pipes,
muffler and hangers for cracks, dete-
rioration, or damage. Start the
engine and listen carefully for any
exhaust gas leakage. Tighten con-
nections or replace parts as neces-
sary.
Suspension Mounting Bolts
Check the suspension connections
for looseness or damage. Retighten
to the specified torque.
Steering Gear Box, Linkage &
Boots/Lower Arm Ball Joint
With the vehicle stopped and the
engine off, check for excessive free-
play in the steering wheel. Check the
linkage for bends or damage. Check
the dust boots and ball joints for
deterioration, cracks, or damage.
Replace any damaged parts.
Drive Shafts and Boots
Check the drive shafts, boots and
clamps for cracks, deterioration, or
damage. Replace any damaged
parts and, if necessary, repack the
grease.
Air Conditioning Refrigerant
Check the air conditioning lines and
connections for leakage and damage.
Page 433 of 522
7-23
7
Maintenance
E
EN
N G
GI
IN
N E
E
O
O I
IL
L
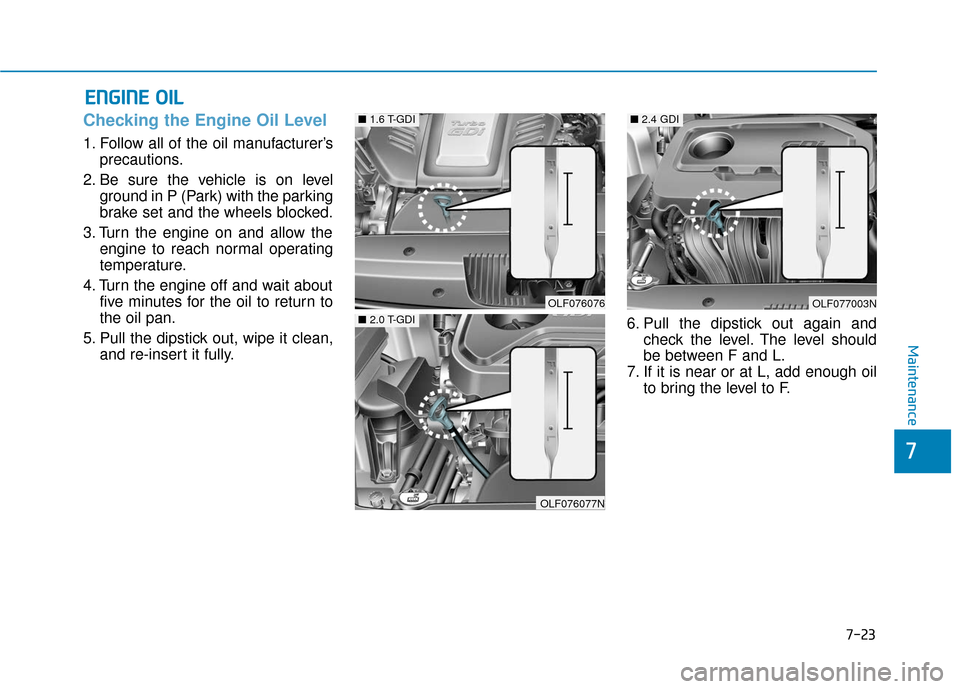
Checking the Engine Oil Level
1. Follow all of the oil manufacturer’s
precautions.
2. Be sure the vehicle is on level ground in P (Park) with the parking
brake set and the wheels blocked.
3. Turn the engine on and allow the engine to reach normal operating
temperature.
4. Turn the engine off and wait about five minutes for the oil to return to
the oil pan.
5. Pull the dipstick out, wipe it clean, and re-insert it fully. 6. Pull the dipstick out again and
check the level. The level should
be between F and L.
7. If it is near or at L, add enough oil to bring the level to F.
OLF076076OLF077003N
■1.6 T-GDI
OLF076077N
■2.0 T-GDI
■2.4 GDI
Page 437 of 522
7-27
7
MaintenanceThe electric motor for the cooling fan
is controlled by engine coolant tem-
perature, refrigerant pressure and
vehicle speed. As the engine coolant
temperature decreases, the electric
motor will automatically shut off. This
is a normal condition. If your vehicle
is equipped with GDI, the electric
motor for the cooling fan may begin
to operate at any time and continue
to operate until you disconnect the
negative battery cable.Check the condition and connections
of all cooling system hoses and
heater hoses. Replace any swollen
or deteriorated hoses.
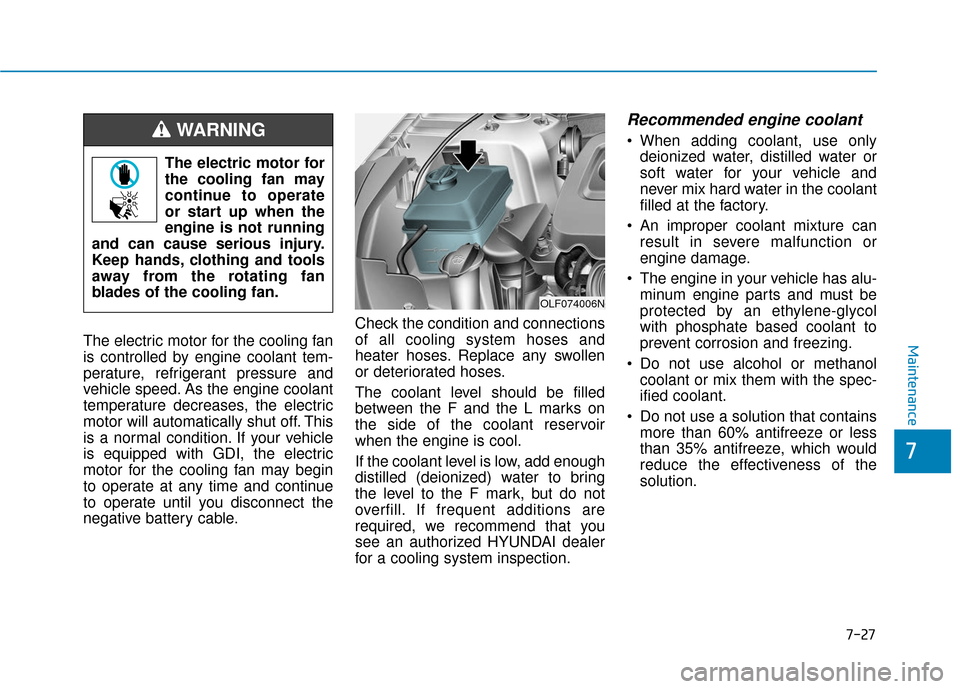
The coolant level should be filled
between the F and the L marks on
the side of the coolant reservoir
when the engine is cool.
If the coolant level is low, add enough
distilled (deionized) water to bring
the level to the F mark, but do not
overfill. If frequent additions are
required, we recommend that you
see an authorized HYUNDAI dealer
for a cooling system inspection.
Recommended engine coolant
When adding coolant, use only
deionized water, distilled water or
soft water for your vehicle and
never mix hard water in the coolant
filled at the factory.
An improper coolant mixture can result in severe malfunction or
engine damage.
The engine in your vehicle has alu- minum engine parts and must be
protected by an ethylene-glycol
with phosphate based coolant to
prevent corrosion and freezing.
Do not use alcohol or methanol coolant or mix them with the spec-
ified coolant.
Do not use a solution that contains more than 60% antifreeze or less
than 35% antifreeze, which would
reduce the effectiveness of the
solution.
The electric motor for
the cooling fan may
continue to operate
or start up when the
engine is not running
and can cause serious injury.
Keep hands, clothing and tools
away from the rotating fan
blades of the cooling fan.WARNING
OLF074006N
Page 439 of 522
7-29
7
Maintenance
B
BR
RA
A K
KE
E
F
F L
LU
U I
ID
D
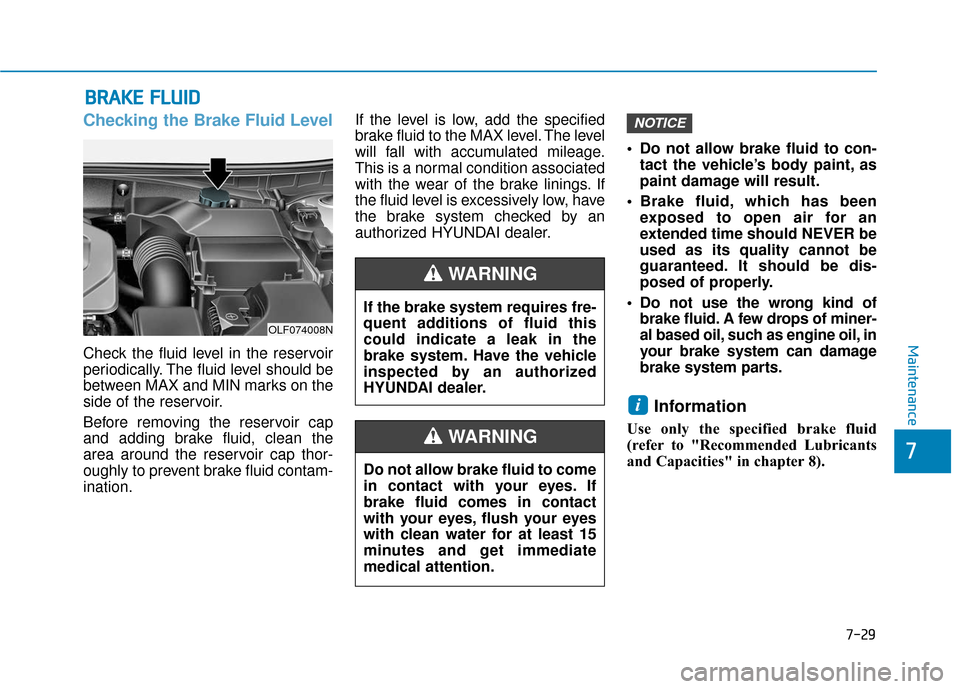
Checking the Brake Fluid Level
Check the fluid level in the reservoir
periodically. The fluid level should be
between MAX and MIN marks on the
side of the reservoir.
Before removing the reservoir cap
and adding brake fluid, clean the
area around the reservoir cap thor-
oughly to prevent brake fluid contam-
ination. If the level is low, add the specified
brake fluid to the MAX level. The level
will fall with accumulated mileage.
This is a normal condition associated
with the wear of the brake linings. If
the fluid level is excessively low, have
the brake system checked by an
authorized HYUNDAI dealer.
Do not allow brake fluid to con-
tact the vehicle’s body paint, as
paint damage will result.
Brake fluid, which has been exposed to open air for an
extended time should NEVER be
used as its quality cannot be
guaranteed. It should be dis-
posed of properly.
Do not use the wrong kind of brake fluid. A few drops of miner-
al based oil, such as engine oil, in
your brake system can damage
brake system parts.
Information
Use only the specified brake fluid
(refer to "Recommended Lubricants
and Capacities" in chapter 8).
i
NOTICE
If the brake system requires fre-
quent additions of fluid this
could indicate a leak in the
brake system. Have the vehicle
inspected by an authorized
HYUNDAI dealer.
WARNING
Do not allow brake fluid to come
in contact with your eyes. If
brake fluid comes in contact
with your eyes, flush your eyes
with clean water for at least 15
minutes and get immediate
medical attention.
WARNING
OLF074008N
Page 440 of 522
7-30
Maintenance
W
WA
AS
SH
H E
ER
R
F
F L
LU
U I
ID
D
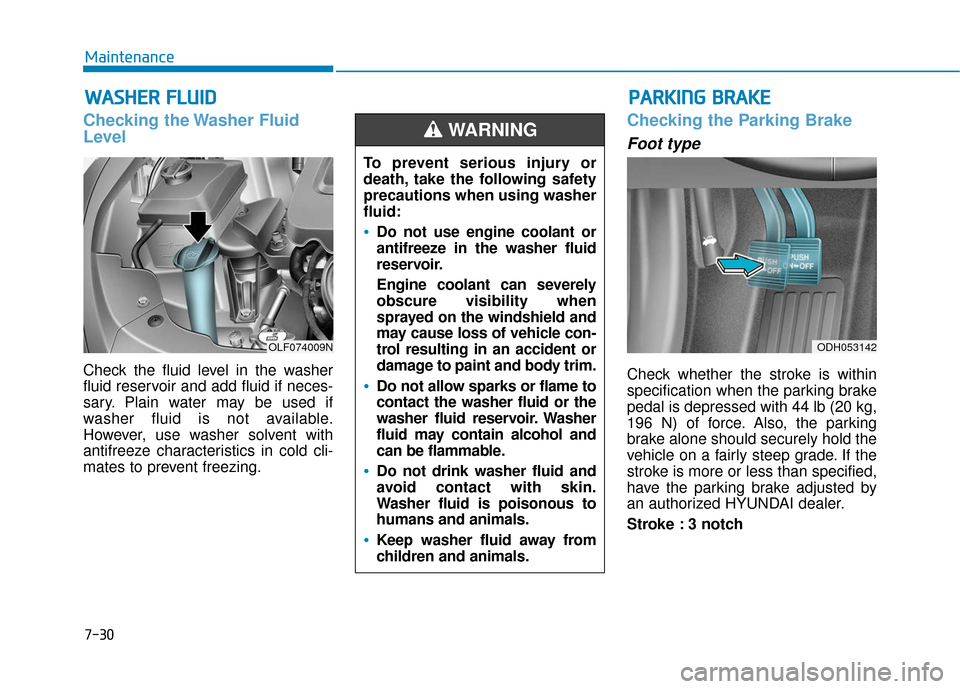
Checking the Washer Fluid
Level
Check the fluid level in the washer
fluid reservoir and add fluid if neces-
sary. Plain water may be used if
washer fluid is not available.
However, use washer solvent with
antifreeze characteristics in cold cli-
mates to prevent freezing.
Checking the Parking Brake
Foot type
Check whether the stroke is within
specification when the parking brake
pedal is depressed with 44 lb (20 kg,
196 N) of force. Also, the parking
brake alone should securely hold the
vehicle on a fairly steep grade. If the
stroke is more or less than specified,
have the parking brake adjusted by
an authorized HYUNDAI dealer.
Stroke : 3 notch
OLF074009NODH053142
P
P A
A R
RK
K I
IN
N G
G
B
B R
RA
A K
KE
E
To prevent serious injury or
death, take the following safety
precautions when using washer
fluid:
Do not use engine coolant or
antifreeze in the washer fluid
reservoir.
Engine coolant can severely
obscure visibility when
sprayed on the windshield and
may cause loss of vehicle con-
trol resulting in an accident or
damage to paint and body trim.
Do not allow sparks or flame to
contact the washer fluid or the
washer fluid reservoir. Washer
fluid may contain alcohol and
can be flammable.
Do not drink washer fluid and
avoid contact with skin.
Washer fluid is poisonous to
humans and animals.
Keep washer fluid away from
children and animals.
WARNING
Page 442 of 522
7-32
Maintenance
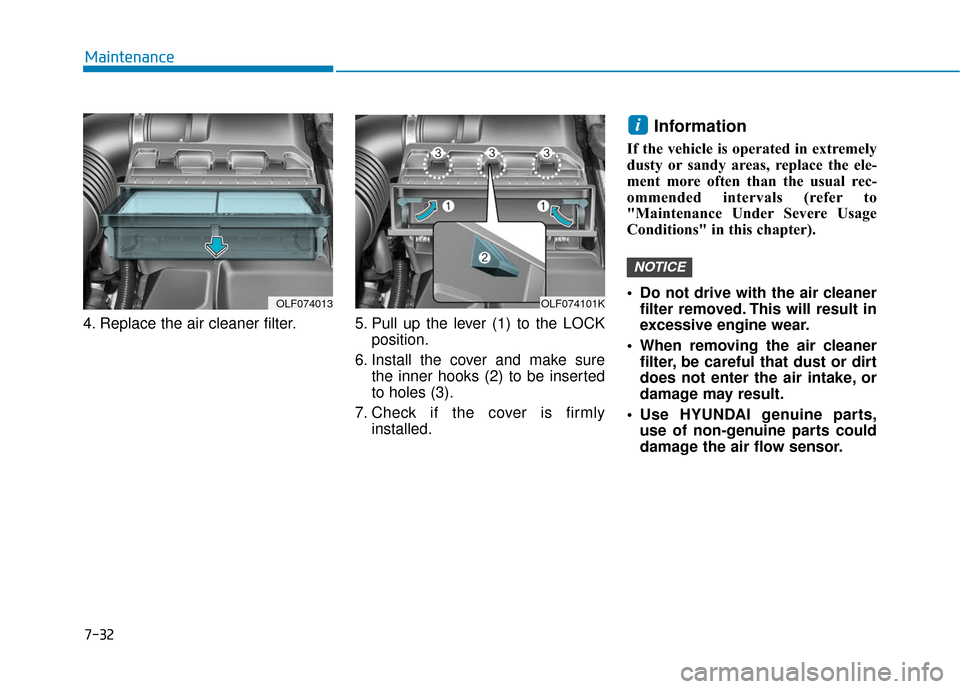
4. Replace the air cleaner filter. 5. Pull up the lever (1) to the LOCK position.
6. Install the cover and make sure the inner hooks (2) to be inserted
to holes (3).
7. Check if the cover is firmly installed.
Information
If the vehicle is operated in extremely
dusty or sandy areas, replace the ele-
ment more often than the usual rec-
ommended intervals (refer to
"Maintenance Under Severe Usage
Conditions" in this chapter).
Do not drive with the air cleanerfilter removed. This will result in
excessive engine wear.
When removing the air cleaner filter, be careful that dust or dirt
does not enter the air intake, or
damage may result.
Use HYUNDAI genuine parts, use of non-genuine parts could
damage the air flow sensor.
NOTICE
i
OLF074013OLF074101K
Page 443 of 522
7-33
7
Maintenance
C
CL
LI
IM
M A
AT
TE
E
C
C O
O N
NT
TR
R O
O L
L
A
A I
IR
R
F
F I
IL
L T
T E
ER
R
Filter Inspection
The climate control air filter should
be replaced according to the
Maintenance Schedule. If the vehicle
is operated in severely air-polluted
cities or on dusty rough roads for a
long period, it should be inspected
more frequently and replaced earlier.
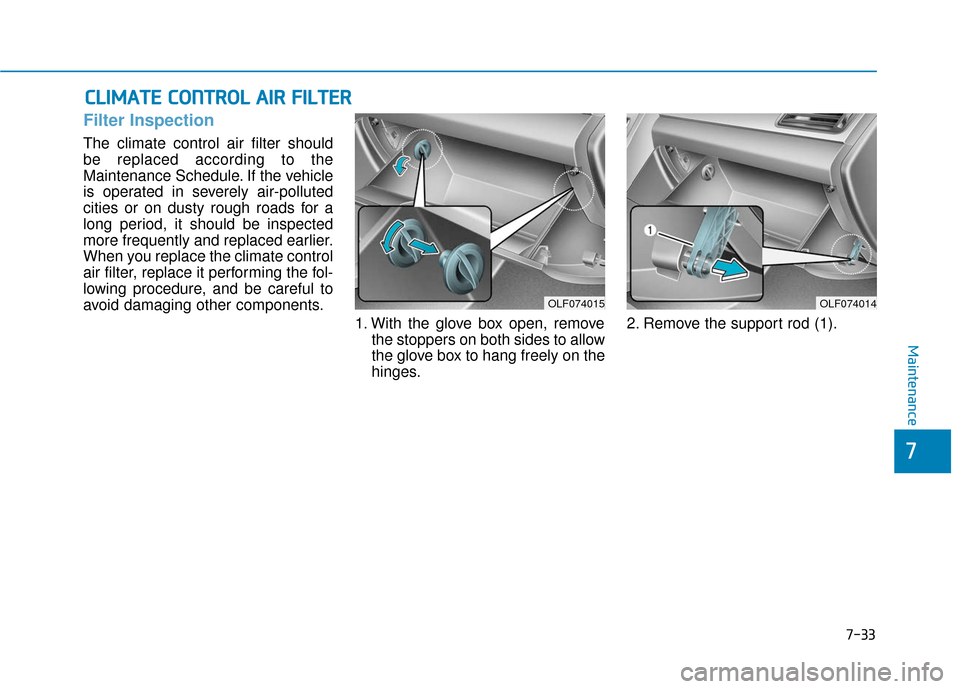
When you replace the climate control
air filter, replace it performing the fol-
lowing procedure, and be careful to
avoid damaging other components.
1. With the glove box open, removethe stoppers on both sides to allow
the glove box to hang freely on the
hinges. 2. Remove the support rod (1).
OLF074015OLF074014
Page 445 of 522
7-35
7
Maintenance
W
WI
IP
P E
ER
R
B
B L
LA
A D
DE
ES
S
Blade Inspection
Contamination of either the wind-
shield or the wiper blades with for-
eign matter can reduce the effective-
ness of the windshield wipers.
Common sources of contamination
are insects, tree sap, and hot wax
treatments used by some commer-
cial car washes. If the blades are not
wiping properly, clean both the win-
dow and the blades with a clean
cloth dampened with washer fluid or
clean water. To prevent damage to the wiper
blades, arms or other compo-
nents, do not:
Use gasoline, kerosene, paint
thinner, or other solvents on or
near them.
Attempt to move the wipers manually.
Use non-specified wiper blades.
Information
Commercial hot waxes applied by
automatic car washes have been
known to make the windshield diffi-
cult to clean.
Blade Replacement
When the wipers no longer clean
adequately, the blades may be worn
or cracked, and require replacement.
To prevent damage to the wiper
arms or other components, do not
attempt to move the wipers manu-
ally.
The use of a non-specified wiper
blade could result in wiper mal-
function and failure.
NOTICE
NOTICE
i
NOTICE
Page 450 of 522
7-40
Maintenance
T
TI
IR
R E
ES
S
A
A N
N D
D
W
W H
HE
EE
EL
LS
S
Tire Care
For proper maintenance, safety, and
maximum fuel economy, you must
always maintain recommended tire
inflation pressures and stay within the
load limits and weight distribution rec-
ommended for your vehicle.
(Continued)Replace tires that are worn,
show uneven wear, or are dam-
aged. Worn tires can cause
loss of braking effectiveness,
steering) control, or traction.
ALWAYS replace tires with the
same size as each tire that
was originally supplied with
this vehicle. Using tires and
wheels other than the recom-
mended sizes could cause
unusual handling characteris-
tics, poor vehicle control, or
negatively affect your vehi-
cle’s Anti-Lock Brake System
(ABS) resulting in a serious
accident.
Tire failure may cause loss of
vehicle control resulting in an
accident. To reduce risk of
SERIOUS INJURY or DEATH,
take the following precautions:
Inspect your tires monthly for
proper inflation as well as
wear and damage.
The recommended cold tire
pressure for your vehicle can
be found in this manual and on
the tire label located on the dri-
ver’s side center pillar. Always
use a tire pressure gauge to
measure tire pressure. Tires
with too much or too little
pressure wear unevenly caus-
ing poor handling.
Check the pressure of the
spare every time you check
the pressure of the other tires
on your vehicle.
(Continued)
WARNING