oil HYUNDAI SONATA 2023 Owner's Guide
[x] Cancel search | Manufacturer: HYUNDAI, Model Year: 2023, Model line: SONATA, Model: HYUNDAI SONATA 2023Pages: 555, PDF Size: 42.72 MB
Page 501 of 555

08
8-31
Filter Replacement
The air cleaner filter can be cleaned for
inspection using compressed air.
Do not attempt to wash or to rinse it, as
water will damage the filter.
If soiled, the air cleaner filter must be
replaced.
„„Smartstream G1.6 T-GDI
ODN8089106
„„Smartstream G2.5 GDI, Smartatream G2.5 T-GDI
ODN8089007
ODN8089008
ODN8089040
ODN8089041
ODN8089009
air CLEanEr
Page 507 of 555
08
8-37
Battery Recharging
WARNING
Always follow these instructions when
recharging your vehicle’s battery to
avoid the risk of SERIOUS INJURY or
DEATH from explosions or acid burns: • Before performing maintenance or
recharging the battery, turn off all
accessories and place the ignition
switch to the LOCK/OFF position.
• Keep all flames, sparks, or smoking
materials away from the battery.
• Always work outdoors or in an area
with plenty of ventilation.
• Wear eye protection when checking
the battery during charging.
• The battery must be removed from
the vehicle and placed in a well
ventilated area.
• Watch the battery during charging,
and stop or reduce the charging
rate if the battery cells begin boiling
violently.
• Vehicle is equipped with the
Absorbent Glass Mat (AGM) battery.
Do not charge the AGM battery with
a general charger. It may damage
or explode the AGM battery. Only
charge the AGM battery with a
charger that has AGM battery
setting.
• The negative battery cable must
be removed first to disconnect
the battery and installed last
to reconnect with the battery.
Disconnect the battery charger in the
following order:
1. Turn off the battery charger main
switch.
2. Unhook the negative clamp from the negative battery terminal.
3. Unhook the positive clamp from the positive battery terminal.
• Always use a genuine HYUNDAI
approved battery when you replace
the battery. By jump starting
After a jump start, idle the engine
with the headlights ON for 20-30
minutes before shutting the engine
off. The vehicle may not restart if you
shut it off before the battery had a
chance to adequately recharge. See
“Jump Starting” in chapter 7 for more
information on jump starting procedures.
Information
An inappropriately disposed battery can be harmful to
the environment and human health. Dispose of the battery
according to your local law(s) or
regulations.
Reset Features
The following items may need to be reset
after the battery has been discharged or
the battery has been disconnected. See
chapter 3 or 4 for: •
Power Windows
• Trip Computer
• Climate Control System
• Clock
• Audio System
• Sunroof
Page 515 of 555
08
8-45
WARNING
The traction grade assigned to this tire
is based on straight-ahead braking
traction tests, and does not include
acceleration, cornering, hydroplaning,
or peak traction characteristics.
Temperature A, B & C
The temperature grades are A (the
highest), B and C representing the tire’s
resistance to the generation of heat
and its ability to dissipate heat when
tested under controlled conditions on a
specified indoor laboratory test wheel.
Sustained high temperature can cause
the material of the tire to degenerate
and reduce tire life, and excessive
temperature can lead to sudden tire
failure.
WARNING
The temperature grade for this tire is
established for a tire that is properly
inflated and not overloaded. Excessive
speed, under-inflation, over-inflation,
or excessive loading, either separately
or in combination, can cause heat build-
up and possible sudden tire failure.
This may cause loss of vehicle control
resulting in an accident.
Tire Terminology and Definitions
Air Pressure
The amount of air inside the tire pressing
outward on the tire. Air pressure is
expressed in kilopascal (kPa) or pounds
per square inch (psi).
Accessory Weight
This means the combined weight of
optional accessories. Some examples
of optional accessories are automatic
transmission, power seats, and air conditioning.
Aspect Ratio
The relationship of a tire’s height to its width. Belt
A rubber coated layer of cords that is
located between the plies and the tread.
Cords may be made from steel or other
reinforcing materials. Bead
The tire bead contains steel wires
wrapped by steel cords that hold the tire
onto the rim.
Bias Ply Tire
A pneumatic tire in which the plies are
laid at alternate angles less than 90
degrees to the centerline of the tread.
Cold Tire Pressure
The amount of air pressure in a tire,
measured in kilopascals (kPa) or pounds
per square inch (psi) before a tire has
built up heat from driving.
Curb Weight
This means the weight of a motor vehicle
with standard and optional equipment
including the maximum capacity of fuel,
oil and coolant, but without passengers
and cargo.
Page 520 of 555
Maintenance
8-50
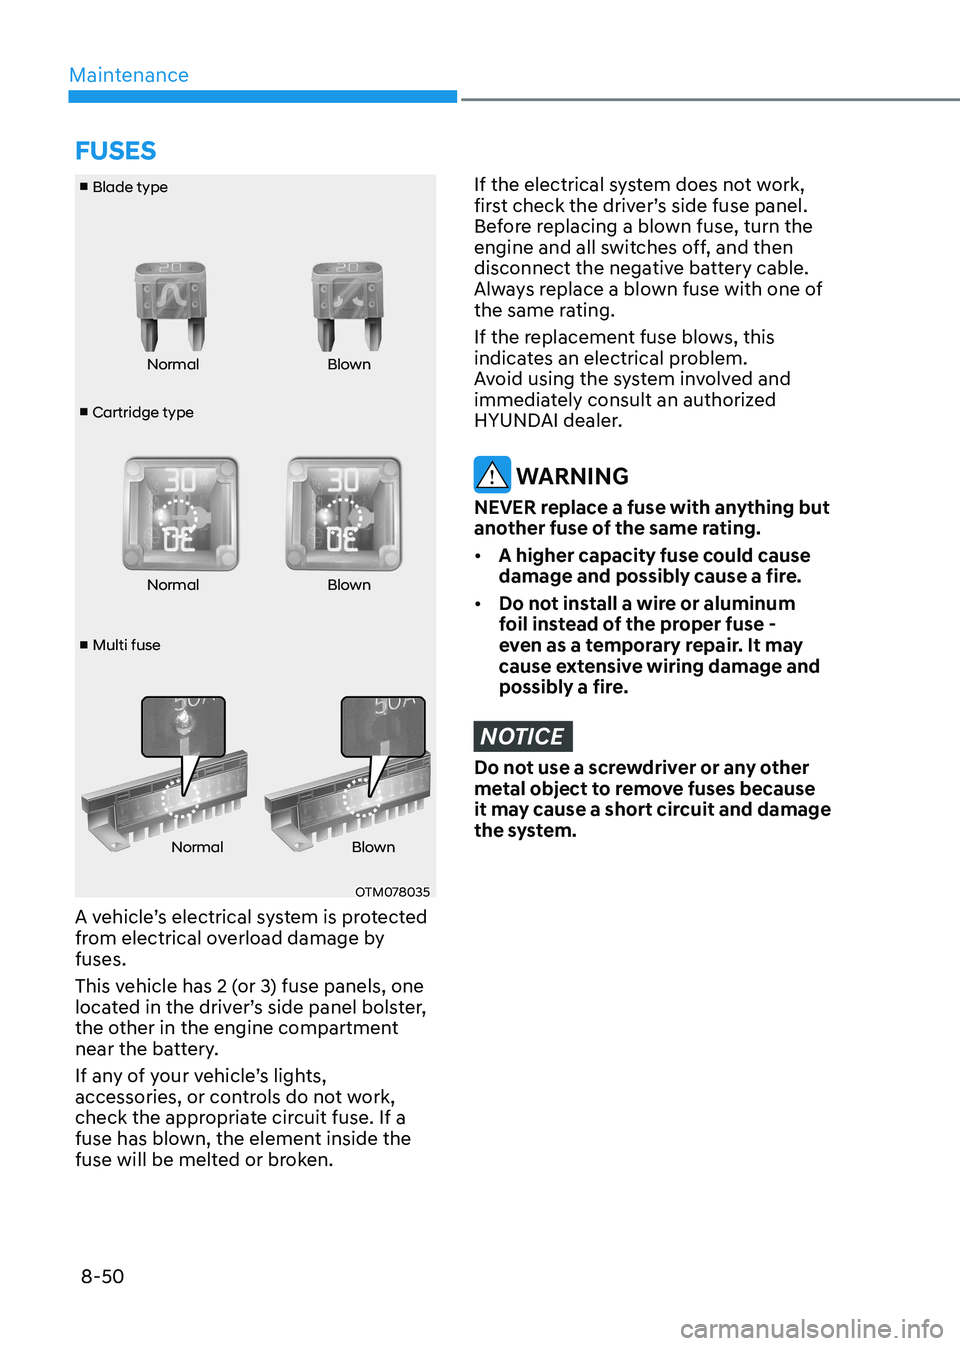
■ Cartridge type
■ Blade type
■ Multi fuse Normal Blown
Normal Blown
Normal Blown
OTM078035
A vehicle’s electrical system is protected
from electrical overload damage by fuses.
This vehicle has 2 (or 3) fuse panels, one
located in the driver’s side panel bolster,
the other in the engine compartment
near the battery.
If any of your vehicle’s lights,
accessories, or controls do not work,
check the appropriate circuit fuse. If a
fuse has blown, the element inside the
fuse will be melted or broken.
If the electrical system does not work,
first check the driver’s side fuse panel.
Before replacing a blown fuse, turn the
engine and all switches off, and then
disconnect the negative battery cable.
Always replace a blown fuse with one of
the same rating.
If the replacement fuse blows, this
indicates an electrical problem.
Avoid using the system involved and
immediately consult an authorized
HYUNDAI dealer.
WARNING
NEVER replace a fuse with anything but
another fuse of the same rating. • A higher capacity fuse could cause
damage and possibly cause a fire.
• Do not install a wire or aluminum
foil instead of the proper fuse -
even as a temporary repair. It may
cause extensive wiring damage and
possibly a fire.
NOTICE
Do not use a screwdriver or any other
metal object to remove fuses because
it may cause a short circuit and damage
the system.
fUSES
Page 527 of 555
08
8-57
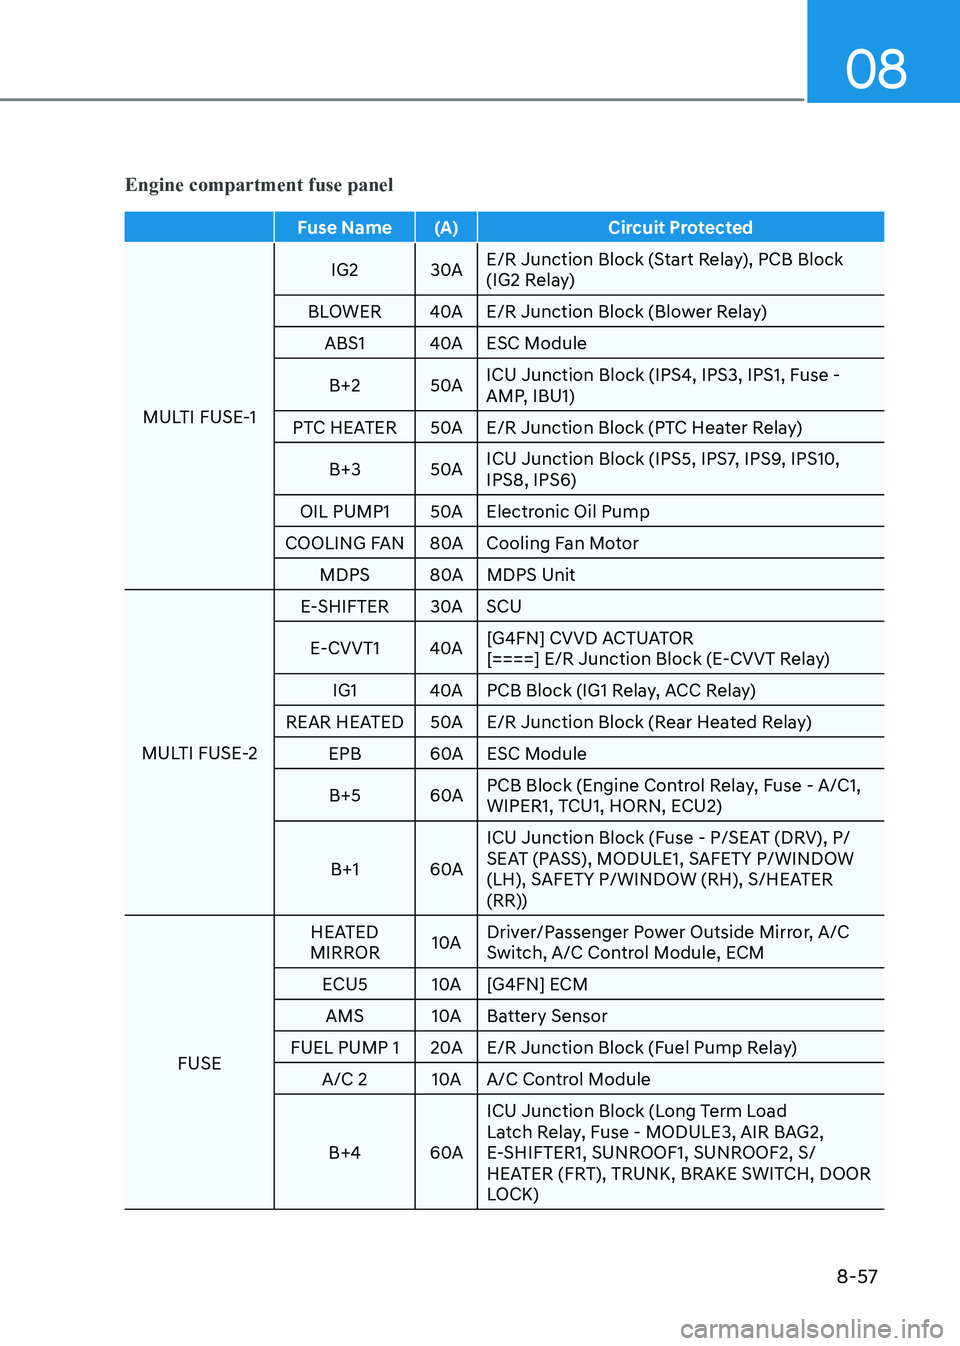
Engine compartment fuse panel
Fuse Name (A) Circuit Protected
MULTI FUSE-1 IG2 30A
E/R Junction Block (Start Relay), PCB Block
(IG2 Relay)
BLOWER 40A E/R Junction Block (Blower Relay) ABS1 40A ESC Module
B+2 50A ICU Junction Block (IPS4, IPS3, IPS1, Fuse -
AMP, IBU1)
PTC HEATER 50A E/R Junction Block (PTC Heater Relay)
B+3 50A ICU Junction Block (IPS5, IPS7, IPS9, IPS10, IPS8, IPS6)
OIL PUMP1 50A Electronic Oil Pump
COOLING FAN 80A Cooling Fan Motor MDPS 80A MDPS Unit
MULTI FUSE-2 E-SHIFTER 30A SCU
E-CVVT1 40A [G4FN] CVVD ACTUATOR
[====] E/R Junction Block (E-CVVT Relay)
IG1 40A PCB Block (IG1 Relay, ACC Relay)
REAR HEATED 50A E/R Junction Block (Rear Heated Relay)
EPB 60A ESC Module
B+5 60A PCB Block (Engine Control Relay, Fuse - A/C1,
WIPER1, TCU1, HORN, ECU2)
B+1 60A ICU Junction Block (Fuse - P/SEAT (DRV), P/
SEAT (PASS), MODULE1, SAFETY P/WINDOW
(LH), SAFETY P/WINDOW (RH), S/HEATER
(RR))
FUSE HEATED
MIRROR 10A Driver/Passenger Power Outside Mirror, A/C
Switch, A/C Control Module, ECM
ECU5 10A [G4FN] ECM AMS 10A Battery Sensor
FUEL PUMP 1 20A E/R Junction Block (Fuel Pump Relay) A/C 2 10A A/C Control Module
B+4 60A ICU Junction Block (Long Term Load
Latch Relay, Fuse - MODULE3, AIR BAG2,
E-SHIFTER1, SUNROOF1, SUNROOF2, S/
HEATER (FRT), TRUNK, BRAKE SWITCH, DOOR
LOCK)
Page 535 of 555
08
8-65
ODN8A089039
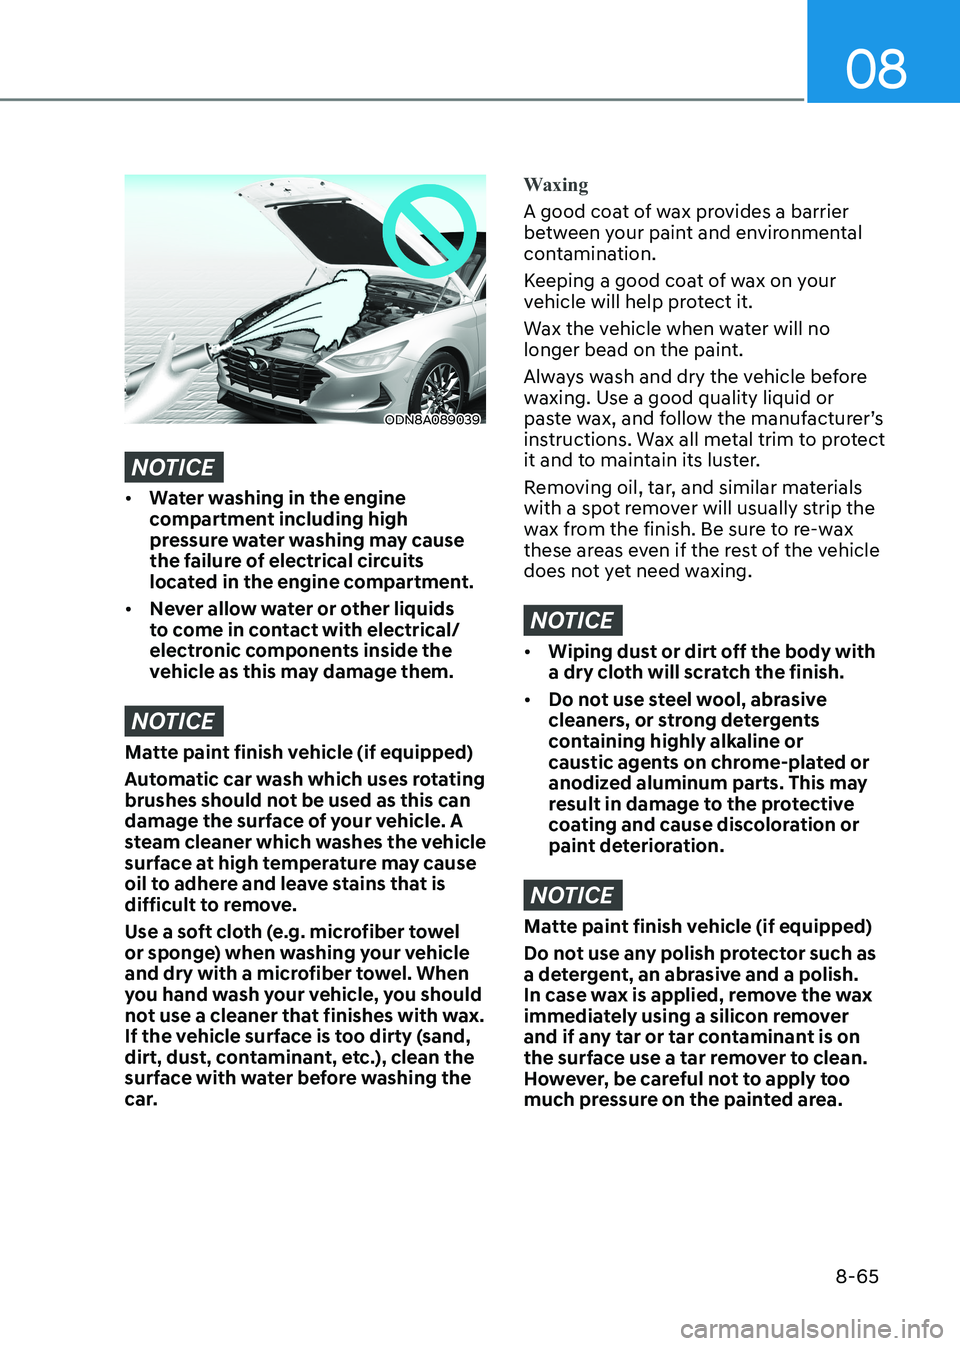
NOTICE
• Water washing in the engine
compartment including high
pressure water washing may cause
the failure of electrical circuits
located in the engine compartment.
• Never allow water or other liquids
to come in contact with electrical/
electronic components inside the
vehicle as this may damage them.
NOTICE
Matte paint finish vehicle (if equipped)
Automatic car wash which uses rotating
brushes should not be used as this can
damage the surface of your vehicle. A
steam cleaner which washes the vehicle
surface at high temperature may cause
oil to adhere and leave stains that is
difficult to remove.
Use a soft cloth (e.g. microfiber towel
or sponge) when washing your vehicle
and dry with a microfiber towel. When
you hand wash your vehicle, you should
not use a cleaner that finishes with wax.
If the vehicle surface is too dirty (sand,
dirt, dust, contaminant, etc.), clean the
surface with water before washing the
car.
Waxing
A good coat of wax provides a barrier
between your paint and environmental
contamination.
Keeping a good coat of wax on your
vehicle will help protect it.
Wax the vehicle when water will no
longer bead on the paint.
Always wash and dry the vehicle before
waxing. Use a good quality liquid or
paste wax, and follow the manufacturer’s
instructions. Wax all metal trim to protect
it and to maintain its luster.
Removing oil, tar, and similar materials
with a spot remover will usually strip the
wax from the finish. Be sure to re-wax
these areas even if the rest of the vehicle
does not yet need waxing.
NOTICE
• Wiping dust or dirt off the body with
a dry cloth will scratch the finish.
• Do not use steel wool, abrasive
cleaners, or strong detergents
containing highly alkaline or
caustic agents on chrome-plated or
anodized aluminum parts. This may
result in damage to the protective
coating and cause discoloration or
paint deterioration.
NOTICE
Matte paint finish vehicle (if equipped)
Do not use any polish protector such as
a detergent, an abrasive and a polish.
In case wax is applied, remove the wax
immediately using a silicon remover
and if any tar or tar contaminant is on
the surface use a tar remover to clean.
However, be careful not to apply too
much pressure on the painted area.
Page 538 of 555
Maintenance
8-68
•
When cleaning underneath the
vehicle, pay particular attention to the
components under the fenders and
other areas that are hidden from view.
Do a thorough job; just dampening
the accumulated mud rather than
washing it away will accelerate
corrosion rather than prevent it. Water
under high pressure and steam are
particularly effective in removing
accumulated mud and corrosive
materials.
• When cleaning lower door panels,
rocker panels and frame members, be
sure that drain holes are kept open so
that moisture can escape and not be
trapped inside to accelerate corrosion.
Keep your garage dry
Don’t park your vehicle in a damp,
poorly ventilated garage. This creates
a favorable environment for corrosion.
This is particularly true if you wash your
vehicle in the garage or drive it into the
garage when it is still wet or covered with
snow, ice or mud. Even a heated garage
can contribute to corrosion unless it is
well ventilated so moisture is dispersed.
Keep paint and trim in good condition
Scratches or chips in the finish should
be covered with “touch-up” paint as
soon as possible to reduce the possibility
of corrosion. If bare metal is showing
through, the attention of a qualified body
and paint shop is recommended.
Bird droppings are highly corrosive and
may damage painted surfaces in just a
few hours. Always remove bird droppings as soon as possible.
Interior Care
Interior general precautions
Prevent caustic solutions such as
perfume and cosmetic oil, from
contacting the interior parts because
they may cause damage or discoloration.
If they do contact the interior parts,
wipe them off immediately. See the
instructions for the proper way to clean
vinyl.
NOTICE
• Never allow water or other liquids
to come in contact with electrical/
electronic components inside the
vehicle as this may damage them.
• When cleaning leather products
(steering wheel, seats etc.), use
neutral detergents or low alcohol
content solutions. If you use high
alcohol content solutions or acid/
alkaline detergents, the color of the
leather may fade or the surface may
get stripped off.
Cleaning the upholstery and interior trim
Vinyl (if equipped)
Remove dust and loose dirt from vinyl
with a whisk broom or vacuum cleaner.
Clean vinyl surfaces with a vinyl cleaner.
Fabric (if equipped)
Remove dust and loose dirt from
fabric with a whisk broom or vacuum
cleaner. Clean with a mild soap solution
recommended for upholstery or carpets.
Remove fresh spots immediately with
a fabric spot cleaner. If fresh spots do
not receive immediate attention, the
fabric can be stained and its color can be
affected. Also, its fire-resistant properties
can be reduced if the material is not
properly maintained.
Page 539 of 555
08
8-69
NOTICE
Using anything but recommended
cleaners and procedures may affect the
fabric’s appearance and fire-resistant
properties.
Leather (if equipped)
• Features of seat leather
- Leather is made from the outer skin of an animal, which goes through a
special process to be available for
use. Since it is a natural product,
each part differs in thickness or
density.
Wrinkles may appear as a natural
result of stretching and shrinking
depending on the temperature and
humidity.
- The seat is made of stretchable fabric to improve comfort.
- The parts contacting the body are curved and the side supporting
area is high which provides driving
comfort and stability.
- Wrinkles may appear naturally from usage. It is not a fault of the
products.
CAUTION
• Wrinkles or abrasions which appear
naturally from usage are not covered
by warranty.
• Belts with metallic accessories,
zippers or keys inside the back
pocket may damage the seat fabric.
• Make sure not to wet the seat. It may
change the nature of natural leather.
• Jeans or clothes which could bleach
may contaminate the surface of the
seat covering fabric. •
Caring for the leather seats
- Vacuum the seat periodically to remove dust and sand on the seat. It
will prevent abrasion or damage of
the leather and maintain its quality.
- Wipe the natural leather seat cover often with dry or soft cloth.
- Use of proper leather protector may prevent abrasion of the cover and
helps maintain the color. Be sure to
read the instructions and consult
a specialist when using leather
coating or protective agent.
- Light colored (beige, cream beige) leather is easily contaminated and
the stain is noticeable. Clean the
seats frequently.
- Avoid wiping with wet cloth. It may cause the surface to crack.
• Cleaning the leather seats
- Remove all contaminations instantly. Refer to instructions below
for removal of each contaminant.
- Cosmetic products (sunscreen, foundation, etc.)
Apply cleansing cream on a cloth
and wipe the contaminated spot.
Wipe off the cream with a wet cloth
and remove water with a dry cloth.
- Beverages (coffee, soft drink, etc.) Apply a small amount of neutral
detergent and wipe until
contaminations do not smear.
- Oil Remove oil instantly with
absorbable cloth and wipe with
stain remover used only for natural
leather.
- Chewing gum Harden the gum with ice and
remove gradually.
Page 540 of 555
Maintenance
8-70
Cleaning the seat belt webbing
Clean the belt webbing with any
mild soap solution recommended for
cleaning upholstery or carpet. Follow
the instructions provided with the soap.
Do not bleach or re-dye the webbing
because this may weaken the seat belt.
Cleaning the interior window glass
If the interior glass surfaces of the
vehicle become hazy (that is, covered
with an oily, greasy or waxy film), they
should be cleaned with glass cleaner.
Follow the directions on the glass cleaner
container.
NOTICE
Do not scrape or scratch the inside of
the rear window. This may result in
damage to the rear window defroster grid.
EmiSSion ControL
SyStEm
The emission control system of your
vehicle is covered by a written limited
warranty. Please see the warranty
information contained in the Service
Passport in your vehicle.
Your vehicle is equipped with an
emission control system to meet all
applicable emission regulations. There
are three emission control systems, as
follows.
(1) Crankcase emission control system
(2) Evaporative emission control system
(3) Exhaust emission control system
In order to ensure the proper function
of the emission control systems, it
is recommended that you have your
vehicle inspected and maintained
by an authorized HYUNDAI dealer in
accordance with the maintenance schedule in this manual.
NOTICE
For the Inspection and Maintenance
Test (with Electronic Stability Control
(ESC) system) • To prevent the vehicle from misfiring
during dynamometer testing, turn
the Electronic Stability Control
(ESC) system off by pressing the ESC
switch (ESC OFF light illuminated).
• After dynamometer testing is
completed, turn the ESC system back
on by pressing the ESC switch again.
Page 547 of 555
I
I-5
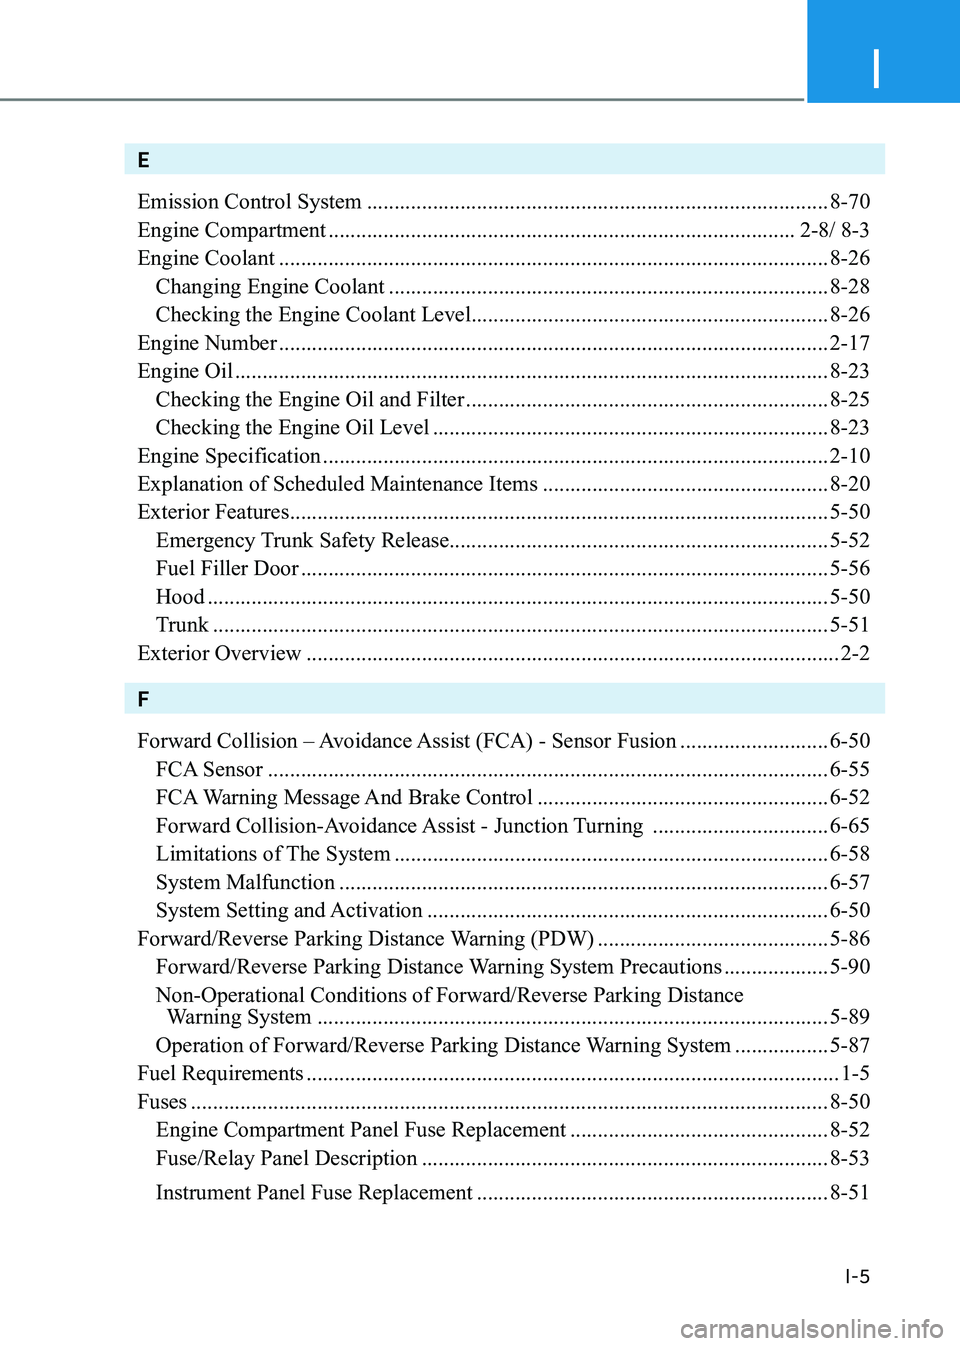
E Emission Control System .................................................................................... 8-70
Engine Compartment ..................................................................................... 2-8/ 8-3
Engine Coolant .................................................................................................... 8-26
Changing Engine Coolant ................................................................................ 8-28
Checking the Engine Coolant Level ................................................................. 8-26
Engine Number .................................................................................................... 2-17
Engine Oil ............................................................................................................ 8-23
Checking the Engine Oil and Filter .................................................................. 8-25
Checking the Engine Oil Level ........................................................................ 8-23
Engine Specification ............................................................................................ 2-10
Explanation of Scheduled Maintenance Items ....................................................8-20
Exterior Features .................................................................................................. 5-50
Emergency Trunk Safety Release..................................................................... 5-52
Fuel Filler Door ................................................................................................ 5-56
Hood ................................................................................................................. 5-50
Trunk ................................................................................................................ 5-51
Exterior Overview ................................................................................................. 2-2
F
Forward Collision – Avoidance Assist (FCA) - Sensor Fusion ...........................6-50
FCA Sensor ...................................................................................................... 6-55
FCA Warning Message And Brake Control .....................................................6-52
Forward Collision-Avoidance Assist - Junction Turning ................................6-65
Limitations of The System ............................................................................... 6-58
System Malfunction ......................................................................................... 6-57
System Setting and Activation ......................................................................... 6-50
Forward/Reverse Parking Distance Warning (PDW) ..........................................5-86
Forward/Reverse Parking Distance Warning System Precautions ...................5-90
Non-Operational Conditions of Forward/Reverse Parking Distance
Warning System ............................................................................................. 5-89
Operation of Forward/Reverse Parking Distance Warning System .................5-87
Fuel Requirements ................................................................................................. 1-5
Fuses .................................................................................................................... 8-50
Engine Compartment Panel Fuse Replacement ...............................................8-52
Fuse/Relay Panel Description .......................................................................... 8-53
Instrument Panel Fuse Replacement ................................................................ 8-51