jump start HYUNDAI SONATA 2023 Owners Manual
[x] Cancel search | Manufacturer: HYUNDAI, Model Year: 2023, Model line: SONATA, Model: HYUNDAI SONATA 2023Pages: 555, PDF Size: 42.72 MB
Page 303 of 555
While Driving
6-16
When the battery is discharged:
You cannot shift the gear when the
battery is discharged.
In emergencies, do the following to
move the shift button to N (Neutral) on a
level ground.
1. Connect the battery cables from
another vehicle or from a another
battery to the jump-starting terminals
inside the engine compartment.
For more information refer to "Jump Starting" in chapter 7.
2. Release the parking brake with the Engine Start/Stop button in the ON position.
3. Shift the gear to the N(Neutral) position. Refer to the "Stay in Neutral
when vehicle is Off" in this chapter.
Parking
Always come to a complete stop and
continue to depress the brake pedal.
Press the P button, apply the parking
brake, and place the ignition switch in
the LOCK/OFF position. Take the Key
with you when exiting the vehicle. • The gear is shifted to P (Park) position
automatically for safety under the
following conditions.
- When the driver unfastens the seat belt and opens the driver’s door.
- When the engine is turned off with the gear shifted to R (Reverse), D
(Drive) or N (Neutral).
WARNING
When you stay in the vehicle with
the engine running, be careful not to
depress the accelerator pedal for a long
period of time. The engine or exhaust
system may overheat and start a fire.
The exhaust gas and the exhaust system
are very hot. Keep away from the
exhaust system components.
Do not stop or park over flammable
materials, such as dry grass, paper or
leaves. They may ignite and cause a fire.
Page 313 of 555
While Driving
6-26
D (Drive)
This is the normal driving position. The
transmission will automatically shift
through a 8-gear sequence, providing
the best fuel economy and power.
To start the vehicle forward, push the D
(Drive) button by depressing the brake
pedal with the engine ON. Then depress
the accelerator pedal smoothly. For extra
power when passing another vehicle or
driving uphill, depress the accelerator
fully. The transmission will automatically
downshift to the next lower gear (or
gears, as appropriate). When the vehicle
is stopped in D (Drive) position, if you
open the driver’s door with the seat belt
unfastened, the gear is shifted to P (Park)
position automatically.
However when the vehicle moves in D
(Drive) position, if you open the driver’s
door with the seat belt unfastened,
the gear may be not shifted to P (Park)
position automatically for protecting the
dual clutch transmission.
The DRIVE MODE switch, located on
the shift lever/button console, allows
the driver to switch from NORMAL/
COMFORT mode to SPORT or ECO mode. (if equipped)
For more details, refer to “Drive Mode
Integrated Control System” later in this
chapter. Shift-lock system
For your safety, the automatic
transmission has a shift-lock system
which prevents shifting the transmission
from P (Park) or N (Neutral) to R
(Reverse) or D (Drive) unless the brake
pedal is depressed.
To shift the transmission from P (Park)
into R (Reverse):
1. Depress and hold the brake pedal.
2. Start the engine or place the ignition
switch in the ON position.
3. Depress the brake pedal and move the shift lever to R (Reverse). (shift lever
type)
Depress the brake pedal and push the
R (Reverse) button. (shift button type)
When the battery is discharged:
You cannot shift the shift lever/button,
when the battery is discharged.
In emergencies, do the following
to move the shift lever/button to N
(Neutral) on a level ground.
1. Connect the battery cables from another vehicle or from a another
battery to the jump-starting terminals
inside the engine compartment.
For more details, refer to “Jump
Starting” in chapter 8.
2. Release the parking brake with the ignition switch in the ON position.
3. Shift the gear to the N(Neutral) position refer to the “Stay in Neutral
when vehicle is Off” in this chapter.
Page 325 of 555
While Driving
6-38
Using ABS
To obtain the maximum benefit from
your ABS in an emergency situation,
do not attempt to modulate your brake
pressure and do not try to pump your
brakes. Depress your brake pedal as hard as possible.
When you apply your brakes under
conditions which may lock the wheels,
you may hear sounds from the brakes,
or feel a corresponding sensation in the
brake pedal. This is normal and it means
your ABS is active.
ABS does not reduce the time or distance
it takes to stop the vehicle.
Always maintain a safe distance from the
vehicle in front of you.
ABS will not prevent a skid that results
from sudden changes in direction, such
as trying to take a corner too fast or
making a sudden lane change. Always
drive at a safe speed for the road and
weather conditions.
ABS cannot prevent a loss of stability.
Always steer moderately when braking
hard. Severe or sharp steering wheel
movement can still cause your vehicle to
veer into oncoming traffic or off the road.
On loose or uneven road surfaces,
operation of the anti-lock brake system
may result in a longer stopping distance
than for vehicles equipped with a
conventional brake system.
The ABS warning light (
) will stay on
for several seconds after the ignition
switch is in the ON position. During
that time, the ABS will go through self-
diagnosis and the light will go off if
everything is normal. If the light stays on,
you may have a problem with your ABS.
Contact an authorized HYUNDAI dealer as soon as possible.
WARNING
If the ABS warning light (
) is on and
stays on, you may have a problem with
the ABS. Your power brakes will work
normally. To reduce the risk of serious
injury or death, contact your HYUNDAI dealer as soon as possible.
CAUTION
When you drive on a road having poor
traction, such as an icy road, and apply
your brakes continuously, the ABS will
be active continuously and the ABS
warning light (
) may illuminate. Pull
your car over to a safe place and turn
the engine off.
Restart the engine. If the ABS warning
light is off, then your ABS system is normal.
Otherwise, you may have a problem
with your ABS system. Contact an
authorized HYUNDAI dealer as soon as possible.
Information
When you jump start your vehicle because
of a drained battery, the ABS warning light (
) may turn on at the same
time. This happens because of the low
battery voltage. It does not mean your ABS is malfunctioning. Have the battery
recharged before driving the vehicle.
Page 449 of 555
Hazard Warning Flasher ................................................................................. 7-2
In Case of an Emergency While Driving ........................................................7-2
If the Engine Stalls While Driving ............................................................................. 7-2
If the Engine Stalls at a Crossroad or Crossing .......................................................7-2
If you Have a Flat Tire While Driving ........................................................................ 7-3
If the Engine Will not Start ............................................................................. 7-3
If the Engine Doesn’t Turn Over or Turns Over Slowly ............................................7-3
If the Engine Turns Over Normally but Doesn’t Start ..............................................7-3
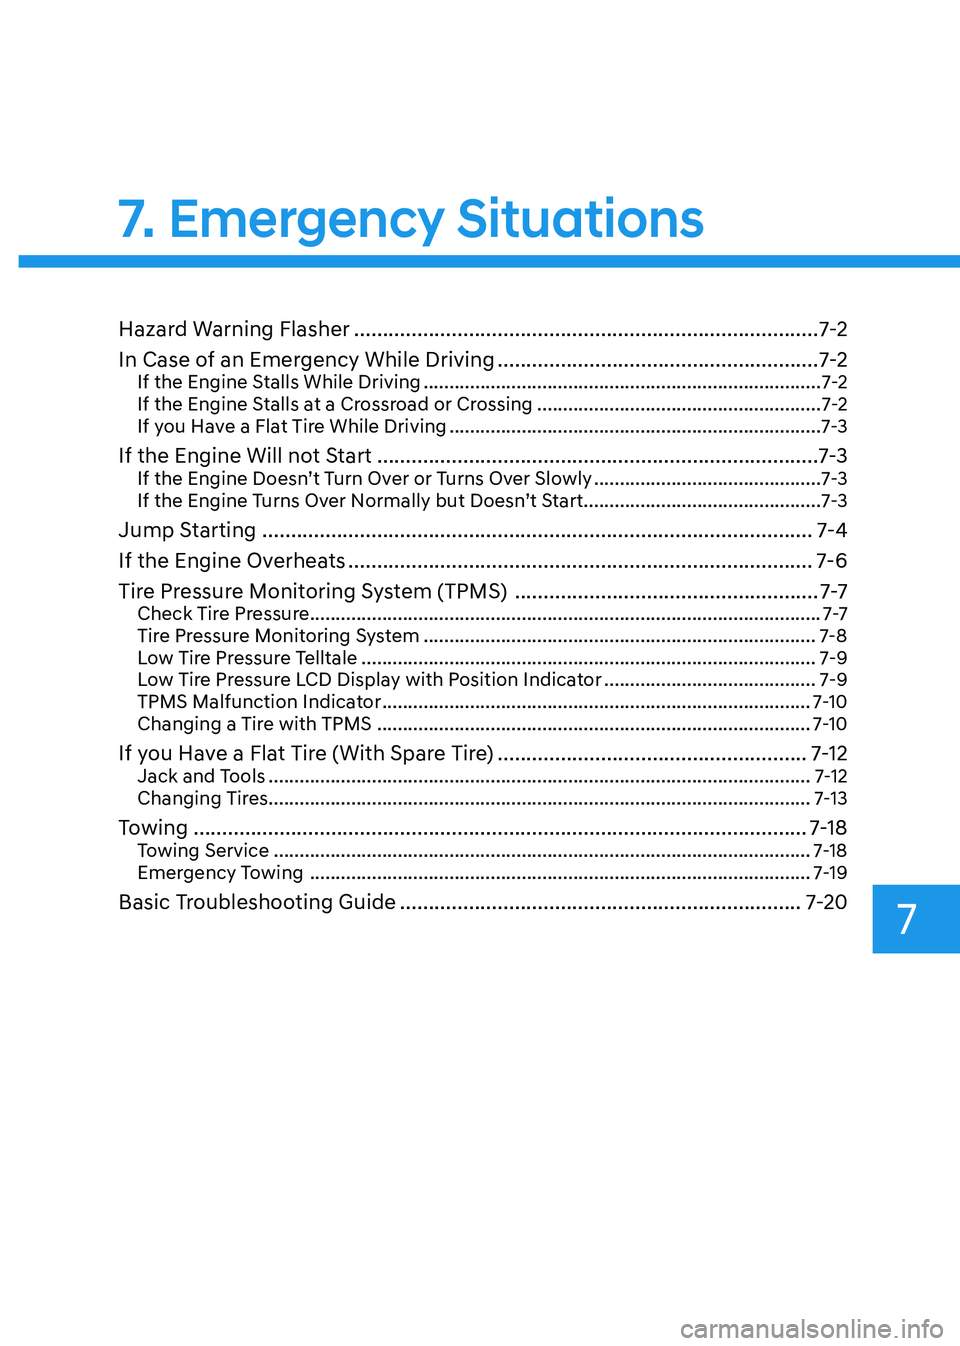
Jump Starting ................................................................................................ 7-4
If the Engine Overheats ................................................................................. 7-6
Tire Pressure Monitoring System (TPMS) .....................................................7-7
Check Tire Pressure ................................................................................................... 7-7
Tire Pressure Monitoring System ............................................................................ 7-8
Low Tire Pressure Telltale ........................................................................................ 7-9
Low Tire Pressure LCD Display with Position Indicator .........................................7-9
TPMS Malfunction Indicator ................................................................................... 7-10
Changing a Tire with TPMS .................................................................................... 7-10
If you Have a Flat Tire (With Spare Tire) ......................................................7-12
Jack and Tools ......................................................................................................... 7-12
Changing Tires ......................................................................................................... 7-13
Towing ........................................................................................................... 7-18
Towing Service ........................................................................................................ 7-18
Emergency Towing ................................................................................................. 7-19
Basic Troubleshooting Guide ...................................................................... 7-20
7. Emergency Situations
7
Page 451 of 555
07
7-3
If you Have a Flat Tire While Driving
If a tire goes flat while you are driving: • Take your foot off the accelerator
pedal and let the vehicle slow down
while driving straight ahead. Do not
apply the brakes immediately or
attempt to pull off the road as this
may cause loss of vehicle control
resulting in an accident. When the
vehicle has slowed to such a speed
that it is safe to do so, brake carefully
and pull off the road. Drive off the
road as far as possible and park on
firm, level ground. If you are on a
divided highway, do not park in the
median area between the two traffic lanes.
• When the vehicle is stopped, press the
hazard warning flasher button, move
the shift button into P (Park), and
apply the parking brake, and place
the ignition switch in the LOCK/OFF position.
• Have all passengers get out of the
vehicle. Be sure they all get out on the
side of the vehicle that is away from
traffic.
• When changing a flat tire, follow the
instructions provided later in this
chapter.
If the engIne WIll not
s ta rt
If the Engine Doesn’t Turn Over
or Turns Over Slowly
• Be sure the shift button is in N
(Neutral) or P (Park). The engine starts
only when the shift button is in N
(Neutral) or P (Park).
• Check the battery connections to be
sure they are clean and tight.
• Turn on the interior light. If the light
dims or goes out when you operate
the starter, the battery is drained.
Do not push or pull the vehicle to start it.
This could cause damage to your vehicle.
See instructions for “Jump Starting”
provided in this chapter.
CAUTION
Push or pull starting the vehicle may
cause the catalytic converter to
overload which can lead to damage to
the emission control system.
If the Engine Turns Over
Normally but Doesn’t Start
Check the fuel level and add fuel if
necessary.
If the engine still does not start, have
your vehicle checked by an authorized
HYUNDAI dealer.
Page 452 of 555
Emergency Situations
7-4
Jump starting can be dangerous if done
incorrectly. Follow the jump starting
procedure in this section to avoid serious
injury or damage to your vehicle. If in
doubt about how to properly jump start
your vehicle, we strongly recommend
that you have a service technician or
towing service do it for you.
WARNING
To prevent SERIOUS INJURY or DEATH
to you or bystanders, always follow
these precautions when working near
or handling the battery:
Always read and follow
instructions carefully when
handling a battery.
Wear eye protection designed
to protect the eyes from acid splashes.
Keep all flames, sparks, or
smoking materials away from
the battery.
Hydrogen is always present
in battery cells, is highly
combustible, and may explode
if ignited.
Keep batteries out of reach of
children.
Batteries contain sulfuric acid
which is highly corrosive. Do
not allow acid to contact your
eyes, skin or clothing.
If acid gets into your eyes, flush your
eyes with clean water for at least 15
minutes and get immediate medical
attention. If acid gets on your skin,
thoroughly wash the area. If you feel
pain or a burning sensation, get medical
attention immediately. • When lifting a plastic-cased battery,
excessive pressure on the case may
cause battery acid to leak. Lift with a
battery carrier or with your hands on
opposite corners.
• Do not attempt to jump start your
vehicle if your battery is frozen.
• NEVER attempt to recharge the
battery when the vehicle’s battery
cables are connected to the battery.
• The electrical ignition system works
with high voltage. NEVER touch
these components with the engine
running or when the ignition switch is in the ON position.
Information
An inappropriately disposed battery can be harmful to
the environment and human health. Dispose of the battery
according to your local law(s) or
regulations.
NOTICE
To prevent damage to your vehicle: • Only use a 12-volt power supply
(battery or jumper system) to jump
start your vehicle.
• Do not attempt to jump start your
vehicle by push-starting.
Jump startIng
Page 453 of 555
07
7-5
Jump starting procedure
1. Position the vehicles close enough
that the jumper cables will reach, but
do not allow the vehicles to touch.
2. Avoid fans or any moving parts in the engine compartment at all times, even
when the vehicles are turned off.
3. Turn off all electrical devices such as radios, lights, air conditioning, etc.
Put the vehicles in P (Park) and set
the parking brakes. Turn both vehicles
OFF.
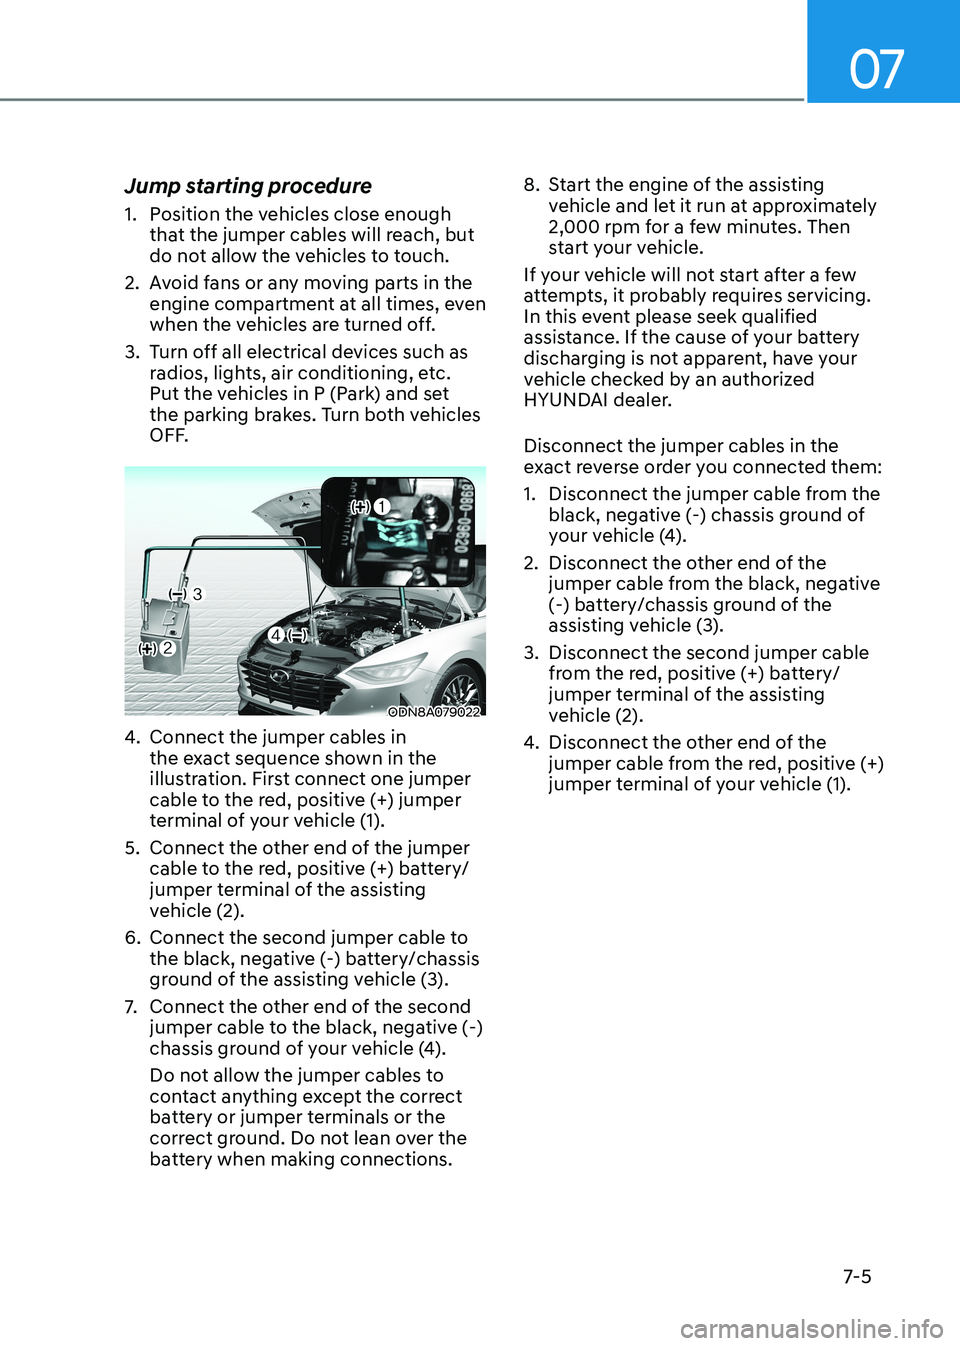
ODN8A079022
4. Connect the jumper cables in
the exact sequence shown in the
illustration. First connect one jumper
cable to the red, positive (+) jumper
terminal of your vehicle (1).
5. Connect the other end of the jumper cable to the red, positive (+) battery/
jumper terminal of the assisting
vehicle (2).
6. Connect the second jumper cable to the black, negative (-) battery/chassis
ground of the assisting vehicle (3).
7. Connect the other end of the second
jumper cable to the black, negative (-)
chassis ground of your vehicle (4).
Do not allow the jumper cables to
contact anything except the correct
battery or jumper terminals or the
correct ground. Do not lean over the
battery when making connections. 8. Start the engine of the assisting
vehicle and let it run at approximately
2,000 rpm for a few minutes. Then
start your vehicle.
If your vehicle will not start after a few
attempts, it probably requires servicing.
In this event please seek qualified
assistance. If the cause of your battery
discharging is not apparent, have your
vehicle checked by an authorized
HYUNDAI dealer. Disconnect the jumper cables in the
exact reverse order you connected them:
1. Disconnect the jumper cable from the black, negative (-) chassis ground of
your vehicle (4).
2. Disconnect the other end of the jumper cable from the black, negative
(-) battery/chassis ground of the
assisting vehicle (3).
3. Disconnect the second jumper cable from the red, positive (+) battery/
jumper terminal of the assisting
vehicle (2).
4. Disconnect the other end of the
jumper cable from the red, positive (+)
jumper terminal of your vehicle (1).
Page 506 of 555
Maintenance
8-36
WARNING
To prevent SERIOUS INJURY or DEATH
to you or bystanders, always follow
these precautions when working near
or handling the battery:
Always read and follow
instructions carefully when
handling a battery.
Wear eye protection designed
to protect the eyes from acid splashes.
Keep all flames, sparks, or
smoking materials away from
the battery.
Hydrogen is always present
in battery cells, is highly
combustible, and may explode
if ignited.
Keep batteries out of reach of
children.
Batteries contain sulfuric acid
which is highly corrosive. Do
not allow acid to contact your
eyes, skin or clothing.
If acid gets into your eyes, flush your
eyes with clean water for at least 15
minutes and get immediate medical
attention. If acid gets on your skin,
thoroughly wash the area. If you feel
pain or a burning sensation, get medical
attention immediately. • When lifting a plastic-cased battery,
excessive pressure on the case may
cause battery acid to leak. Lift with a
battery carrier or with your hands on
opposite corners.
• Do not attempt to jump start your
vehicle if your battery is frozen.
• NEVER attempt to recharge the
battery when the vehicle’s battery
cables are connected to the battery.
• The electrical ignition system works
with high voltage. NEVER touch
these components with the engine
running or when the ignition switch is in the ON position.
NOTICE
• When you do not use the vehicle for a
long time in a low temperature area,
disconnect the battery and keep it
indoors.
• Always charge the battery fully to
prevent battery case damage in low
temperature areas.
For Best Battery Service
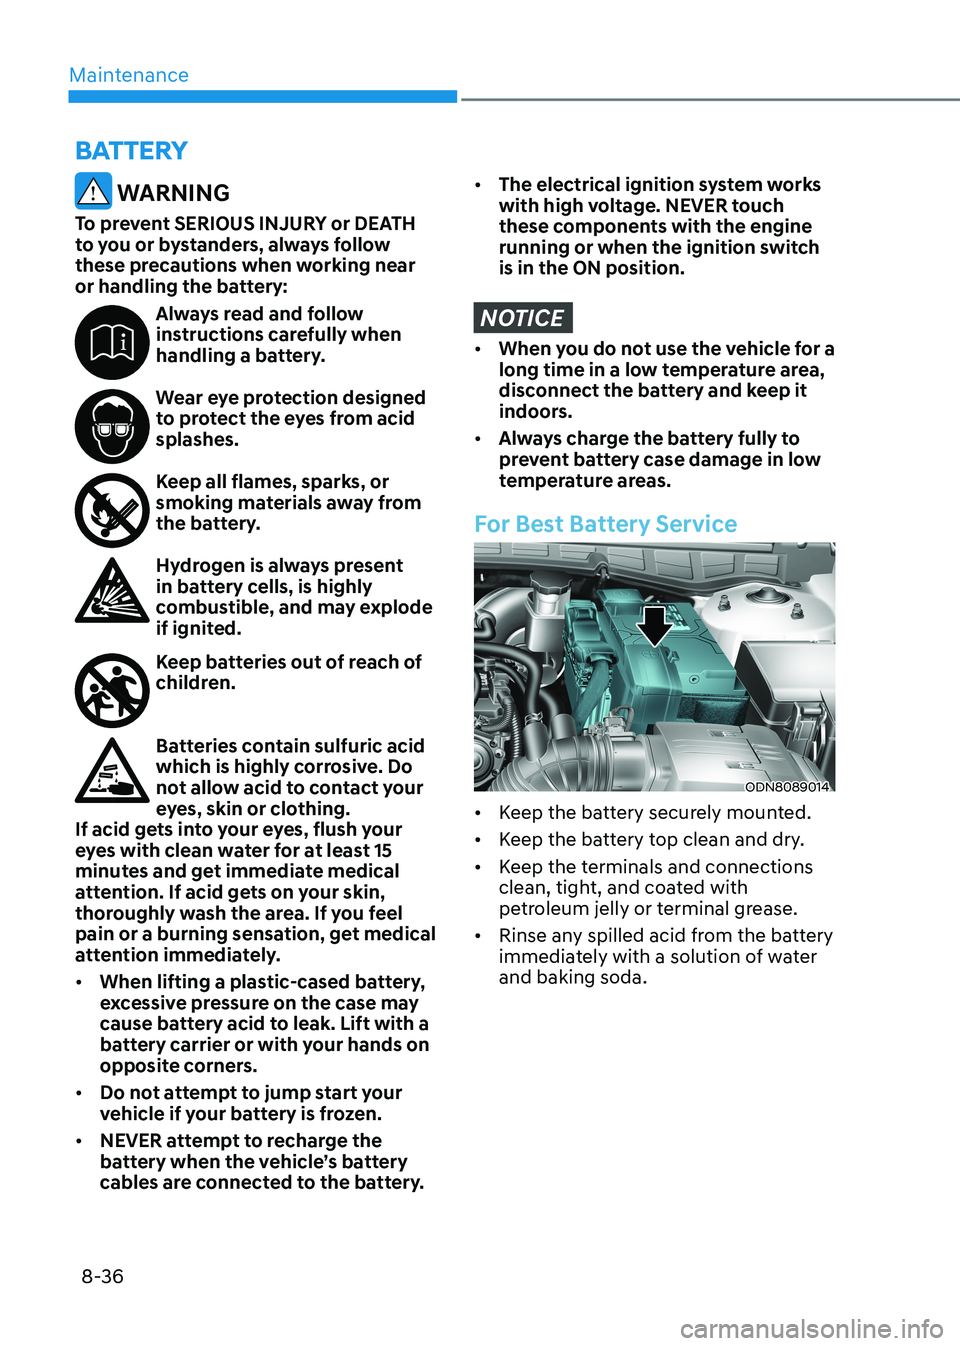
ODN8089014
• Keep the battery securely mounted.
• Keep the battery top clean and dry.
• Keep the terminals and connections
clean, tight, and coated with
petroleum jelly or terminal grease.
• Rinse any spilled acid from the battery
immediately with a solution of water and baking soda.
BattEry
Page 507 of 555
08
8-37
Battery Recharging
WARNING
Always follow these instructions when
recharging your vehicle’s battery to
avoid the risk of SERIOUS INJURY or
DEATH from explosions or acid burns: • Before performing maintenance or
recharging the battery, turn off all
accessories and place the ignition
switch to the LOCK/OFF position.
• Keep all flames, sparks, or smoking
materials away from the battery.
• Always work outdoors or in an area
with plenty of ventilation.
• Wear eye protection when checking
the battery during charging.
• The battery must be removed from
the vehicle and placed in a well
ventilated area.
• Watch the battery during charging,
and stop or reduce the charging
rate if the battery cells begin boiling
violently.
• Vehicle is equipped with the
Absorbent Glass Mat (AGM) battery.
Do not charge the AGM battery with
a general charger. It may damage
or explode the AGM battery. Only
charge the AGM battery with a
charger that has AGM battery
setting.
• The negative battery cable must
be removed first to disconnect
the battery and installed last
to reconnect with the battery.
Disconnect the battery charger in the
following order:
1. Turn off the battery charger main
switch.
2. Unhook the negative clamp from the negative battery terminal.
3. Unhook the positive clamp from the positive battery terminal.
• Always use a genuine HYUNDAI
approved battery when you replace
the battery. By jump starting
After a jump start, idle the engine
with the headlights ON for 20-30
minutes before shutting the engine
off. The vehicle may not restart if you
shut it off before the battery had a
chance to adequately recharge. See
“Jump Starting” in chapter 7 for more
information on jump starting procedures.
Information
An inappropriately disposed battery can be harmful to
the environment and human health. Dispose of the battery
according to your local law(s) or
regulations.
Reset Features
The following items may need to be reset
after the battery has been discharged or
the battery has been disconnected. See
chapter 3 or 4 for: •
Power Windows
• Trip Computer
• Climate Control System
• Clock
• Audio System
• Sunroof
Page 549 of 555
I
I -7
Infotainment System .......................................................................................... 5-139
Antenna .......................................................................................................... 5-139
Audio (Display Audio) / Video / Navigation System (AVN) ........................5-141
Bluetooth ®
Wireless Technology Hands-Free ................................................5-141
Steering Wheel Audio Control ....................................................................... 5-140
USB and iPod® Port ...................................................................................... 5-139
Instrument Cluster ................................................................................................. 4-2
Gauges and Meters ............................................................................................. 4-4
Instrument Cluster Control ................................................................................. 4-4
LCD Display Messages .................................................................................... 4-19
Transmission Shift Indicator .............................................................................. 4-9
Warning and Indicator Lights ........................................................................... 4-11
Instrument Panel Overview ................................................................................... 2-7
Interior Features ................................................................................................. 5-132
Clock .............................................................................................................. 5-137
Clothes Hanger ............................................................................................... 5-137
Cup Holder ..................................................................................................... 5-132
Floor Mat Anchor(s) ....................................................................................... 5-138
Power Outlet ................................................................................................... 5-133
Sunvisor .......................................................................................................... 5-133
USB Charger .................................................................................................. 5-134
Wireless Cellular Phone Charging System ....................................................5-135
Interior Overview................................................................................................... 2-6 Introduction ........................................................................................................... 1-2
J Jump Starting ......................................................................................................... 7-4
L
Lane Following Assist (LFA) ............................................................................ 6-126
LFA Operation ................................................................................................ 6-127
Limitations of the System .............................................................................. 6-130
Warning Message ........................................................................................... 6-128
Lane Keeping Assist (LKA) ................................................................................ 6-70
Limitations of the System ................................................................................ 6-75
LKA Operation ................................................................................................. 6-71
LKA System Function Change ......................................................................... 6-72
Warning Light and Message ............................................................................. 6-74