open hood Hyundai Terracan 2003 Owner's Manual
[x] Cancel search | Manufacturer: HYUNDAI, Model Year: 2003, Model line: Terracan, Model: Hyundai Terracan 2003Pages: 349, PDF Size: 4.56 MB
Page 16 of 349
FEATURES OF YOUR HYUNDAI
1- 8
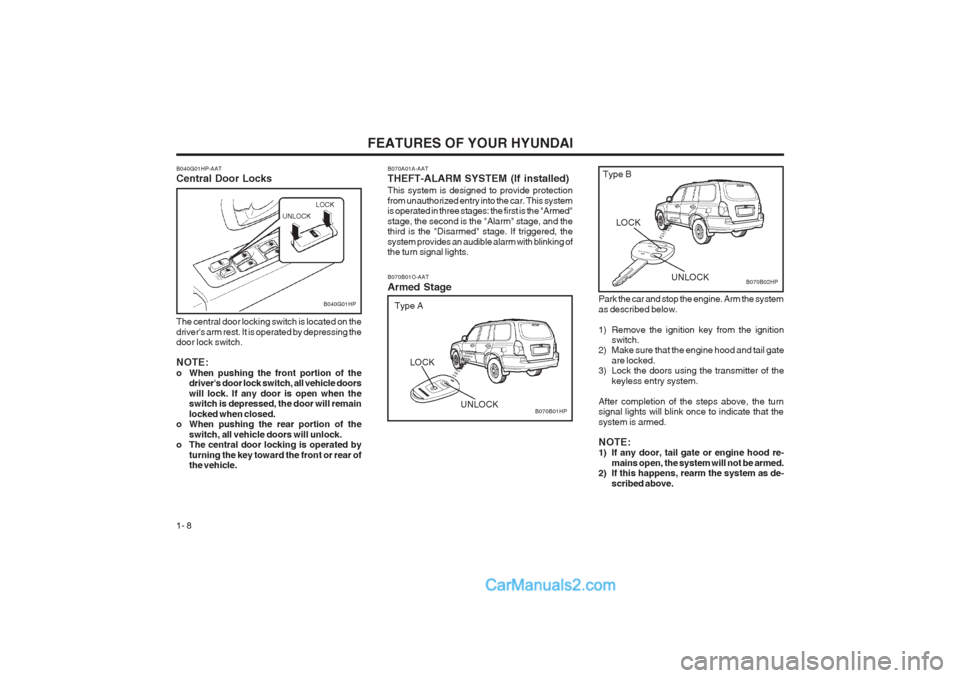
Park the car and stop the engine. Arm the system as described below.
1) Remove the ignition key from the ignition switch.
2) Make sure that the engine hood and tail gate
are locked.
3) Lock the doors using the transmitter of the
keyless entry system.
After completion of the steps above, the turn signal lights will blink once to indicate that the system is armed. NOTE:
1) If any door, tail gate or engine hood re- mains open, the system will not be armed.
2) If this happens, rearm the system as de-
scribed above.
B070B02HP
LOCK
UNLOCK
Type B
B070A01A-AAT THEFT-ALARM SYSTEM (If installed) This system is designed to provide protection from unauthorized entry into the car. This system is operated in three stages: the first is the "Armed" stage, the second is the "Alarm" stage, and the third is the "Disarmed" stage. If triggered, the system provides an audible alarm with blinking of the turn signal lights. B070B01O-AAT Armed Stage
B070B01HP
LOCK
B040G01HP-AAT Central Door Locks
B040G01HP
The central door locking switch is located on the driver's arm rest. It is operated by depressing the door lock switch. NOTE:
o When pushing the front portion of the driver's door lock switch, all vehicle doorswill lock. If any door is open when the switch is depressed, the door will remain locked when closed.
o When pushing the rear portion of the
switch, all vehicle doors will unlock.
o The central door locking is operated by
turning the key toward the front or rear of the vehicle. UNLOCK
LOCK
UNLOCKType A
Page 17 of 349
FEATURES OF YOUR HYUNDAI 1- 9
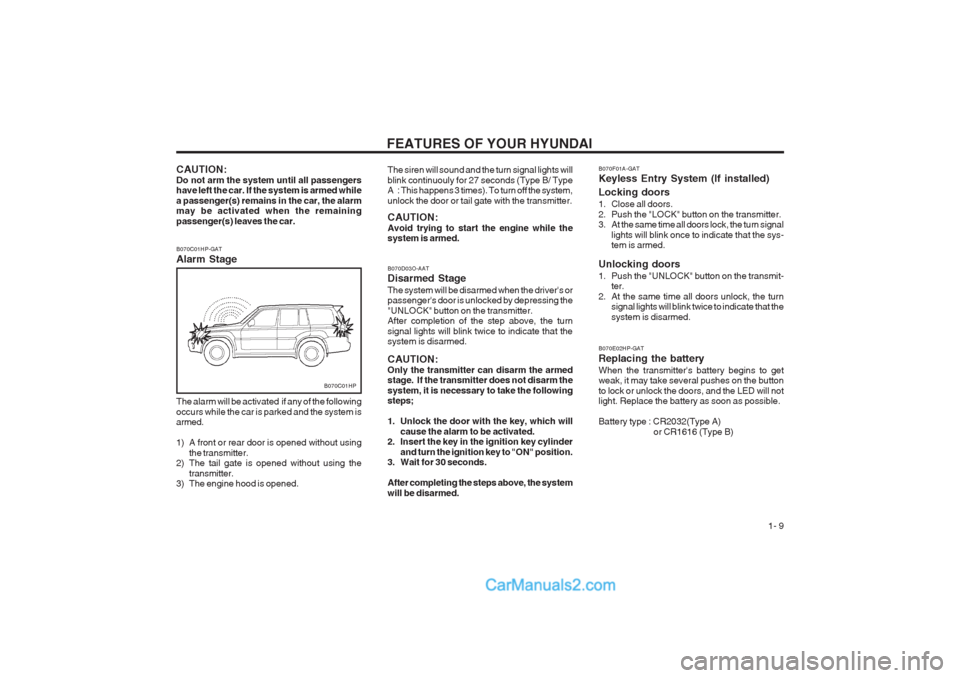
B070C01HP-GAT Alarm Stage
CAUTION: Do not arm the system until all passengers have left the car. If the system is armed while a passenger(s) remains in the car, the alarm may be activated when the remaining passenger(s) leaves the car.
B070D03O-AAT Disarmed Stage The system will be disarmed when the driver's or passenger's door is unlocked by depressing the "UNLOCK" button on the transmitter. After completion of the step above, the turn signal lights will blink twice to indicate that the system is disarmed. CAUTION: Only the transmitter can disarm the armed stage. If the transmitter does not disarm the system, it is necessary to take the following steps;
1. Unlock the door with the key, which willcause the alarm to be activated.
2. Insert the key in the ignition key cylinder
and turn the ignition key to "ON" position.
3. Wait for 30 seconds.After completing the steps above, the system will be disarmed.
B070C01HP
The alarm will be activated if any of the following occurs while the car is parked and the system is armed.
1) A front or rear door is opened without using the transmitter.
2) The tail gate is opened without using the
transmitter.
3) The engine hood is opened. The siren will sound and the turn signal lights will blink continuouly for 27 seconds (Type B/ Type
A : This happens 3 times). To turn off the system, unlock the door or tail gate with the transmitter. CAUTION: Avoid trying to start the engine while the system is armed.
B070F01A-GAT Keyless Entry System (If installed) Locking doors
1. Close all doors.
2. Push the "LOCK" button on the transmitter.
3. At the same time all doors lock, the turn signal
lights will blink once to indicate that the sys-tem is armed.
Unlocking doors
1. Push the "UNLOCK" button on the transmit- ter.
2. At the same time all doors unlock, the turn signal lights will blink twice to indicate that the system is disarmed.
B070E02HP-GAT Replacing the batteryWhen the transmitter's battery begins to get weak, it may take several pushes on the button to lock or unlock the doors, and the LED will not light. Replace the battery as soon as possible. Battery type : CR2032(Type A) or CR1616 (Type B)
Page 47 of 349
FEATURES OF YOUR HYUNDAI 1- 39
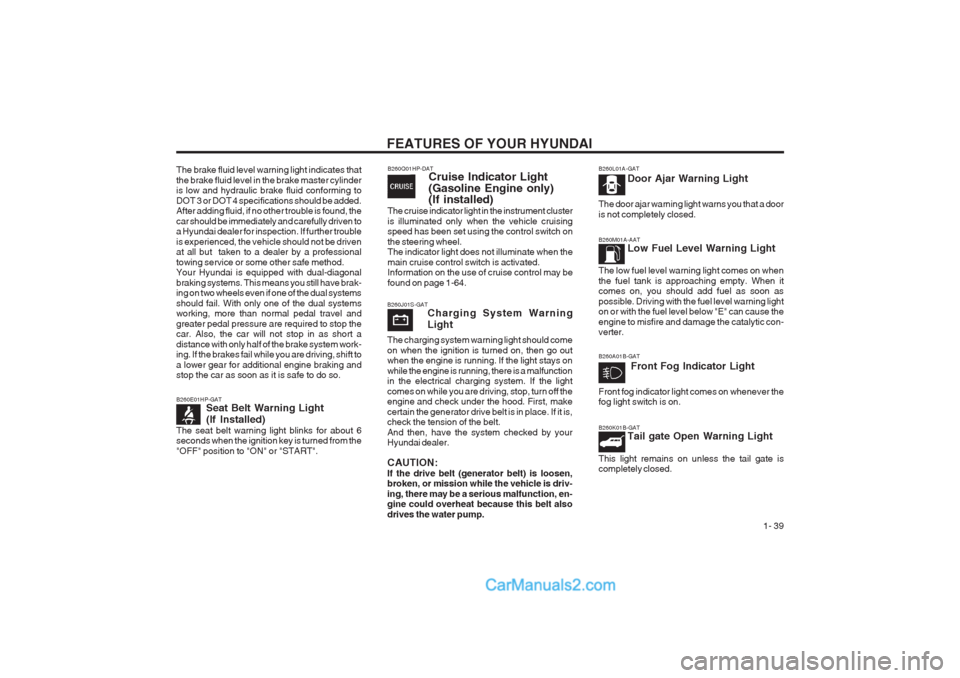
B260M01A-AATLow Fuel Level Warning Light
The low fuel level warning light comes on when the fuel tank is approaching empty. When it comes on, you should add fuel as soon as possible. Driving with the fuel level warning light on or with the fuel level below "E" can cause the engine to misfire and damage the catalytic con- verter. B260K01B-GAT Tail gate Open Warning Light
This light remains on unless the tail gate is completely closed.
B260E01HP-GAT
Seat Belt Warning Light (If Installed)
The seat belt warning light blinks for about 6 seconds when the ignition key is turned from the "OFF" position to "ON" or "START".
B260L01A-GAT
Door Ajar Warning Light
The door ajar warning light warns you that a door is not completely closed.
B260A01B-GAT Front Fog Indicator Light
Front fog indicator light comes on whenever the fog light switch is on.
B260J01S-GAT Charging System Warning Light
The charging system warning light should come on when the ignition is turned on, then go out when the engine is running. If the light stays on while the engine is running, there is a malfunction in the electrical charging system. If the light comes on while you are driving, stop, turn off the engine and check under the hood. First, make certain the generator drive belt is in place. If it is, check the tension of the belt. And then, have the system checked by your Hyundai dealer. CAUTION: If the drive belt (generator belt) is loosen, broken, or mission while the vehicle is driv- ing, there may be a serious malfunction, en- gine could overheat because this belt also drives the water pump.
B260Q01HP-DAT Cruise Indicator Light (Gasoline Engine only) (If installed)
The cruise indicator light in the instrument cluster is illuminated only when the vehicle cruising speed has been set using the control switch on the steering wheel. The indicator light does not illuminate when the main cruise control switch is activated. Information on the use of cruise control may be found on page 1-64.
The brake fluid level warning light indicates thatthe brake fluid level in the brake master cylinder is low and hydraulic brake fluid conforming to DOT 3 or DOT 4 specifications should be added. After adding fluid, if no other trouble is found, the car should be immediately and carefully driven to a Hyundai dealer for inspection. If further trouble is experienced, the vehicle should not be driven at all but taken to a dealer by a professional towing service or some other safe method. Your Hyundai is equipped with dual-diagonal braking systems. This means you still have brak- ing on two wheels even if one of the dual systems should fail. With only one of the dual systems working, more than normal pedal travel and greater pedal pressure are required to stop the car. Also, the car will not stop in as short a distance with only half of the brake system work- ing. If the brakes fail while you are driving, shift to a lower gear for additional engine braking and stop the car as soon as it is safe to do so.
Page 50 of 349
FEATURES OF YOUR HYUNDAI
1- 42
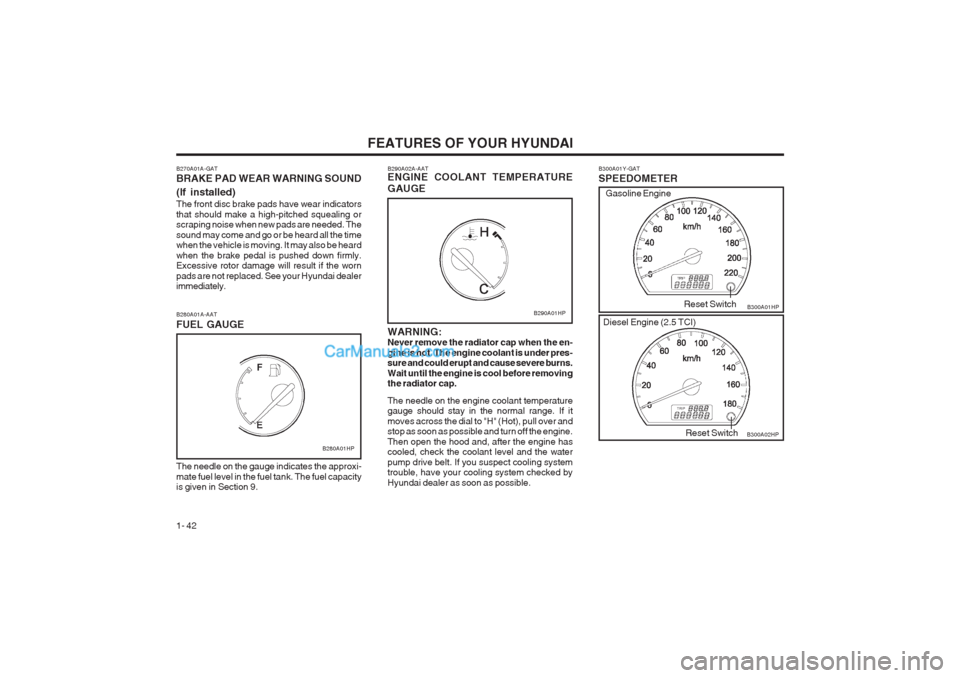
B300A01Y-GAT SPEEDOMETER B300A01HP
B300A02HP
Reset Switch
Reset Switch
Gasoline Engine
Diesel Engine (2.5 TCI)
B280A01A-AAT FUEL GAUGE
B280A01HP
The needle on the gauge indicates the approxi- mate fuel level in the fuel tank. The fuel capacity is given in Section 9. B290A02A-AAT ENGINE COOLANT TEMPERATURE GAUGE WARNING: Never remove the radiator cap when the en- gine is hot. The engine coolant is under pres- sure and could erupt and cause severe burns. Wait until the engine is cool before removing the radiator cap. The needle on the engine coolant temperature gauge should stay in the normal range. If it moves across the dial to "H" (Hot), pull over and stop as soon as possible and turn off the engine. Then open the hood and, after the engine has cooled, check the coolant level and the water pump drive belt. If you suspect cooling system trouble, have your cooling system checked by Hyundai dealer as soon as possible.
B290A01HP
B270A01A-GAT BRAKE PAD WEAR WARNING SOUND (If installed) The front disc brake pads have wear indicators that should make a high-pitched squealing or scraping noise when new pads are needed. The sound may come and go or be heard all the time when the vehicle is moving. It may also be heard when the brake pedal is pushed down firmly. Excessive rotor damage will result if the worn pads are not replaced. See your Hyundai dealer immediately.
Page 70 of 349
FEATURES OF YOUR HYUNDAI
1- 62
B580A02A-AAT SUNVISOR
B580A01HP
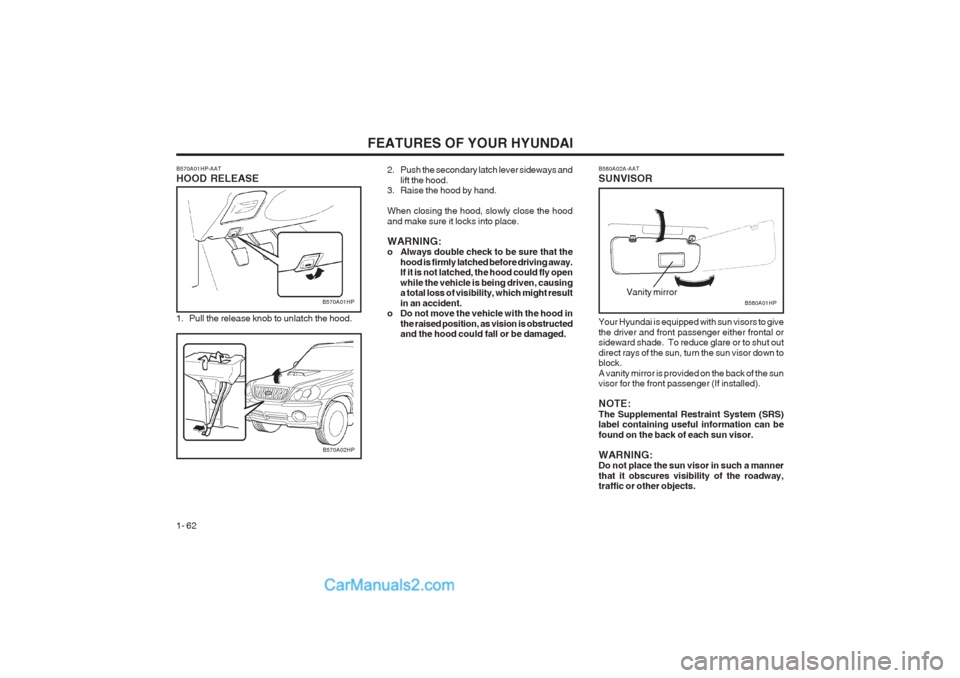
Your Hyundai is equipped with sun visors to give the driver and front passenger either frontal or sideward shade. To reduce glare or to shut out direct rays of the sun, turn the sun visor down to block. A vanity mirror is provided on the back of the sun visor for the front passenger (If installed). NOTE: The Supplemental Restraint System (SRS) label containing useful information can be found on the back of each sun visor. WARNING: Do not place the sun visor in such a manner that it obscures visibility of the roadway, traffic or other objects.Vanity mirror
2. Push the secondary latch lever sideways and lift the hood.
3. Raise the hood by hand. When closing the hood, slowly close the hood and make sure it locks into place. WARNING:
o Always double check to be sure that the
hood is firmly latched before driving away.If it is not latched, the hood could fly open while the vehicle is being driven, causing a total loss of visibility, which might result in an accident.
o Do not move the vehicle with the hood in
the raised position, as vision is obstructed and the hood could fall or be damaged.
B570A02HP
B570A01HP-AAT HOOD RELEASE
1. Pull the release knob to unlatch the hood.
B570A01HP
Page 126 of 349
WHAT TO DO IN AN EMERGENCY
3-2 tinue to apply water to the affected area with a sponge or cloth.
o The gas produced by the battery during the
jump-start operation is highly explosive. Do not smoke or allow a spark or an open flame in the vicinity.
o The battery being used to provide the jump
start must be 12-volt. If you cannot determine that it is a 12-volt battery, do not attempt to use it for the jump start.
o To jump start a car with a discharged battery,
follow this procedure exactly:
1. If the booster battery is installed in another vehicle, be sure the two vehicles are nottouching.
2. Turn off all unnecessary lights and acces-
sories in both vehicles.
3. Attach the clamps of the jumper cable in the
exact location shown in the illustration. First, attach one clamp of the jumper cable to the positive (+) post or cable of the discharged battery. Then attach the other end of the same cable to the positive (+) post or cable of the booster battery. Next, using the other cable, attach one clamp to the negative (-) post or cable of the booster battery. Then attach the other end of that cable to a solid metal part of the engine away from the battery. Do not connect the cable to any moving part.
4. Start the engine in the car with the booster battery and let it run for a few minutes. This will help to assure that the booster battery is fully charged. During the jumping operation,run the engine in this vehicle at about 2000 rpm.
5. Start the engine in the car with the discharged battery using the normal starting procedure. After the engine starts, leave the jumper cables connected and let the engine run at fast idle or about 2000 rpm for several min- utes.
6. Carefully remove the jumper cables in the reverse order of attachment.
If you do not know why your battery became discharged (because the lights were left on, etc.), have the charging system checked by your Hyundai dealer. visible loss of coolant and no steam, leave theengine running and check to be sure the engine cooling fan is operating. If the fan is not running, turn the engine off.
4. Check to see if the water pump drive belt is
missing. If it is not missing, check to see that it is tight. If the drive belt seems to be satis- factory, check for engine coolant leaking from the radiator, hoses or under the car. (If the air conditioning had been in use, it is normal for cold water to be draining from it when you stop).
WARNING: While the engine is running, keep hands and clothing away from moving parts such as the fan and drive belts to prevent injury.
5. If the water pump drive belt is broken or coolant is leaking out, stop the engine im- mediately and call the nearest Hyundai deal- er for assistance.
WARNING: Do not remove the radiator cap when the engine is hot. This can allow coolant to be blown out of the opening and cause serious burns.
6. If you cannot find the cause of the overheat- ing, wait until the engine temperature has returned to normal. Then, if coolant has been lost, carefully add coolant to the reservoir (Page 6-8) to bring the fluid level in the reser- voir up to the halfway mark.
D030A01HP-AAT IF THE ENGINE OVERHEATS If your temperature gauge indicates overheating, you experience a loss of power, or hear loud pinging or knocking, the engine is probably too hot. If this happens to you, you should:
1. Pull off the road and stop as soon as it is safe
to do so.
2. Place the gear selector lever in "P" (auto- matic), or neutral (manual transmission) and set the parking brake. If the air conditioning is on, turn it off.
3. If engine coolant is running out under the car or steam is coming out from under the hood, stop the engine. Do not open the hood until the engine coolant has stopped running or the steaming has stopped. If there is no
Page 153 of 349
DO-IT-YOURSELF MAINTENANCE 6-7
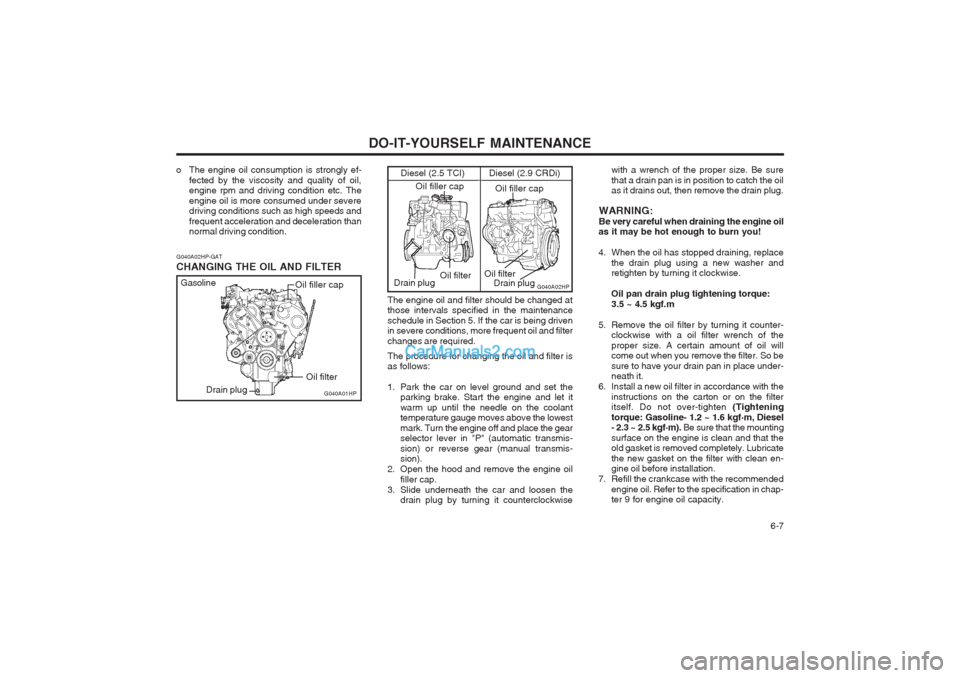
The engine oil and filter should be changed at those intervals specified in the maintenance schedule in Section 5. If the car is being driven in severe conditions, more frequent oil and filter changes are required. The procedure for changing the oil and filter is as follows:
1. Park the car on level ground and set theparking brake. Start the engine and let it warm up until the needle on the coolant temperature gauge moves above the lowest mark. Turn the engine off and place the gear selector lever in "P" (automatic transmis- sion) or reverse gear (manual transmis- sion).
2. Open the hood and remove the engine oil filler cap.
3. Slide underneath the car and loosen the drain plug by turning it counterclockwise with a wrench of the proper size. Be sure that a drain pan is in position to catch the oil as it drains out, then remove the drain plug.
WARNING: Be very careful when draining the engine oil
as it may be hot enough to burn you!
4. When the oil has stopped draining, replace
the drain plug using a new washer and retighten by turning it clockwise. Oil pan drain plug tightening torque: 3.5 ~ 4.5 kgf.m
5. Remove the oil filter by turning it counter- clockwise with a oil filter wrench of theproper size. A certain amount of oil will come out when you remove the filter. So be sure to have your drain pan in place under- neath it.
6. Install a new oil filter in accordance with the instructions on the carton or on the filteritself. Do not over-tighten (Tightening
torque: Gasoline- 1.2 ~ 1.6 kgf .
m, Diesel
- 2.3 ~ 2.5 kgf .
m). Be sure that the mounting
surface on the engine is clean and that theold gasket is removed completely. Lubricate the new gasket on the filter with clean en- gine oil before installation.
7. Refill the crankcase with the recommended engine oil. Refer to the specification in chap-ter 9 for engine oil capacity.
G040A02HP
Diesel (2.9 CRDi)
Diesel (2.5 TCI)
Oil filter
Oil filler cap
Oil filler cap
Drain plug Oil filter
Drain plug
G040A02HP-GAT CHANGING THE OIL AND FILTER
o The engine oil consumption is strongly ef-
fected by the viscosity and quality of oil, engine rpm and driving condition etc. The engine oil is more consumed under severe driving conditions such as high speeds and
frequent acceleration and deceleration than normal driving condition.
G040A01HP
Gasoline
Oil filter
Drain plug Oil filler cap
Page 159 of 349
DO-IT-YOURSELF MAINTENANCE 6-13
G110D03Y
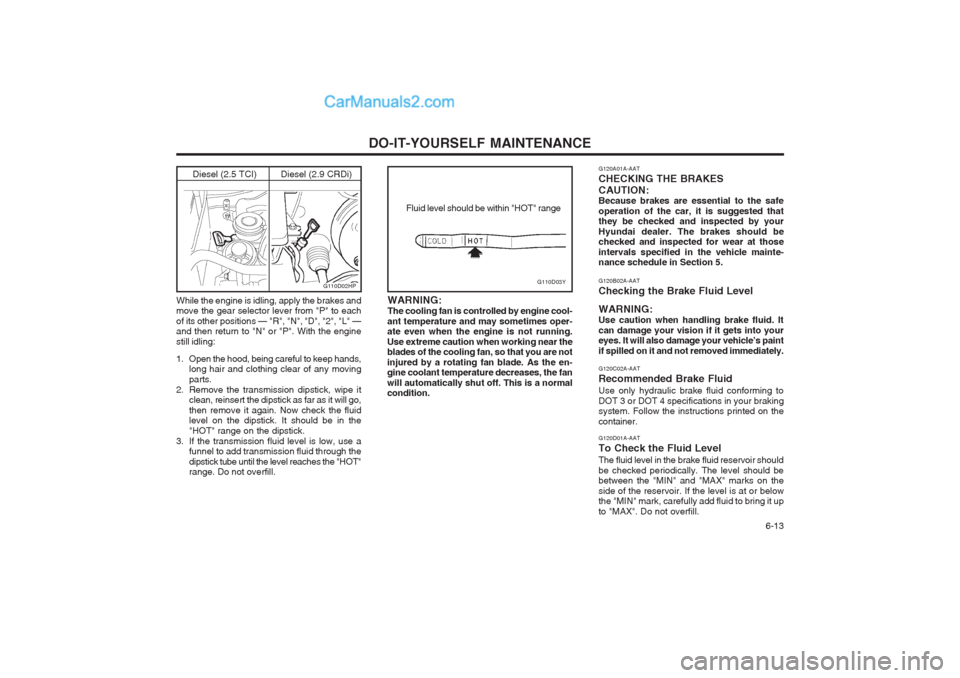
Fluid level should be within "HOT" range
G120A01A-AAT CHECKING THE BRAKESCAUTION: Because brakes are essential to the safe operation of the car, it is suggested that they be checked and inspected by your Hyundai dealer. The brakes should be checked and inspected for wear at those intervals specified in the vehicle mainte- nance schedule in Section 5.
WARNING: The cooling fan is controlled by engine cool-
ant temperature and may sometimes oper- ate even when the engine is not running. Use extreme caution when working near the blades of the cooling fan, so that you are not injured by a rotating fan blade. As the en- gine coolant temperature decreases, the fan will automatically shut off. This is a normal condition. G120B02A-AAT Checking the Brake Fluid Level WARNING: Use caution when handling brake fluid. Itcan damage your vision if it gets into your eyes. It will also damage your vehicle’s paint if spilled on it and not removed immediately. G120C02A-AAT Recommended Brake FluidUse only hydraulic brake fluid conforming to DOT 3 or DOT 4 specifications in your braking system. Follow the instructions printed on the container. G120D01A-AAT To Check the Fluid LevelThe fluid level in the brake fluid reservoir should be checked periodically. The level should be between the "MIN" and "MAX" marks on the side of the reservoir. If the level is at or below the "MIN" mark, carefully add fluid to bring it up to "MAX". Do not overfill.
While the engine is idling, apply the brakes and move the gear selector lever from "P" to each of its other positions — "R", "N", "D", "2", "L" — and then return to "N" or "P". With the engine still idling:
1. Open the hood, being careful to keep hands,
long hair and clothing clear of any moving parts.
2. Remove the transmission dipstick, wipe it clean, reinsert the dipstick as far as it will go,then remove it again. Now check the fluid level on the dipstick. It should be in the "HOT" range on the dipstick.
3. If the transmission fluid level is low, use a funnel to add transmission fluid through thedipstick tube until the level reaches the "HOT" range. Do not overfill.
Diesel (2.9 CRDi)
Diesel (2.5 TCI)
G110D02HP
Page 160 of 349
DO-IT-YOURSELF MAINTENANCE
6-14 G140A01A-AAT
AIR CONDITIONING CARE Keeping the Condenser Clean
The air conditioning condenser (and engine
radiator) should be checked periodically for accumulation of dirt, dead insects, leaves, etc. These can interfere with maximum cooling effi- ciency. When removing such accumulations, brush or hose them away carefully to avoid bending the cooling fans. G130B02A-AAT
To Replace the Fluid Recommended brake fluid conforming to DOT
3 or DOT 4 specification should be used. The reservoir cap must be fully tightened to avoid contamination from foreign matter or moisture.
NOTE: Do not allow any other liquids to contami-
nate the brake fluid. Seal damage will result.
WARNING:Use caution when handling brake fluid. It
can damage your vision if you get it in your eyes. It will also damage your vehicle’s paint if spilled on it and not removed immediately.
G130A01A-AAT
CHECKING THE CLUTCH FLUID To Check the Clutch Fluid
G130A01HP
The clutch fluid level in the master cylinder
should be checked when performing other un- der hood services. The system should be checked for leakage at the same time. Check to make certain that the clutch fluid level is always between the "MAX" and "MIN" level markings on the fluid reservoir. Fill as required. Fluid loss indicates a leak in the clutch system which should be inspected and repaired immediately. Consult your Hyundai dealer.
G120E02A-AAT
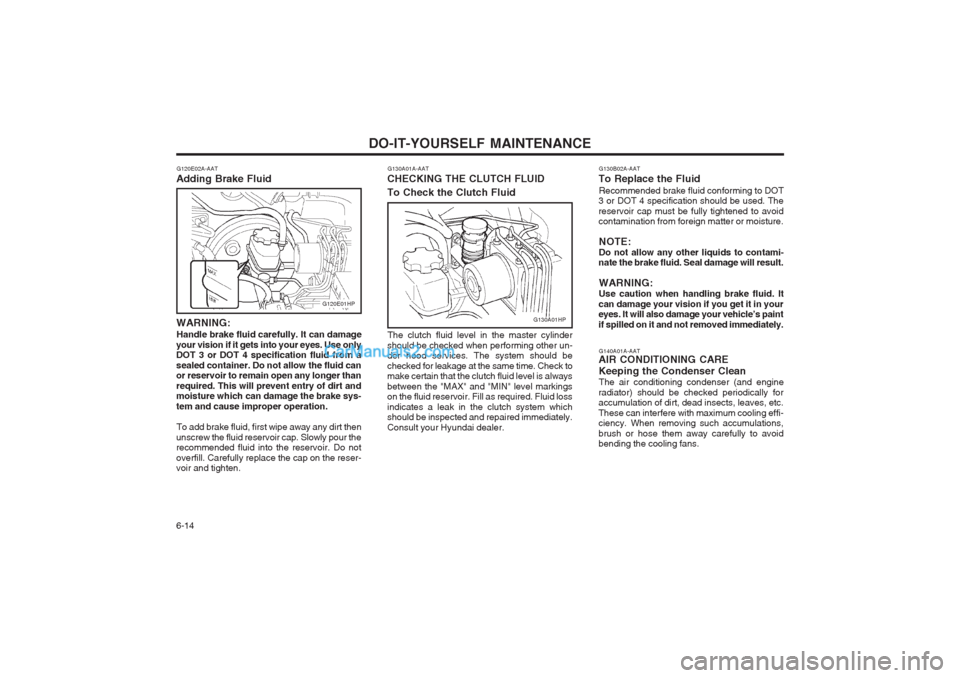
Adding Brake Fluid
WARNING: Handle brake fluid carefully. It can damage
your vision if it gets into your eyes. Use only DOT 3 or DOT 4 specification fluid from a sealed container. Do not allow the fluid can or reservoir to remain open any longer than required. This will prevent entry of dirt and moisture which can damage the brake sys- tem and cause improper operation.
To add brake fluid, first wipe away any dirt then
unscrew the fluid reservoir cap. Slowly pour the recommended fluid into the reservoir. Do not overfill. Carefully replace the cap on the reser- voir and tighten.
G120E01HP
Page 170 of 349
DO-IT-YOURSELF MAINTENANCE
6-24 6. Draw the vertical line (through the center of
each headlight) and the horizontal line (through the center of each headlight) on the aiming screen.
(1) Horizontal line dimension from ground :Low Beam : 894 mm (35.1 in.)
High Beam : 839 mm (33 in.)
(2) Distance between each vertical line : Low Beam : 1,316 mm (51.8 in.)
High Beam : 1,076 mm (42.4 in.)
And then, draw a parallel line at 38 mm (1.50 in.) under the horizontal line in case of adjusting the low beam or at 21 mm (0.83 in.) under the horizontal line in case of adjusting the high beam.
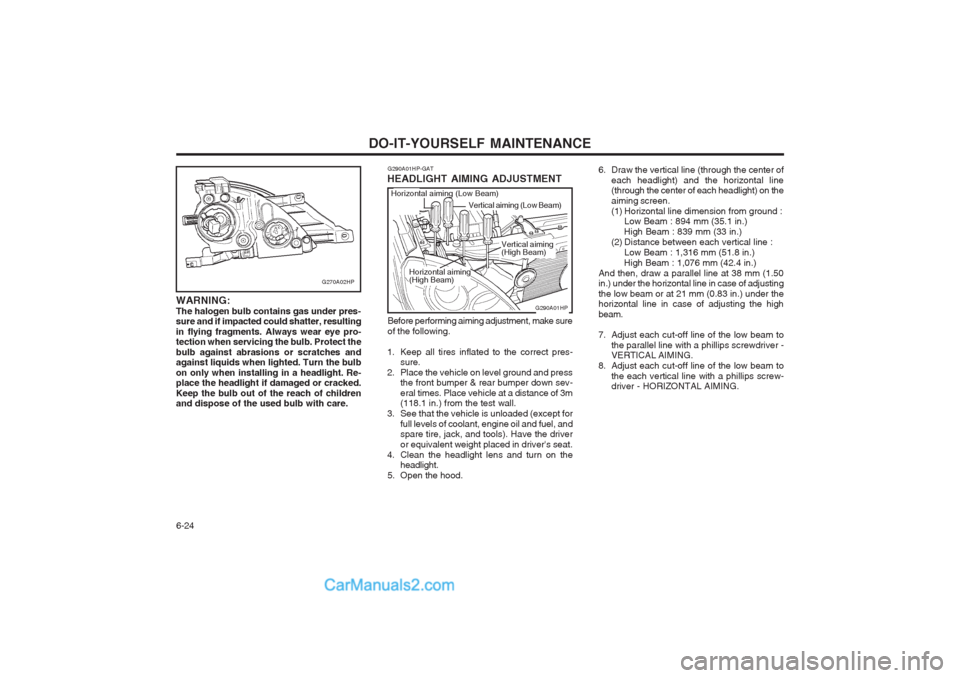
7. Adjust each cut-off line of the low beam to the parallel line with a phillips screwdriver - VERTICAL AIMING.
8. Adjust each cut-off line of the low beam to
the each vertical line with a phillips screw-driver - HORIZONTAL AIMING.
G290A01HP-GAT
HEADLIGHT AIMING ADJUSTMENT
G290A01HP
Horizontal aiming (Low Beam)
Vertical aiming (Low Beam)
Before performing aiming adjustment, make sure of the following.
1. Keep all tires inflated to the correct pres- sure.
2. Place the vehicle on level ground and press the front bumper & rear bumper down sev-eral times. Place vehicle at a distance of 3m (118.1 in.) from the test wall.
3. See that the vehicle is unloaded (except for
full levels of coolant, engine oil and fuel, andspare tire, jack, and tools). Have the driver or equivalent weight placed in driver's seat.
4. Clean the headlight lens and turn on the headlight.
5. Open the hood. Vertical aiming (High Beam)
Horizontal aiming(High Beam)
G270A02HP
WARNING: The halogen bulb contains gas under pres- sure and if impacted could shatter, resulting in flying fragments. Always wear eye pro- tection when servicing the bulb. Protect the bulb against abrasions or scratches and against liquids when lighted. Turn the bulb on only when installing in a headlight. Re- place the headlight if damaged or cracked. Keep the bulb out of the reach of children and dispose of the used bulb with care.