weight Hyundai Terracan 2003 Owner's Manual
[x] Cancel search | Manufacturer: HYUNDAI, Model Year: 2003, Model line: Terracan, Model: Hyundai Terracan 2003Pages: 349, PDF Size: 4.56 MB
Page 19 of 349
FEATURES OF YOUR HYUNDAI 1- 11
B060A02HP
NOTE: The power windows can be operated for 30 seconds after the ignition key is turned to the "ACC" or "LOCK" positions, or removed from the ignition switch. If the front doors are opened during this 30 second period, the power windows can no longer be operated without the ignition key turned to the "ON" position. WARNING:
(1) Be careful that someone's head, hands and body are not trapped by a closingwindow.
(2) Never try to operate the main switch on
the driver's door and the individual door window switch in opposing directions at the same time. If this is done, the window will stop and cannot be opened or closed.
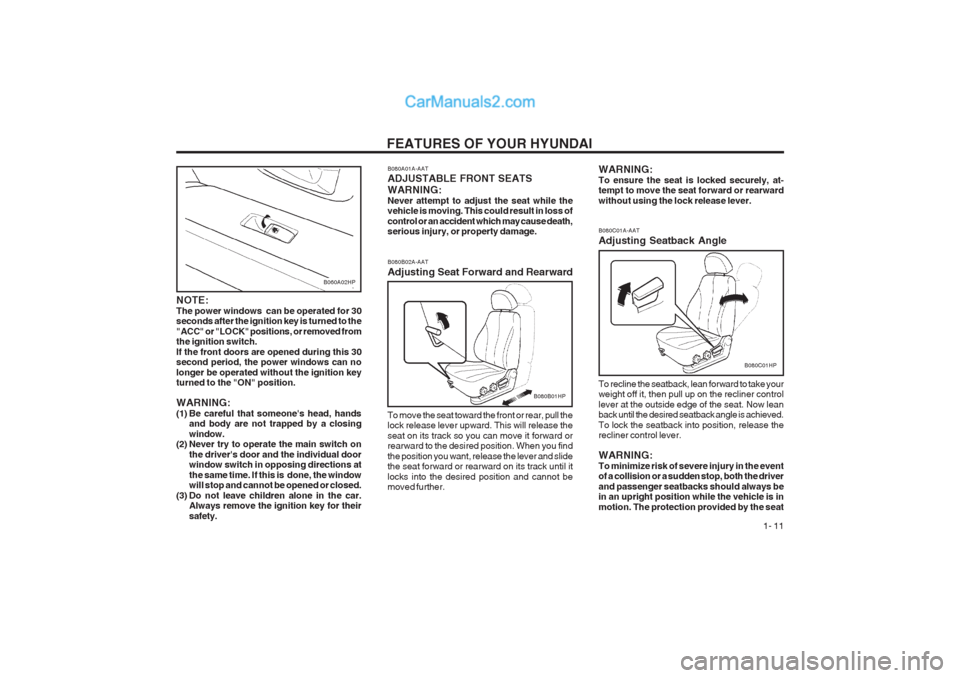
(3) Do not leave children alone in the car. Always remove the ignition key for their safety. To move the seat toward the front or rear, pull the lock release lever upward. This will release the seat on its track so you can move it forward or rearward to the desired position. When you find the position you want, release the lever and slide the seat forward or rearward on its track until it locks into the desired position and cannot be moved further.
B080A01A-AAT ADJUSTABLE FRONT SEATS WARNING: Never attempt to adjust the seat while the vehicle is moving. This could result in loss of control or an accident which may cause death, serious injury, or property damage. B080B02A-AAT Adjusting Seat Forward and Rearward
B080B01HP
B080C01A-AAT Adjusting Seatback Angle
To recline the seatback, lean forward to take your weight off it, then pull up on the recliner control lever at the outside edge of the seat. Now lean back until the desired seatback angle is achieved. To lock the seatback into position, release the recliner control lever. WARNING: To minimize risk of severe injury in the event of a collision or a sudden stop, both the driver and passenger seatbacks should always be in an upright position while the vehicle is in motion. The protection provided by the seat
B080C01HP
WARNING: To ensure the seat is locked securely, at- tempt to move the seat forward or rearward without using the lock release lever.
Page 68 of 349
FEATURES OF YOUR HYUNDAI
1- 60
B640A01S-AAT CARGO SECURITY SCREEN (If installed)
B640A01HP
To use the security screen, pull it out of the retractor and hook it to the anchors as illustrated. B650A01S-AAT STOWAGE PRECAUTIONS
1. Do not place objects on the cargo security screen. Such objects may be thrown about inside the vehicle and possibly injure vehicle occupants during an accident or when brak- ing.
2. For better fuel economy, do not carry unnec-
essary weight.
3. Never allow anyone to ride in the luggage
compartment. It is designed for luggage only.
4. Try to maintain the balance of the vehicle and
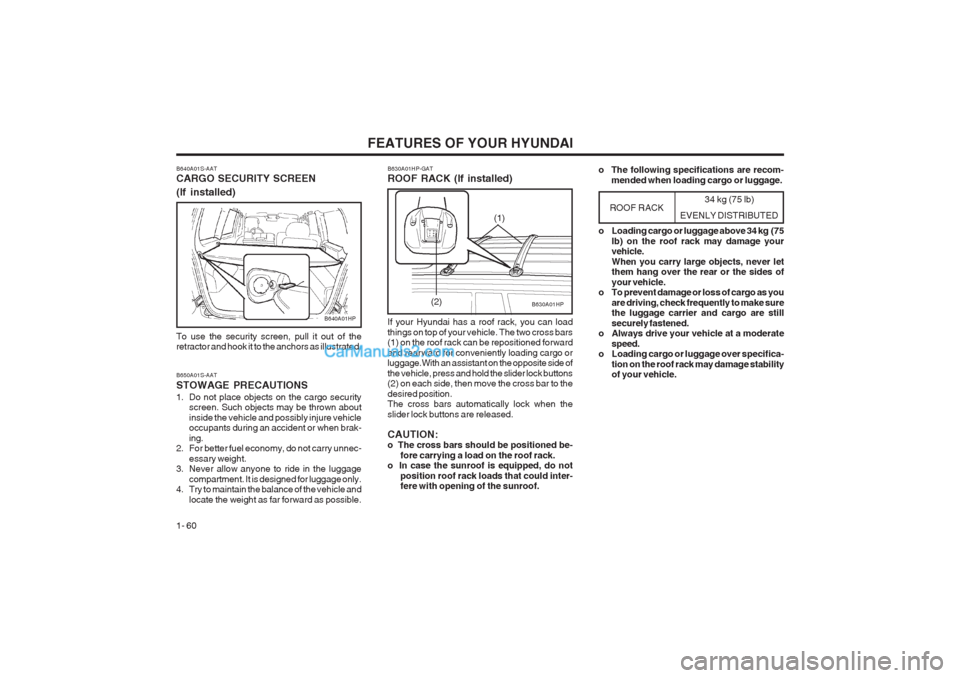
locate the weight as far forward as possible. 34 kg (75 lb)
EVENLY DISTRIBUTED
B630A01HP
B630A01HP-GAT ROOF RACK (If installed) If your Hyundai has a roof rack, you can load things on top of your vehicle. The two cross bars (1) on the roof rack can be repositioned forward and rearward for conveniently loading cargo or luggage.With an assistant on the opposite side of the vehicle, press and hold the slider lock buttons (2) on each side, then move the cross bar to the desired position. The cross bars automatically lock when the slider lock buttons are released. CAUTION: o The cross bars should be positioned be-
fore carrying a load on the roof rack.
o In case the sunroof is equipped, do not
position roof rack loads that could inter-fere with opening of the sunroof.
ROOF RACK
(2) o Loading cargo or luggage above 34 kg (75
lb) on the roof rack may damage your vehicle. When you carry large objects, never let them hang over the rear or the sides of your vehicle.
o To prevent damage or loss of cargo as you
are driving, check frequently to make sure the luggage carrier and cargo are still securely fastened.
o Always drive your vehicle at a moderate
speed.
o Loading cargo or luggage over specifica-
tion on the roof rack may damage stability of your vehicle.
(1)
o The following specifications are recom-
mended when loading cargo or luggage.
Page 72 of 349
FEATURES OF YOUR HYUNDAI
1- 64
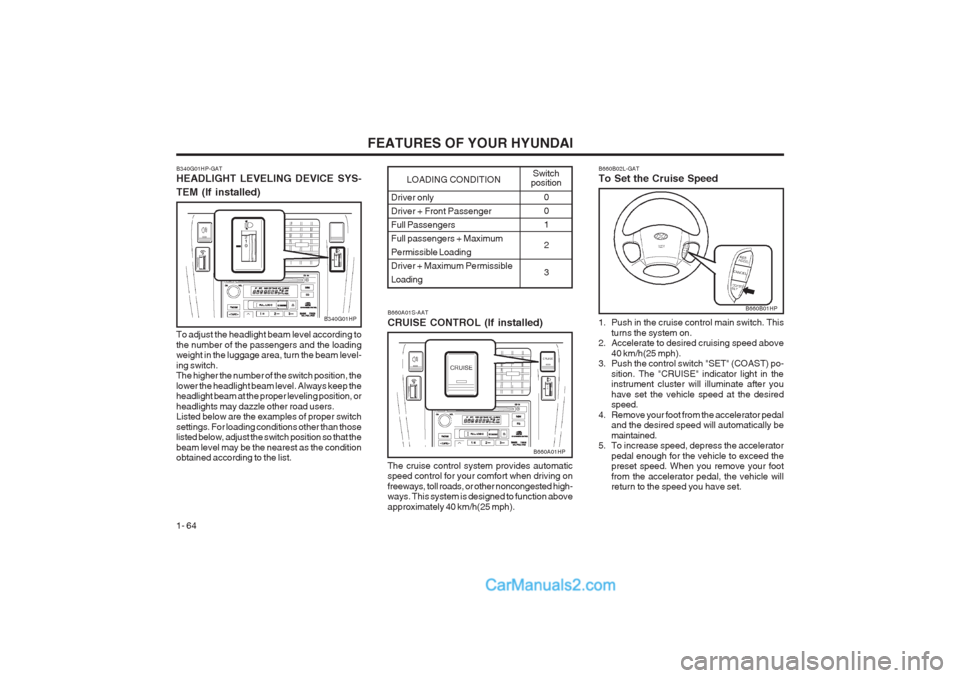
Driver only
Driver + Front PassengerFull PassengersFull passengers + MaximumPermissible Loading
Driver + Maximum PermissibleLoading0 01 2 3
LOADING CONDITION Switch
position
B340G01HP-GAT HEADLIGHT LEVELING DEVICE SYS- TEM (If installed)
To adjust the headlight beam level according to the number of the passengers and the loading weight in the luggage area, turn the beam level- ing switch. The higher the number of the switch position, the lower the headlight beam level. Always keep the headlight beam at the proper leveling position, or headlights may dazzle other road users. Listed below are the examples of proper switch settings. For loading conditions other than those listed below, adjust the switch position so that the beam level may be the nearest as the condition obtained according to the list.
B340G01HPB660A01S-AAT CRUISE CONTROL (If installed) The cruise control system provides automatic speed control for your comfort when driving on freeways, toll roads, or other noncongested high- ways. This system is designed to function above approximately 40 km/h(25 mph).
B660A01HP B660B02L-GAT To Set the Cruise Speed
1. Push in the cruise control main switch. This
turns the system on.
2. Accelerate to desired cruising speed above
40 km/h(25 mph).
3. Push the control switch "SET" (COAST) po-
sition. The "CRUISE" indicator light in the instrument cluster will illuminate after you have set the vehicle speed at the desired speed.
4. Remove your foot from the accelerator pedal and the desired speed will automatically be maintained.
5. To increase speed, depress the accelerator
pedal enough for the vehicle to exceed the preset speed. When you remove your foot from the accelerator pedal, the vehicle will return to the speed you have set.
B660B01HP
Page 119 of 349
DRIVING YOUR HYUNDAI 2- 13
o Don’t "ride" the brake pedal. Resting your foot
on the brake pedal while driving can be dan- gerous because it can result in the brakes overheating and losing their effectiveness. It also increases the wear of the brake com- ponents.
o If a tire goes flat while you are driving, apply
the brakes gently and keep the car pointed straight ahead while you slow down. When you are moving slowly enough for it to be safe to do so, pull off the road and stop in a safe place.
o If your car is equipped with an automatic
transmission, don’t let your car creep for- ward. To avoid creeping forward, keep your foot firmly on the brake pedal when the car is stopped.
o Use caution when parking on a hill. Engage the parking brake and place the gear selector lever in "P" (automatic transmission) or in first or reverse gear (manual transmission). If your car is facing downhill, turn the front wheels into the curb to help keep the car from rolling. If your car is facing uphill, turn the front wheels away from the curb to help keep the car from rolling. If there is no curb or if it is required by other conditions to keep the car from rolling, block the wheels.
o Under some conditions your parking brake
can freeze in the engaged position. This is most likely to happen when there is an ac- cumulation of snow or ice around or near the rear brakes or if the brakes are wet. If there is a risk that the parking brake may freeze, apply it only temporarily while you put thegear selector lever in "P" (automatic) or in first or reverse gear (manual transmission) and block the rear wheels so the car cannot roll. Then release the parking brake.
o Do not hold the vehicle on the upgrade with the accelerator pedal. This can cause the transmission to overheat. Always use the brake pedal or parking brake.
C140A01A-AAT DRIVING FOR ECONOMY You can save fuel and get more miles from your car if you follow these suggestions:
o Drive smoothly. Accelerate at a moderate rate. Don't make "jack-rabbit" starts or full- throttle shifts and maintain a steady cruising speed. Don't race between stoplights. Try to adjust your speed to that of the other traffic so you don't have to change speeds unneces- sarily. Avoid heavy traffic whenever possible. Always maintain a safe distance from other vehicles so you can avoid unnecessary brak- ing. This also reduces brake wear.
o Drive at a moderate speed. The faster you drive, the more fuel your car uses. Driving at a moderate speed, especially on the high- way, is one of the most effective ways to reduce fuel consumption.
o Don't "ride" the brake or clutch pedal. This
can increase fuel consumption and also in- crease wear on these components. In addi- tion, driving with your foot resting on the brake pedal may cause the brakes to overheat,which reduces their effectiveness and may lead to more serious consequences.
o Take care of your tires. Keep them inflated to the recommended pressure. Incorrect infla- tion, either too much or too little, results in unnecessary tire wear. Check the tire pres- sures at least once a month.
o Be sure that the wheels are aligned correctly.
Improper alignment can result from hitting curbs or driving too fast over irregular surfac- es. Poor alignment causes faster tire wear and may also result in other problems as well as greater fuel consumption.
o Keep your car in good condition. For better
fuel economy and reduced maintenance costs, maintain your car in accordance with the maintenance schedule in Section 5. If you drive your car in severe conditions, more frequent maintenance is required (see Sec- tion 5 for details).
o Keep your car clean. For maximum service, your Hyundai should be kept clean and free of corrosive materials. It is especially important that mud, dirt, ice, etc. not be allowed to accumulate on the underside of the car. This extra weight can result in increased fuel con- sumption and also contribute to corrosion.
o Travel lightly. Don't carry unnecessary weight
in your car. Weight reduces fuel economy.
o Don't let the engine idle longer than neces-
sary. If you are waiting (and not in traffic), turn off your engine and restart only when you're ready to go.
Page 120 of 349
DRIVING YOUR HYUNDAI
2- 14 C160C01A-AAT Use High Quality Ethylene Glycol Coolant Your Hyundai is delivered with high quality ethyl- ene glycol coolant in the cooling system. It is the only type of coolant that should be used because it helps prevent corrosion in the cooling system, lubricates the water pump and prevents freezing. Be sure to replace or replenish your coolant in accordance with the maintenance schedule in Section 5. Before winter, have your coolant test- ed to assure that its freezing point is sufficient for the temperatures anticipated during the winter. C160D01A-AAT Check Battery and Cables Winter puts additional burdens on the battery system. Visually inspect the battery and cables as described in Section 6. The level of charge in your battery can be checked by your Hyundai dealer or a service station. C160E01A-AAT Change to "Winter Weight" Oil if Necessary In some climates it is recommended that a lower viscosity "winter weight" oil be used during cold weather. See Section 9 for recommendations. If you aren’t sure what weight oil you should use, consult your Hyundai dealer.
o Remember, your Hyundai does not require
extended warm-up. As soon as the engine is running smoothly, you can drive away. In very cold weather, however, give your engine a slightly longer warm-up period.
o Don't "lug" or "over-rev" the engine. Lugging is driving too slowly in too high a gear result- ing in the engine bucking. If this happens, shift to a lower gear. Over-revving is racing the engine beyond its safe limit. This can be avoided by shifting at the recommended speeds.
o Use your air conditioning sparingly. The air
conditioning system is operated by engine power so your fuel economy is reduced when you use it.
C160A01A-AAT WINTER DRIVING The more severe weather conditions of winter result in greater wear and other problems. To minimize the problems of winter driving, you should follow these suggestions:
C150A01A-AAT SMOOTH CORNERING Avoid braking or gear changing in corners, espe- cially when roads are wet. Ideally, corners should always be taken under gentle acceleration. If you follow these suggestions, tire wear will be held to a minimum. C160B01A-GAT Snowy or Icy Conditions To drive your vehicle in deep snow, it may be necessary to use snow tires or to install tire chains on your tires. If snow tires are needed, it is necessary to select tires equivalent in size and type of the original equipment tires. Failure to do so may adversely affect the safety and handling of your car. Furthermore, speeding, rapid accel- eration, sudden brake applications, and sharp turns are potentially very hazardous practices. During deceleration, use engine braking to the fullest extent. Sudden brake applications on snowy or icy roads may cause skids to occur. You need to keep sufficient distance between the vehicle in operation in front and your vehicle. Also, apply the brake gently. It should be noted that installing tire chains on the tire will provide a greater driving force, but will not prevent side skids. NOTE: Tire chains are not legal in all provinces. Check province laws before fitting tire chains.
Page 122 of 349
DRIVING YOUR HYUNDAI
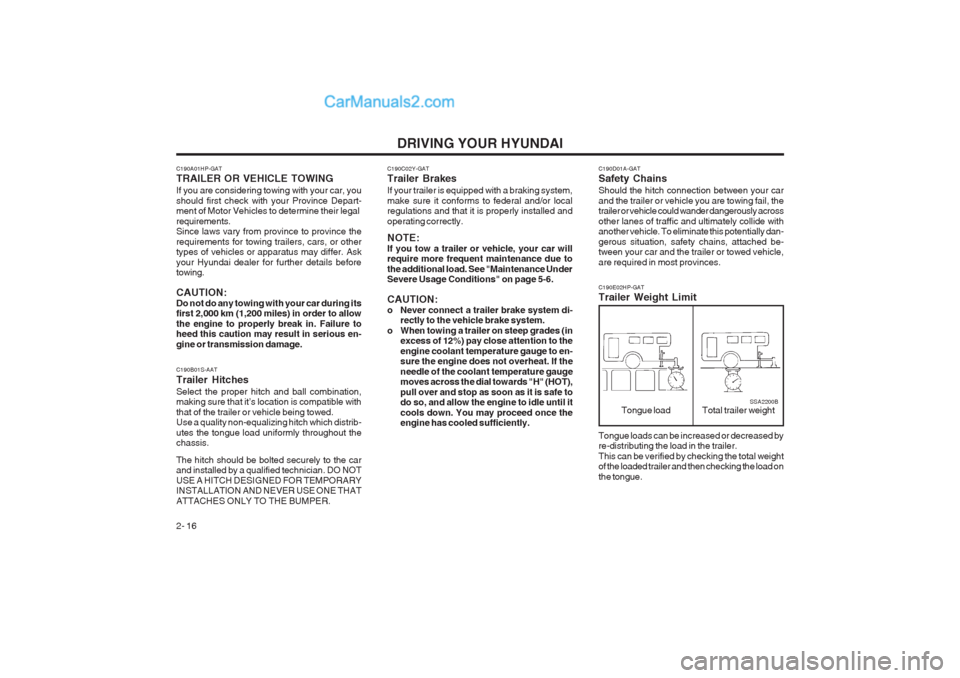
2- 16 C190D01A-GAT Safety Chains Should the hitch connection between your car and the trailer or vehicle you are towing fail, the trailer or vehicle could wander dangerously across other lanes of traffic and ultimately collide with another vehicle. To eliminate this potentially dan- gerous situation, safety chains, attached be- tween your car and the trailer or towed vehicle, are required in most provinces. C190E02HP-GAT Trailer Weight Limit
Tongue load Total trailer weightSSA2200B
Tongue loads can be increased or decreased by re-distributing the load in the trailer. This can be verified by checking the total weight of the loaded trailer and then checking the load on the tongue.
C190A01HP-GAT TRAILER OR VEHICLE TOWING If you are considering towing with your car, you should first check with your Province Depart- ment of Motor Vehicles to determine their legal requirements. Since laws vary from province to province the requirements for towing trailers, cars, or other types of vehicles or apparatus may differ. Ask your Hyundai dealer for further details before towing. CAUTION: Do not do any towing with your car during its first 2,000 km (1,200 miles) in order to allow the engine to properly break in. Failure to heed this caution may result in serious en- gine or transmission damage. C190B01S-AAT Trailer HitchesSelect the proper hitch and ball combination, making sure that it’s location is compatible with that of the trailer or vehicle being towed. Use a quality non-equalizing hitch which distrib- utes the tongue load uniformly throughout the chassis. The hitch should be bolted securely to the car and installed by a qualified technician. DO NOT USE A HITCH DESIGNED FOR TEMPORARY INSTALLATION AND NEVER USE ONE THAT ATTACHES ONLY TO THE BUMPER. C190C02Y-GAT Trailer Brakes If your trailer is equipped with a braking system, make sure it conforms to federal and/or local regulations and that it is properly installed and operating correctly. NOTE: If you tow a trailer or vehicle, your car will require more frequent maintenance due to the additional load. See "Maintenance Under Severe Usage Conditions" on page 5-6. CAUTION:
o Never connect a trailer brake system di-
rectly to the vehicle brake system.
o When towing a trailer on steep grades (in excess of 12%) pay close attention to theengine coolant temperature gauge to en- sure the engine does not overheat. If the needle of the coolant temperature gauge moves across the dial towards "H" (HOT), pull over and stop as soon as it is safe to do so, and allow the engine to idle until it cools down. You may proceed once the engine has cooled sufficiently.
Page 123 of 349
DRIVING YOUR HYUNDAI 2- 17
NOTE:
1. Never load the trailer with more weight in
the back than in the front. About 60% ofthe trailer load should be in the front half on the trailer and the remaining 40% in the rear.
2. The total gross vehicle weight with trailer
must not exceed the Gross Vehicle Weight Rating (GVWR) shown on the vehicle iden- tification plate (see page 8-1). The total gross vehicle weight is the combined weight of the vehicle, driver, all passen- gers and their luggage, cargo, hitch, trailer tongue load and other optional equip- ment.
3. The front or rear mission weight must not exceed the Gross Axle Weight Rating (GAWR) shown on the vehicle identifica- tion plate (see page 8-1). It is possible that your towing package does not exceed the GVWR but exceeds the GAWR. Improper trailer loading and/or too much luggage in the cargo area can overload the rear mis- sion. Redistribute the load and check the mission weight again.
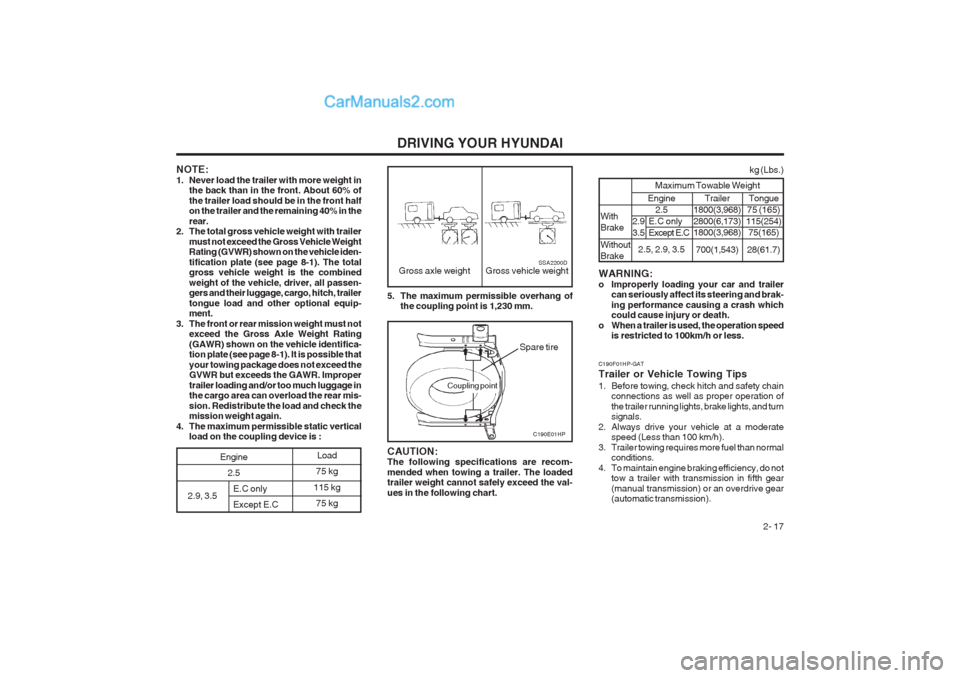
4. The maximum permissible static vertical load on the coupling device is : 5. The maximum permissible overhang of
the coupling point is 1,230 mm.
Gross axle weight Gross vehicle weightSSA2200D
C190E01HP
CAUTION: The following specifications are recom- mended when towing a trailer. The loaded trailer weight cannot safely exceed the val- ues in the following chart.
Spare tire
2.9, 3.5 E.C only Except E.C Load
75 kg
115 kg 75 kg
Engine 2.5
Coupling point
C190F01HP-GAT Trailer or Vehicle Towing Tips
1. Before towing, check hitch and safety chain connections as well as proper operation of the trailer running lights, brake lights, and turn
signals.
2. Always drive your vehicle at a moderate speed (Less than 100 km/h).
3. Trailer towing requires more fuel than normal conditions.
4. To maintain engine braking efficiency, do not tow a trailer with transmission in fifth gear(manual transmission) or an overdrive gear (automatic transmission).
WARNING:
o Improperly loading your car and trailer
can seriously affect its steering and brak-ing performance causing a crash which could cause injury or death.
o When a trailer is used, the operation speed is restricted to 100km/h or less. Engine
2.5
2.5, 2.9, 3.5
2.9 E.C only
3.5 Except E.C
kg (Lbs.)
Maximum Towable Weight
With Brake Without Brake Trailer
1800(3,968) 2800(6,173) 1800(3,968)
700(1,543) Tongue
75 (165)
115(254) 75(165)
28(61.7)
Page 170 of 349
DO-IT-YOURSELF MAINTENANCE
6-24 6. Draw the vertical line (through the center of
each headlight) and the horizontal line (through the center of each headlight) on the aiming screen.
(1) Horizontal line dimension from ground :Low Beam : 894 mm (35.1 in.)
High Beam : 839 mm (33 in.)
(2) Distance between each vertical line : Low Beam : 1,316 mm (51.8 in.)
High Beam : 1,076 mm (42.4 in.)
And then, draw a parallel line at 38 mm (1.50 in.) under the horizontal line in case of adjusting the low beam or at 21 mm (0.83 in.) under the horizontal line in case of adjusting the high beam.
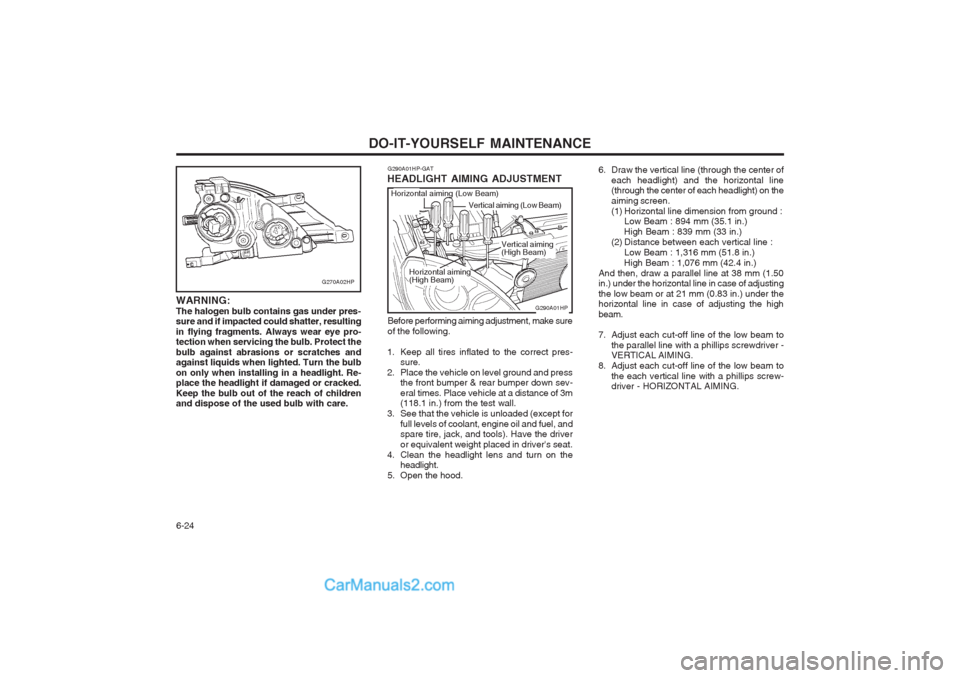
7. Adjust each cut-off line of the low beam to the parallel line with a phillips screwdriver - VERTICAL AIMING.
8. Adjust each cut-off line of the low beam to
the each vertical line with a phillips screw-driver - HORIZONTAL AIMING.
G290A01HP-GAT
HEADLIGHT AIMING ADJUSTMENT
G290A01HP
Horizontal aiming (Low Beam)
Vertical aiming (Low Beam)
Before performing aiming adjustment, make sure of the following.
1. Keep all tires inflated to the correct pres- sure.
2. Place the vehicle on level ground and press the front bumper & rear bumper down sev-eral times. Place vehicle at a distance of 3m (118.1 in.) from the test wall.
3. See that the vehicle is unloaded (except for
full levels of coolant, engine oil and fuel, andspare tire, jack, and tools). Have the driver or equivalent weight placed in driver's seat.
4. Clean the headlight lens and turn on the headlight.
5. Open the hood. Vertical aiming (High Beam)
Horizontal aiming(High Beam)
G270A02HP
WARNING: The halogen bulb contains gas under pres- sure and if impacted could shatter, resulting in flying fragments. Always wear eye pro- tection when servicing the bulb. Protect the bulb against abrasions or scratches and against liquids when lighted. Turn the bulb on only when installing in a headlight. Re- place the headlight if damaged or cracked. Keep the bulb out of the reach of children and dispose of the used bulb with care.
Page 205 of 349
CONTROLS AND EQUIPMENT1- 11
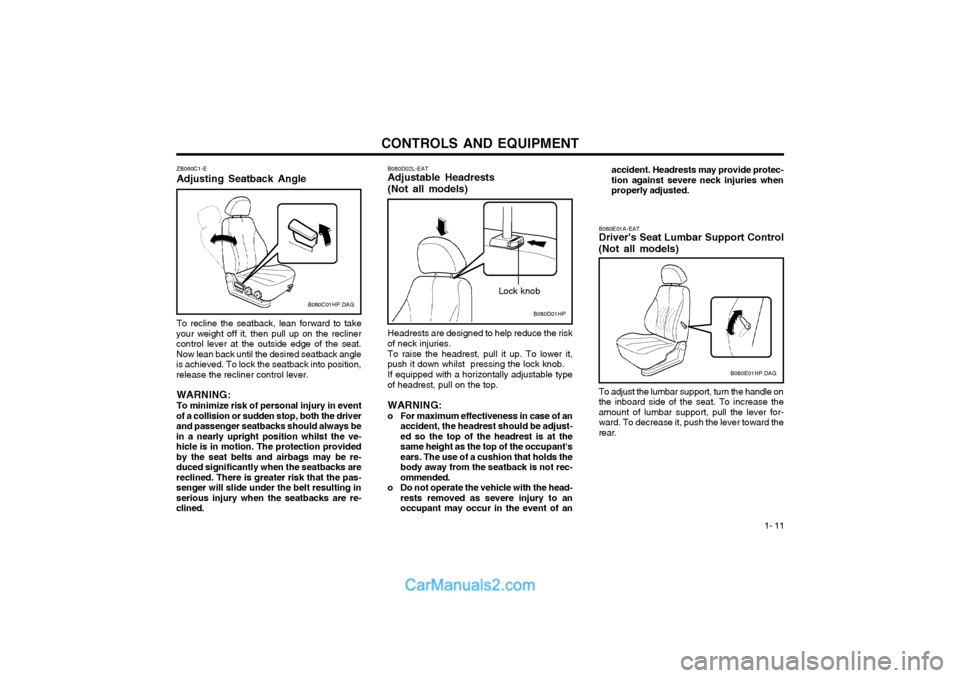
To recline the seatback, lean forward to take
your weight off it, then pull up on the recliner control lever at the outside edge of the seat.Now lean back until the desired seatback angleis achieved. To lock the seatback into position,release the recliner control lever.
WARNING: To minimize risk of personal injury in event
of a collision or sudden stop, both the driver and passenger seatbacks should always bein a nearly upright position whilst the ve-hicle is in motion. The protection providedby the seat belts and airbags may be re-duced significantly when the seatbacks arereclined. There is greater risk that the pas-senger will slide under the belt resulting inserious injury when the seatbacks are re-clined. ZB060C1-E Adjusting Seatback Angle
B080C01HP.DAG
To adjust the lumbar support, turn the handle on the inboard side of the seat. To increase theamount of lumbar support, pull the lever for-ward. To decrease it, push the lever toward therear.
B080D02L-EAT Adjustable Headrests (Not all models) Headrests are designed to help reduce the risk
of neck injuries.
To raise the headrest, pull it up. To lower it,
push it down whilst pressing the lock knob.
If equipped with a horizontally adjustable type
of headrest, pull on the top.
WARNING:
o For maximum effectiveness in case of an accident, the headrest should be adjust- ed so the top of the headrest is at thesame height as the top of the occupant'sears. The use of a cushion that holds thebody away from the seatback is not rec-ommended.
o Do not operate the vehicle with the head- rests removed as severe injury to anoccupant may occur in the event of an B080E01A-EAT Driver's Seat Lumbar Support Control
(Not all models)
B080E01HP.DAG
B080D01HP
Lock knob accident. Headrests may provide protec- tion against severe neck injuries whenproperly adjusted.
Page 210 of 349
CONTROLS AND EQUIPMENT
1- 16 SB090F1-E Seat Belt OccupancyThe seat belts are designed to be used by one seat occupant only. The use of a seat belt bymore than one person increases the levels ofinjury which may be sustained in the event of anaccident.
SB090E1-E Injured PersonsA seat belt should be used when an injured person is being transported. For specific rec-ommendations, the advice of a qualified Medi-cal Practioner should be sought. SE090G1-E Do Not Lie DownTo ensure that the maximum level of protection
may be afforded by the seat belt system, all passengers should be sitting in an upright posi-tion throughout the journey. The seat belt will beunable to afford maximum protection if the frontseats are at or near the fully reclined position.
SB090C1-E Larger ChildrenLarger children should occupy the rear seat
and be restrained at all times. The restraint may take the form of a special safety belt or theoriginal factory fitted seat belt used in conjunc-tion with an approved booster cushion depend-ing upon the size and weight of the child. Underno circumstances should children be allowed totravel standing, kneeling or lying on the seat.
Never allow childen to ride in the front passen-
ger seat.
SB090A1-E SEAT BELT PRECAUTIONS Seat belts should be worn at all times by all
occupants front and rear. The possibility of injury or the severity of injuries suffered in theevent of an accident will be greatly reduced bythe wearing of seat belts.
In addition the following recommendations
should be observed. SB090B1-E
Babies/Small Children
Babies and small children must be restrained
using a restraint system specifically designedfor this purpose. Under no circumstances shoulda child be carried in the vehicle without the useof a suitable restraint which meets the regula-tions in force in the country where the vehicle isin operation.
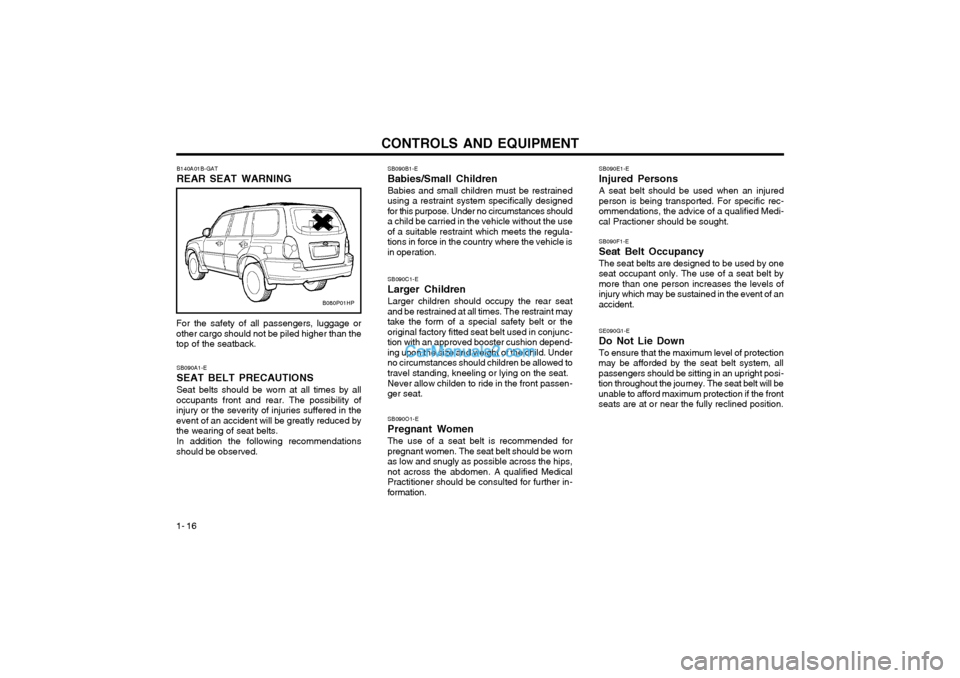
B140A01B-GAT REAR SEAT WARNING
B080P01HP
For the safety of all passengers, luggage or other cargo should not be piled higher than thetop of the seatback.
SB090O1-E Pregnant WomenThe use of a seat belt is recommended for
pregnant women. The seat belt should be worn as low and snugly as possible across the hips,not across the abdomen. A qualified MedicalPractitioner should be consulted for further in-formation.