window Hyundai Terracan 2003 Owner's Manual
[x] Cancel search | Manufacturer: HYUNDAI, Model Year: 2003, Model line: Terracan, Model: Hyundai Terracan 2003Pages: 349, PDF Size: 4.56 MB
Page 15 of 349
FEATURES OF YOUR HYUNDAI 1- 7
o The door can be locked or unlocked with akey.
o Lock the door by turning the key toward the
front of the vehicle and unlock it by turning the key toward the rear.
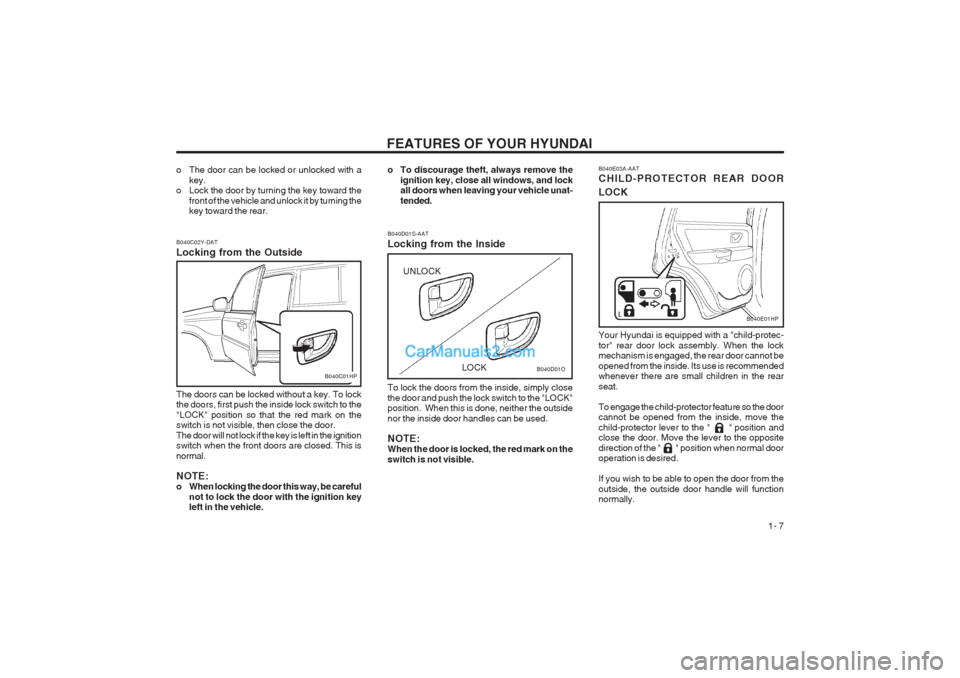
B040C02Y-DAT Locking from the Outside
B040C01HP
The doors can be locked without a key. To lock the doors, first push the inside lock switch to the "LOCK" position so that the red mark on the switch is not visible, then close the door. The door will not lock if the key is left in the ignition switch when the front doors are closed. This is normal. NOTE:
o When locking the door this way, be careful not to lock the door with the ignition keyleft in the vehicle.
B040D01S-AAT Locking from the Inside To lock the doors from the inside, simply close the door and push the lock switch to the "LOCK" position. When this is done, neither the outside nor the inside door handles can be used. NOTE: When the door is locked, the red mark on the switch is not visible.
B040D01O
LOCK
UNLOCK
o To discourage theft, always remove the
ignition key, close all windows, and lock all doors when leaving your vehicle unat- tended. B040E03A-AAT CHILD-PROTECTOR REAR DOOR LOCK Your Hyundai is equipped with a "child-protec- tor" rear door lock assembly. When the lock mechanism is engaged, the rear door cannot be opened from the inside. Its use is recommended whenever there are small children in the rear seat. To engage the child-protector feature so the door cannot be opened from the inside, move the child-protector lever to the " " position and close the door. Move the lever to the opposite direction of the " " position when normal door operation is desired. If you wish to be able to open the door from the outside, the outside door handle will function normally.
B040E01HP
Page 18 of 349
FEATURES OF YOUR HYUNDAI
1- 10
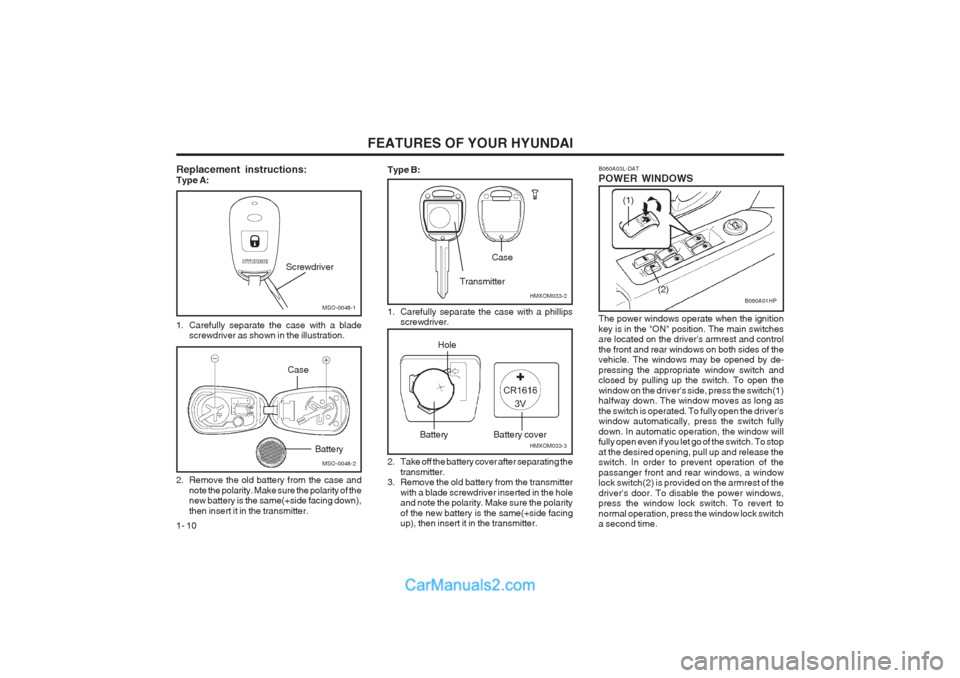
B060A03L-DAT POWER WINDOWS
(1) (2)
B060A01HP
The power windows operate when the ignition key is in the "ON" position. The main switches are located on the driver's armrest and control the front and rear windows on both sides of the vehicle. The windows may be opened by de- pressing the appropriate window switch and closed by pulling up the switch. To open the window on the driver's side, press the switch(1) halfway down. The window moves as long as the switch is operated. To fully open the driver's window automatically, press the switch fully down. In automatic operation, the window will fully open even if you let go of the switch. To stop at the desired opening, pull up and release the switch. In order to prevent operation of the passanger front and rear windows, a window lock switch(2) is provided on the armrest of the driver's door. To disable the power windows, press the window lock switch. To revert to normal operation, press the window lock switch a second time.
Replacement instructions: Type A:
MSO-0048-1
Screwdriver
1. Carefully separate the case with a blade screwdriver as shown in the illustration.
MSO-0048-2
Battery
CaseType B:
HMXOM033-2
Transmitter
Case
HMXOM033-3
Battery
Hole
Battery cover
2. Remove the old battery from the case and note the polarity. Make sure the polarity of the new battery is the same(+side facing down), then insert it in the transmitter. 1. Carefully separate the case with a phillips
screwdriver.
2. Take off the battery cover after separating the transmitter.
3. Remove the old battery from the transmitter
with a blade screwdriver inserted in the hole and note the polarity. Make sure the polarity of the new battery is the same(+side facing up), then insert it in the transmitter.
Page 19 of 349
FEATURES OF YOUR HYUNDAI 1- 11
B060A02HP
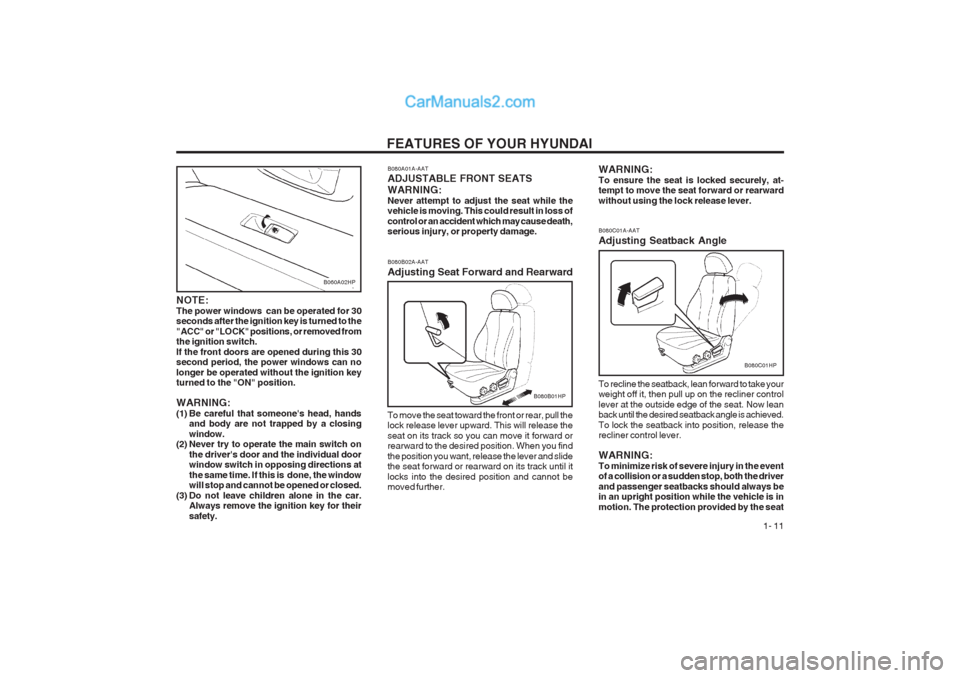
NOTE: The power windows can be operated for 30 seconds after the ignition key is turned to the "ACC" or "LOCK" positions, or removed from the ignition switch. If the front doors are opened during this 30 second period, the power windows can no longer be operated without the ignition key turned to the "ON" position. WARNING:
(1) Be careful that someone's head, hands and body are not trapped by a closingwindow.
(2) Never try to operate the main switch on
the driver's door and the individual door window switch in opposing directions at the same time. If this is done, the window will stop and cannot be opened or closed.
(3) Do not leave children alone in the car. Always remove the ignition key for their safety. To move the seat toward the front or rear, pull the lock release lever upward. This will release the seat on its track so you can move it forward or rearward to the desired position. When you find the position you want, release the lever and slide the seat forward or rearward on its track until it locks into the desired position and cannot be moved further.
B080A01A-AAT ADJUSTABLE FRONT SEATS WARNING: Never attempt to adjust the seat while the vehicle is moving. This could result in loss of control or an accident which may cause death, serious injury, or property damage. B080B02A-AAT Adjusting Seat Forward and Rearward
B080B01HP
B080C01A-AAT Adjusting Seatback Angle
To recline the seatback, lean forward to take your weight off it, then pull up on the recliner control lever at the outside edge of the seat. Now lean back until the desired seatback angle is achieved. To lock the seatback into position, release the recliner control lever. WARNING: To minimize risk of severe injury in the event of a collision or a sudden stop, both the driver and passenger seatbacks should always be in an upright position while the vehicle is in motion. The protection provided by the seat
B080C01HP
WARNING: To ensure the seat is locked securely, at- tempt to move the seat forward or rearward without using the lock release lever.
Page 41 of 349
FEATURES OF YOUR HYUNDAI 1- 33
8
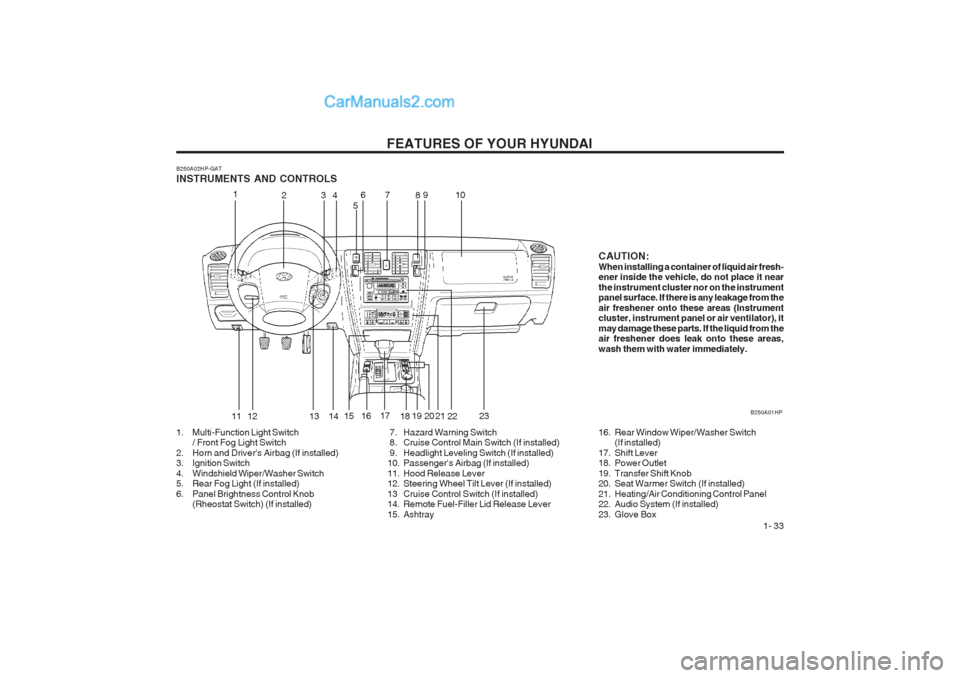
B250A02HP-GAT INSTRUMENTS AND CONTROLS
1. Multi-Function Light Switch
/ Front Fog Light Switch
2. Horn and Driver's Airbag (If installed)
3. Ignition Switch
4. Windshield Wiper/Washer Switch
5. Rear Fog Light (If installed)
6. Panel Brightness Control Knob (Rheostat Switch) (If installed) 7. Hazard Warning Switch
8. Cruise Control Main Switch (If installed)
9. Headlight Leveling Switch (If installed)
10. Passenger's Airbag (If installed)
11. Hood Release Lever
12. Steering Wheel Tilt Lever (If installed)
13 Cruise Control Switch (If installed)
14. Remote Fuel-Filler Lid Release Lever
15. Ashtray B250A01HP1
23 4
56
11 79
12 13 15 16
17
18
19 2014
16. Rear Window Wiper/Washer Switch(If installed)
17. Shift Lever
18. Power Outlet
19. Transfer Shift Knob
20. Seat Warmer Switch (If installed)
21. Heating/Air Conditioning Control Panel
22. Audio System (If installed)
23. Glove Box21
10
2223 CAUTION: When installing a container of liquid air fresh- ener inside the vehicle, do not place it near the instrument cluster nor on the instrument panel surface. If there is any leakage from the air freshener onto these areas (Instrument cluster, instrument panel or air ventilator), it may damage these parts. If the liquid from the air freshener does leak onto these areas, wash them with water immediately.
Page 54 of 349
FEATURES OF YOUR HYUNDAI
1- 46
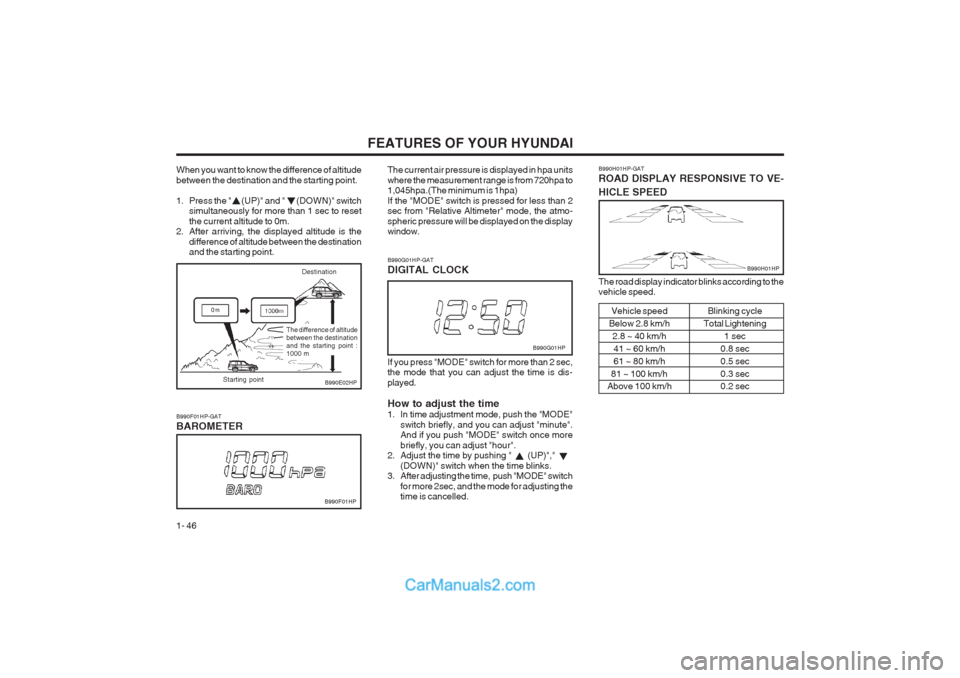
When you want to know the difference of altitude between the destination and the starting point.
1. Press the " (UP)" and " (DOWN)" switch simultaneously for more than 1 sec to reset the current altitude to 0m.
2. After arriving, the displayed altitude is the
difference of altitude between the destination and the starting point.
Destination
B990E02HP
B990F01HP-GAT BAROMETER The current air pressure is displayed in hpa units
where the measurement range is from 720hpa to 1,045hpa.(The minimum is 1hpa) If the "MODE" switch is pressed for less than 2 sec from "Relative Altimeter" mode, the atmo- spheric pressure will be displayed on the display window.
B990F01HP
B990G01HP-GAT DIGITAL CLOCK If you press "MODE" switch for more than 2 sec,
the mode that you can adjust the time is dis- played. How to adjust the time
1. In time adjustment mode, push the "MODE" switch briefly, and you can adjust "minute". And if you push "MODE" switch once more briefly, you can adjust "hour".
2. Adjust the time by pushing " (UP)","
(DOWN)" switch when the time blinks.
3. After adjusting the time, push "MODE" switch
for more 2sec, and the mode for adjusting the time is cancelled. B990G01HP
B990H01HP-GAT ROAD DISPLAY RESPONSIVE TO VE- HICLE SPEED
B990H01HP
The road display indicator blinks according to the vehicle speed.Vehicle speed
Below 2.8 km/h 2.8 ~ 40 km/h
41 ~ 60 km/h 61 ~ 80 km/h
81 ~ 100 km/h
Above 100 km/h Blinking cycle
Total Lightening 1 sec
0.8 sec0.5 sec0.3 sec 0.2 sec
The difference of altitude between the destinationand the starting point :1000 m
Starting point
Page 57 of 349
FEATURES OF YOUR HYUNDAI 1- 49
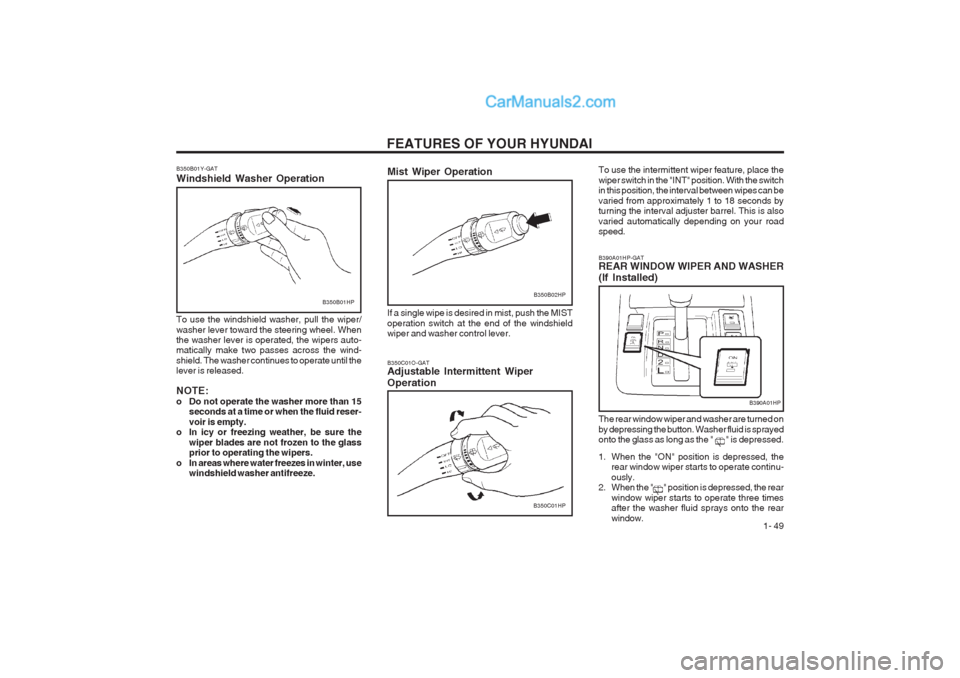
To use the intermittent wiper feature, place the wiper switch in the "INT" position. With the switch in this position, the interval between wipes can be varied from approximately 1 to 18 seconds by turning the interval adjuster barrel. This is also varied automatically depending on your road speed.
B350B01Y-GAT Windshield Washer Operation
B350B01HP
To use the windshield washer, pull the wiper/ washer lever toward the steering wheel. When the washer lever is operated, the wipers auto-matically make two passes across the wind- shield. The washer continues to operate until the lever is released. NOTE:
o Do not operate the washer more than 15 seconds at a time or when the fluid reser-voir is empty.
o In icy or freezing weather, be sure the
wiper blades are not frozen to the glass prior to operating the wipers.
o In areas where water freezes in winter, use windshield washer antifreeze.
B350C01HP
B350C01O-GAT Adjustable Intermittent Wiper Operation
Mist Wiper Operation If a single wipe is desired in mist, push the MIST operation switch at the end of the windshield wiper and washer control lever.
B350B02HP
B390A01HP-GAT REAR WINDOW WIPER AND WASHER (If Installed)
B390A01HP
The rear window wiper and washer are turned on by depressing the button. Washer fluid is sprayed onto the glass as long as the " " is depressed.
1. When the "ON" position is depressed, the rear window wiper starts to operate continu- ously.
2. When the " " position is depressed, the rear
window wiper starts to operate three times after the washer fluid sprays onto the rear window.
Page 58 of 349
FEATURES OF YOUR HYUNDAI
1- 50
B370A01A-AAT HAZARD WARNING SYSTEM
B370A01HP
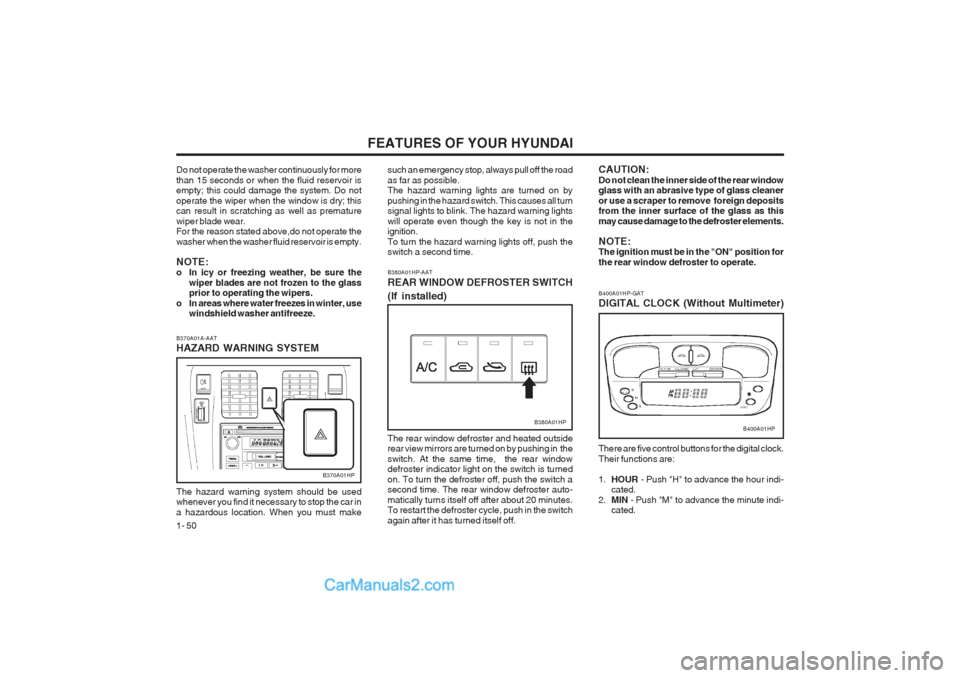
The hazard warning system should be used whenever you find it necessary to stop the car in a hazardous location. When you must make B380A01HP-AAT REAR WINDOW DEFROSTER SWITCH (If installed)
B380A01HP
The rear window defroster and heated outside rear view mirrors are turned on by pushing in the
switch. At the same time, the rear window defroster indicator light on the switch is turned on. To turn the defroster off, push the switch a second time. The rear window defroster auto- matically turns itself off after about 20 minutes. To restart the defroster cycle, push in the switch
again after it has turned itself off.
Do not operate the washer continuously for morethan 15 seconds or when the fluid reservoir is empty; this could damage the system. Do not operate the wiper when the window is dry; this can result in scratching as well as premature wiper blade wear. For the reason stated above,do not operate the washer when the washer fluid reservoir is empty. NOTE:
o In icy or freezing weather, be sure the
wiper blades are not frozen to the glassprior to operating the wipers.
o In areas where water freezes in winter, use windshield washer antifreeze. such an emergency stop, always pull off the road as far as possible. The hazard warning lights are turned on by pushing in the hazard switch. This causes all turn signal lights to blink. The hazard warning lights will operate even though the key is not in the ignition. To turn the hazard warning lights off, push the switch a second time.
CAUTION: Do not clean the inner side of the rear window glass with an abrasive type of glass cleaner or use a scraper to remove foreign deposits from the inner surface of the glass as this
may cause damage to the defroster elements. NOTE: The ignition must be in the "ON" position for the rear window defroster to operate.B400A01HP
B400A01HP-GAT DIGITAL CLOCK (Without Multimeter) There are five control buttons for the digital clock. Their functions are: 1.
HOUR - Push "H" to advance the hour indi-
cated.
2. MIN - Push "M" to advance the minute indi-
cated.
Page 63 of 349
FEATURES OF YOUR HYUNDAI 1- 55
B510A01A-AAT OUTSIDE REAR VIEW MIRROR Manual Type
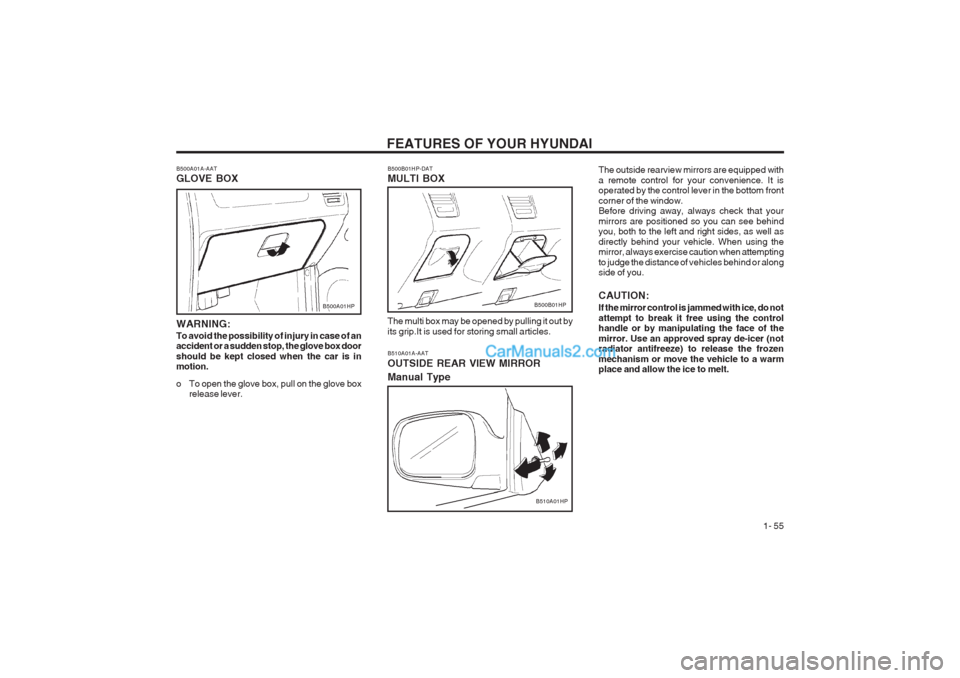
B510A01HPThe outside rearview mirrors are equipped with a remote control for your convenience. It is operated by the control lever in the bottom front corner of the window. Before driving away, always check that your mirrors are positioned so you can see behind you, both to the left and right sides, as well as directly behind your vehicle. When using the mirror, always exercise caution when attempting to judge the distance of vehicles behind or along side of you. CAUTION: If the mirror control is jammed with ice, do not attempt to break it free using the control handle or by manipulating the face of the mirror. Use an approved spray de-icer (not radiator antifreeze) to release the frozen mechanism or move the vehicle to a warm place and allow the ice to melt.
B500A01A-AAT GLOVE BOX
B500A01HP
WARNING: To avoid the possibility of injury in case of an accident or a sudden stop, the glove box door should be kept closed when the car is in motion.
o To open the glove box, pull on the glove box release lever.B500B01HP
The multi box may be opened by pulling it out by its grip.It is used for storing small articles.
B500B01HP-DAT MULTI BOX
Page 64 of 349
FEATURES OF YOUR HYUNDAI
1- 56
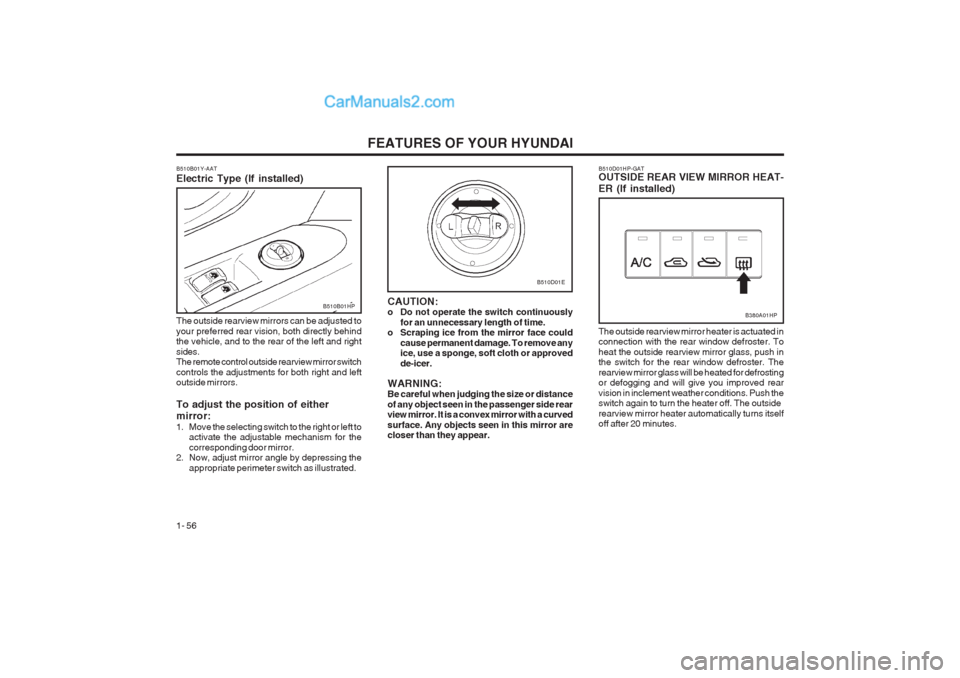
B510D01HP-GAT OUTSIDE REAR VIEW MIRROR HEAT- ER (If installed)
B380A01HP
The outside rearview mirror heater is actuated in connection with the rear window defroster. To heat the outside rearview mirror glass, push in the switch for the rear window defroster. The rearview mirror glass will be heated for defrosting or defogging and will give you improved rear vision in inclement weather conditions. Push the switch again to turn the heater off. The outside rearview mirror heater automatically turns itself off after 20 minutes.
B510D01E
CAUTION:
o Do not operate the switch continuously for an unnecessary length of time.
o Scraping ice from the mirror face could
cause permanent damage. To remove anyice, use a sponge, soft cloth or approved de-icer.
WARNING: Be careful when judging the size or distance of any object seen in the passenger side rear view mirror. It is a convex mirror with a curved surface. Any objects seen in this mirror are closer than they appear.
B510B01Y-AAT Electric Type (If installed)
B510B01HP
The outside rearview mirrors can be adjusted to your preferred rear vision, both directly behind the vehicle, and to the rear of the left and right sides. The remote control outside rearview mirror switch controls the adjustments for both right and left outside mirrors. To adjust the position of either mirror:
1. Move the selecting switch to the right or left to activate the adjustable mechanism for the corresponding door mirror.
2. Now, adjust mirror angle by depressing the
appropriate perimeter switch as illustrated.
Page 69 of 349
FEATURES OF YOUR HYUNDAI 1- 61
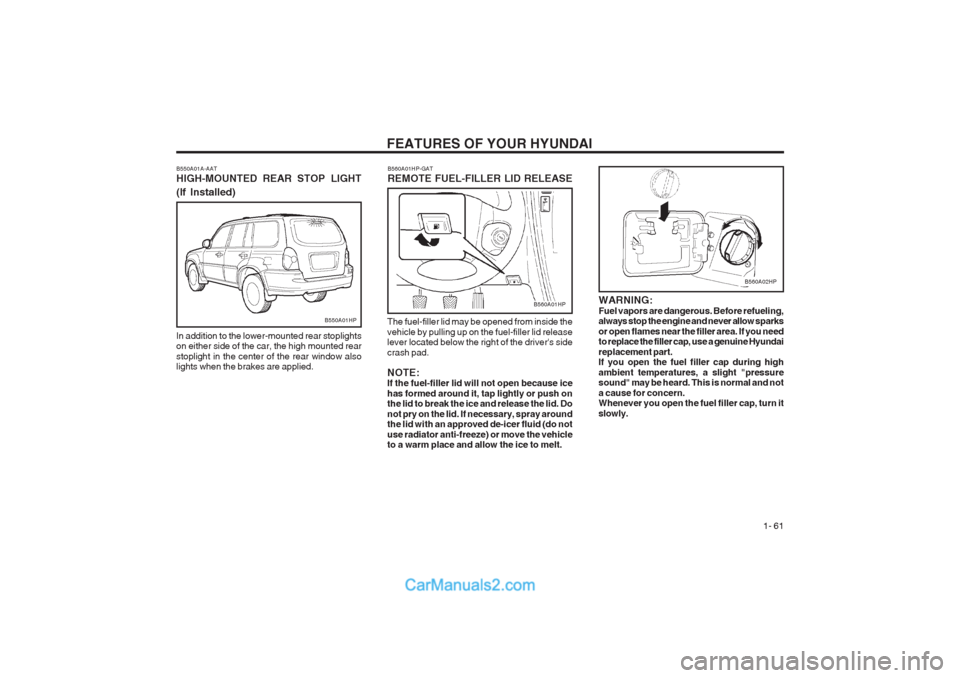
WARNING: Fuel vapors are dangerous. Before refueling, always stop the engine and never allow sparks or open flames near the filler area. If you need to replace the filler cap, use a genuine Hyundai replacement part. If you open the fuel filler cap during high ambient temperatures, a slight "pressure sound" may be heard. This is normal and not a cause for concern. Whenever you open the fuel filler cap, turn it slowly.
B550A01A-AAT HIGH-MOUNTED REAR STOP LIGHT (If Installed)
In addition to the lower-mounted rear stoplights on either side of the car, the high mounted rear stoplight in the center of the rear window also lights when the brakes are applied.
B550A01HP
B560A01HP-GAT REMOTE FUEL-FILLER LID RELEASE
The fuel-filler lid may be opened from inside the vehicle by pulling up on the fuel-filler lid release lever located below the right of the driver's side crash pad. NOTE: If the fuel-filler lid will not open because ice has formed around it, tap lightly or push on the lid to break the ice and release the lid. Do not pry on the lid. If necessary, spray around the lid with an approved de-icer fluid (do not use radiator anti-freeze) or move the vehicle to a warm place and allow the ice to melt.
B560A01HP
B560A02HP