jump start Hyundai Terracan 2003 Owner's Manual
[x] Cancel search | Manufacturer: HYUNDAI, Model Year: 2003, Model line: Terracan, Model: Hyundai Terracan 2003Pages: 349, PDF Size: 4.56 MB
Page 118 of 349
DRIVING YOUR HYUNDAI
2- 12 C130A01HP-GAT GOOD BRAKING PRACTICES WARNING: Nothing should be carried on top of the cargo area cover behind the rear seat. If there were an accident or a sudden stop, such objects could move forward and cause damage to the vehicle or injure the occupants.
o After being parked, check to be sure the
parking brake is not engaged and that the parking brake indicator light is out before driving away.
o Driving through water may get the brakes
wet. They can also get wet when the car is washed. Wet brakes can be dangerous! Your car will not stop as quickly if the brakes are wet. Wet brakes cause the car to pull to one side. To dry the brakes, apply the brakes lightly until the braking action returns to nor- mal, taking care to keep the car under control at all times. If the braking action does not return to normal, stop as soon as it is safe to do so and call your Hyundai dealer for assis- tance.
o Don’t coast down hills with the car out of gear.
This is extremely hazardous. Keep the car in gear at all times, use the brakes to slow down, then shift to a lower gear so that engine braking will help you maintain a safe speed.
D190A01O-GAT LIMITED-SLIP DIFFERENTIAL (If installed) A limited-slip differential, if equipped, is for the rear wheel differential only. The features of this limited-slip differential are described below: Just as with a conventional differential, the wheel on one side is allowed to turn at a different speed from the wheel on the other side when the vehicle is cornering. The difference between the limited- slip differential and a conventional differential is that if the wheel on one side of the vehicle loses traction, a greater amount of torque is applied to the rear wheel on the other side to improve traction.
WARNING:Keep away from the front of the vehicle while inspecting. This is very dangerous as the vehicle can jump forward and cause serious injury or death.
(9) When using tire chains, always attach them
to the rear wheels.
(10) I f the front or rear wheels get stuck in the
mud, do not spin them recklessly. The 4WD system could be damaged.
CAUTION:
o While the full-time 4WD vehicle is being raised on a jack, never start the engine orcause the tires to rotate. There is the danger that rotating tires touching the ground could cause the ve- hicle to go off the jack and to jump for- ward.
o If one of the front or rear wheels begins to
spin in mud, snow, etc., the vehicle can sometimes be driven out by depressing the accelerator pedal further; however, avoid running the engine continuously at high rpm because doing so could damage the 4WD system. WARNING:
o Avoid high cornering speeds.
o Do not make quick steering wheel move-
ments, such as sharp lane charges or fast,sharp turns.
o The risk of rollover is greatly increased if you lose control of your vehicle at high- way speeds.
o In a collision crash, an unbelted person is
significantly more likely to die than a per- son wear a seatbelt.
o Loss of control often occurs if two or more wheels drop off the roadway and the driver oversteers to reenter the roadway.
o In the event your vehicle leaves the road-
way, do not steer sharply. Instead, slow down before pulling back into the travel lanes.
Page 125 of 349
WHAT TO DO IN AN EMERGENCY 3-1
3. WHAT TO DO IN ANEMERGENCY
D010A01A-AAT IF THE ENGINE WILL NOT START WARNING: If the engine will not start, do not push or pull the car to start it. This could result in a collision or cause other damage. In addition, push or pull starting may cause the catalytic converter to be overloaded and create a fire hazard. D010B01HP-GAT If Engine Doesn’t Turn Over or Turns Over Slowly
1. If your car has an automatic transmission, be sure the gear selector lever is in "N" or "P" and the emergency brake is set. 2. Check the battery connections to be sure
they are clean and tight.
3. Turn on the interior light. If the light dims or
goes out when you operate the starter, the battery is discharged.
4. Check the starter connections to be sure they are securely tightened.
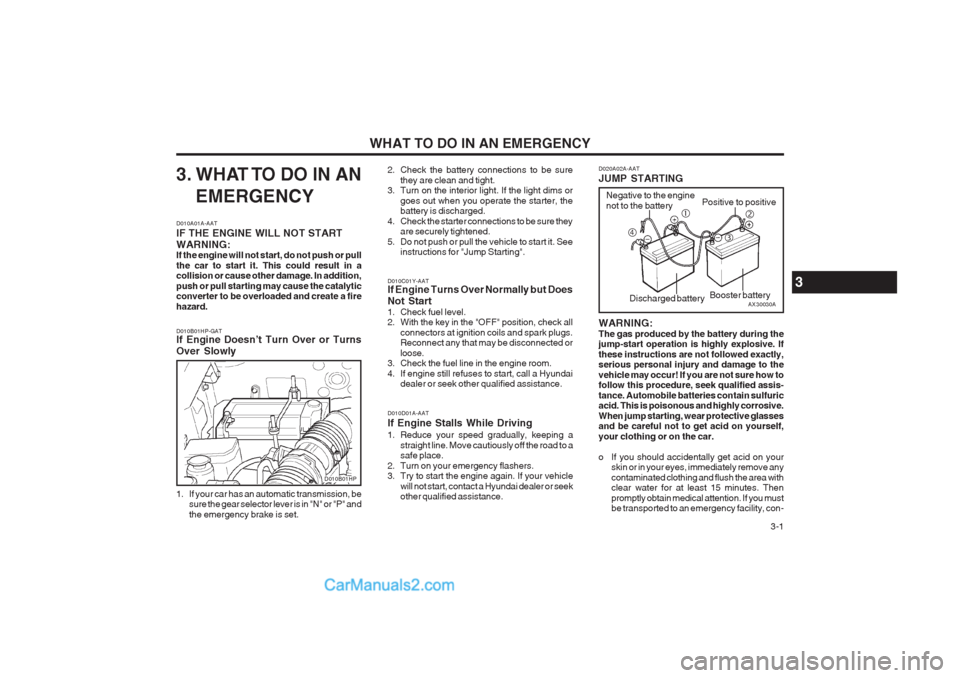
5. Do not push or pull the vehicle to start it. See instructions for "Jump Starting". D020A02A-AAT JUMP STARTING WARNING: The gas produced by the battery during the jump-start operation is highly explosive. If these instructions are not followed exactly, serious personal injury and damage to the vehicle may occur! If you are not sure how to follow this procedure, seek qualified assis- tance. Automobile batteries contain sulfuric acid. This is poisonous and highly corrosive. When jump starting, wear protective glasses and be careful not to get acid on yourself, your clothing or on the car.
o If you should accidentally get acid on your
skin or in your eyes, immediately remove any contaminated clothing and flush the area with clear water for at least 15 minutes. Then promptly obtain medical attention. If you must be transported to an emergency facility, con-
D010C01Y-AAT If Engine Turns Over Normally but Does Not Start
1. Check fuel level.
2. With the key in the "OFF" position, check all
connectors at ignition coils and spark plugs.Reconnect any that may be disconnected or loose.
3. Check the fuel line in the engine room.
4. If engine still refuses to start, call a Hyundai dealer or seek other qualified assistance.
D010D01A-AAT If Engine Stalls While Driving
1. Reduce your speed gradually, keeping a straight line. Move cautiously off the road to a safe place.
2. Turn on your emergency flashers.
3. Try to start the engine again. If your vehicle will not start, contact a Hyundai dealer or seekother qualified assistance.
AX30030A
Negative to the engine not to the battery
Positive to positive
Booster battery
�c
�e
�f �d
Discharged battery
D010B01HP
3
Page 126 of 349
WHAT TO DO IN AN EMERGENCY
3-2 tinue to apply water to the affected area with a sponge or cloth.
o The gas produced by the battery during the
jump-start operation is highly explosive. Do not smoke or allow a spark or an open flame in the vicinity.
o The battery being used to provide the jump
start must be 12-volt. If you cannot determine that it is a 12-volt battery, do not attempt to use it for the jump start.
o To jump start a car with a discharged battery,
follow this procedure exactly:
1. If the booster battery is installed in another vehicle, be sure the two vehicles are nottouching.
2. Turn off all unnecessary lights and acces-
sories in both vehicles.
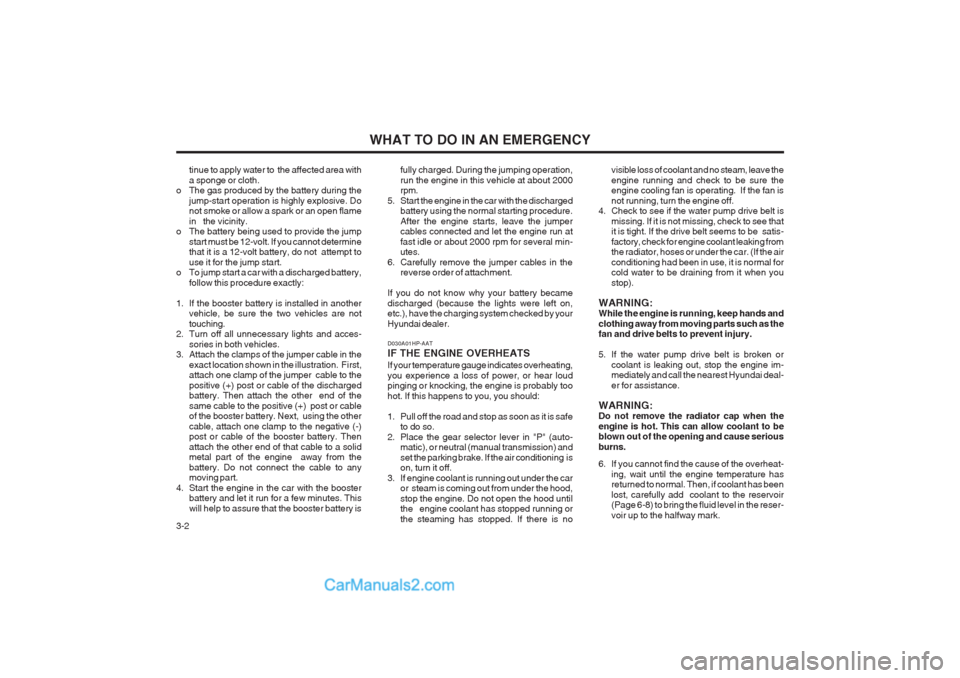
3. Attach the clamps of the jumper cable in the
exact location shown in the illustration. First, attach one clamp of the jumper cable to the positive (+) post or cable of the discharged battery. Then attach the other end of the same cable to the positive (+) post or cable of the booster battery. Next, using the other cable, attach one clamp to the negative (-) post or cable of the booster battery. Then attach the other end of that cable to a solid metal part of the engine away from the battery. Do not connect the cable to any moving part.
4. Start the engine in the car with the booster battery and let it run for a few minutes. This will help to assure that the booster battery is fully charged. During the jumping operation,run the engine in this vehicle at about 2000 rpm.
5. Start the engine in the car with the discharged battery using the normal starting procedure. After the engine starts, leave the jumper cables connected and let the engine run at fast idle or about 2000 rpm for several min- utes.
6. Carefully remove the jumper cables in the reverse order of attachment.
If you do not know why your battery became discharged (because the lights were left on, etc.), have the charging system checked by your Hyundai dealer. visible loss of coolant and no steam, leave theengine running and check to be sure the engine cooling fan is operating. If the fan is not running, turn the engine off.
4. Check to see if the water pump drive belt is
missing. If it is not missing, check to see that it is tight. If the drive belt seems to be satis- factory, check for engine coolant leaking from the radiator, hoses or under the car. (If the air conditioning had been in use, it is normal for cold water to be draining from it when you stop).
WARNING: While the engine is running, keep hands and clothing away from moving parts such as the fan and drive belts to prevent injury.
5. If the water pump drive belt is broken or coolant is leaking out, stop the engine im- mediately and call the nearest Hyundai deal- er for assistance.
WARNING: Do not remove the radiator cap when the engine is hot. This can allow coolant to be blown out of the opening and cause serious burns.
6. If you cannot find the cause of the overheat- ing, wait until the engine temperature has returned to normal. Then, if coolant has been lost, carefully add coolant to the reservoir (Page 6-8) to bring the fluid level in the reser- voir up to the halfway mark.
D030A01HP-AAT IF THE ENGINE OVERHEATS If your temperature gauge indicates overheating, you experience a loss of power, or hear loud pinging or knocking, the engine is probably too hot. If this happens to you, you should:
1. Pull off the road and stop as soon as it is safe
to do so.
2. Place the gear selector lever in "P" (auto- matic), or neutral (manual transmission) and set the parking brake. If the air conditioning is on, turn it off.
3. If engine coolant is running out under the car or steam is coming out from under the hood, stop the engine. Do not open the hood until the engine coolant has stopped running or the steaming has stopped. If there is no
Page 184 of 349
INDEX 10-3
High-Mounted Rear Stoplight ............................................................
1-61
Hood Release ................................................................................... 1-62
Horn .................................................................................................. 1-63
I
Ignition Switch ..................................................................................... 2-2Immobilizer System .................................................................... 1-3 ~ 1-6
Limp Home Procedures ....................................... 1-3 ~ 1-4, 1-5 ~ 1-6
Key ........................................................................................... 1-3, 1-4
Instrument Cluster and Indicator ............................................ 1-34 ~ 1-37
Instrument Panel Light Control (Rheostat) .......................................1-51
Instruments and Controls ............. ..................................................... 1-33
Intermittent Wiper .............................................................................. 1-49
JJump Starting ...................................................................................... 3-1
K
Key ...................................................................................................... 1-2 If you lose your keys .................................................................... 3-10
Positions .......................................................................................... 2-2
L
Light Bulbs Replacement ............. ..................................................... 6-23
Limited-Slip Differential ..................................................................... 2-12Luggage Compartment
Cargo Security Screen .................................................................. 1-60
Light ............................................................................................... 1-59
Net ................................................................................................. 1-59
MMaintenance Intervals Explanation of scheduled maintenance items ........................ 5-7 ~ 5-8
Maintenance under severe usage conditions ................................. 5-6
Scheduled maintenance ......................................................... 5-2 ~ 5-5
Service requirements ...................................................................... 5-1
Mirrors Day-night inside rearview ................................................... 1-57 ~ 1-58
Outside rear view .......................................................................... 1-55
Multimeter ............................................................................... 1-44 ~ 1-46
Altimeter ........................................................................................ 1-45
Azimuth compass .......................................................................... 1-44
Barometer ...................................................................................... 1-46
Digital Clock .................................................................................. 1-46
Relative altimeter ........................................................................... 1-45
OOdometer .......................................................................................... 1-43
PParking Brake ................................................................................... 1-58
Part-time 4WD Operation ......................................................... 2-9 ~ 2-10
Power Driver's Seat .......................................................................... 1-13
Page 284 of 349
DRIVING YOUR HYUNDAI 2- 13
Driving on dry paved road and high- way
Select the AUTO to drive on dry paved roads.
Especially on dry highway, never select the LOW. Driving on snowy or icy roads
Select the AUTO or LOW in accordance with
the road conditions, and then gradually depress the accelerator pedal for a smooth start. Driving on sandy or muddy roads
Select the LOW and then gradually depress the
accelerator pedal for a smooth start. Keep the pressure on the accelerator pedal constant aspossible, and drive at low speed. Climbing sharp grades
Select the LOW to maximize use the engine
torque.Descending sharp grades
Select the LOW, use the engine brake and
descend slowly.
(8) For speedometer test or inspection/mainte- nance (I/M) program of full-time 4WD ve- hicle, use a four-wheel chassis dynamom-eter.
CAUTION: Never engage the parking brake whilst per-
forming these tests.
o In rare cases when it's unavoidable that a 4WD vehicle is to be inspected for speed- ometer test on 2WD roll tester, strictly followthe procedures next.
1. Check the tyre pressures recommended for your vehicle.
2. Place the rear wheels on the roll tester for speedometer test as shown in theillustration.
3. Release the parking brake.
4. Place the front wheels on the temporary free roller as shown in the illustration.
WARNING:Keep away from the front of the vehicle
whilst inspecting. This is very dangerous as the vehicle can jump forward and causeserious injury or death.
(9) When using tyre chains, always attach them to the rear wheels.
(10) I f the front or rear wheels get stuck in the
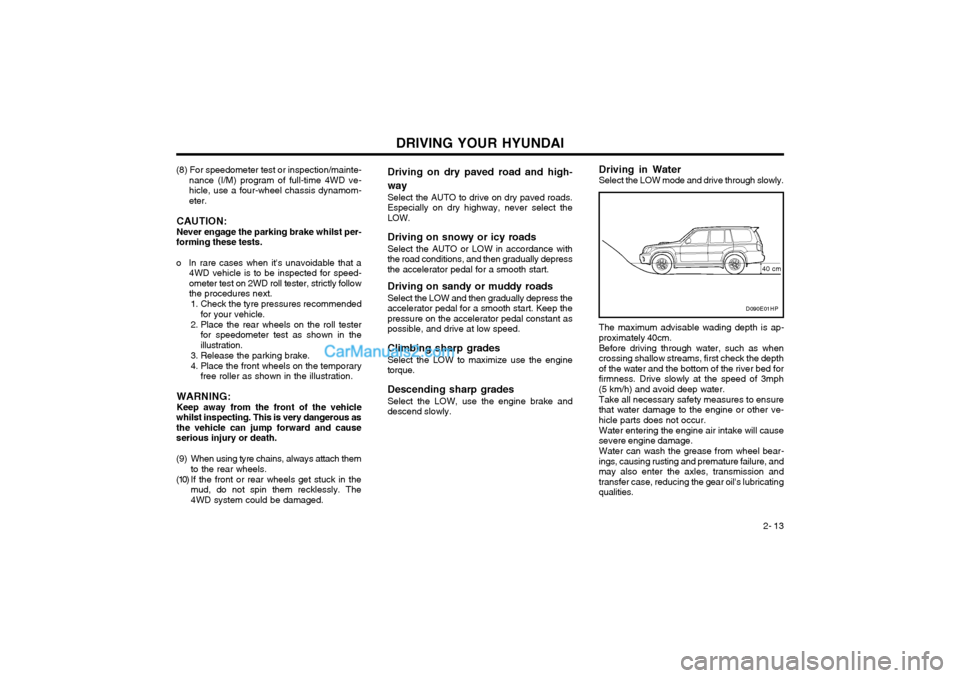
mud, do not spin them recklessly. The 4WD system could be damaged. Driving in Water Select the LOW mode and drive through slowly.
D090E01HP
The maximum advisable wading depth is ap-
proximately 40cm.
Before driving through water, such as when
crossing shallow streams, first check the depth of the water and the bottom of the river bed forfirmness. Drive slowly at the speed of 3mph(5 km/h) and avoid deep water.
Take all necessary safety measures to ensure
that water damage to the engine or other ve-hicle parts does not occur.
Water entering the engine air intake will cause
severe engine damage.
Water can wash the grease from wheel bear-
ings, causing rusting and premature failure, andmay also enter the axles, transmission andtransfer case, reducing the gear oil's lubricatingqualities.
40 cm
Page 285 of 349
DRIVING YOUR HYUNDAI
2- 14 D190A01O-EAT
LIMITED-SLIP DIFFERENTIAL (Not all models)
A limited-slip differential, if equipped, is for the
rear wheel differential only. The features of this limited-slip differential are described below:
Just as with a conventional differential, the
wheel on one side is allowed to turn at adifferent speed from the wheel on the other sidewhen the vehicle is cornering. The differencebetween the limited-slip differential and a con-ventional differential is that if the wheel on oneside of the vehicle loses traction, a greateramount of torque is applied to the rear wheel onthe other side to improve traction.
SC140A1-E
EFFECTIVE BRAKING Braking system performance and friction mate-rial life are greatly affected by the driving styleadopted. The following suggestions are madeto assist in achieving the best results from thebraking system.
o Anticipate the road and conditions ahead in order that heavy braking may be avoided.
o When descending long gradients, use the engine to assist in retarding the vehicle tominimize the possibility of brake fade occur-ring. o When trailer towing, ensure that the trailer
brakes function correctly and use enginebraking to assist the vehicle braking system.
o Use only genuine Hyundai replacement brake pads and shoes to ensure consistentfriction characteristics and wear rates.
o After driving through deep water (e.g. fording), the brakes may become wet andperformance reduced. Always check brakeefficiency after emerging from the water anddry the brakes by lightly depressing thebrake pedal several times whilst driving slow-ly.
o Apply the parking brake only when the vehi- cle is at rest.
o Since the power assistance provided by the brake servo is derived from the engine,coasting with the engine turned off or towingof the vehicle with the engine turned off willresult in greatly increased pedal pressuresbeing required to stop the vehicle.
o Do not hold the vehicle on the upgrade with the accelerator pedal. This can cause thetransmission to overheat. Always use thebrake pedal or parking brake.
CAUTION:
o Whilst the full-time 4WD vehicle is being raised on a jack, never start the engine orcause the tyres to rotate. There is the danger that rotating tyres touching the ground could cause thevehicle to go off the jack and to jumpforward.
o If one of the front or rear wheels begins to spin in mud, snow, etc., the vehiclecan sometimes be driven out by depress-ing the accelerator pedal further; how-ever, avoid running the engine continu-ously at high rpm because doing so coulddamage the 4WD system.
WARNING:
o Avoid high cornering speeds.
o Do not make quick steering wheel move- ments, such as sharp lane charges or fast, sharp turns.
o The risk of rollover is greatly increased if you lose control of your vehicle at high-way speeds.
o In a collision crash, an unbelted person is significantly more likely to die than aperson wearing a seatbelt.
o Loss of control often occurs if two or more wheels drop off the roadway and thedriver oversteers to reenter the roadway.
o In the event your vehicle leaves the road- way, do not steer sharply. Instead, slowdown before pulling back into the travellanes.
Page 291 of 349
IN CASE OF EMERGENCY 3-1
ZD000A1-A
3. IN CASE OF EMER-
GENCY
D010A01A-EAT
If Engine Stalls Whilst Driving
1. Reduce your speed gradually, keeping a straight line. Move cautiously off the road to a safe place.
2. Turn on your emergency flashers.
3. Try starting the engine again. If your vehicle will not start, contact Hyundai dealer or seek other qualified assistance.
SD020A1-E
IF THE ENGINE WILL NOT START Seek assistance from the nearest Hyundai dealer with regard to the method of ignition and fuelsystem diagnosis.
CAUTION: If the engine refuses to start, no attempt
should be made to push or tow start the vehicle. Vehicles with automatic transmis- sion or fuel injection will not be able to be started in this manner since no drive istransmitted through the automatic trans-mission whilst the engine is not running,and in the case of fuel injected derivatives,the fuel pump will not operate under towstart conditions. In addition, if the vehicle isequipped with an exhaust catalyst, damageto the catalyst may result if the vehicle istow started. HPD020B1-E
IF THE ENGINE CANNOT BE
CRANKED
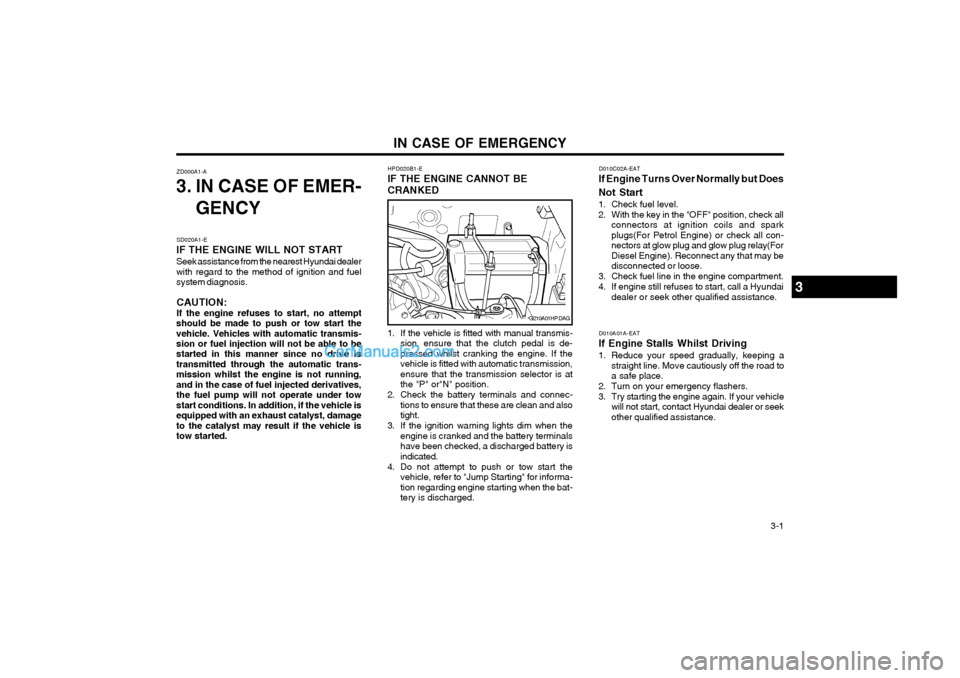
1. If the vehicle is fitted with manual transmis- sion, ensure that the clutch pedal is de-
pressed whilst cranking the engine. If thevehicle is fitted with automatic transmission,ensure that the transmission selector is atthe "P" or"N" position.
2. Check the battery terminals and connec- tions to ensure that these are clean and alsotight.
3. If the ignition warning lights dim when the engine is cranked and the battery terminalshave been checked, a discharged battery isindicated.
4. Do not attempt to push or tow start the vehicle, refer to "Jump Starting" for informa-tion regarding engine starting when the bat-tery is discharged.
G210A01HP.DAG
3
D010C02A-EAT
If Engine Turns Over Normally but Does Not Start
1. Check fuel level.
2. With the key in the "OFF" position, check all connectors at ignition coils and spark plugs(For Petrol Engine) or check all con-nectors at glow plug and glow plug relay(ForDiesel Engine). Reconnect any that may bedisconnected or loose.
3. Check fuel line in the engine compartment.
4. If engine still refuses to start, call a Hyundai dealer or seek other qualified assistance.
Page 292 of 349
IN CASE OF EMERGENCY
3-2
CAUTION:
Personal injury and damage to the vehicle
may occur if jump starting is not performed correctly. If any doubt exists as to how thisoperation should be performed, seek assis-tance from qualified personnel. WARNING:
Motor vehicle batteries contain sulphuric
acid and emit hydrogen gas. Protective cloth- ing should be worn and care exercised toprevent the acid from coming into contactwith skin or clothing and the vehicle. Nakedlights should not be permitted in the vicinityof the battery. Care should be exercised toprevent sparks occurring during connec-tion. If acid accidentally comes into contactwith skin or eyes, the affected area shouldimmediately be flushed with copious CAUTION: If the jump cable is incorrectly installed, damage to the vehicle electrical system mayoccur, in particular the electronic compo-nents such as the Fuel Injection system
computer and the Automatic Transmissioncomputer. The battery must never be dis-connected whilst the engine is running.
SD030A1-E JUMP STARTING
amounts of water and medical assistance sought.
1. Ensure that the booster battery is 12 volt type. If the booster battery is installed inanother vehicle, ensure that the two vehi-cles are not touching.
2. Turn off all unnecessary electrical equip- ment in both vehicles.
3. Ensure that the engine of the vehicle provid- ing the jump start is running prior to connec-tion of the jump cables.
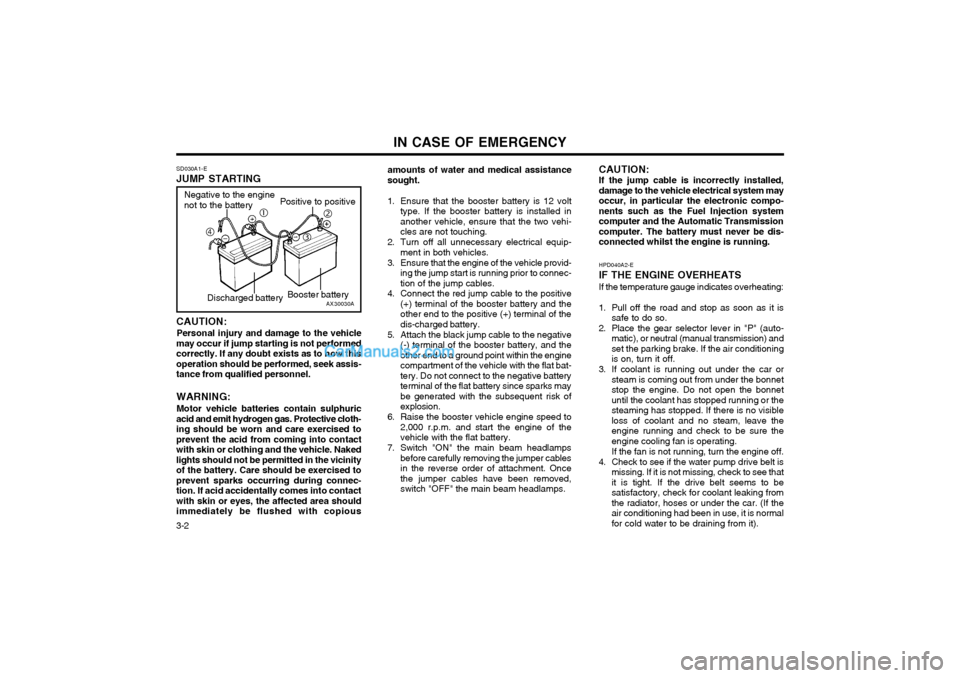
4. Connect the red jump cable to the positive (+) terminal of the booster battery and theother end to the positive (+) terminal of thedis-charged battery.
5. Attach the black jump cable to the negative (-) terminal of the booster battery, and theother end to a ground point within the enginecompartment of the vehicle with the flat bat-tery. Do not connect to the negative batteryterminal of the flat battery since sparks maybe generated with the subsequent risk ofexplosion.
6. Raise the booster vehicle engine speed to 2,000 r.p.m. and start the engine of thevehicle with the flat battery.
7. Switch "ON" the main beam headlamps before carefully removing the jumper cablesin the reverse order of attachment. Oncethe jumper cables have been removed,switch "OFF" the main beam headlamps. HPD040A2-E IF THE ENGINE OVERHEATS If the temperature gauge indicates overheating:
1. Pull off the road and stop as soon as it is
safe to do so.
2. Place the gear selector lever in "P" (auto- matic), or neutral (manual transmission) and set the parking brake. If the air conditioningis on, turn it off.
3. If coolant is running out under the car or steam is coming out from under the bonnetstop the engine. Do not open the bonnetuntil the coolant has stopped running or thesteaming has stopped. If there is no visibleloss of coolant and no steam, leave theengine running and check to be sure theengine cooling fan is operating. If the fan is not running, turn the engine off.
4. Check to see if the water pump drive belt is missing. If it is not missing, check to see that it is tight. If the drive belt seems to besatisfactory, check for coolant leaking fromthe radiator, hoses or under the car. (If theair conditioning had been in use, it is normalfor cold water to be draining from it).
AX30030A
Negative to the engine not to the battery
Positive to positive
Booster battery
�c
�e
�f �d
Discharged battery
Page 347 of 349
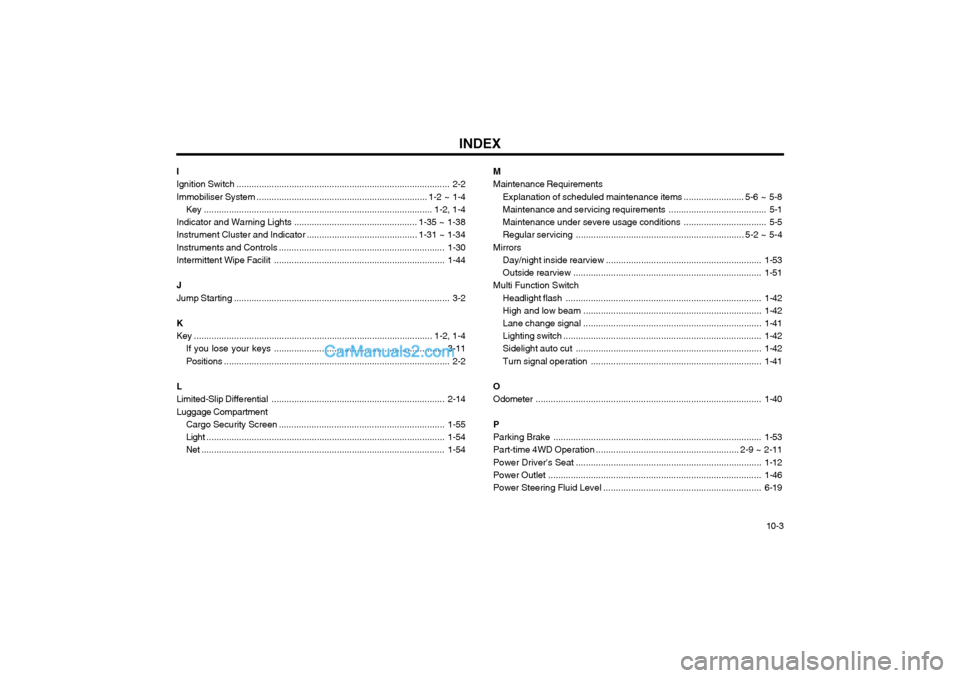
INDEX10-3
M Maintenance Requirements
Explanation of scheduled maintenance items ........................ 5-6 ~ 5-8
Maintenance and servicing requirements ....................................... 5-1
Maintenance under severe usage conditions ................................. 5-5
Regular servicing ................................................................... 5-2 ~ 5-4
Mirrors Day/night inside rearview .............................................................. 1-53
Outside rearview ........................................................................... 1-51
Multi Function Switch
Headlight flash .............................................................................. 1-42
High and low beam ....................................................................... 1-42
Lane change signal ....................................................................... 1-41
Lighting switch ............................................................................... 1-42
Sidelight auto cut .......................................................................... 1-42
Turn signal operation .................................................................... 1-41
OOdometer .......................................................................................... 1-40
P Parking Brake ................................................................................... 1-53
Part-time 4WD Operation ......................................................... 2-9 ~ 2-11
Power Driver's Seat .......................................................................... 1-12
Power Outlet ..................................................................................... 1-46
Power Steering Fluid Level ............. ..................................................6-19
I Ignition Switch
..................................................................................... 2-2
Immobiliser System .................................................................... 1-2 ~ 1-4
Key ........................................................................................... 1-2, 1-4
Indicator and Warning Lights ................................................. 1-35 ~ 1-38
Instrument Cluster and Indicator ............................................ 1-31 ~ 1-34
Instruments and Controls ................ ..................................................1-30
Intermittent Wipe Facilit .................................................................... 1-44
J Jump Starting ...................................................................................... 3-2
K
Key ............................................................................................... 1-2, 1-4 If you lose your keys .................................................................... 3-11
Positions .......................................................................................... 2-2
LLimited-Slip Differential ..................................................................... 2-14
Luggage Compartment Cargo Security Screen .................................................................. 1-55
Light ............................................................................................... 1-54
Net ................................................................................................. 1-54