wheel torque Hyundai Terracan 2005 User Guide
[x] Cancel search | Manufacturer: HYUNDAI, Model Year: 2005, Model line: Terracan, Model: Hyundai Terracan 2005Pages: 539, PDF Size: 18.03 MB
Page 433 of 539
2 DRIVING YOUR HYUNDAI
20
!
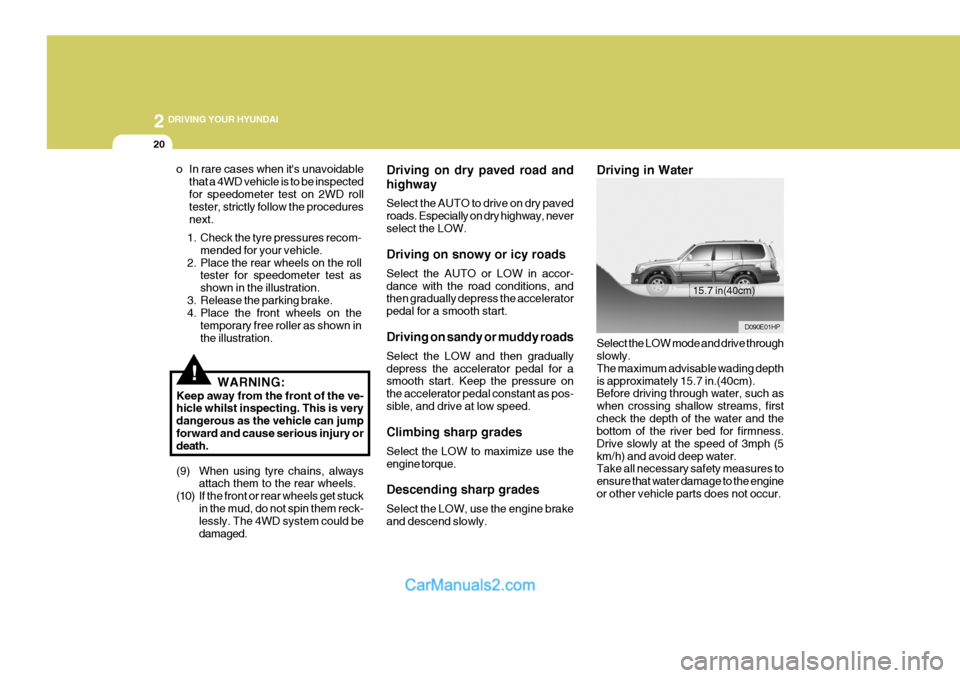
Driving in Water Select the LOW mode and drive through slowly. The maximum advisable wading depthis approximately 15.7 in.(40cm). Before driving through water, such as when crossing shallow streams, firstcheck the depth of the water and the bottom of the river bed for firmness. Drive slowly at the speed of 3mph (5km/h) and avoid deep water. Take all necessary safety measures to ensure that water damage to the engineor other vehicle parts does not occur.
o In rare cases when it's unavoidable
that a 4WD vehicle is to be inspectedfor speedometer test on 2WD roll tester, strictly follow the procedures next. Driving on dry paved road and highway Select the AUTO to drive on dry paved roads. Especially on dry highway, neverselect the LOW. Driving on snowy or icy roads Select the AUTO or LOW in accor- dance with the road conditions, and then gradually depress the accelerator pedal for a smooth start. Driving on sandy or muddy roads Select the LOW and then gradually depress the accelerator pedal for a smooth start. Keep the pressure on the accelerator pedal constant as pos-sible, and drive at low speed. Climbing sharp grades Select the LOW to maximize use the engine torque. Descending sharp grades Select the LOW, use the engine brake and descend slowly.
D090E01HP
15.7 in(40cm)
1. Check the tyre pressures recom-
mended for your vehicle.
2. Place the rear wheels on the roll tester for speedometer test as shown in the illustration.
3. Release the parking brake.
4. Place the front wheels on the
temporary free roller as shown in the illustration.
WARNING:
Keep away from the front of the ve- hicle whilst inspecting. This is very dangerous as the vehicle can jumpforward and cause serious injury or death.
(9) When using tyre chains, always attach them to the rear wheels.
(10) If the front or rear wheels get stuck in the mud, do not spin them reck- lessly. The 4WD system could be damaged.
Page 435 of 539
2 DRIVING YOUR HYUNDAI
22EFFECTIVE BRAKING
HPC140A1-E Braking system performance and fric- tion material life are greatly affected by the driving style adopted. The follow- ing suggestions are made to assist inachieving the best results from the braking system.
o Anticipate the road and conditions ahead in order that heavy braking may be avoided.
o When descending long gradients, use the engine to assist in retardingthe vehicle to minimize the possibil-ity of brake fade occurring.
o When trailer towing, ensure that the
trailer brakes function correctly anduse engine braking to assist the vehicle braking system.
o Use only genuine Hyundai replace- ment brake pads and shoes to en-sure consistent friction characteris- tics and wear rates.
o After driving through deep water (e.g. fording), the brakes may becomewet and performance reduced. Al-ways check brake efficiency after emerging from the water and dry the brakes by lightly depressing theLIMITED-SLIP DIFFEREN- TIAL
D190A01HP-EAT (Not all models) A limited-slip differential, if equipped, is for the rear wheel differential only.The features of this limited-slip differ- ential are described below: Just as with a conventional differential,the wheel on one side is allowed to turn at a different speed from the wheel on the other side when the vehicle iscornering. The difference between the limited-slip differential and a conven- tional differential is that if the wheel onone side of the vehicle loses traction, a greater amount of torque is applied to the rear wheel on the other side toimprove traction.
gency braking, always maintain a safe distance between you and ob- jects ahead. Vehicle speeds should always be reduced during extremeroad conditions. The braking distance for cars equipped with an anti-lock brakingsystem may be longer than for those without it in the following road con- ditions.
o Driving on rough, gravel or snow-
covered roads.
o Driving with tire chains installed.
o Driving on roads where the road surface is pitted or has different surface height.
These roads should be driven atreduced speeds. The safety features of an ABS equipped vehicle should not be tested by high speed drivingor cornering. This could endanger the safety of yourself or others.
! CAUTION:
o Never start the engine with the gearshift lever placed in the for- ward or reverse whilst one of therear wheels is jacked up and the other in contact with the ground; doing so may cause the vehicle tojump forward.
o Use only recommended oil for
LSD in the rear axle.See page 9-5 for the recommended oil descriptions.
Page 451 of 539
3
IN CASE OF EMERGENCY
7
!
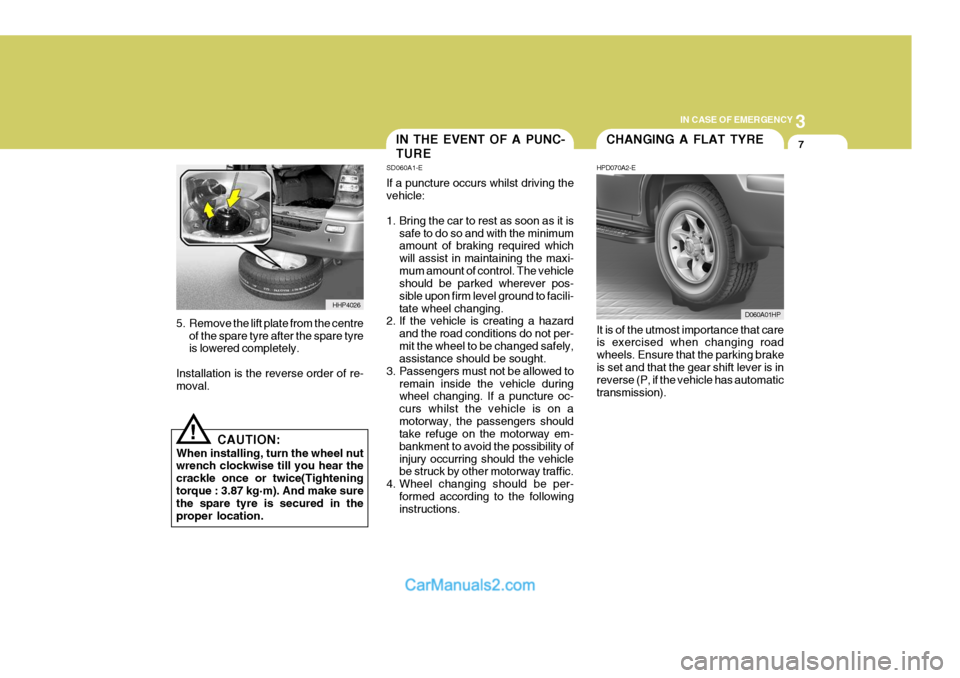
5. Remove the lift plate from the centre
of the spare tyre after the spare tyre is lowered completely.
Installation is the reverse order of re-moval.
CAUTION:
When installing, turn the wheel nutwrench clockwise till you hear the crackle once or twice(Tighteningtorque : 3.87 kg·m). And make sure the spare tyre is secured in the proper location. It is of the utmost importance that care is exercised when changing road wheels. Ensure that the parking brakeis set and that the gear shift lever is in reverse (P, if the vehicle has automatic transmission).
HHP4026
IN THE EVENT OF A PUNC- TURE
SD060A1-E If a puncture occurs whilst driving the vehicle:
1. Bring the car to rest as soon as it is
safe to do so and with the minimum amount of braking required which will assist in maintaining the maxi-mum amount of control. The vehicle should be parked wherever pos- sible upon firm level ground to facili-tate wheel changing.
2. If the vehicle is creating a hazard
and the road conditions do not per-mit the wheel to be changed safely, assistance should be sought.
3. Passengers must not be allowed to remain inside the vehicle duringwheel changing. If a puncture oc- curs whilst the vehicle is on amotorway, the passengers should take refuge on the motorway em- bankment to avoid the possibility ofinjury occurring should the vehicle be struck by other motorway traffic.
4. Wheel changing should be per- formed according to the followinginstructions.CHANGING A FLAT TYRE
HPD070A2-E
D060A01HP
Page 457 of 539
3
IN CASE OF EMERGENCY
13
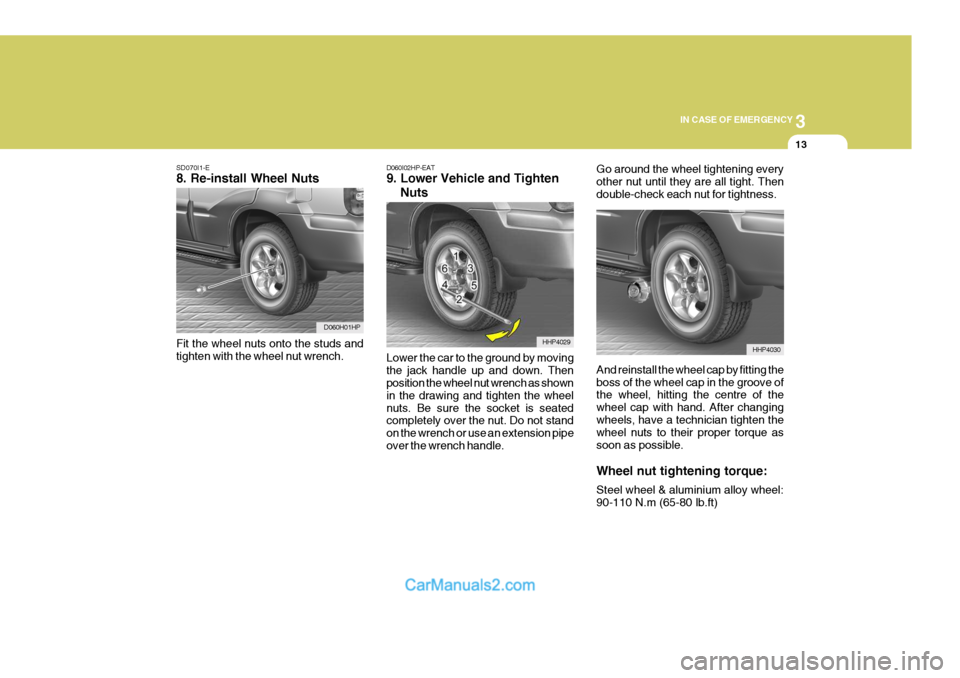
SD070I1-E 8. Re-install Wheel Nuts Fit the wheel nuts onto the studs and tighten with the wheel nut wrench.
D060H01HP D060I02HP-EAT 9. Lower Vehicle and Tighten Nuts Lower the car to the ground by moving the jack handle up and down. Then position the wheel nut wrench as shown in the drawing and tighten the wheelnuts. Be sure the socket is seated completely over the nut. Do not stand on the wrench or use an extension pipeover the wrench handle. Go around the wheel tightening everyother nut until they are all tight. Thendouble-check each nut for tightness. And reinstall the wheel cap by fitting the boss of the wheel cap in the groove of the wheel, hitting the centre of the wheel cap with hand. After changingwheels, have a technician tighten the wheel nuts to their proper torque as soon as possible. Wheel nut tightening torque: Steel wheel & aluminium alloy wheel: 90-110 N.m (65-80 lb.ft)
HHP4029HHP4030
Page 477 of 539
5VEHICLE MAINTENANCE REQUIREMENTS
10
F070J01A-AAT
o Brake pads, calipers and rotors
Check the pads for excessive wear, discs for run out and wear, and cali- pers for fluid leakage. F070K01A-AAT o Exhaust pipe and muffler Visually inspect the exhaust pipes, muffler and hangers for cracks, dete- rioration, or damage. Start the engineand listen carefully for any exhaust gas leakage. Tighten connections or replace parts as necessary. F070L01A-AAT
o Suspension mounting bolts
Check the suspension connections for
looseness or damage. Retighten to the specified torque.
F070M01B-AAT
o Steering gear box, linkage & boots/lower arm ball joint, upper arm ball joint
With the vehicle stopped and engine
off, check for excessive free-play in the steering wheel. Check the linkage for bends or dam-
age. Check the dust boots and ball joints for deterioration, cracks, or dam- age. Replace any damaged parts. F070N01A-AAT
o Power steering pump, belt and hoses
Check the power steering pump and
hoses for leakage and damage. Re- place any damaged or leaking parts immediately. Inspect the power steer-ing belt for evidence of cuts, cracks, excessive wear, oiliness and proper tension. Replace or adjust it if neces-sary.
F070P01HP-AAT
o Drive shafts and boots
Check the drive shafts, boots and
clamps for cracks, deterioration, ordamage. Replace any damaged partsand, if necessary, repack the grease.
F070Q01A-AAT
o Air conditioning refrigerant
Check the air conditioning lines and
connections for leAakage and dam-age. Check air conditioning perfor- mance according to the relevant shop manual if necessary.