oil Hyundai Terracan 2005 Service Manual
[x] Cancel search | Manufacturer: HYUNDAI, Model Year: 2005, Model line: Terracan, Model: Hyundai Terracan 2005Pages: 539, PDF Size: 18.03 MB
Page 232 of 539

6 DO-IT-YOURSELF MAINTENANCE
10CHANGING THE ENGINE OIL AND FILTER
!
The engine oil and filter should be changed at those intervals specified in the maintenance schedule in Sec- tion 5. If the car is being driven in severe conditions, more frequent oiland filter changes are required. The procedure for changing the oil and filter is as follows:
1. Park the car on level ground and set the parking brake. Start the engine and let it warm up until the needle on the coolant temperature gauge moves above the lowestmark. Turn the engine off and place the gear selector lever in "P" (auto- WARNING:
Be very careful when draining the engine oil as it may be hot enough to burn you!
4. When the oil has stopped draining, replace the drain plug using a new gasket and retighten by turning itclockwise. Oil pan drain plug tightening torque: 3.5 ~ 4.5 kgf.m
G040A03HP-GAT
HHP5004
G040A01HP
G040A02HP matic transmission) or reverse gear (manual transmission).
2. Open the hood and remove the engine oil filler cap.
3. Slide underneath the car and loosen the drain plug by turning it counter-clockwise with a wrench of theproper size. Be sure that a drain pan is in position to catch the oil as it drains out, then remove the drainplug.
Diesel Engine (2.9 CRDi)
Diesel Engine (2.5 TCI)
Gasoline Engine
Oil filter
Drain plug Oil filler cap
Oil filler cap
Oil filter
Drain plug Oil filler cap
Oil filter
Drain plug
Page 233 of 539
6
DO-IT-YOURSELF MAINTENANCE
11CHECKING AND CHANGING THE ENGINE COOLANT
!
G050A01A-AAT
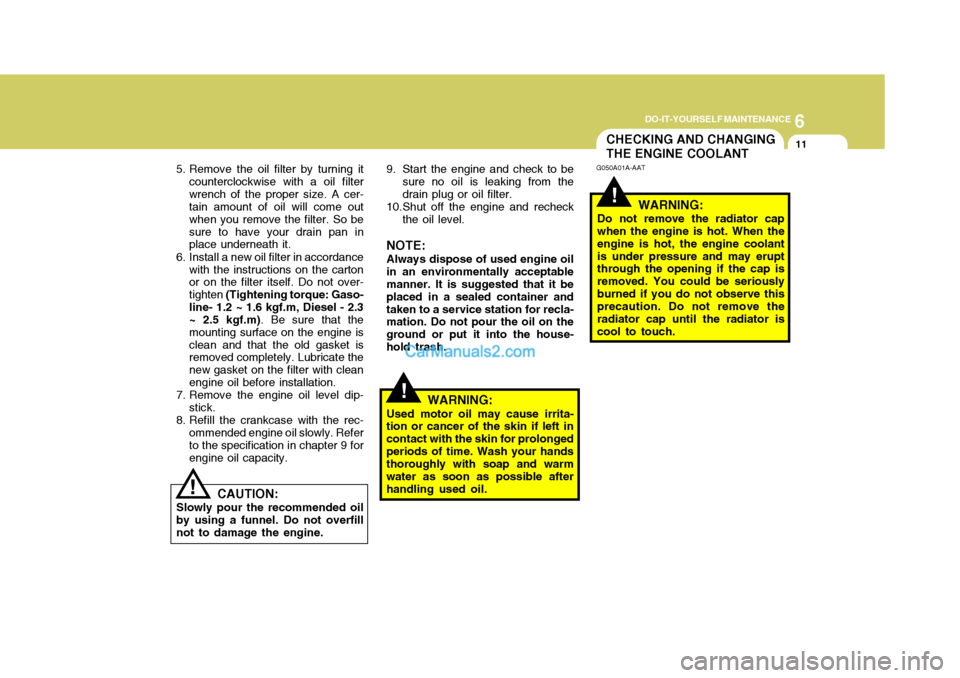
WARNING:
Do not remove the radiator cap when the engine is hot. When the engine is hot, the engine coolantis under pressure and may erupt through the opening if the cap is removed. You could be seriouslyburned if you do not observe this precaution. Do not remove the radiator cap until the radiator iscool to touch.
!
5. Remove the oil filter by turning it counterclockwise with a oil filter wrench of the proper size. A cer- tain amount of oil will come out when you remove the filter. So besure to have your drain pan in place underneath it.
6. Install a new oil filter in accordance with the instructions on the cartonor on the filter itself. Do not over- tighten (Tightening torque: Gaso-
line- 1.2 ~ 1.6 kgf.m, Diesel - 2.3 ~ 2.5 kgf.m) . Be sure that the
mounting surface on the engine is clean and that the old gasket is removed completely. Lubricate the new gasket on the filter with cleanengine oil before installation.
7. Remove the engine oil level dip- stick.
8. Refill the crankcase with the rec- ommended engine oil slowly. Referto the specification in chapter 9 for engine oil capacity.
! CAUTION:
Slowly pour the recommended oil by using a funnel. Do not overfill not to damage the engine. 9. Start the engine and check to be
sure no oil is leaking from thedrain plug or oil filter.
10.Shut off the engine and recheck
the oil level.
NOTE: Always dispose of used engine oil
in an environmentally acceptable manner. It is suggested that it be placed in a sealed container andtaken to a service station for recla- mation. Do not pour the oil on the ground or put it into the house-hold trash.
WARNING:
Used motor oil may cause irrita-
tion or cancer of the skin if left incontact with the skin for prolongedperiods of time. Wash your hands thoroughly with soap and warm water as soon as possible afterhandling used oil.
Page 238 of 539
6 DO-IT-YOURSELF MAINTENANCE
16WINDSHIELD WIPER BLADES
!
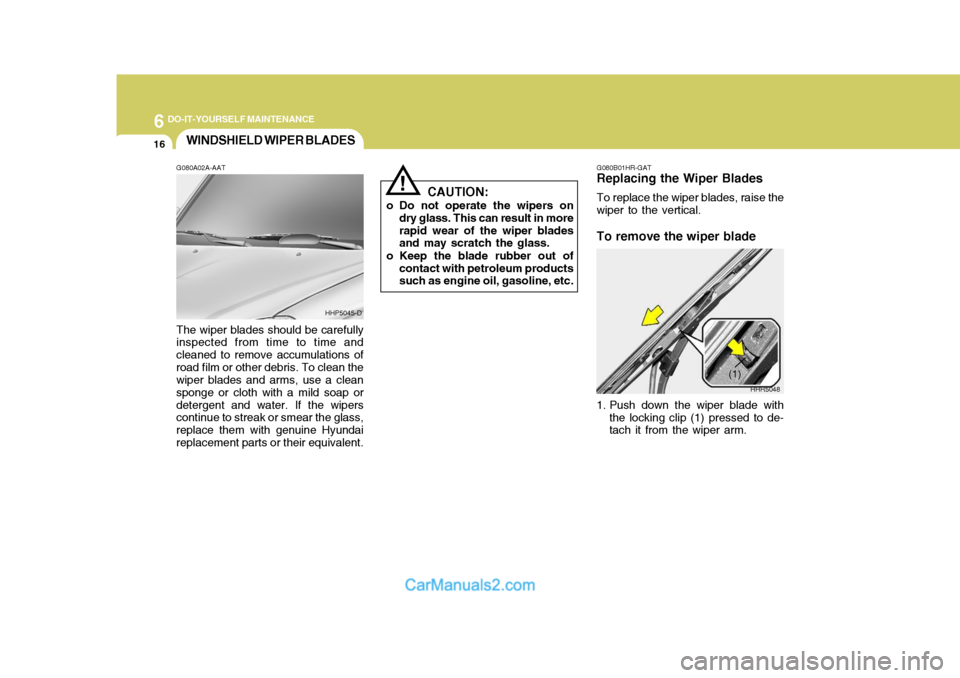
G080A02A-AAT The wiper blades should be carefully inspected from time to time and cleaned to remove accumulations ofroad film or other debris. To clean the wiper blades and arms, use a clean sponge or cloth with a mild soap ordetergent and water. If the wipers continue to streak or smear the glass, replace them with genuine Hyundaireplacement parts or their equivalent. CAUTION:
o Do not operate the wipers on dry glass. This can result in morerapid wear of the wiper blades and may scratch the glass.
o Keep the blade rubber out of contact with petroleum productssuch as engine oil, gasoline, etc. G080B01HR-GAT
Replacing the Wiper Blades
To replace the wiper blades, raise the
wiper to the vertical. To remove the wiper blade
1. Push down the wiper blade with the locking clip (1) pressed to de- tach it from the wiper arm.
HHP5045-D
HHR5048
(1)
Page 240 of 539
6 DO-IT-YOURSELF MAINTENANCE
18
!
CHECKING THE TRANSMIS- SION OIL (MANUAL)FILLING THE WASHER RES- ERVOIR
CAUTION:
o Radiator antifreeze (engine cool- ant) should not be used in the washer system because it will damage the car's finish.
o The washer should not be oper- ated if the washer reservoir isempty. This can damage the washer fluid pump.
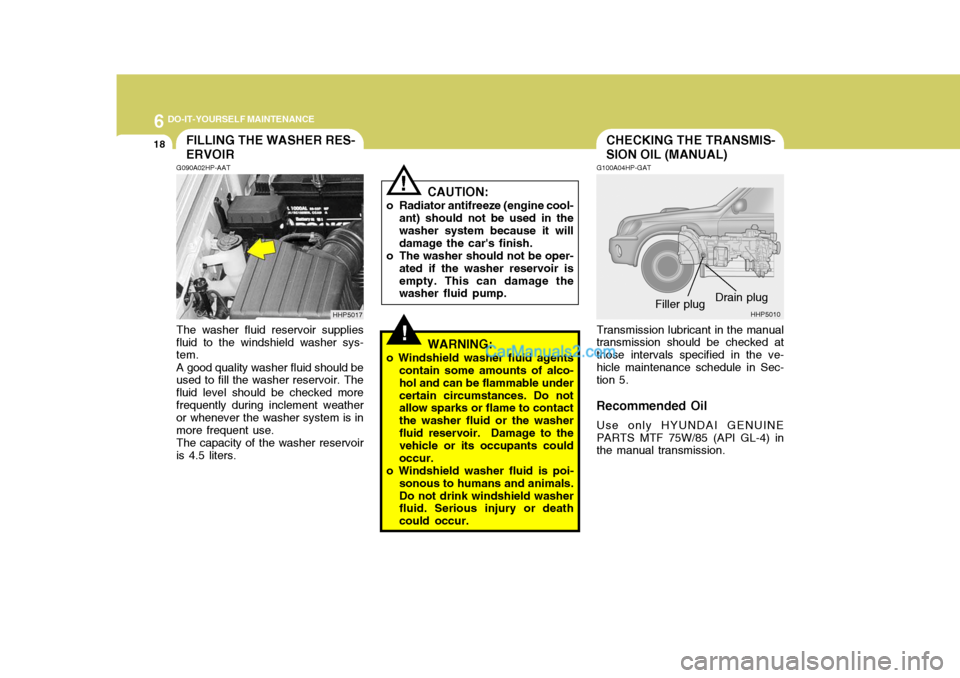
! G100A04HP-GAT Transmission lubricant in the manual transmission should be checked at those intervals specified in the ve-hicle maintenance schedule in Sec- tion 5.
Recommended Oil Use only HYUNDAI GENUINE PARTS MTF 75W/85 (API GL-4) in the manual transmission. Drain plug
G090A02HP-AAT The washer fluid reservoir supplies fluid to the windshield washer sys- tem. A good quality washer fluid should be used to fill the washer reservoir. The fluid level should be checked morefrequently during inclement weather or whenever the washer system is in more frequent use. The capacity of the washer reservoir is 4.5 liters. HHP5017
HHP5010
Filler plug
WARNING:
o Windshield washer fluid agents contain some amounts of alco- hol and can be flammable undercertain circumstances. Do not allow sparks or flame to contact the washer fluid or the washerfluid reservoir. Damage to the vehicle or its occupants could occur.
o Windshield washer fluid is poi- sonous to humans and animals.Do not drink windshield washer fluid. Serious injury or death could occur.
Page 241 of 539
6
DO-IT-YOURSELF MAINTENANCE
19
Manual Transmission Oil Capac- ity
The oil capacity of the manual trans-
mission is;
WARNING:
It is always better to check the
transmission oil level when the engine is cool or cold. If the en- gine is hot, you should exercise great caution to avoid burningyourself on hot engine or exhaust parts.
!
Engine GasolineDiesel (2.9 CRDi)Diesel (2.5 TCI) Capacity 3.2 liters 2.5 liters
G100B01HP-GAT
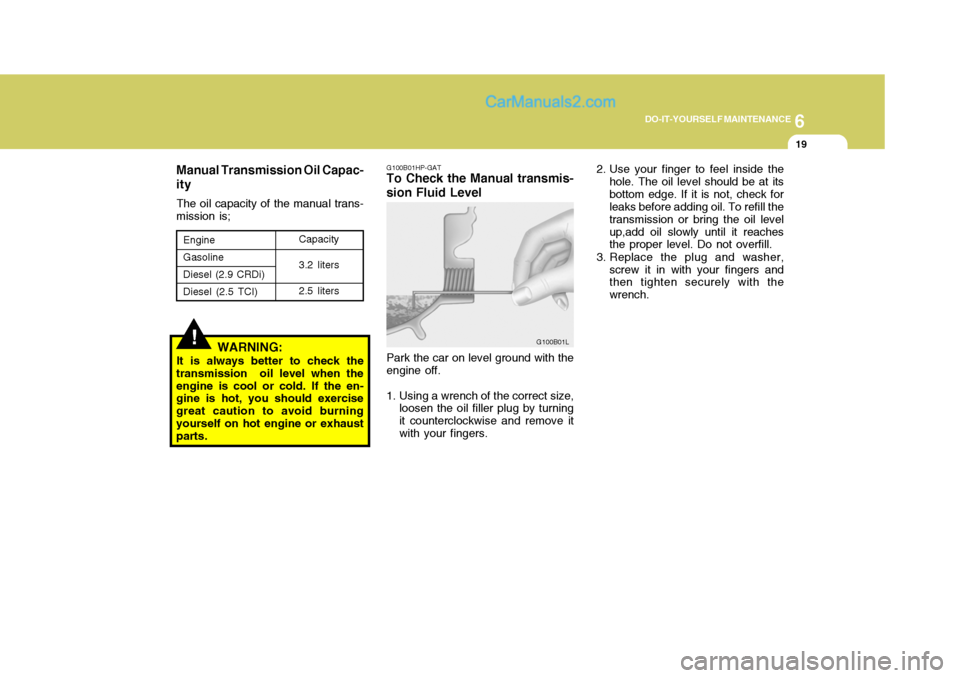
To Check the Manual transmis- sion Fluid Level
Park the car on level ground with the engine off.
1. Using a wrench of the correct size, loosen the oil filler plug by turningit counterclockwise and remove itwith your fingers. G100B01L2. Use your finger to feel inside the
hole. The oil level should be at itsbottom edge. If it is not, check for leaks before adding oil. To refill the transmission or bring the oil levelup,add oil slowly until it reaches the proper level. Do not overfill.
3. Replace the plug and washer, screw it in with your fingers andthen tighten securely with the wrench.
Page 254 of 539
6 DO-IT-YOURSELF MAINTENANCE
32CHECKING THE BATTERY
!
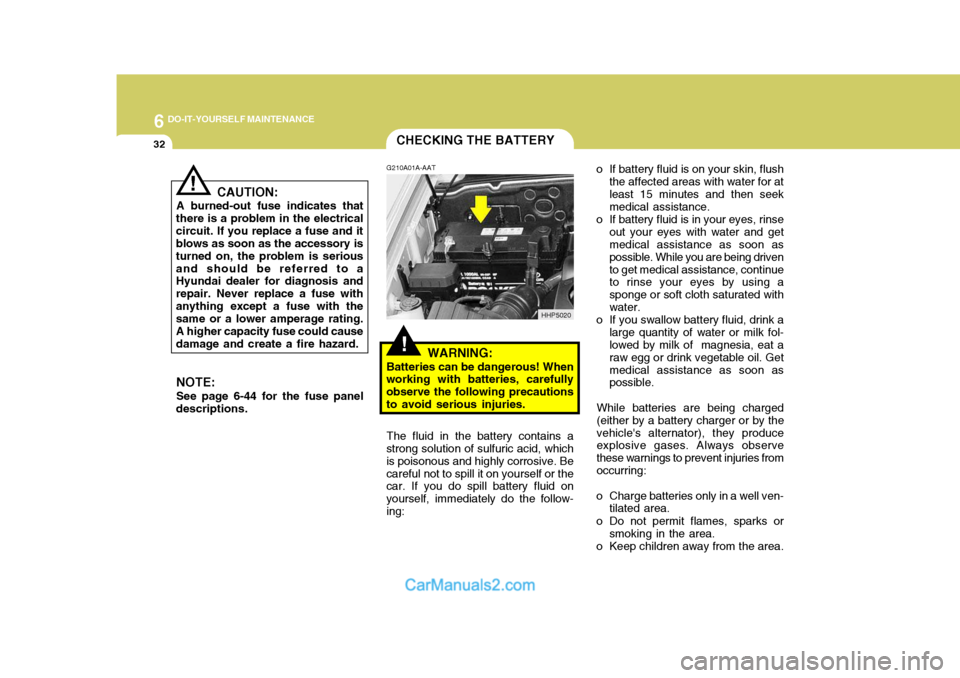
G210A01A-AAT
WARNING:
Batteries can be dangerous! When
working with batteries, carefully observe the following precautionsto avoid serious injuries. o If battery fluid is on your skin, flush
the affected areas with water for atleast 15 minutes and then seek medical assistance.
o If battery fluid is in your eyes, rinse out your eyes with water and getmedical assistance as soon as possible. While you are being drivento get medical assistance, continue to rinse your eyes by using a sponge or soft cloth saturated withwater.
o If you swallow battery fluid, drink a large quantity of water or milk fol- lowed by milk of magnesia, eat a raw egg or drink vegetable oil. Getmedical assistance as soon as possible.
While batteries are being charged (either by a battery charger or by thevehicle's alternator), they produce explosive gases. Always observe these warnings to prevent injuries fromoccurring:
o Charge batteries only in a well ven- tilated area.
o Do not permit flames, sparks or smoking in the area.
o Keep children away from the area.
The fluid in the battery contains a
strong solution of sulfuric acid, whichis poisonous and highly corrosive. Becareful not to spill it on yourself or the car. If you do spill battery fluid on yourself, immediately do the follow-ing:
CAUTION:
A burned-out fuse indicates that
there is a problem in the electricalcircuit. If you replace a fuse and it blows as soon as the accessory is turned on, the problem is seriousand should be referred to a Hyundai dealer for diagnosis and repair. Never replace a fuse withanything except a fuse with the same or a lower amperage rating. A higher capacity fuse could causedamage and create a fire hazard.
NOTE: See page 6-44 for the fuse panel
descriptions.
!
HHP5020
Page 257 of 539
6
DO-IT-YOURSELF MAINTENANCE
35
To check the power steering fluid level, be sure the ignition is "OFF",then check to make certain that the power steering fluid level is between the "MAX" and "MIN" level markingson the fluid reservoir. NOTE: Grinding noise from the power steering pump may be heard im- mediately after the engine is startedin extremely cold conditions (be- low - 20°C). If the noise stops dur- ing warm up, there is no abnormalfunction in the system. If is due to a power steering fluid characteris- tic in extremely cold conditions.
Recommended Fluid Use PSF-3 type fluid. NOTE: Do not start the engine when the power steering oil reservoir is empty.
FUEL FILTER
G240A01A-AAT
POWER STEERING HOSES
It is suggested that you check the
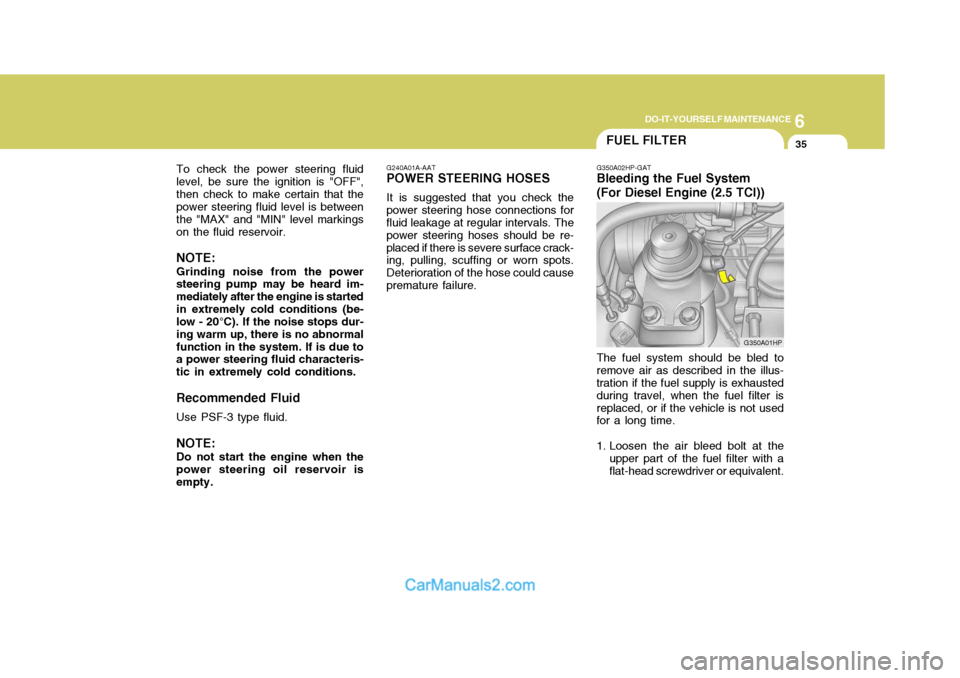
power steering hose connections for fluid leakage at regular intervals. The power steering hoses should be re-placed if there is severe surface crack- ing, pulling, scuffing or worn spots. Deterioration of the hose could causepremature failure. G350A02HP-GAT Bleeding the Fuel System (For Diesel Engine (2.5 TCI)) The fuel system should be bled to remove air as described in the illus- tration if the fuel supply is exhausted during travel, when the fuel filter isreplaced, or if the vehicle is not used for a long time.
1. Loosen the air bleed bolt at the
upper part of the fuel filter with a flat-head screwdriver or equivalent. G350A01HP
Page 261 of 539
6
DO-IT-YOURSELF MAINTENANCE
39REPLACING HEADLIGHT BULBS
G260A02A-GAT Before attempting to replace a head- light bulb, be sure the switch is turned to the "OFF" position. The next paragraph shows how to reach the headlight bulbs so they may be changed. Be sure to replacethe burned-out bulb with one of the same number and wattage rating.
CAUTION:
Keep the lamps out of contact with
petroleum product, such as oil, gasoline, etc.
! G270A01B-GAT
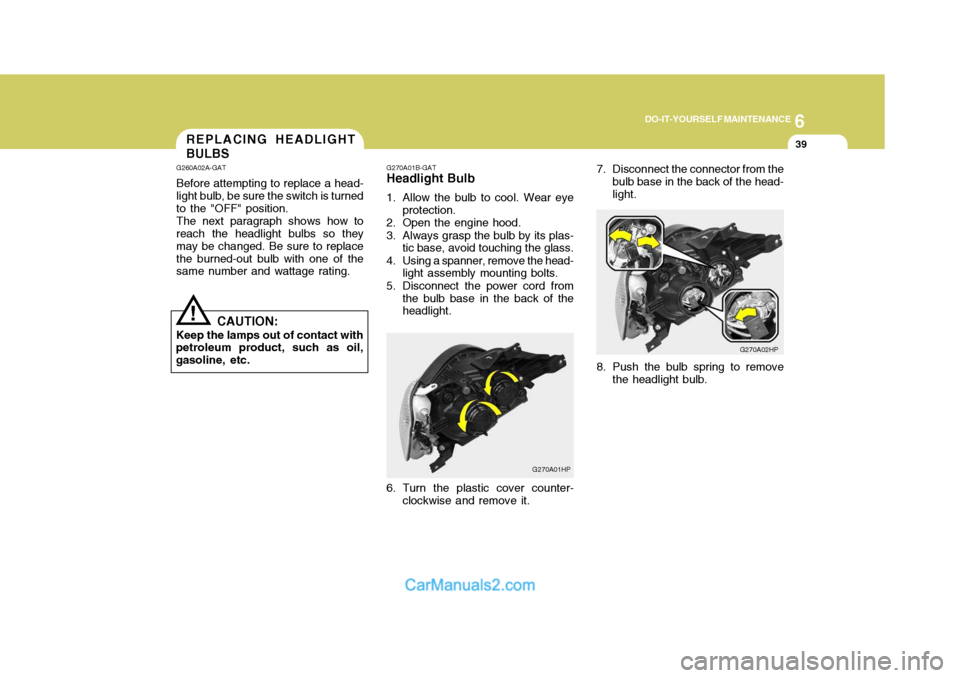
Headlight Bulb
1. Allow the bulb to cool. Wear eye
protection.
2. Open the engine hood.
3. Always grasp the bulb by its plas- tic base, avoid touching the glass.
4. Using a spanner, remove the head- light assembly mounting bolts.
5. Disconnect the power cord from the bulb base in the back of the headlight.
G270A01HP7. Disconnect the connector from the
bulb base in the back of the head- light.
G270A02HP
6. Turn the plastic cover counter- clockwise and remove it. 8. Push the bulb spring to remove
the headlight bulb.
Page 263 of 539
6
DO-IT-YOURSELF MAINTENANCE
41
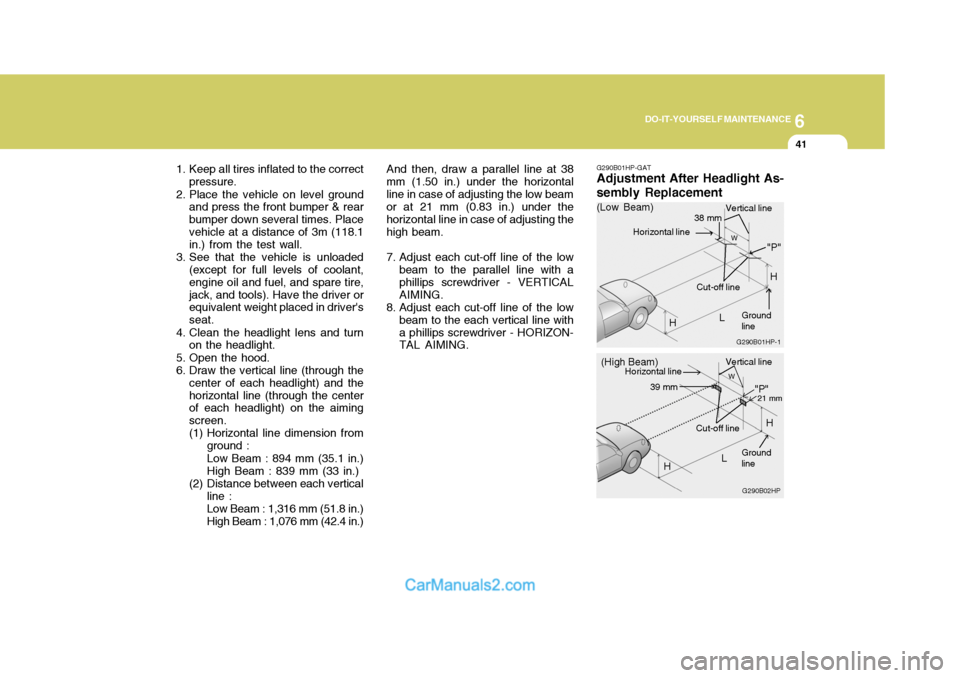
1. Keep all tires inflated to the correct
pressure.
2. Place the vehicle on level ground and press the front bumper & rear bumper down several times. Placevehicle at a distance of 3m (118.1 in.) from the test wall.
3. See that the vehicle is unloaded (except for full levels of coolant, engine oil and fuel, and spare tire,jack, and tools). Have the driver or equivalent weight placed in driver's seat.
4. Clean the headlight lens and turn on the headlight.
5. Open the hood.
6. Draw the vertical line (through the center of each headlight) and thehorizontal line (through the center of each headlight) on the aiming screen.
(1) Horizontal line dimension from
ground : Low Beam : 894 mm (35.1 in.) High Beam : 839 mm (33 in.)
(2) Distance between each vertical line : Low Beam : 1,316 mm (51.8 in.) High Beam : 1,076 mm (42.4 in.) And then, draw a parallel line at 38
mm (1.50 in.) under the horizontalline in case of adjusting the low beam or at 21 mm (0.83 in.) under the horizontal line in case of adjusting thehigh beam.
7. Adjust each cut-off line of the low beam to the parallel line with a phillips screwdriver - VERTICALAIMING.
8. Adjust each cut-off line of the low beam to the each vertical line witha phillips screwdriver - HORIZON- TAL AIMING. G290B01HP-GAT Adjustment After Headlight As- sembly Replacement
G290B02HP
LW
H Cut-off line
"P"
Vertical line
Horizontal line
Ground line
21 mm39 mm
(High Beam)
H
G290B01HP-1
LW
"P"
38 mm
H
H
(Low Beam)
Vertical line
Ground line
Cut-off line
Horizontal line
Page 284 of 539
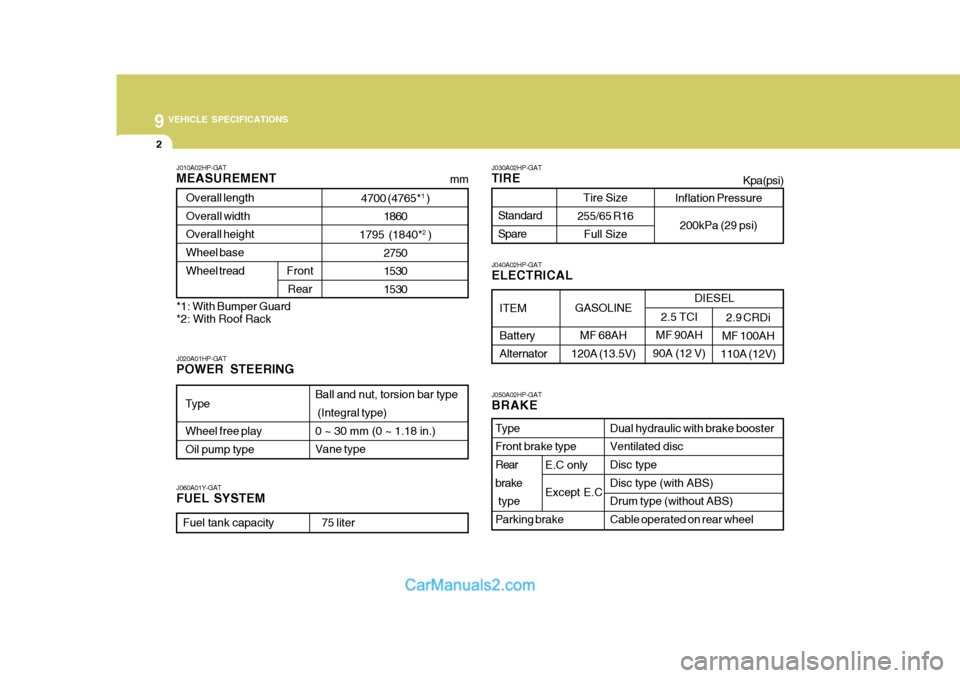
9 VEHICLE SPECIFICATIONS
2
J010A02HP-GAT MEASUREMENT
4700 (4765* 1
)
1860
1795 (1840* 2
)
2750 15301530
Overall length Overall width Overall heightWheel base Wheel tread
Front
Rear
Type Wheel free play Oil pump type Ball and nut, torsion bar type (Integral type) 0 ~ 30 mm (0 ~ 1.18 in.)Vane type
J060A01Y-GAT FUEL SYSTEM
J020A01HP-GAT POWER STEERING J030A02HP-GAT TIRE
Standard Spare
J050A02HP-GAT BRAKE Dual hydraulic with brake booster Ventilated disc Disc type Disc type (with ABS)Drum type (without ABS) Cable operated on rear wheel
Type Front brake type Rear brake type Parking brake
ITEM Battery Alternator
J040A02HP-GAT ELECTRICAL
mm
Fuel tank capacity 75 liter
2.5 TCI
MF 90AH
90A (12 V)
Tire Size
255/65 R16 Full Size Kpa(psi)
2.9 CRDi
MF 100AH
110A (12V)GASOLINE
MF 68AH
120A (13.5V)DIESEL
E.C only Except E.C*1: With Bumper Guard *2: With Roof Rack Inflation Pressure
200kPa (29 psi)