airbag Hyundai Terracan 2005 Owner's Manual
[x] Cancel search | Manufacturer: HYUNDAI, Model Year: 2005, Model line: Terracan, Model: Hyundai Terracan 2005Pages: 539, PDF Size: 18.03 MB
Page 11 of 539
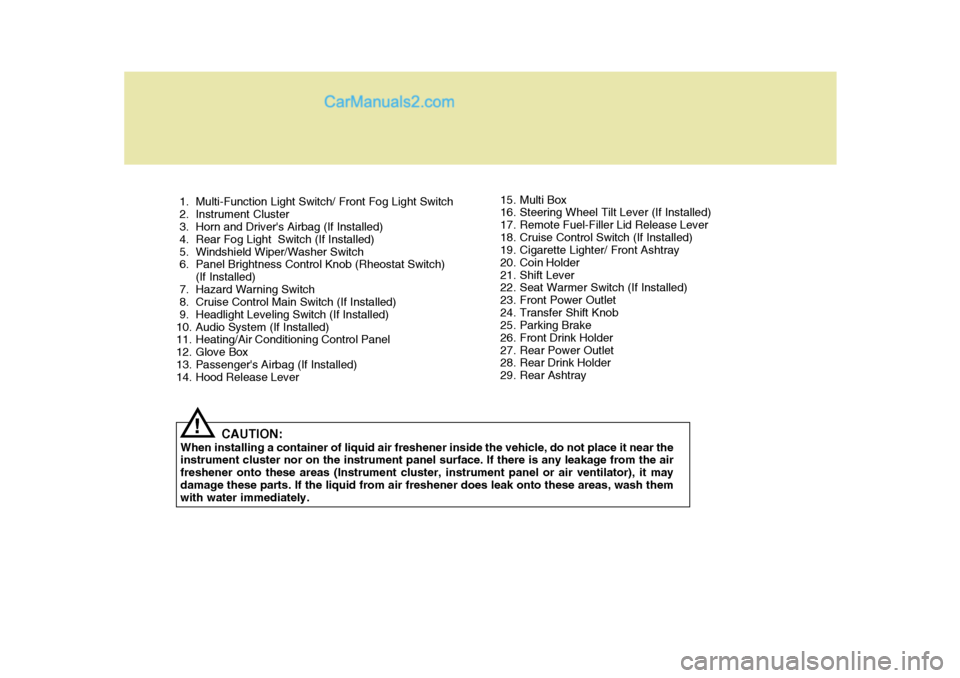
1. Multi-Function Light Switch/ Front Fog Light Switch
2. Instrument Cluster
3. Horn and Driver's Airbag (If Installed)
4. Rear Fog Light Switch (If Installed)
5. Windshield Wiper/Washer Switch
6. Panel Brightness Control Knob (Rheostat Switch)(If Installed)
7. Hazard Warning Switch
8. Cruise Control Main Switch (If Installed)
9. Headlight Leveling Switch (If Installed)
10. Audio System (If Installed)
11. Heating/Air Conditioning Control Panel
12. Glove Box
13. Passenger's Airbag (If Installed)
14. Hood Release Lever
CAUTION:
When installing a container of liquid air freshener inside the vehicle, do not place it near theinstrument cluster nor on the instrument panel surface. If there is any leakage from the air freshener onto these areas (Instrument cluster, instrument panel or air ventilator), it maydamage these parts. If the liquid from air freshener does leak onto these areas, wash them with water immediately.
! 15. Multi Box
16. Steering Wheel Tilt Lever (If Installed)
17. Remote Fuel-Filler Lid Release Lever
18. Cruise Control Switch (If Installed)
19. Cigarette Lighter/ Front Ashtray
20. Coin Holder
21. Shift Lever
22. Seat Warmer Switch (If Installed)
23. Front Power Outlet
24. Transfer Shift Knob
25. Parking Brake
26. Front Drink Holder
27. Rear Power Outlet
28. Rear Drink Holder
29. Rear Ashtray
Page 13 of 539
CAUTION:
When installing a container of liquid air freshener inside the vehicle, do not place it near the instrument cluster nor on the instrument panel surface. If there is any leakage from the air freshener onto these areas (Instrument cluster, instrument panel or air ventilator), it may damage these parts. If the liquid from air freshener does leak onto these areas, wash themwith water immediately.!
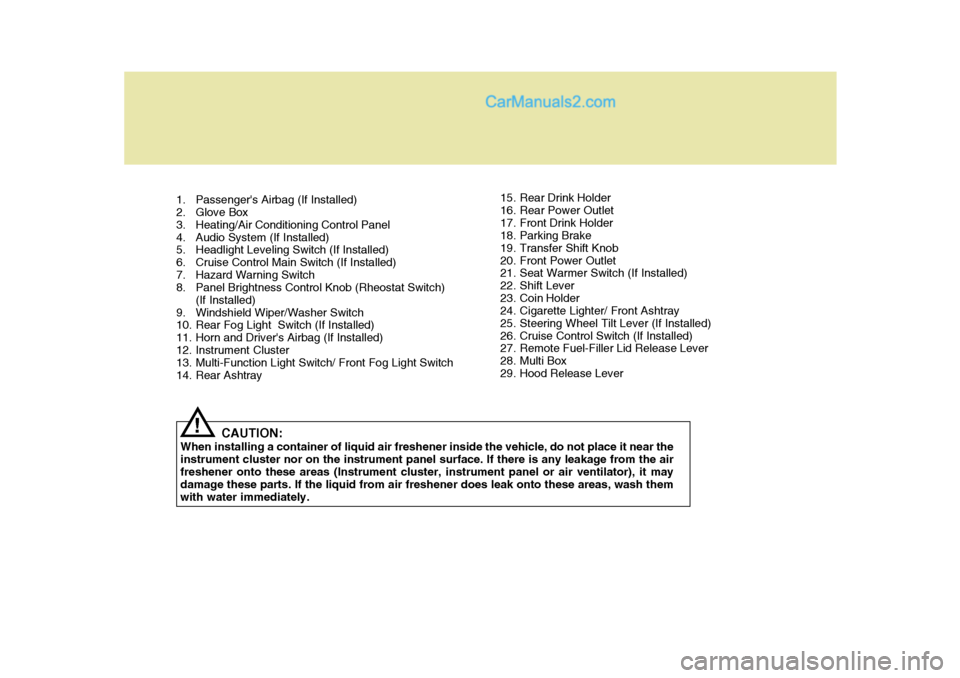
1. Passenger's Airbag (If Installed)
2. Glove Box
3. Heating/Air Conditioning Control Panel
4. Audio System (If Installed)
5. Headlight Leveling Switch (If Installed)
6. Cruise Control Main Switch (If Installed)
7. Hazard Warning Switch
8. Panel Brightness Control Knob (Rheostat Switch)
(If Installed)
9. Windshield Wiper/Washer Switch
10. Rear Fog Light Switch (If Installed)
11. Horn and Driver's Airbag (If Installed)
12. Instrument Cluster
13. Multi-Function Light Switch/ Front Fog Light Switch
14. Rear Ashtray 15. Rear Drink Holder
16. Rear Power Outlet
17. Front Drink Holder
18. Parking Brake
19. Transfer Shift Knob
20. Front Power Outlet
21. Seat Warmer Switch (If Installed)
22. Shift Lever
23. Coin Holder
24. Cigarette Lighter/ Front Ashtray
25. Steering Wheel Tilt Lever (If Installed)
26. Cruise Control Switch (If Installed)
27. Remote Fuel-Filler Lid Release Lever
28. Multi Box
29. Hood Release Lever
Page 14 of 539
YOUR VEHICLE AT A GLANCE
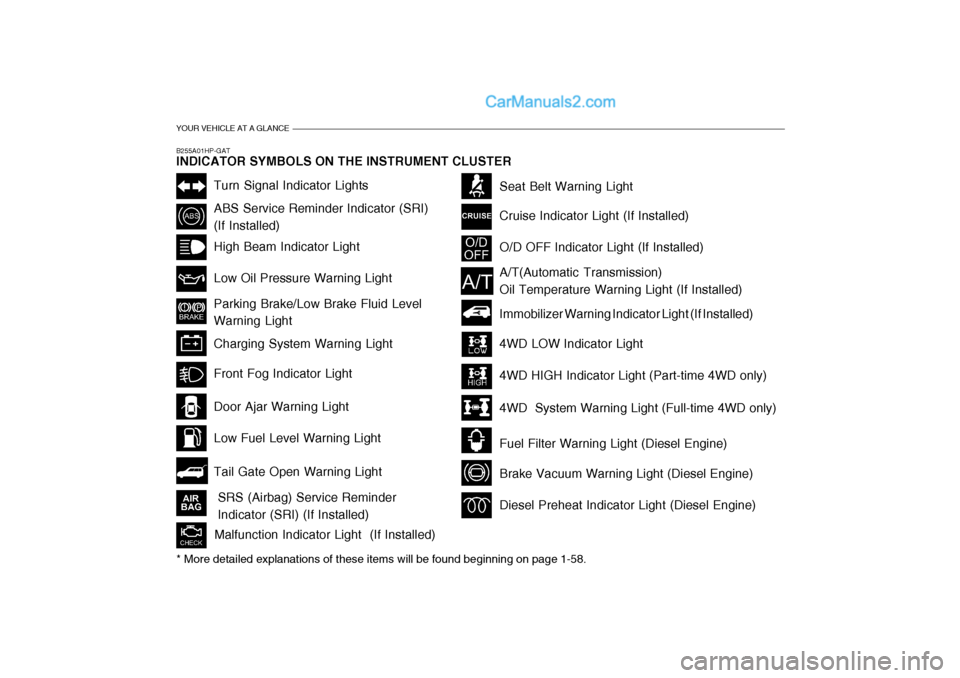
B255A01HP-GAT INDICATOR SYMBOLS ON THE INSTRUMENT CLUSTER
Turn Signal Indicator Lights
ABS Service Reminder Indicator (SRI) (If Installed) High Beam Indicator Light Low Oil Pressure Warning Light Parking Brake/Low Brake Fluid Level Warning Light Charging System Warning Light
Tail Gate Open Warning Light
Door Ajar Warning Light Low Fuel Level Warning Light
Front Fog Indicator Light
O/D OFF Indicator Light (If Installed)
Immobilizer Warning Indicator Light (If Installed)
SRS (Airbag) Service Reminder Indicator (SRI) (If Installed) Seat Belt Warning Light Cruise Indicator Light (If Installed)
Malfunction Indicator Light (If Installed)
A/T(Automatic Transmission) Oil Temperature Warning Light (If Installed)
4WD LOW Indicator Light 4WD HIGH Indicator Light (Part-time 4WD only)
4WD System Warning Light (Full-time 4WD only)
Fuel Filter Warning Light (Diesel Engine)
Brake Vacuum Warning Light (Diesel Engine)
* More detailed explanations of these items will be found beginning on page 1-58.
Diesel Preheat Indicator Light (Diesel Engine)
Page 15 of 539
Fuel Recommendations ............................................... 1-2
Breaking In Your New Hyundai .................................... 1-3
Keys .............................................................................. 1-4
Immobilizer System ...................................................... 1-5
Door Locks .................................................................1-11
Theft-Alarm System .................................................... 1-13
Power Windows .......................................................... 1-17
Seats .......................................................................... 1-18
Seat Belts ................................................................... 1-31
Child Restraint System............................................... 1-39
Supplemental Restraint (AIRBAG) System ............... 1-48
Instrument Cluster and Indicator Lights ..................... 1-54
Warning and Indicator Lights ..................................... 1-58
Multim eter ................................................................... 1-69
Multi-function Light Switch ......................................... 1-73
Windshield Wiper/Washer Switch .............................. 1-76
Sunroof ....................................................................... 1-84
Mirror .......................................................................... 1-88
Hood Release ............................................................. 1-96
Cruise Control .......................................................... 1-100
Heating and Cooling Control .................................... 1-103
Stereo Sound System .............................................. 1-119
Audio System ........................................................... 1-121Antenna .................................................................... 1-140FEATURES OF YOUR HYUNDAI
1
1
Page 33 of 539
1
FEATURES OF YOUR HYUNDAI
19
!
!WARNING:
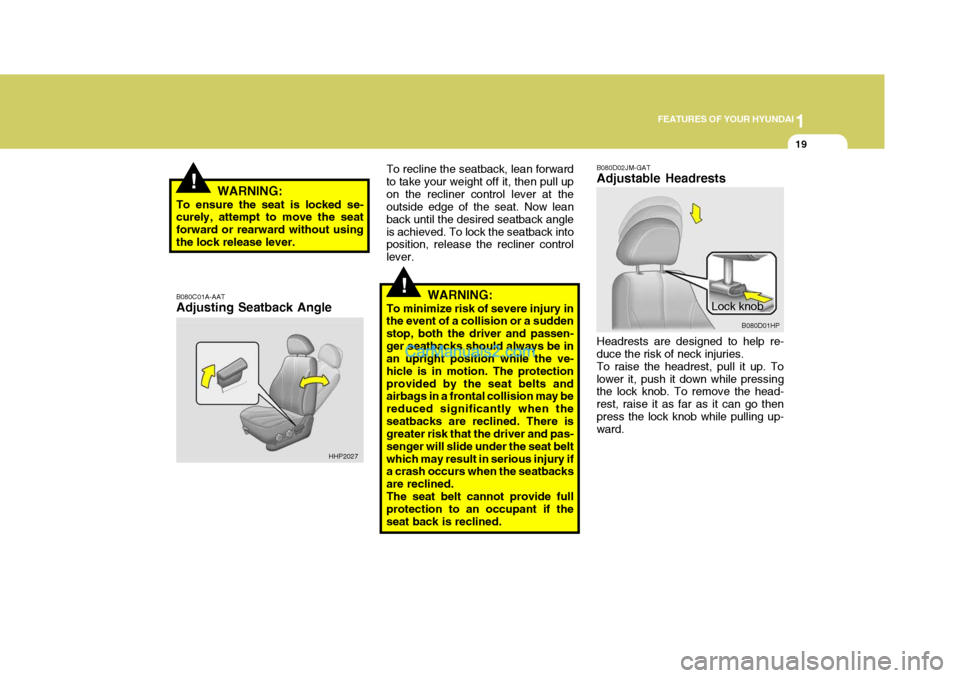
To ensure the seat is locked se- curely, attempt to move the seat forward or rearward without usingthe lock release lever. B080C01A-AAT Adjusting Seatback Angle To recline the seatback, lean forward to take your weight off it, then pull upon the recliner control lever at the outside edge of the seat. Now lean back until the desired seatback angleis achieved. To lock the seatback into position, release the recliner control lever.
WARNING:
To minimize risk of severe injury in the event of a collision or a sudden stop, both the driver and passen-ger seatbacks should always be in an upright position while the ve- hicle is in motion. The protectionprovided by the seat belts and airbags in a frontal collision may be reduced significantly when theseatbacks are reclined. There is greater risk that the driver and pas- senger will slide under the seat beltwhich may result in serious injury if a crash occurs when the seatbacks are reclined.The seat belt cannot provide full protection to an occupant if the seat back is reclined.
HHP2027 B080D02JM-GAT Adjustable Headrests
Lock knobB080D01HP
Headrests are designed to help re- duce the risk of neck injuries. To raise the headrest, pull it up. Tolower it, push it down while pressing the lock knob. To remove the head- rest, raise it as far as it can go thenpress the lock knob while pulling up- ward.
Page 35 of 539
1
FEATURES OF YOUR HYUNDAI
21
!
!
B090A02Y-AAT POWER DRIVER'S SEAT (If Installed) The driver's seat can be adjusted ap- propriately by using the control knobon the left side of the seat. Before driving, adjust the seat to the proper position so as to easily control thesteering wheel, pedals and switches on the instrument panel.
CAUTION:
Do not operate two knobs at the same time.
WARNING:
o Never attempt to adjust the seat while the vehicle is moving. Thiscould result in loss of control oran accident causing death, seri- ous injury, or property damage.
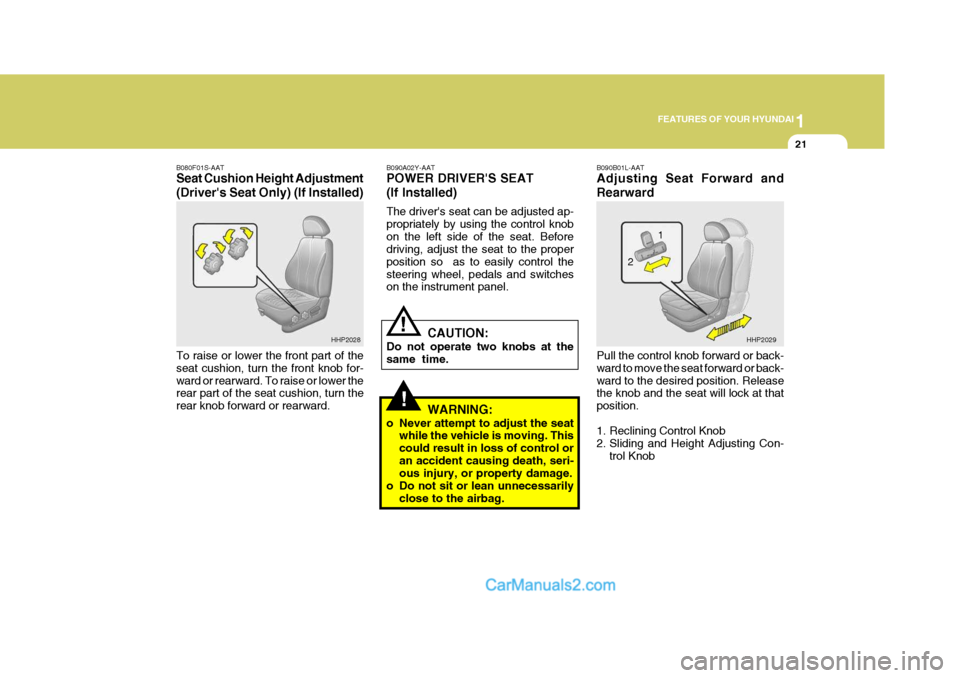
o Do not sit or lean unnecessarily close to the airbag. B090B01L-AAT Adjusting Seat Forward and Rearward Pull the control knob forward or back- ward to move the seat forward or back-ward to the desired position. Release the knob and the seat will lock at that position.
1. Reclining Control Knob
2. Sliding and Height Adjusting Con-
trol Knob
B080F01S-AAT Seat Cushion Height Adjustment (Driver's Seat Only) (If Installed) To raise or lower the front part of the seat cushion, turn the front knob for-ward or rearward. To raise or lower the rear part of the seat cushion, turn the rear knob forward or rearward.
HHP2028
HHP2029
1
2
Page 36 of 539
1FEATURES OF YOUR HYUNDAI
22
!
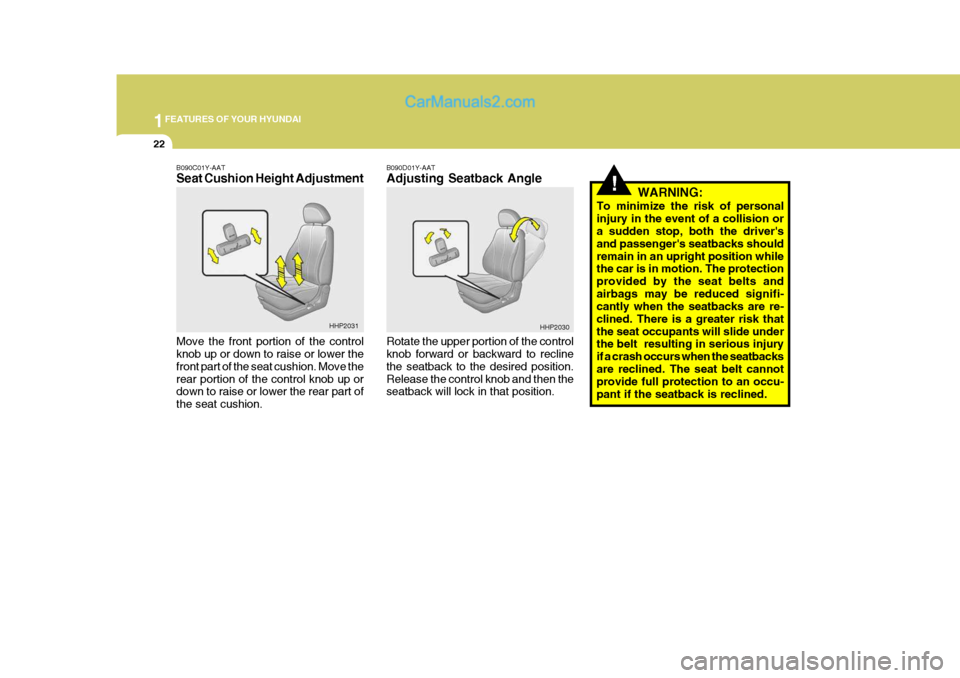
B090D01Y-AAT Adjusting Seatback Angle Rotate the upper portion of the control knob forward or backward to recline the seatback to the desired position.Release the control knob and then the seatback will lock in that position. WARNING:
To minimize the risk of personal injury in the event of a collision or a sudden stop, both the driver's and passenger's seatbacks shouldremain in an upright position while the car is in motion. The protection provided by the seat belts andairbags may be reduced signifi- cantly when the seatbacks are re- clined. There is a greater risk thatthe seat occupants will slide under the belt resulting in serious injury if a crash occurs when the seatbacksare reclined. The seat belt cannot provide full protection to an occu- pant if the seatback is reclined.
B090C01Y-AAT Seat Cushion Height Adjustment Move the front portion of the control knob up or down to raise or lower the front part of the seat cushion. Move therear portion of the control knob up or down to raise or lower the rear part of the seat cushion.
HHP2031
HHP2030
Page 39 of 539
1
FEATURES OF YOUR HYUNDAI
25
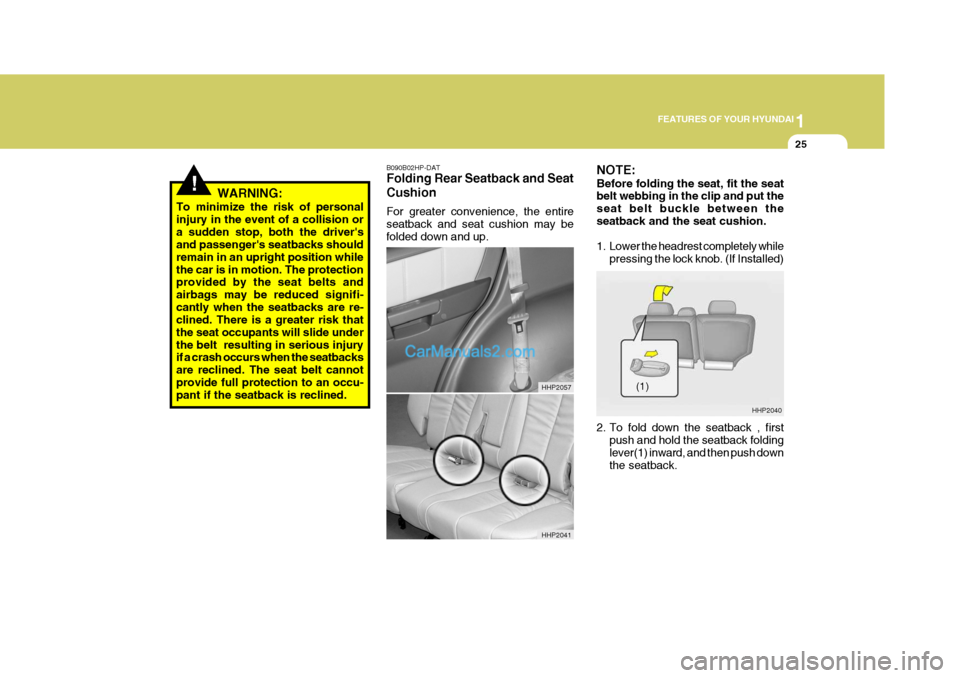
B090B02HP-DAT Folding Rear Seatback and Seat Cushion For greater convenience, the entire seatback and seat cushion may befolded down and up.
!WARNING:
To minimize the risk of personal injury in the event of a collision ora sudden stop, both the driver's and passenger's seatbacks should remain in an upright position whilethe car is in motion. The protection provided by the seat belts and airbags may be reduced signifi-cantly when the seatbacks are re- clined. There is a greater risk that the seat occupants will slide underthe belt resulting in serious injury if a crash occurs when the seatbacks are reclined. The seat belt cannotprovide full protection to an occu- pant if the seatback is reclined. NOTE: Before folding the seat, fit the seat belt webbing in the clip and put the seat belt buckle between theseatback and the seat cushion.
1. Lower the headrest completely while
pressing the lock knob. (If Installed)
HHP2057 HHP2041 HHP2040
2. To fold down the seatback , first push and hold the seatback folding lever(1) inward, and then push down the seatback. (1)
Page 42 of 539
1FEATURES OF YOUR HYUNDAI
28
!
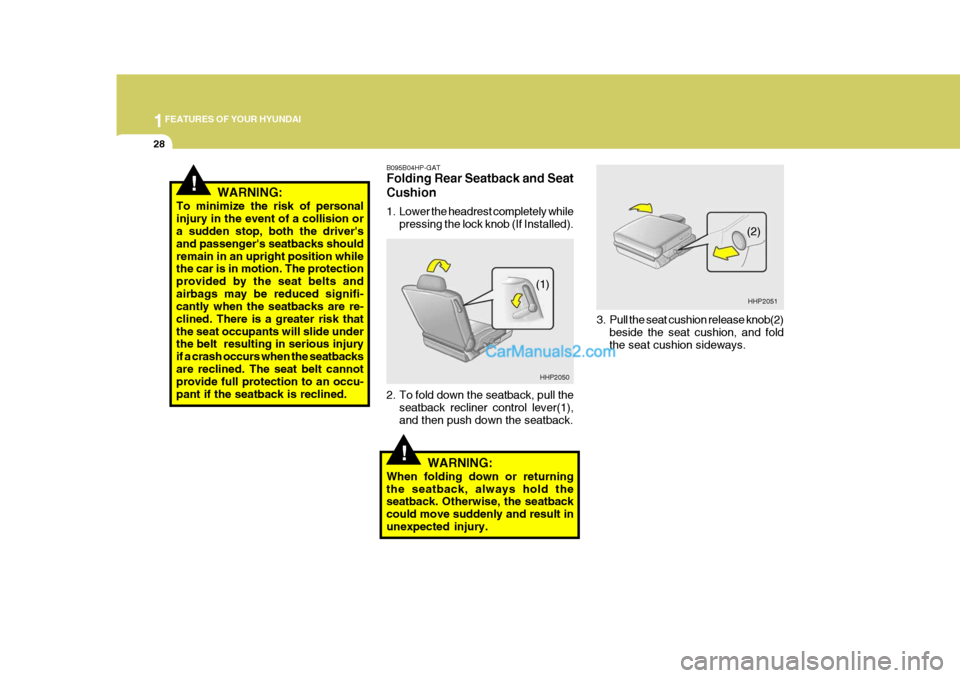
3. Pull the seat cushion release knob(2)
beside the seat cushion, and fold the seat cushion sideways.
B095B04HP-GAT Folding Rear Seatback and Seat Cushion
1. Lower the headrest completely while
pressing the lock knob (If Installed).
2. To fold down the seatback, pull the seatback recliner control lever(1), and then push down the seatback.
WARNING:
To minimize the risk of personalinjury in the event of a collision or a sudden stop, both the driver's and passenger's seatbacks shouldremain in an upright position while the car is in motion. The protection provided by the seat belts andairbags may be reduced signifi- cantly when the seatbacks are re- clined. There is a greater risk thatthe seat occupants will slide under the belt resulting in serious injury if a crash occurs when the seatbacksare reclined. The seat belt cannot provide full protection to an occu- pant if the seatback is reclined.
!WARNING:
When folding down or returning the seatback, always hold the seatback. Otherwise, the seatback could move suddenly and result inunexpected injury. HHP2050
HHP2051
(1) (2)
Page 53 of 539
1
FEATURES OF YOUR HYUNDAI
39CHILD RESTRAINT SYSTEM
!
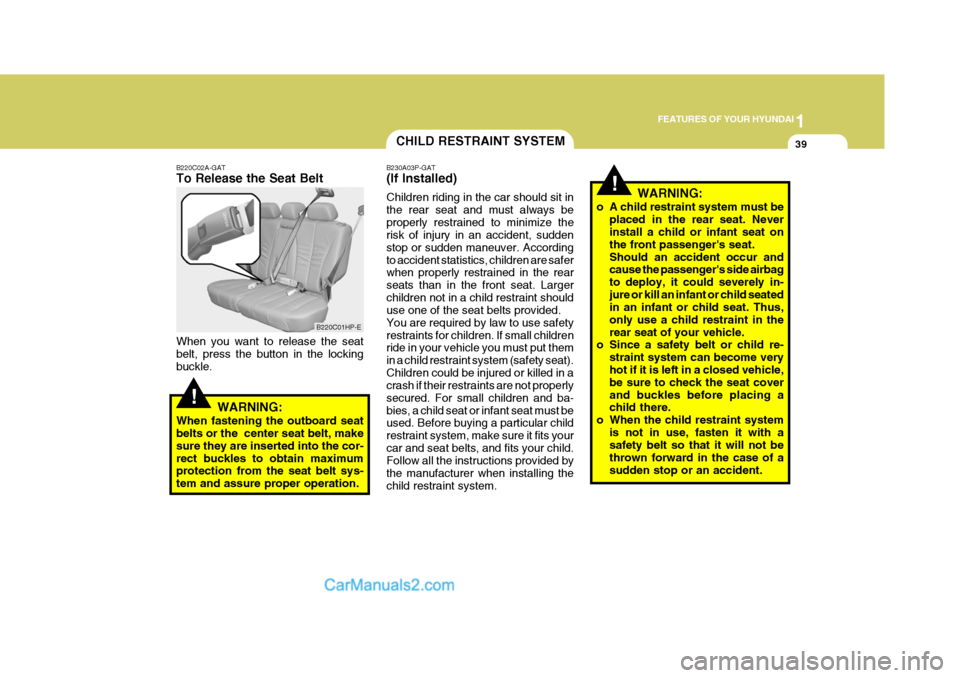
B220C02A-GAT To Release the Seat Belt When you want to release the seat belt, press the button in the locking buckle.
WARNING:
When fastening the outboard seat belts or the center seat belt, make sure they are inserted into the cor-rect buckles to obtain maximum protection from the seat belt sys- tem and assure proper operation. B230A03P-GAT (If Installed) Children riding in the car should sit in the rear seat and must always beproperly restrained to minimize the risk of injury in an accident, sudden stop or sudden maneuver. Accordingto accident statistics, children are safer when properly restrained in the rear seats than in the front seat. Largerchildren not in a child restraint should use one of the seat belts provided. You are required by law to use safetyrestraints for children. If small children ride in your vehicle you must put them in a child restraint system (safety seat).Children could be injured or killed in a crash if their restraints are not properly secured. For small children and ba-bies, a child seat or infant seat must be used. Before buying a particular child restraint system, make sure it fits yourcar and seat belts, and fits your child. Follow all the instructions provided by the manufacturer when installing thechild restraint system.
B220C01HP-E
!WARNING:
o A child restraint system must be placed in the rear seat. Never install a child or infant seat on the front passenger's seat.Should an accident occur and cause the passenger's side airbag to deploy, it could severely in-jure or kill an infant or child seated in an infant or child seat. Thus, only use a child restraint in therear seat of your vehicle.
o Since a safety belt or child re-
straint system can become very hot if it is left in a closed vehicle, be sure to check the seat coverand buckles before placing a child there.
o When the child restraint system is not in use, fasten it with asafety belt so that it will not be thrown forward in the case of asudden stop or an accident.