clock Hyundai Tiburon 2003 User Guide
[x] Cancel search | Manufacturer: HYUNDAI, Model Year: 2003, Model line: Tiburon, Model: Hyundai Tiburon 2003Pages: 169, PDF Size: 3.04 MB
Page 115 of 169
WHAT TO DO IN AN EMERGENCY
3-5
3. Change the flat tire.
4. Reinstall the wheel cap by fitting the boss of
the wheel cap in the groove of the wheel,
hitting the center of the wheel cap with your
hand.
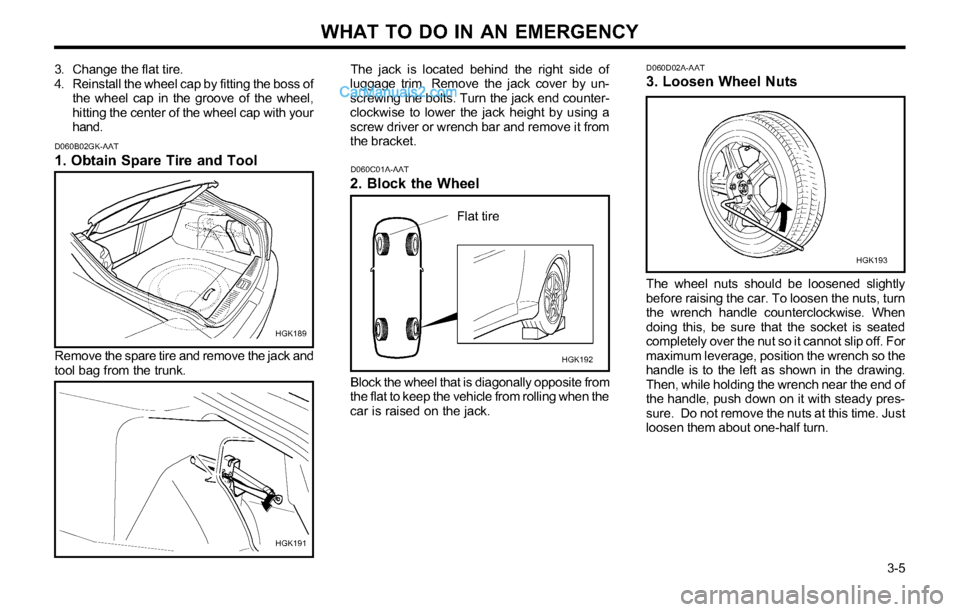
D060C01A-AAT
2. Block the Wheel
Block the wheel that is diagonally opposite from
the flat to keep the vehicle from rolling when the
car is raised on the jack.
Flat tire
HGK192D060D02A-AAT
3. Loosen Wheel Nuts
The wheel nuts should be loosened slightly
before raising the car. To loosen the nuts, turn
the wrench handle counterclockwise. When
doing this, be sure that the socket is seated
completely over the nut so it cannot slip off. For
maximum leverage, position the wrench so the
handle is to the left as shown in the drawing.
Then, while holding the wrench near the end of
the handle, push down on it with steady pres-
sure. Do not remove the nuts at this time. Just
loosen them about one-half turn.
Remove the spare tire and remove the jack and
tool bag from the trunk.
D060B02GK-AAT
1. Obtain Spare Tire and Tool
HGK189
HGK191
HGK193
The jack is located behind the right side of
luggage trim. Remove the jack cover by un-
screwing the bolts. Turn the jack end counter-
clockwise to lower the jack height by using a
screw driver or wrench bar and remove it from
the bracket.
Page 116 of 169
WHAT TO DO IN AN EMERGENCY
3-6
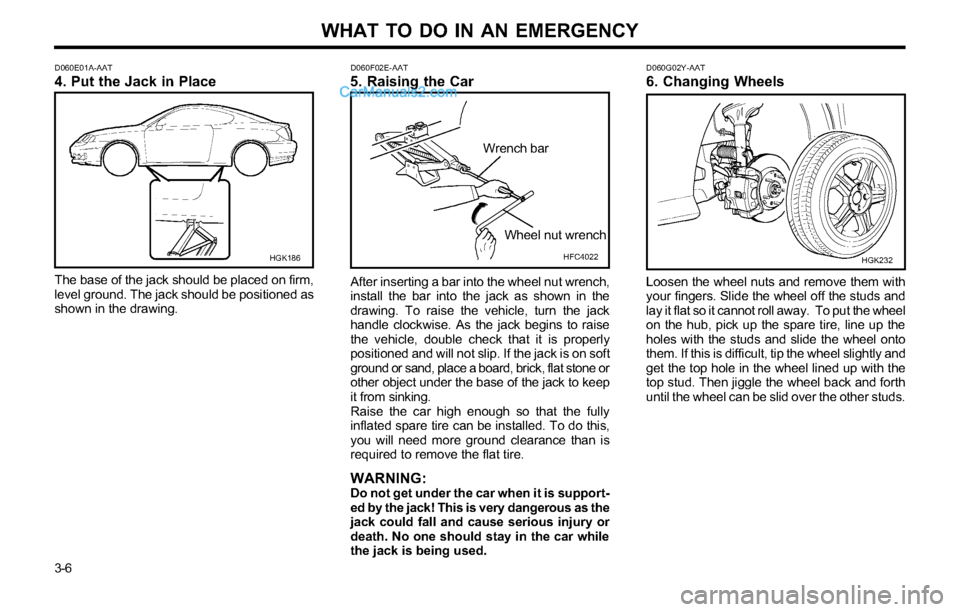
D060E01A-AAT4. Put the Jack in Place
The base of the jack should be placed on firm,
level ground. The jack should be positioned as
shown in the drawing.
HGK186D060F02E-AAT
5. Raising the Car
After inserting a bar into the wheel nut wrench,
install the bar into the jack as shown in the
drawing. To raise the vehicle, turn the jack
handle clockwise. As the jack begins to raise
the vehicle, double check that it is properly
positioned and will not slip. If the jack is on soft
ground or sand, place a board, brick, flat stone or
other object under the base of the jack to keep
it from sinking.
Raise the car high enough so that the fully
inflated spare tire can be installed. To do this,
you will need more ground clearance than is
required to remove the flat tire.
WARNING:Do not get under the car when it is support-
ed by the jack! This is very dangerous as the
jack could fall and cause serious injury or
death. No one should stay in the car while
the jack is being used.
D060G02Y-AAT6. Changing Wheels
Loosen the wheel nuts and remove them with
your fingers. Slide the wheel off the studs and
lay it flat so it cannot roll away. To put the wheel
on the hub, pick up the spare tire, line up the
holes with the studs and slide the wheel onto
them. If this is difficult, tip the wheel slightly and
get the top hole in the wheel lined up with the
top stud. Then jiggle the wheel back and forth
until the wheel can be slid over the other studs.
HGK232HFC4022
Wrench bar
Wheel nut wrench
Page 117 of 169
WHAT TO DO IN AN EMERGENCY
3-7
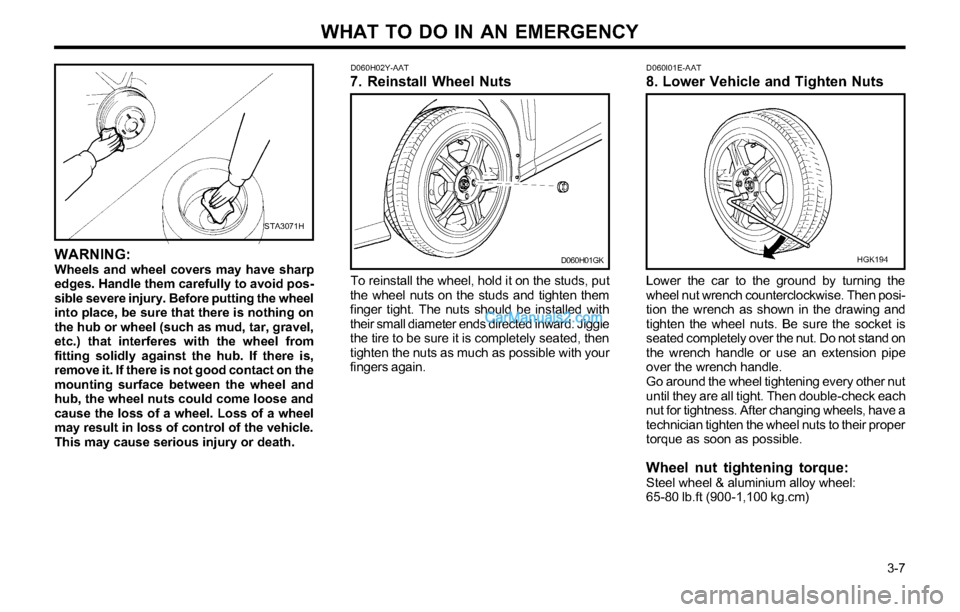
D060H02Y-AAT7. Reinstall Wheel Nuts
To reinstall the wheel, hold it on the studs, put
the wheel nuts on the studs and tighten them
finger tight. The nuts should be installed with
their small diameter ends directed inward. Jiggle
the tire to be sure it is completely seated, then
tighten the nuts as much as possible with your
fingers again.
D060H01GKWARNING:Wheels and wheel covers may have sharp
edges. Handle them carefully to avoid pos-
sible severe injury. Before putting the wheel
into place, be sure that there is nothing on
the hub or wheel (such as mud, tar, gravel,
etc.) that interferes with the wheel from
fitting solidly against the hub. If there is,
remove it. If there is not good contact on the
mounting surface between the wheel and
hub, the wheel nuts could come loose and
cause the loss of a wheel. Loss of a wheel
may result in loss of control of the vehicle.
This may cause serious injury or death.
STA3071H
Lower the car to the ground by turning the
wheel nut wrench counterclockwise. Then posi-
tion the wrench as shown in the drawing and
tighten the wheel nuts. Be sure the socket is
seated completely over the nut. Do not stand on
the wrench handle or use an extension pipe
over the wrench handle.
Go around the wheel tightening every other nut
until they are all tight. Then double-check each
nut for tightness. After changing wheels, have a
technician tighten the wheel nuts to their proper
torque as soon as possible.
Wheel nut tightening torque:Steel wheel & aluminium alloy wheel:
65-80 lb.ft (900-1,100 kg.cm)
D060I01E-AAT8. Lower Vehicle and Tighten Nuts
HGK194
Page 135 of 169
DO-IT-YOURSELF MAINTENANCE
6-4
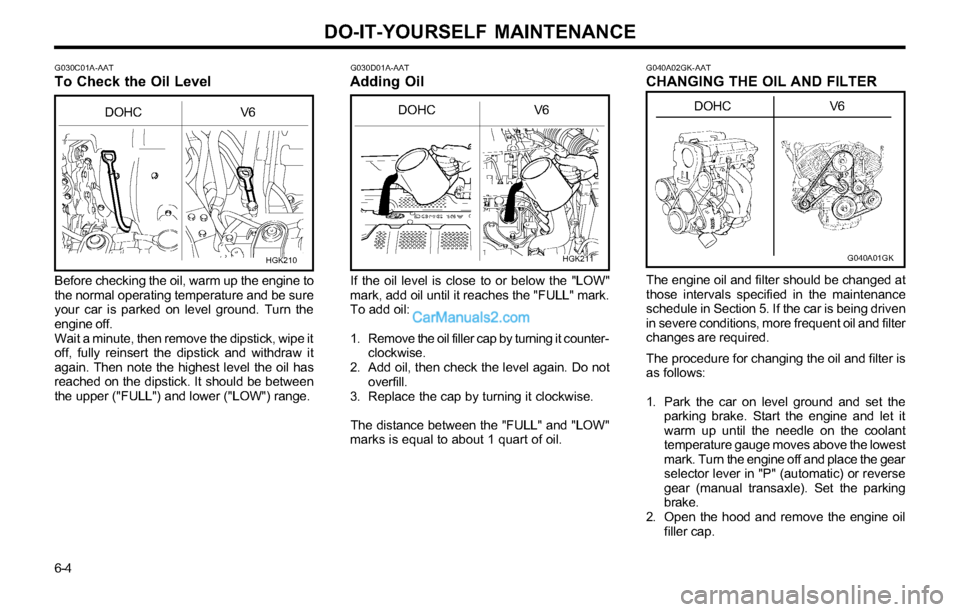
G030C01A-AATTo Check the Oil LevelG030D01A-AATAdding Oil
Before checking the oil, warm up the engine to
the normal operating temperature and be sure
your car is parked on level ground. Turn the
engine off.
Wait a minute, then remove the dipstick, wipe it
off, fully reinsert the dipstick and withdraw it
again. Then note the highest level the oil has
reached on the dipstick. It should be between
the upper ("FULL") and lower ("LOW") range.If the oil level is close to or below the "LOW"
mark, add oil until it reaches the "FULL" mark.
To add oil:
1. Remove the oil filler cap by turning it counter-
clockwise.
2. Add oil, then check the level again. Do not
overfill.
3. Replace the cap by turning it clockwise.
The distance between the "FULL" and "LOW"
marks is equal to about 1 quart of oil.
G040A02GK-AATCHANGING THE OIL AND FILTER
The engine oil and filter should be changed at
those intervals specified in the maintenance
schedule in Section 5. If the car is being driven
in severe conditions, more frequent oil and filter
changes are required.
The procedure for changing the oil and filter is
as follows:
1. Park the car on level ground and set the
parking brake. Start the engine and let it
warm up until the needle on the coolant
temperature gauge moves above the lowest
mark. Turn the engine off and place the gear
selector lever in "P" (automatic) or reverse
gear (manual transaxle). Set the parking
brake.
2. Open the hood and remove the engine oil
filler cap.
HGK210HGK211
DOHC V6DOHC V6
G040A01GK
DOHC V6
Page 136 of 169
DO-IT-YOURSELF MAINTENANCE
6-5 3. Slide underneath the car and loosen the
drain plug by turning it counterclockwise
with a wrench of the proper size. Be sure
that a drain pan is in position to catch the oil
as it drains out, then remove the drain plug.
WARNING:Be very careful when draining the engine oil
as it may be hot enough to burn you!
4. When the oil has stopped draining, replace
the drain plug using a new washer and
retighten by turning it clockwise.
Tightening torque is:
4.5 ~ 4.0 kgf.m (2.0L)
4.5 ~ 3.5 kgf.m (2.7L)
5. Remove the oil filter by turning it counter-
clockwise with a oil filter wrench of the
proper size. A certain amount of oil will
come out when you remove the filter. So be
sure to have your drain pan in place under-
neath it.
6. Install a new oil filter in accordance with the
instructions on the carton or on the filter
itself. Do not over-tighten. (Tightening
torque : 1.2 ~ 1.6 kgf.m)
Be sure that the mounting surface on the
engine is clean and that the old gasket is
removed completely. Lubricate the new gas-
ket on the filter with clean engine oil before
installation.
7. Refill the crankcase with the recommended
engine oil. Refer to the specification in chap-
ter 9 for engine oil capacity.8. Start the engine and check to be sure no oil
is leaking from the drain plug or oil filter.
9. Shut off the engine and recheck the oil level.
NOTE:Always dispose of used engine oil in an
environmentally acceptable manner. It is sug-
gested that it be placed in a sealed container
and taken to a service station for reclama-
tion. Do not pour the oil on the ground or
put it into the household trash.
WARNING:Used motor oil may cause irritation or can-
cer of the skin if left in contact with the skin
for prolonged periods of time. Wash your
hands thoroughly with soap and warm wa-
ter as soon as possible after handling used
oil.
G050A01A-AATCHECKING AND CHANGING THE EN-
GINE COOLANT
WARNING:
Do not remove the radiator cap when the
engine is hot. When the engine is hot, the
engine coolant is under pressure and may
erupt through the opening if the cap is
removed. You could be seriously burned if
you do not observe this precaution. Do not
remove the radiator cap until the radiator is
cool to the touch.
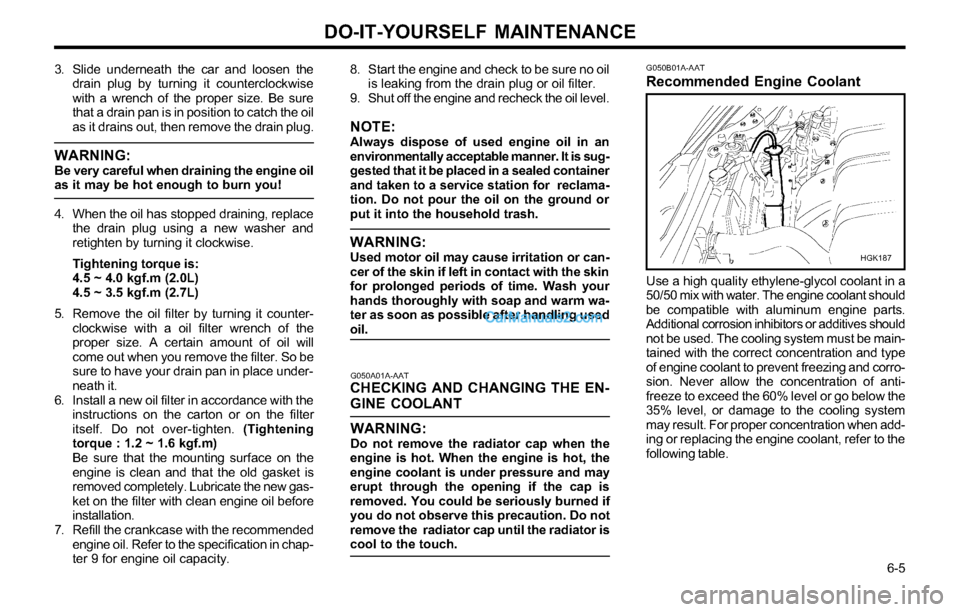
G050B01A-AATRecommended Engine Coolant
Use a high quality ethylene-glycol coolant in a
50/50 mix with water. The engine coolant should
be compatible with aluminum engine parts.
Additional corrosion inhibitors or additives should
not be used. The cooling system must be main-
tained with the correct concentration and type
of engine coolant to prevent freezing and corro-
sion. Never allow the concentration of anti-
freeze to exceed the 60% level or go below the
35% level, or damage to the cooling system
may result. For proper concentration when add-
ing or replacing the engine coolant, refer to the
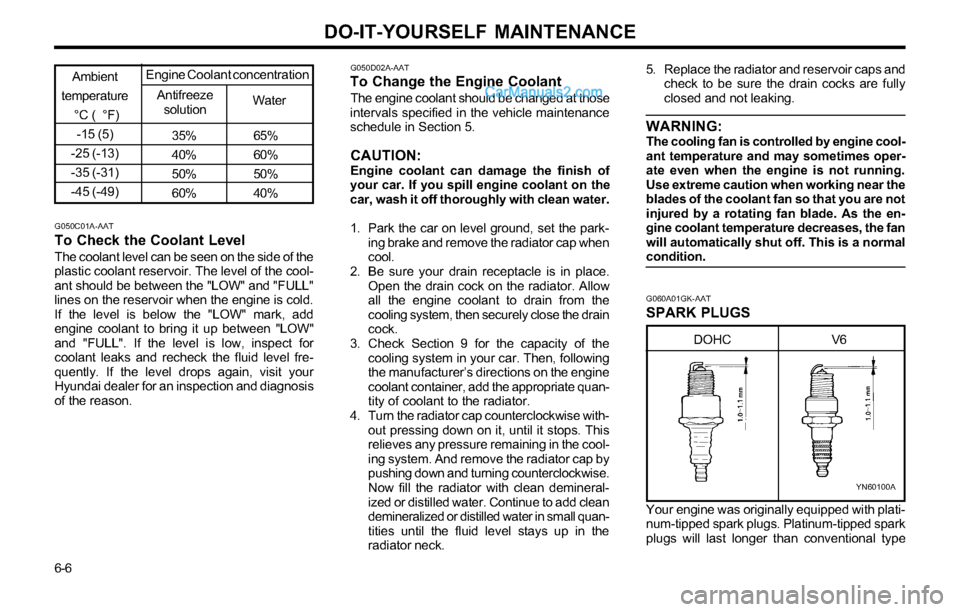
following table.
HGK187
Page 137 of 169
DO-IT-YOURSELF MAINTENANCE
6-6
35% 65%
40% 60%
50% 50%
60% 40%
Ambient
temperature
°C ( °F)
-15 (5)
-25 (-13)
-35 (-31)
-45 (-49)
Antifreeze
solutionWater Engine Coolant concentration
G050C01A-AAT
To Check the Coolant Level
The coolant level can be seen on the side of the
plastic coolant reservoir. The level of the cool-
ant should be between the "LOW" and "FULL"
lines on the reservoir when the engine is cold.
If the level is below the "LOW" mark, add
engine coolant to bring it up between "LOW"
and "FULL". If the level is low, inspect for
coolant leaks and recheck the fluid level fre-
quently. If the level drops again, visit your
Hyundai dealer for an inspection and diagnosis
of the reason.
G050D02A-AATTo Change the Engine Coolant
The engine coolant should be changed at those
intervals specified in the vehicle maintenance
schedule in Section 5.
CAUTION:Engine coolant can damage the finish of
your car. If you spill engine coolant on the
car, wash it off thoroughly with clean water.
1. Park the car on level ground, set the park-
ing brake and remove the radiator cap when
cool.
2. Be sure your drain receptacle is in place.
Open the drain cock on the radiator. Allow
all the engine coolant to drain from the
cooling system, then securely close the drain
cock.
3. Check Section 9 for the capacity of the
cooling system in your car. Then, following
the manufacturer’s directions on the engine
coolant container, add the appropriate quan-
tity of coolant to the radiator.
4. Turn the radiator cap counterclockwise with-
out pressing down on it, until it stops. This
relieves any pressure remaining in the cool-
ing system. And remove the radiator cap by
pushing down and turning counterclockwise.
Now fill the radiator with clean demineral-
ized or distilled water. Continue to add clean
demineralized or distilled water in small quan-
tities until the fluid level stays up in the
radiator neck.5. Replace the radiator and reservoir caps and
check to be sure the drain cocks are fully
closed and not leaking.
WARNING:The cooling fan is controlled by engine cool-
ant temperature and may sometimes oper-
ate even when the engine is not running.
Use extreme caution when working near the
blades of the coolant fan so that you are not
injured by a rotating fan blade. As the en-
gine coolant temperature decreases, the fan
will automatically shut off. This is a normal
condition.
G060A01GK-AATSPARK PLUGS
YN60100A
V6 DOHC
Your engine was originally equipped with plati-
num-tipped spark plugs. Platinum-tipped spark
plugs will last longer than conventional type
Page 138 of 169
DO-IT-YOURSELF MAINTENANCE
6-7
WARNING:It is recommended that the engine be cool
or cold when changing the spark plugs. If
the engine is hot, you could burn yourself
on the insulated connector, the spark plug
or the engine itself.
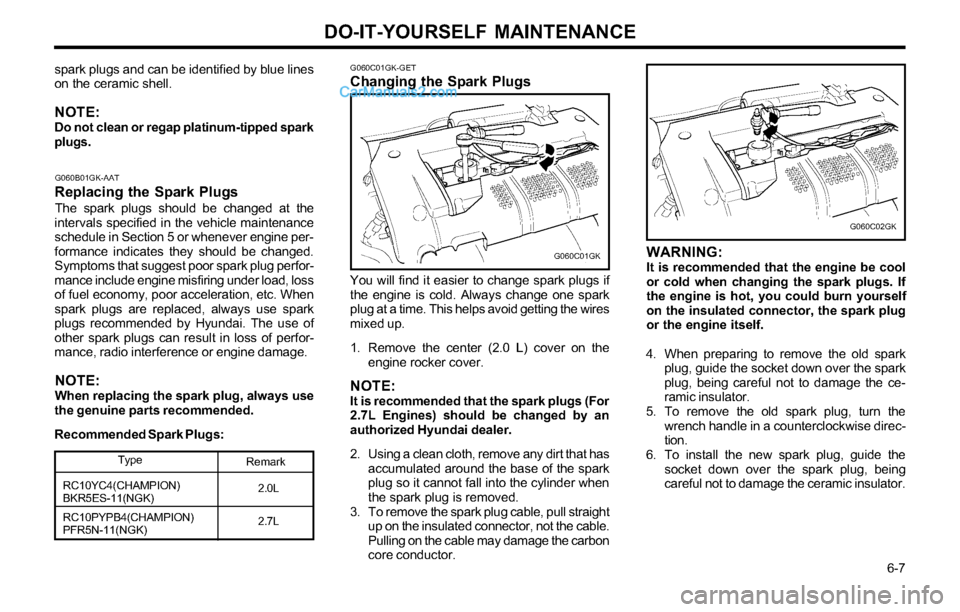
4. When preparing to remove the old spark
plug, guide the socket down over the spark
plug, being careful not to damage the ce-
ramic insulator.
5. To remove the old spark plug, turn the
wrench handle in a counterclockwise direc-
tion.
6. To install the new spark plug, guide the
socket down over the spark plug, being
careful not to damage the ceramic insulator.
G060C02GK
G060B01GK-AAT
Replacing the Spark PlugsThe spark plugs should be changed at the
intervals specified in the vehicle maintenance
schedule in Section 5 or whenever engine per-
formance indicates they should be changed.
Symptoms that suggest poor spark plug perfor-
mance include engine misfiring under load, loss
of fuel economy, poor acceleration, etc. When
spark plugs are replaced, always use spark
plugs recommended by Hyundai. The use of
other spark plugs can result in loss of perfor-
mance, radio interference or engine damage.
NOTE:When replacing the spark plug, always use
the genuine parts recommended.
Recommended Spark Plugs:
Type
RC10YC4(CHAMPION)
BKR5ES-11(NGK)
RC10PYPB4(CHAMPION)
PFR5N-11(NGK)Remark
G060C01GK-GETChanging the Spark Plugs
G060C01GK
You will find it easier to change spark plugs if
the engine is cold. Always change one spark
plug at a time. This helps avoid getting the wires
mixed up.
1. Remove the center (2.0 L) cover on the
engine rocker cover.
NOTE:It is recommended that the spark plugs (For
2.7L Engines) should be changed by an
authorized Hyundai dealer.
2. Using a clean cloth, remove any dirt that has
accumulated around the base of the spark
plug so it cannot fall into the cylinder when
the spark plug is removed.
3. To remove the spark plug cable, pull straight
up on the insulated connector, not the cable.
Pulling on the cable may damage the carbon
core conductor.
2.0L
2.7L
spark plugs and can be identified by blue lines
on the ceramic shell.
NOTE:Do not clean or regap platinum-tipped spark
plugs.
Page 140 of 169
DO-IT-YOURSELF MAINTENANCE
6-9
G100B01A-AATTo Check the Manual Transaxle
Fluid Level
SSA6100B
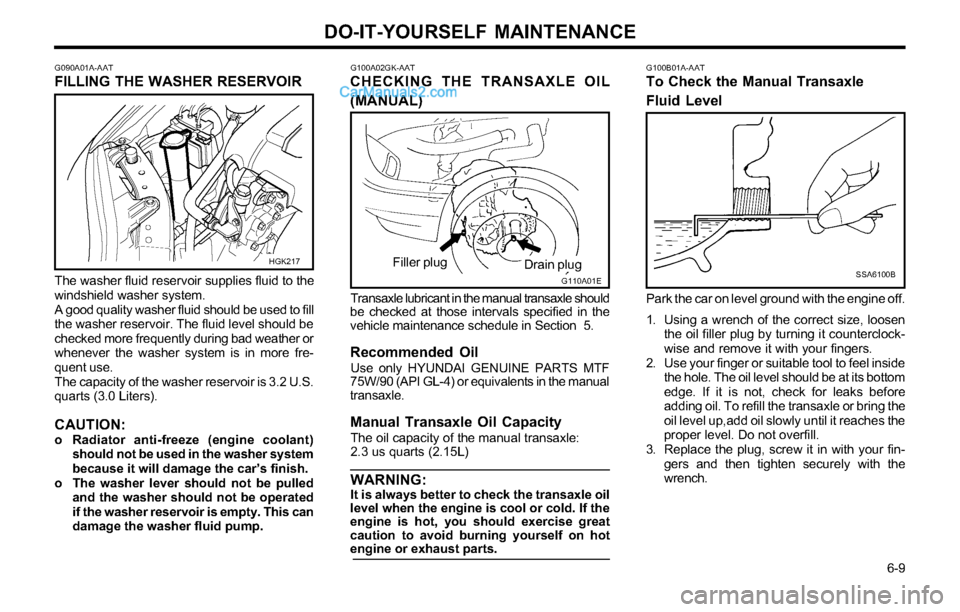
Park the car on level ground with the engine off.
1. Using a wrench of the correct size, loosen
the oil filler plug by turning it counterclock-
wise and remove it with your fingers.
2. Use your finger or suitable tool to feel inside
the hole. The oil level should be at its bottom
edge. If it is not, check for leaks before
adding oil. To refill the transaxle or bring the
oil level up,add oil slowly until it reaches the
proper level. Do not overfill.
3. Replace the plug, screw it in with your fin-
gers and then tighten securely with the
wrench.
G090A01A-AATFILLING THE WASHER RESERVOIR
The washer fluid reservoir supplies fluid to the
windshield washer system.
A good quality washer fluid should be used to fill
the washer reservoir. The fluid level should be
checked more frequently during bad weather or
whenever the washer system is in more fre-
quent use.
The capacity of the washer reservoir is 3.2 U.S.
quarts (3.0 Liters).
CAUTION:o Radiator anti-freeze (engine coolant)
should not be used in the washer system
because it will damage the car’s finish.
o The washer lever should not be pulled
and the washer should not be operated
if the washer reservoir is empty. This can
damage the washer fluid pump.
Transaxle lubricant in the manual transaxle should
be checked at those intervals specified in the
vehicle maintenance schedule in Section 5.
Recommended OilUse only HYUNDAI GENUINE PARTS MTF
75W/90 (API GL-4) or equivalents in the manual
transaxle.
Manual Transaxle Oil CapacityThe oil capacity of the manual transaxle:
2.3 us quarts (2.15L)
WARNING:It is always better to check the transaxle oil
level when the engine is cool or cold. If the
engine is hot, you should exercise great
caution to avoid burning yourself on hot
engine or exhaust parts.
G100A02GK-AATCHECKING THE TRANSAXLE OIL
(MANUAL)
G110A01E
Filler plug
Drain plugHGK217
Page 152 of 169
DO-IT-YOURSELF MAINTENANCE
6-21
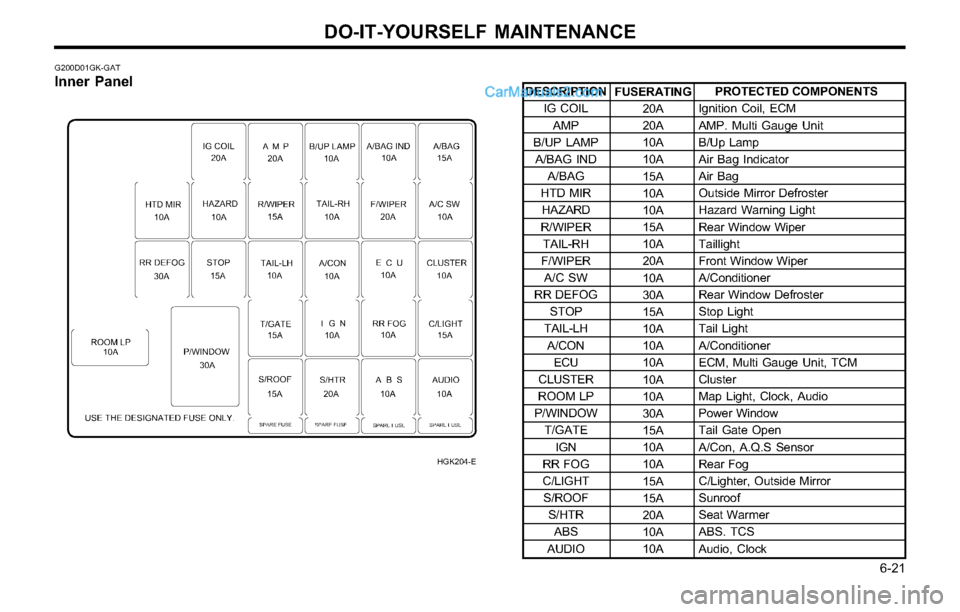
DESCRIPTION
IG COIL
AMP
B/UP LAMP
A/BAG IND
A/BAG
HTD MIR
HAZARD
R/WIPER
TAIL-RH
F/WIPER
A/C SW
RR DEFOG
STOP
TAIL-LH
A/CON
ECU
CLUSTER
ROOM LP
P/WINDOW
T/GATE
IGN
RR FOG
C/LIGHT
S/ROOF
S/HTR
ABS
AUDIO
G200D01GK-GATInner Panel
HGK204-E
PROTECTED COMPONENTS
Ignition Coil, ECM
AMP. Multi Gauge Unit
B/Up Lamp
Air Bag Indicator
Air Bag
Outside Mirror Defroster
Hazard Warning Light
Rear Window Wiper
Taillight
Front Window Wiper
A/Conditioner
Rear Window Defroster
Stop Light
Tail Light
A/Conditioner
ECM, Multi Gauge Unit, TCM
Cluster
Map Light, Clock, Audio
Power Window
Tail Gate Open
A/Con, A.Q.S Sensor
Rear Fog
C/Lighter, Outside Mirror
Sunroof
Seat Warmer
ABS. TCS
Audio, Clock FUSERATING
20A
20A
10A
10A
15A
10A
10A
15A
10A
20A
10A
30A
15A
10A
10A
10A
10A
10A
30A
15A
10A
10A
15A
15A
20A
10A
10A
Page 164 of 169
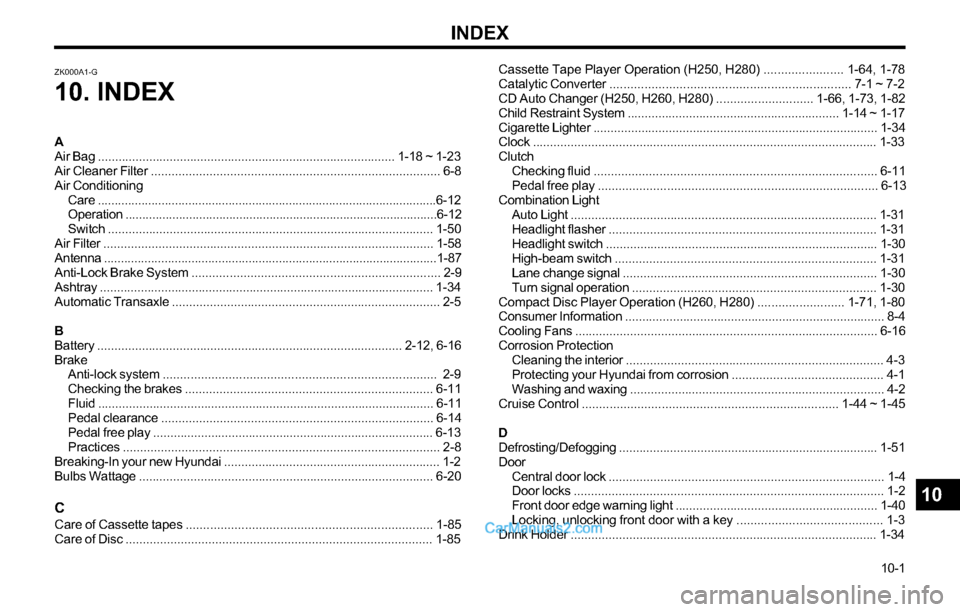
INDEX
10-1 Cassette Tape Player Operation (H250, H280) ....................... 1-64, 1-78
Catalytic Converter ..................................................................... 7-1 ~ 7-2
CD Auto Changer (H250, H260, H280) ............................ 1-66, 1-73, 1-82
Child Restraint System .............................................................. 1-14 ~ 1-17
Cigarette Lighter ................................................................................... 1-34
Clock .................................................................................................... 1-33
Clutch
Checking fluid .................................................................................. 6-11
Pedal free play ................................................................................. 6-13
Combination Light
Auto Light ......................................................................................... 1-31
Headlight flasher .............................................................................. 1-31
Headlight switch ............................................................................... 1-30
High-beam switch ............................................................................ 1-31
Lane change signal .......................................................................... 1-30
Turn signal operation ....................................................................... 1-30
Compact Disc Player Operation (H260, H280) ......................... 1-71, 1-80
Consumer Information ............................................................................ 8-4
Cooling Fans ........................................................................................ 6-16
Corrosion Protection
Cleaning the interior ........................................................................... 4-3
Protecting your Hyundai from corrosion ............................................ 4-1
Washing and waxing .......................................................................... 4-2
Cruise Control .......................................................................... 1-44 ~ 1-45
D
Defrosting/Defogging ............................................................................ 1-51
Door
Central door lock ................................................................................ 1-4
Door locks .......................................................................................... 1-2
Front door edge warning light ........................................................... 1-40
Locking, unlocking front door with a key .......................................... 1-3
Drink Holder ......................................................................................... 1-34
ZK000A1-G
10. INDEX
A
Air Bag ....................................................................................... 1-18 ~ 1-23
Air Cleaner Filter .................................................................................... 6-8
Air Conditioning
Care .....................................................................................................6-12
Operation .............................................................................................6-12
Switch ............................................................................................... 1-50
Air Filter ................................................................................................ 1-58
Antenna ...................................................................................................1-87
Anti-Lock Brake System ........................................................................ 2-9
Ashtray .................................................................................................. 1-34
Automatic Transaxle .............................................................................. 2-5
B
Battery ......................................................................................... 2-12, 6-16
Brake
Anti-lock system ............................................................................... 2-9
Checking the brakes ........................................................................ 6-11
Fluid .................................................................................................. 6-11
Pedal clearance ............................................................................... 6-14
Pedal free play .................................................................................. 6-13
Practices ............................................................................................ 2-8
Breaking-In your new Hyundai ............................................................... 1-2
Bulbs Wattage ...................................................................................... 6-20
C
Care of Cassette tapes ....................................................................... 1-85
Care of Disc ......................................................................................... 1-85
10