parking brake Hyundai Tiburon 2003 Owner's Manual
[x] Cancel search | Manufacturer: HYUNDAI, Model Year: 2003, Model line: Tiburon, Model: Hyundai Tiburon 2003Pages: 169, PDF Size: 3.04 MB
Page 32 of 169
FEATURES OF YOUR HYUNDAI
1- 24
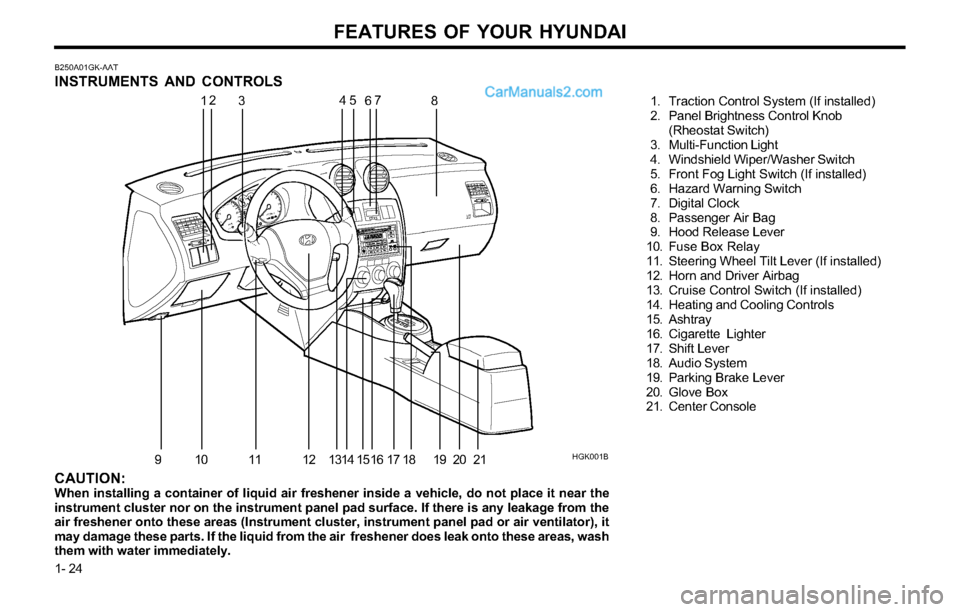
B250A01GK-AAT
INSTRUMENTS AND CONTROLS
1. Traction Control System (If installed)
2. Panel Brightness Control Knob
(Rheostat Switch)
3. Multi-Function Light
4. Windshield Wiper/Washer Switch
5. Front Fog Light Switch (If installed)
6. Hazard Warning Switch
7. Digital Clock
8. Passenger Air Bag
9. Hood Release Lever
10. Fuse Box Relay
11. Steering Wheel Tilt Lever (If installed)
12. Horn and Driver Airbag
13. Cruise Control Switch (If installed)
14. Heating and Cooling Controls
15. Ashtray
16. Cigarette Lighter
17. Shift Lever
18. Audio System
19. Parking Brake Lever
20. Glove Box
21. Center Console
CAUTION:When installing a container of liquid air freshener inside a vehicle, do not place it near the
instrument cluster nor on the instrument panel pad surface. If there is any leakage from the
air freshener onto these areas (Instrument cluster, instrument panel pad or air ventilator), it
may damage these parts. If the liquid from the air freshener does leak onto these areas, wash
them with water immediately.
HGK001B
12
34
5
67
8
910 11 12131415161718192021
Page 33 of 169
FEATURES OF YOUR HYUNDAI
1- 25
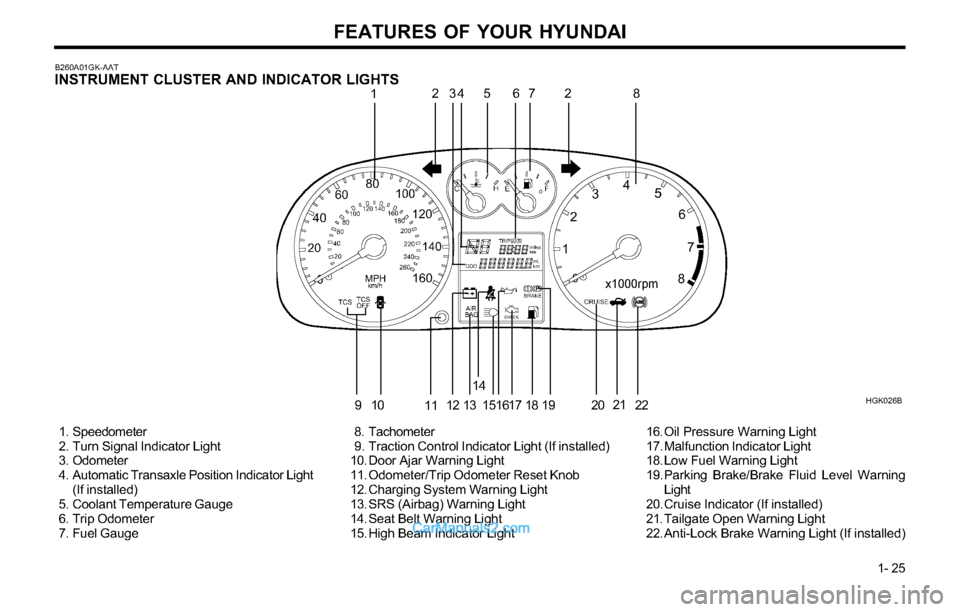
HGK026B B260A01GK-AAT
INSTRUMENT CLUSTER AND INDICATOR LIGHTS1234 5 678
910
1112 1314
151617 18 19 2021
1. Speedometer
2. Turn Signal Indicator Light
3. Odometer
4. Automatic Transaxle Position Indicator Light
(If installed)
5. Coolant Temperature Gauge
6. Trip Odometer
7. Fuel Gauge 8. Tachometer
9. Traction Control Indicator Light (If installed)
10. Door Ajar Warning Light
11. Odometer/Trip Odometer Reset Knob
12. Charging System Warning Light
13. SRS (Airbag) Warning Light
14. Seat Belt Warning Light
15. High Beam Indicator Light16. Oil Pressure Warning Light
17. Malfunction Indicator Light
18. Low Fuel Warning Light
19. Parking Brake/Brake Fluid Level Warning
Light
20. Cruise Indicator (If installed)
21. Tailgate Open Warning Light
22. Anti-Lock Brake Warning Light (If installed) 2
22
Page 34 of 169
FEATURES OF YOUR HYUNDAI
1- 26
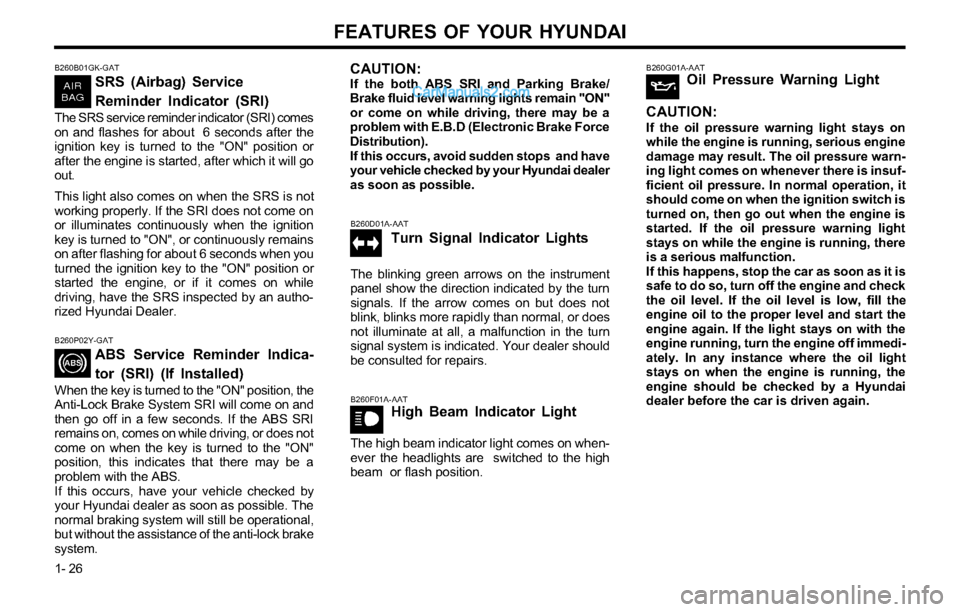
B260G01A-AATOil Pressure Warning Light
CAUTION:
If the oil pressure warning light stays on
while the engine is running, serious engine
damage may result. The oil pressure warn-
ing light comes on whenever there is insuf-
ficient oil pressure. In normal operation, it
should come on when the ignition switch is
turned on, then go out when the engine is
started. If the oil pressure warning light
stays on while the engine is running, there
is a serious malfunction.
If this happens, stop the car as soon as it is
safe to do so, turn off the engine and check
the oil level. If the oil level is low, fill the
engine oil to the proper level and start the
engine again. If the light stays on with the
engine running, turn the engine off immedi-
ately. In any instance where the oil light
stays on when the engine is running, the
engine should be checked by a Hyundai
dealer before the car is driven again.
B260F01A-AATHigh Beam Indicator Light
The high beam indicator light comes on when-
ever the headlights are switched to the high
beam or flash position.
B260D01A-AAT
Turn Signal Indicator Lights
The blinking green arrows on the instrument
panel show the direction indicated by the turn
signals. If the arrow comes on but does not
blink, blinks more rapidly than normal, or does
not illuminate at all, a malfunction in the turn
signal system is indicated. Your dealer should
be consulted for repairs.
B260P02Y-GAT
ABS Service Reminder Indica-
tor (SRI) (If Installed)
When the key is turned to the "ON" position, the
Anti-Lock Brake System SRI will come on and
then go off in a few seconds. If the ABS SRI
remains on, comes on while driving, or does not
come on when the key is turned to the "ON"
position, this indicates that there may be a
problem with the ABS.
If this occurs, have your vehicle checked by
your Hyundai dealer as soon as possible. The
normal braking system will still be operational,
but without the assistance of the anti-lock brake
system.
CAUTION:If the both ABS SRI and Parking Brake/
Brake fluid level warning lights remain "ON"
or come on while driving, there may be a
problem with E.B.D (Electronic Brake Force
Distribution).
If this occurs, avoid sudden stops and have
your vehicle checked by your Hyundai dealer
as soon as possible.
B260B01GK-GAT
SRS (Airbag) Service
Reminder Indicator (SRI)
The SRS service reminder indicator (SRI) comes
on and flashes for about 6 seconds after the
ignition key is turned to the "ON" position or
after the engine is started, after which it will go
out.
This light also comes on when the SRS is not
working properly. If the SRI does not come on
or illuminates continuously when the ignition
key is turned to "ON", or continuously remains
on after flashing for about 6 seconds when you
turned the ignition key to the "ON" position or
started the engine, or if it comes on while
driving, have the SRS inspected by an autho-
rized Hyundai Dealer.
Page 35 of 169
FEATURES OF YOUR HYUNDAI
1- 27
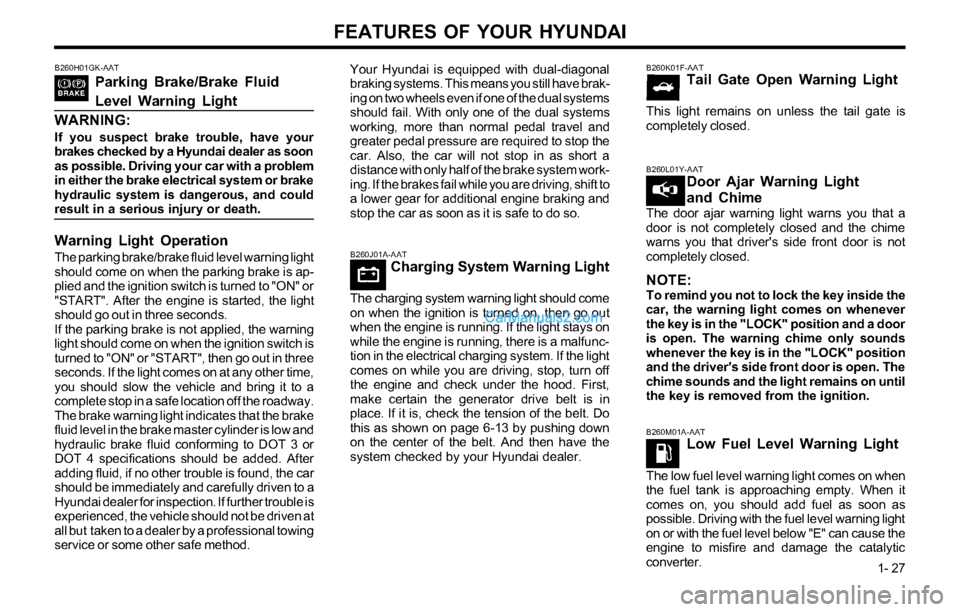
B260M01A-AATLow Fuel Level Warning Light
The low fuel level warning light comes on when
the fuel tank is approaching empty. When it
comes on, you should add fuel as soon as
possible. Driving with the fuel level warning light
on or with the fuel level below "E" can cause the
engine to misfire and damage the catalytic
converter.
B260J01A-AATCharging System Warning Light
The charging system warning light should come
on when the ignition is turned on, then go out
when the engine is running. If the light stays on
while the engine is running, there is a malfunc-
tion in the electrical charging system. If the light
comes on while you are driving, stop, turn off
the engine and check under the hood. First,
make certain the generator drive belt is in
place. If it is, check the tension of the belt. Do
this as shown on page 6-13 by pushing down
on the center of the belt. And then have the
system checked by your Hyundai dealer.
B260K01F-AATTail Gate Open Warning Light
This light remains on unless the tail gate is
completely closed.
B260L01Y-AATDoor Ajar Warning Light
and Chime
The door ajar warning light warns you that a
door is not completely closed and the chime
warns you that driver's side front door is not
completely closed.
NOTE:To remind you not to lock the key inside the
car, the warning light comes on whenever
the key is in the "LOCK" position and a door
is open. The warning chime only sounds
whenever the key is in the "LOCK" position
and the driver's side front door is open. The
chime sounds and the light remains on until
the key is removed from the ignition.
B260H01GK-AAT
Parking Brake/Brake Fluid
Level Warning Light
WARNING:
If you suspect brake trouble, have your
brakes checked by a Hyundai dealer as soon
as possible. Driving your car with a problem
in either the brake electrical system or brake
hydraulic system is dangerous, and could
result in a serious injury or death.
Warning Light Operation
The parking brake/brake fluid level warning light
should come on when the parking brake is ap-
plied and the ignition switch is turned to "ON" or
"START". After the engine is started, the light
should go out in three seconds.
If the parking brake is not applied, the warning
light should come on when the ignition switch is
turned to "ON" or "START", then go out in three
seconds. If the light comes on at any other time,
you should slow the vehicle and bring it to a
complete stop in a safe location off the roadway.
The brake warning light indicates that the brake
fluid level in the brake master cylinder is low and
hydraulic brake fluid conforming to DOT 3 or
DOT 4 specifications should be added. After
adding fluid, if no other trouble is found, the car
should be immediately and carefully driven to a
Hyundai dealer for inspection. If further trouble is
experienced, the vehicle should not be driven at
all but taken to a dealer by a professional towing
service or some other safe method.Your Hyundai is equipped with dual-diagonal
braking systems. This means you still have brak-
ing on two wheels even if one of the dual systems
should fail. With only one of the dual systems
working, more than normal pedal travel and
greater pedal pressure are required to stop the
car. Also, the car will not stop in as short a
distance with only half of the brake system work-
ing. If the brakes fail while you are driving, shift to
a lower gear for additional engine braking and
stop the car as soon as it is safe to do so.
Page 47 of 169
FEATURES OF YOUR HYUNDAI
1- 39
B550A01S-GAT
HIGH-MOUNTED REAR STOP LIGHT
B550A01GK
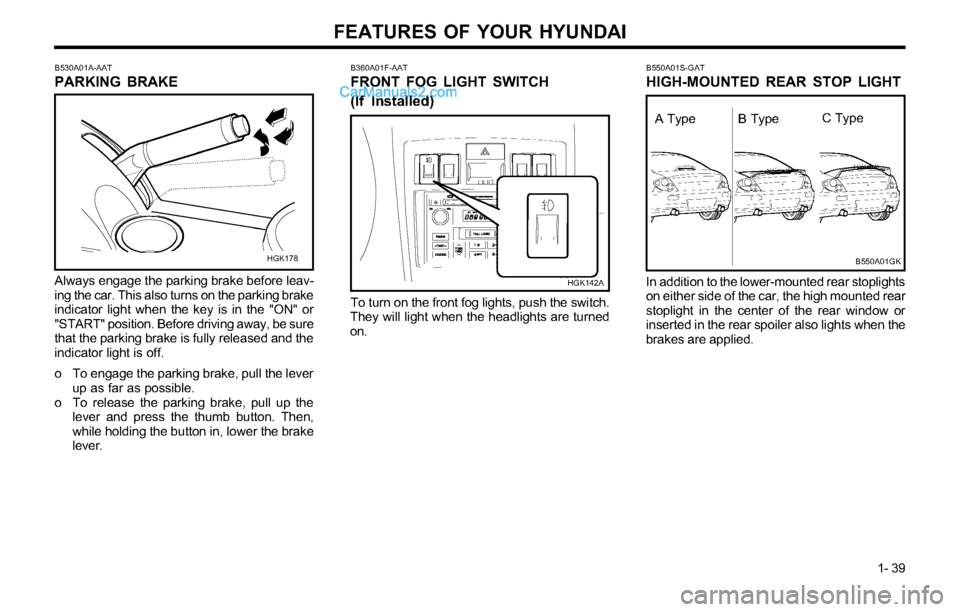
In addition to the lower-mounted rear stoplights
on either side of the car, the high mounted rear
stoplight in the center of the rear window or
inserted in the rear spoiler also lights when the
brakes are applied.
B360A01F-AAT
FRONT FOG LIGHT SWITCH
(If Installed)
HGK142A
To turn on the front fog lights, push the switch.
They will light when the headlights are turned
on.
B530A01A-AAT
PARKING BRAKE
Always engage the parking brake before leav-
ing the car. This also turns on the parking brake
indicator light when the key is in the "ON" or
"START" position. Before driving away, be sure
that the parking brake is fully released and the
indicator light is off.
o To engage the parking brake, pull the lever
up as far as possible.
o To release the parking brake, pull up the
lever and press the thumb button. Then,
while holding the button in, lower the brake
lever.
HGK178
A Type B TypeC Type
Page 97 of 169
DRIVING YOUR HYUNDAI
2- 2
C020A01A-AATBEFORE STARTING THE ENGINE
Before you start the engine, you should always:
1. Look around the vehicle to be sure there are
no flat tires, puddles of oil, water or other
indications of possible trouble.
2. After entering the car, check to be sure the
parking brake is engaged.
3. Check that all windows, and lights are clean.
4. Check that the interior and exterior mirrors
are clean and in position.
5. Check your seat, seatback and headrest to
be sure they are in their proper positions.
6. Lock all the doors.
7. Fasten your seat belt and be sure that all
other occupants have fastened theirs.
8. Turn off all lights and accessories that are
not needed.
9. When you turn the ignition switch to “ON”,
check that all appropriate warning lights are
operating and that you have sufficient fuel.
10. Check the operation of warning lights and all
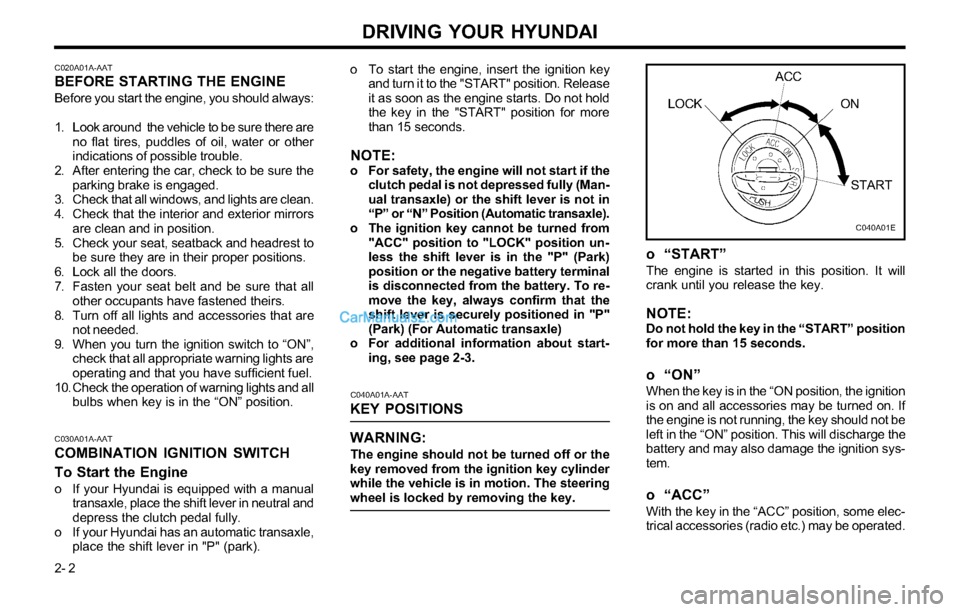
bulbs when key is in the “ON” position.o To start the engine, insert the ignition key
and turn it to the "START" position. Release
it as soon as the engine starts. Do not hold
the key in the "START" position for more
than 15 seconds.
NOTE:o For safety, the engine will not start if the
clutch pedal is not depressed fully (Man-
ual transaxle) or the shift lever is not in
“P” or “N” Position (Automatic transaxle).
o The ignition key cannot be turned from
"ACC" position to "LOCK" position un-
less the shift lever is in the "P" (Park)
position or the negative battery terminal
is disconnected from the battery. To re-
move the key, always confirm that the
shift lever is securely positioned in "P"
(Park) (For Automatic transaxle)
o For additional information about start-
ing, see page 2-3.
C040A01A-AAT
KEY POSITIONS
WARNING:
The engine should not be turned off or the
key removed from the ignition key cylinder
while the vehicle is in motion. The steering
wheel is locked by removing the key.
C030A01A-AATCOMBINATION IGNITION SWITCH
To Start the Engine
o If your Hyundai is equipped with a manual
transaxle, place the shift lever in neutral and
depress the clutch pedal fully.
o If your Hyundai has an automatic transaxle,
place the shift lever in "P" (park).
o “START”The engine is started in this position. It will
crank until you release the key.
NOTE:Do not hold the key in the “START” position
for more than 15 seconds.
o “ON”When the key is in the “ON position, the ignition
is on and all accessories may be turned on. If
the engine is not running, the key should not be
left in the “ON” position. This will discharge the
battery and may also damage the ignition sys-
tem.
o “ACC”
With the key in the “ACC” position, some elec-
trical accessories (radio etc.) may be operated.
C040A01E
LOCKACC
ON
START
Page 99 of 169
DRIVING YOUR HYUNDAI
2- 4
C070B01A-AATUsing the Clutch
The clutch should be pressed all the way to the
floor before shifting, then released slowly. The
clutch pedal should always be used after fully
returning to the original position. Do not rest
your foot on the clutch pedal while driving. This
can cause unnecessary wear.
Do not partially engage the clutch to hold the
car on an incline. This causes unnecessary
wear. Use the parking brake to hold the car on
an incline. Do not operate the clutch pedal
rapidly and repeatedly.
C070D02A-AAT
Good Driving Practiceso Never take the car out of gear and coast
down a hill. This is extremely hazardous.
Always leave the car in gear.
o Don't "ride" the brakes. This can cause
them to overheat and malfunction. Instead,
when you are driving down a long hill, slow
down and shift to a lower gear. When you do
this, engine braking will help slow the car.
o Slow down before shifting to a lower gear.
This will help avoid over-revving the engine,
which can cause damage.
o Slow down when you encounter cross winds.
This gives you much better control of your
car.
C070A02GK-AATOPERATING THE MANUAL
TRANSAXLE
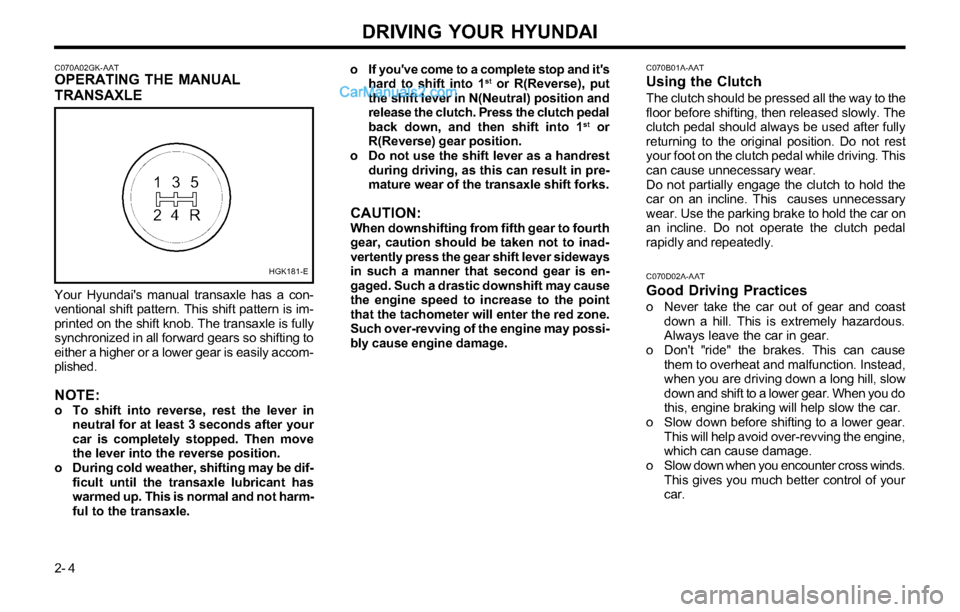
Your Hyundai's manual transaxle has a con-
ventional shift pattern. This shift pattern is im-
printed on the shift knob. The transaxle is fully
synchronized in all forward gears so shifting to
either a higher or a lower gear is easily accom-
plished.
NOTE:o To shift into reverse, rest the lever in
neutral for at least 3 seconds after your
car is completely stopped. Then move
the lever into the reverse position.
o During cold weather, shifting may be dif-
ficult until the transaxle lubricant has
warmed up. This is normal and not harm-
ful to the transaxle.
HGK181-E
o If you've come to a complete stop and it's
hard to shift into 1st or R(Reverse), put
the shift lever in N(Neutral) position and
release the clutch. Press the clutch pedal
back down, and then shift into 1
st or
R(Reverse) gear position.
o Do not use the shift lever as a handrest
during driving, as this can result in pre-
mature wear of the transaxle shift forks.
CAUTION:When downshifting from fifth gear to fourth
gear, caution should be taken not to inad-
vertently press the gear shift lever sideways
in such a manner that second gear is en-
gaged. Such a drastic downshift may cause
the engine speed to increase to the point
that the tachometer will enter the red zone.
Such over-revving of the engine may possi-
bly cause engine damage.
Page 101 of 169
DRIVING YOUR HYUNDAI
2- 6
C090C01A-AAT
o R(Reverse):Use for backing up the vehicle. Bring the car to
a complete stop before shifting the selector
lever to "R" position.
C090D02O-AAT
o N (Neutral):
In the "N" position, the transaxle is in neutral,
which means that no gears are engaged. The
engine can be started with the shift lever in "N"
position, although this is not recommended
except if the engine stalls while the car is
moving.
C090E01O-AATo D(Drive):
Use for normal driving. The transaxle will auto-
matically shift through a four gear sequence.
C090B01A-AATThe function of each position is as
follows:
o P (Park):
Use to hold the vehicle in place when parked or
while starting the engine; shift the selector lever
to the "P" (Park) position. Whenever parking
the car, apply the parking brake and shift the
selector lever to the "P" (Park) position.
CAUTION:Never place the selector lever in the "P"
(Park) position unless the vehicle is fully
stopped. Failure to observe this caution will
cause severe damage to the transaxle.
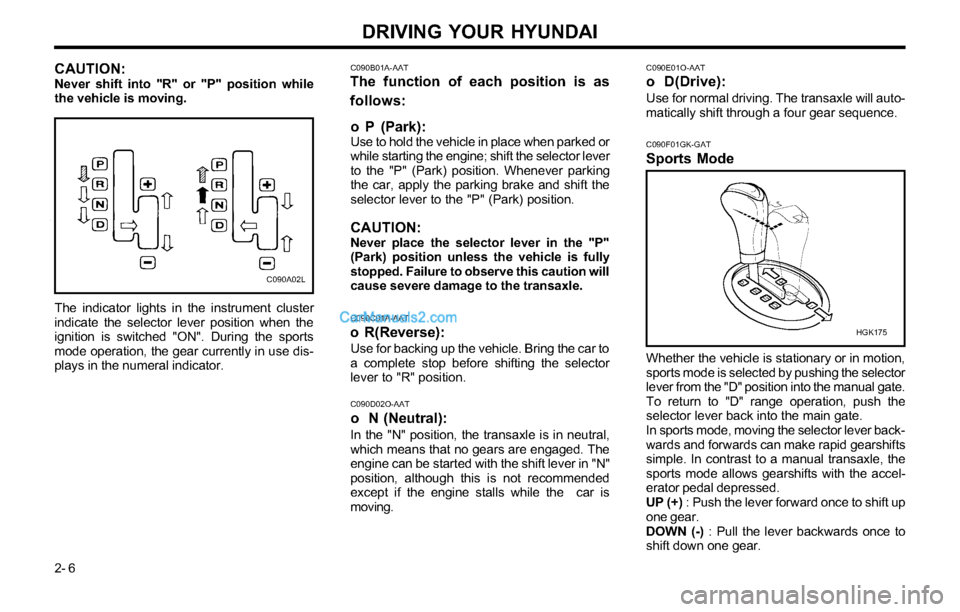
CAUTION:Never shift into "R" or "P" position while
the vehicle is moving.
C090A02L
C090F01GK-GAT
Sports Mode
HGK175
Whether the vehicle is stationary or in motion,
sports mode is selected by pushing the selector
lever from the "D" position into the manual gate.
To return to "D" range operation, push the
selector lever back into the main gate.
In sports mode, moving the selector lever back-
wards and forwards can make rapid gearshifts
simple. In contrast to a manual transaxle, the
sports mode allows gearshifts with the accel-
erator pedal depressed.
UP (+) : Push the lever forward once to shift up
one gear.
DOWN (-) : Pull the lever backwards once to
shift down one gear.
The indicator lights in the instrument cluster
indicate the selector lever position when the
ignition is switched "ON". During the sports
mode operation, the gear currently in use dis-
plays in the numeral indicator.
Page 102 of 169
DRIVING YOUR HYUNDAI
2- 7 SKIP : By rapidly moving the selector forward
or backward twice, it is possible to skip one
gear, i.e. 1st to 3rd or 3rd to 1st .
CAUTION:o In sports mode, the driver must execute
upward shifts in accordance with pre-
vailing road conditions, taking care to
keep the engine speed below the red
zone.
o For engine protection, upward shifts are
made automatically when the engine rpm
reaches the red zone.
o By rapidly moving the selector lever back-
wards (-) twice it is possible to skip one
gear by using the sports mode. Since
sudden engine braking and/or rapid ac-
celeration can cause a loss of traction,
however, downshifts must be made care-
fully in accordance with the vehicle's
speed.
NOTE:o In sports mode, only the four forward
gears can be selected. To reverse or park
the vehicle, move the selector lever to
the "R" or "P" position as required.
o In sports mode, downward shifts are
made automatically when the vehicle
slows down. When the vehicle stops, 1st
gear is automatically selected.
o To maintain the required levels of vehicle
performance and safety, the system may
not execute certain gearshifts when the
selector lever is operated.o Before driving away from a stop on a
slippery road, push the selector lever
forward into the +(UP) position. This
causes the transaxle to shift into 2nd
gear which is better for smooth driving
away on a slippery road. Push the selec-
tor lever to the -(DOWN) side to shift
back to 1st gear.
C090H01L-GAT
NOTE:o For smooth and safe operation, depress
the brake pedal when shifting from “Neu-
tral” position or “Park” position to a
forward or reverse gear.
o The ignition key must be in the “ON”
position and the brake pedal fully de-
pressed in order to move the shift lever
from the “P” (Park) position to any of the
other positions.
o It is always possible to shift from “R”,
“N”, “D” position to “P” position. The
vehicle must be fully stopped to avoid
transaxle damage.
C090I02L-GAT
CAUTION:
o Shift into “R” and “P” position only when
the vehicle has completely stopped.
o Do not accelerate the engine in reverse
or any of the forward positions with the
brakes applied.
o Always apply the footbrake when shift-
ing from “P” or “N”, to “R”, “D”position.
C090N01O-AATGood Driving Practices
o Never move the gear selector lever from “P”
or “N” to any other position with the acceler-
ator pedal depressed.
o Never move the gear selector lever into “P”
when the vehicle is in motion.
o Be sure the car is completely stopped be-
fore you attempt to shift into “R”.
o Never take the car out of gear and coast
down a hill. This may be extremely hazard-
ous. Always leave the car in gear when
moving.
o Do not “ride” the brakes. This can cause
them to overheat and malfunction. Instead,
when you are driving down a long hill, slow
down and shift to a lower gear. When you do
this, engine braking will help slow the car.
o Slow down before shifting to a lower gear.
Otherwise, the lower gear may not be en-
gaged. o Do not use the “P” (Park) position in
place of the parking brake. Always set
the parking brake, shift the transaxle into
“P” (Park) position and turn off the igni-
tion when you leave the vehicle, even
momentarily. Never leave the vehicle
unattended while the engine is running.
o Check the automatic transaxle fluid level
regularly, and add fluid as necessary.
o See the maintenance schedule for the
proper fluid recommendation.
Page 103 of 169
DRIVING YOUR HYUNDAI
2- 8 o Always use the parking brake. Do not de-
pend on placing the transaxle in “P” to keep
the car from moving.
o Exercise extreme caution when driving on a
slippery surface. Be especially careful when
braking, accelerating or shifting gears. On a
slippery surface, an abrupt change in vehi-
cle speed can cause the drive wheels to
lose traction and the vehicle to go out of
control.
WARNING:o Avoid high cornering speeds.
o Do not make quick steering wheel move-
ments, such as sharp lane changes or
fast, sharp turns.
o Always wear your seat belts.
o The risk of rollover is greatly increased if
you lose control of your vehicle at high-
way speeds.
o Loss of control often occurs if two or
more wheels drop off the roadway and
the driver oversteers to reenter the road-
way.
o In the event your vehicle leaves the road-
way, do not steer sharply. Instead, slow
down before pulling back into the travel
lanes.
o In a collision crash, un unbelted person
is significantly more likely to die than a
person wearing a seatbelt.o Don’t “ride” the brake pedal. Resting your
foot on the brake pedal while driving can be
dangerous because it can result in the brakes
overheating and losing their effectiveness. It
also increases the wear of the brake compo-
nents.
o If a tire goes flat while you are driving, apply
the brakes gently and keep the car pointed
straight ahead while you slow down. When
you are moving slowly enough for it to be
safe to do so, pull off the road and stop in a
safe place.
o If your car is equipped with an automatic
transaxle, don’t let your car creep forward.
To avoid creeping forward, keep your foot
on the brake pedal when the car is stopped.
o Use caution when parking on a hill. Engage
the parking brake and place the gear selec-
tor lever in “P” (automatic transaxle) or in
first or reverse gear (manual transaxle). If
your car is facing downhill, turn the front
wheels into the curb to help keep the car
from rolling. If your car is facing uphill, turn
the front wheels away from the curb to help
keep the car from rolling. If there is no curb
or if it is required by other conditions to keep
the car from rolling, block the wheels.
o Under some conditions your parking brake
can freeze in the engaged position. This is
most likely to happen when there is an
accumulation of snow or ice around or near
the rear brakes or if the brakes are wet. If
there is a risk that the parking brake may
freeze, apply it only temporarily while you
C130A01A-AATGOOD BRAKING PRACTICES
WARNING:
Nothing should be carried on top of the
shelf panel behind the rear seat. If there
were an accident or a sudden stop, such
objects could move forward and cause dam-
age to the vehicle or injure the occupants.
o After being parked, check to be sure the
parking brake is not engaged and that the
parking brake indicator light is out before
driving away.
o Driving through water may get the brakes
wet. They can also get wet when the car is
washed. Wet brakes can be dangerous!
Your car will not stop as quickly if the brakes
are wet. Wet brakes cause the car to pull to
one side. To dry the brakes, apply the brakes
lightly until the braking action returns to
normal, taking care to keep the car under
control at all times. If the braking action does
not return to normal, stop as soon as it is
safe to do so and call your Hyundai dealer
for assistance.
o Don’t coast down hills with the car out of
gear. This is extremely hazardous. Keep the
car in gear at all times, use the brakes to
slow down, then shift to a lower gear so that
engine braking will help you maintain a safe
speed.