window Hyundai Tiburon 2008 Owner's Manual
[x] Cancel search | Manufacturer: HYUNDAI, Model Year: 2008, Model line: Tiburon, Model: Hyundai Tiburon 2008Pages: 268, PDF Size: 9.93 MB
Page 13 of 268
FEATURES OF YOUR HYUNDAI
1
Fuel Recommendations ................................................ 1-2
Breaking in Your New Hyundai ..................................... 1-3
Keys.............................................................................. 1-3
Door (Theft-Alarm System) .................................... 1-4, 1-6
Power Windows ............................................................ 1-9
Seats...........................................................................1-10
Seat Belts....................................................................1-16
Child Restraint System ...............................................1-22
Supplemental Restraint (AIRBAG) System (SRS) .....1-30
Instrument Cluster and Indicator Lights...................... 1-46
Warning and Indicator Lights......................................1-48
Multi-Function Light Switch .........................................1-58
Windshield Wiper/Washer...........................................1-60
Sunroof.......................................................................1-66
Mirror...........................................................................1-70
Hood Release .............................................................1-73
Cruise Control.............................................................1-79
Audio Remote Control Switch .....................................1-83
Heating and Cooling Control .......................................1-84
Stereo Sound System...............................................1-102
Antenna.....................................................................1-104
Audio System............................................................1-105
1
Page 21 of 268
1
FEATURES OF YOUR HYUNDAI
9
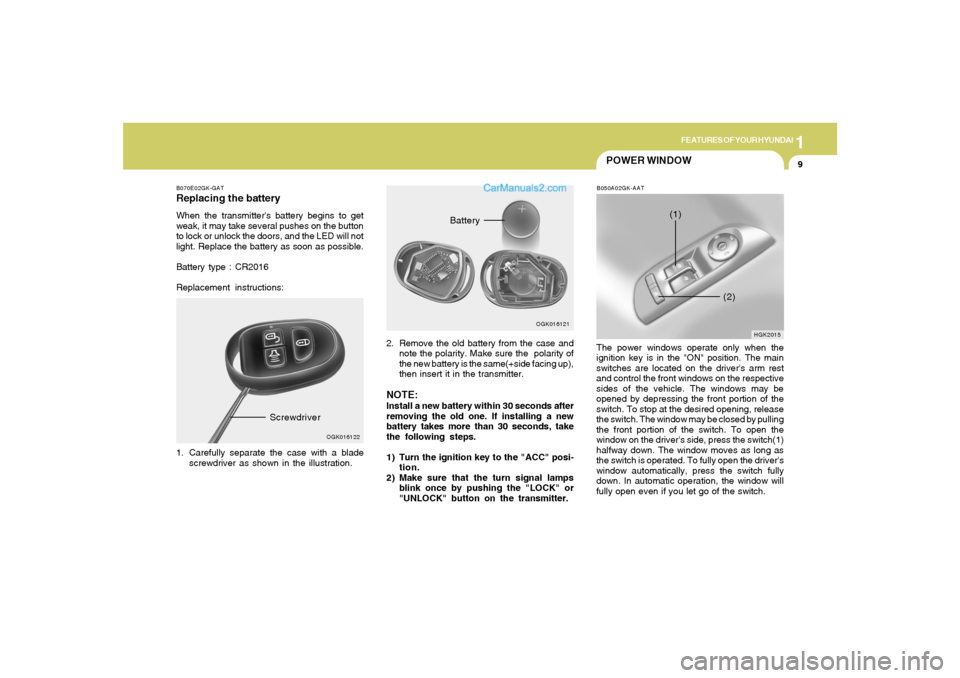
B070E02GK-GATReplacing the batteryWhen the transmitter's battery begins to get
weak, it may take several pushes on the button
to lock or unlock the doors, and the LED will not
light. Replace the battery as soon as possible.
Battery type : CR2016
Replacement instructions:
1. Carefully separate the case with a blade
screwdriver as shown in the illustration.
OGK016122
Screwdriver
2. Remove the old battery from the case and
note the polarity. Make sure the polarity of
the new battery is the same(+side facing up),
then insert it in the transmitter.NOTE:Install a new battery within 30 seconds after
removing the old one. If installing a new
battery takes more than 30 seconds, take
the following steps.
1) Turn the ignition key to the "ACC" posi-
tion.
2) Make sure that the turn signal lamps
blink once by pushing the "LOCK" or
"UNLOCK" button on the transmitter.
OGK016121
Battery
POWER WINDOWB050A02GK-AATThe power windows operate only when the
ignition key is in the "ON" position. The main
switches are located on the driver's arm rest
and control the front windows on the respective
sides of the vehicle. The windows may be
opened by depressing the front portion of the
switch. To stop at the desired opening, release
the switch. The window may be closed by pulling
the front portion of the switch. To open the
window on the driver's side, press the switch(1)
halfway down. The window moves as long as
the switch is operated. To fully open the driver's
window automatically, press the switch fully
down. In automatic operation, the window will
fully open even if you let go of the switch.
HGK2015
(2) (1)
Page 22 of 268
1FEATURES OF YOUR HYUNDAI10
!
HGK2016
WARNING:
o Passengers can be injured if their head,
hands or other body parts are trapped by
a closing window. Always check for
obstructions before raising any window.
o NEVER leave the ignition key in the ve-
hicle.
o NEVER leave any child unattended in the
vehicle. Even very young children may
inadvertently cause the vehicle to move,
entangle themselves in the windows, or
otherwise injure themselves or others.
o Do not attempt to operate the main switch
on the driver's door and a switch on
another door in opposing directions at
the same time. If this is done, the window
will stop and cannot be opened or closed.
SEATSB080A02A-AATAdjustable Front Seats
!
WARNING:
o Never adjust the driver’s seat while the
vehicle is moving. Any sudden or unex-
pected movement of the seat could cause
you to lose control of the vehicle result-
ing in an accident. Only adjust the
driver’s seat when the vehicle is station-
ary.
o Do not sit or lean unnecessarily close to
the airbag. Position the seat so that you
can sit as far back as possible from the
airbag and still comfortably reach all
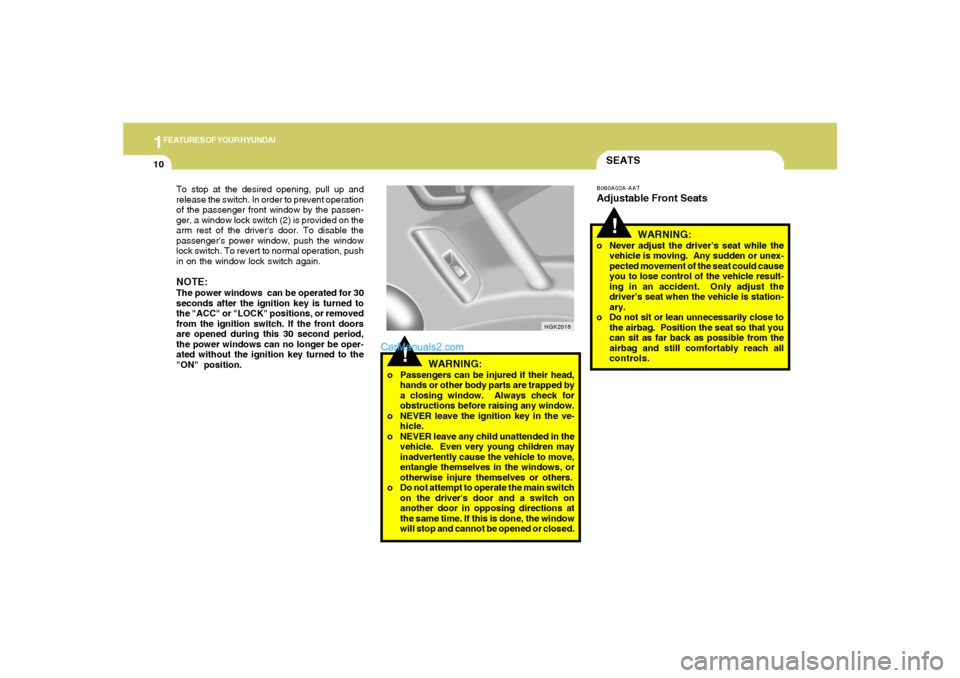
controls. To stop at the desired opening, pull up and
release the switch. In order to prevent operation
of the passenger front window by the passen-
ger, a window lock switch (2) is provided on the
arm rest of the driver's door. To disable the
passenger's power window, push the window
lock switch. To revert to normal operation, push
in on the window lock switch again.
NOTE:The power windows can be operated for 30
seconds after the ignition key is turned to
the "ACC" or "LOCK" positions, or removed
from the ignition switch. If the front doors
are opened during this 30 second period,
the power windows can no longer be oper-
ated without the ignition key turned to the
"ON" position.
Page 34 of 268
1FEATURES OF YOUR HYUNDAI22
!
WARNING:
o A child restraint system must be placed
in the rear seat. Never install a child or
infant seat on the front passenger's seat.
Should an accident occur and cause the
passenger side airbag to deploy, it could
severely injure or kill an infant or child
seated in an infant or child seat. Thus
only use a child restraint in the rear seat
of your vehicle.
o A safety belt or child restraint system
can become very hot if it is left in a closed
vehicle on a sunny day, even if the out-
side temperature does not feel hot. Be
sure to check the seat cover and buckles
before placing a child there.
o When the child restraint system is not in
use, store it in the trunk or fasten it with
a safety belt so that it will not be thrown
forward in the case of a sudden stop or
an accident.
o Children may be seriously injured or
killed by an inflating airbag. All children,
even those too large for child restraints,
must ride in the rear seat.
CHILD RESTRAINT SYSTEMB230A03A-AATChildren riding in the car should sit in the rear
seat and must always be properly restrained to
minimize the risk of injury in an accident, sudden
stop or sudden maneuver. According to acci-
dent statistics provided by the National High-
way Traffic Safety Administration (NHTSA),
children are safer when properly restrained in
the rear seats than in the front seat. Larger
children not in a child restraint should use one
of the seat belts provided.
All 50 states have child restraint laws. You
should be aware of the specific requirements in
your state. Child and/or infant safety seats must
be properly placed and installed in the rear seat.
You must use a commercially available child
restraint system that meets the requirements of
the Federal Motor Vehicle Safety Standards
(FMVSS).
Children could be injured or killed in a crash if
their restraints are not properly secured. For
small children and babies, a child seat or infant
seat must be used. Before buying a particular
child restraint system, make sure it fits your car
and seat belts, and fits your child. Follow all the
instructions provided by the manufacturer when
installing the child restraint system.
!
To reduce the chance of serious or fatal
injuries:
o Children of all ages are safer when re-
strained in the rear seat. A child riding in
the front passenger seat can be force-
fully struck by an inflating airbag result-
ing in serious or fatal injuries.
o Always follow the instructions for in-
stallation and use of the child restraint
maker.
o Always make sure the child seat is se-
cured properly in the car and your child
is securely restrained in the child seat.
o Never hold a child in your arms or lap
when riding in a vehicle. The violent
forces created during a crash will tear the
child from your arms and throw the child
against the car’s interior.
o Never put a seat belt over yourself and a
child. During a crash, the belt could
press deep into the child causing seri-
ous internal injuries.
o Never leave children unattended in a
vehicle – not even for a short time. The
car can heat up very quickly, resulting in
serious injuries to children inside. Even
very young children may inadvertently
cause the vehicle to move, entangle them-
selves in the windows, or lock them-
selves or others inside the vehicle.
WARNING:
Page 71 of 268
1
FEATURES OF YOUR HYUNDAI
59
Parking light auto cuto The purpose of this feature is to prevent the
battery from being discharged. The system
automatically turns off the parking light when
the driver removes the ignition key and
opens the driver- side door.
o With this feature, the parking light will be
turned off automatically if the driver parks on
the side of road at night.
If necessary, to keep the lights on when the
ignition key is removed, perform the following :
1) Open the driver-side door.
2) Turn the parking light OFF and ON again
using the light switch on the steering column.B340D01A-AATHigh-beam SwitchTo turn on the headlight high beams, push the
lever forward (away from you). The high beam
indicator light will come on at the same time. For
low beams, pull the lever back toward you.
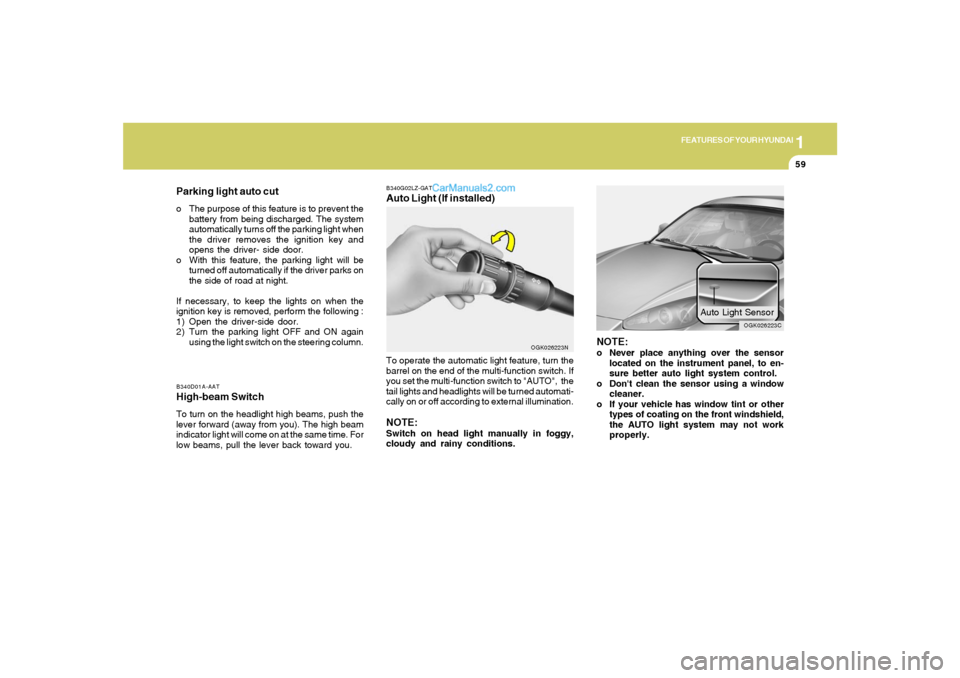
B340G02LZ-GATAuto Light (If installed)To operate the automatic light feature, turn the
barrel on the end of the multi-function switch. If
you set the multi-function switch to "AUTO", the
tail lights and headlights will be turned automati-
cally on or off according to external illumination.NOTE:Switch on head light manually in foggy,
cloudy and rainy conditions.
OGK026223N
NOTE:o Never place anything over the sensor
located on the instrument panel, to en-
sure better auto light system control.
o Don't clean the sensor using a window
cleaner.
o If your vehicle has window tint or other
types of coating on the front windshield,
the AUTO light system may not work
properly.
OGK026223C
Auto Light Sensor
Page 75 of 268
1
FEATURES OF YOUR HYUNDAI
63
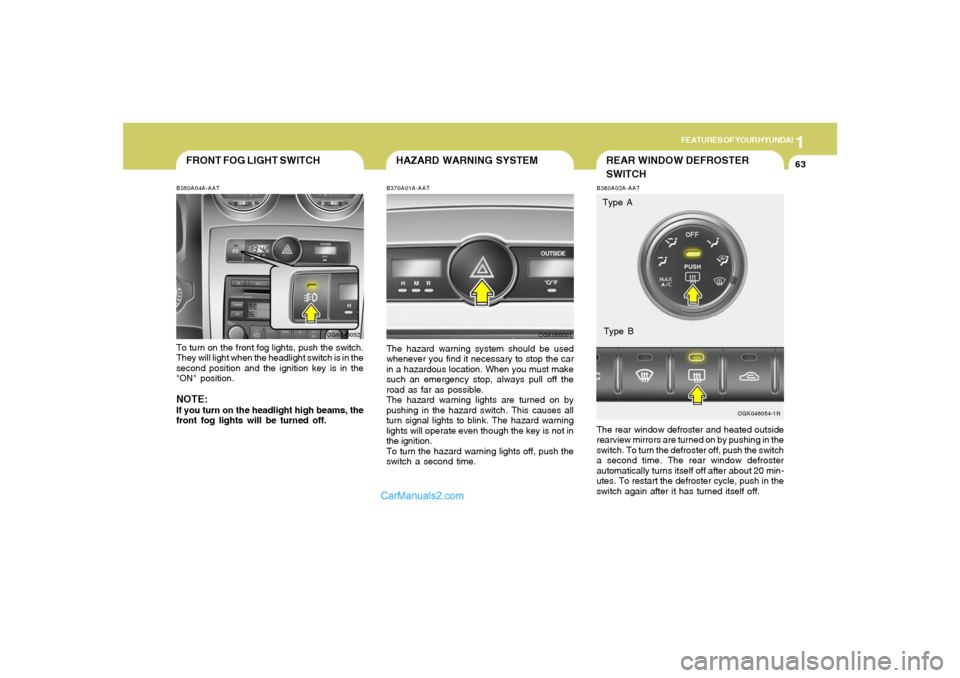
FRONT FOG LIGHT SWITCHB360A04A-AATTo turn on the front fog lights, push the switch.
They will light when the headlight switch is in the
second position and the ignition key is in the
"ON" position.NOTE:If you turn on the headlight high beams, the
front fog lights will be turned off.
OGK046052
REAR WINDOW DEFROSTER
SWITCH
OGK046054-1N B380A02A-AAT
The rear window defroster and heated outside
rearview mirrors are turned on by pushing in the
switch. To turn the defroster off, push the switch
a second time. The rear window defroster
automatically turns itself off after about 20 min-
utes. To restart the defroster cycle, push in the
switch again after it has turned itself off.Type A
Type B
HAZARD WARNING SYSTEMB370A01A-AATThe hazard warning system should be used
whenever you find it necessary to stop the car
in a hazardous location. When you must make
such an emergency stop, always pull off the
road as far as possible.
The hazard warning lights are turned on by
pushing in the hazard switch. This causes all
turn signal lights to blink. The hazard warning
lights will operate even though the key is not in
the ignition.
To turn the hazard warning lights off, push the
switch a second time.
OGK066001
Page 76 of 268
1FEATURES OF YOUR HYUNDAI64
INSTRUMENT PANEL LIGHT
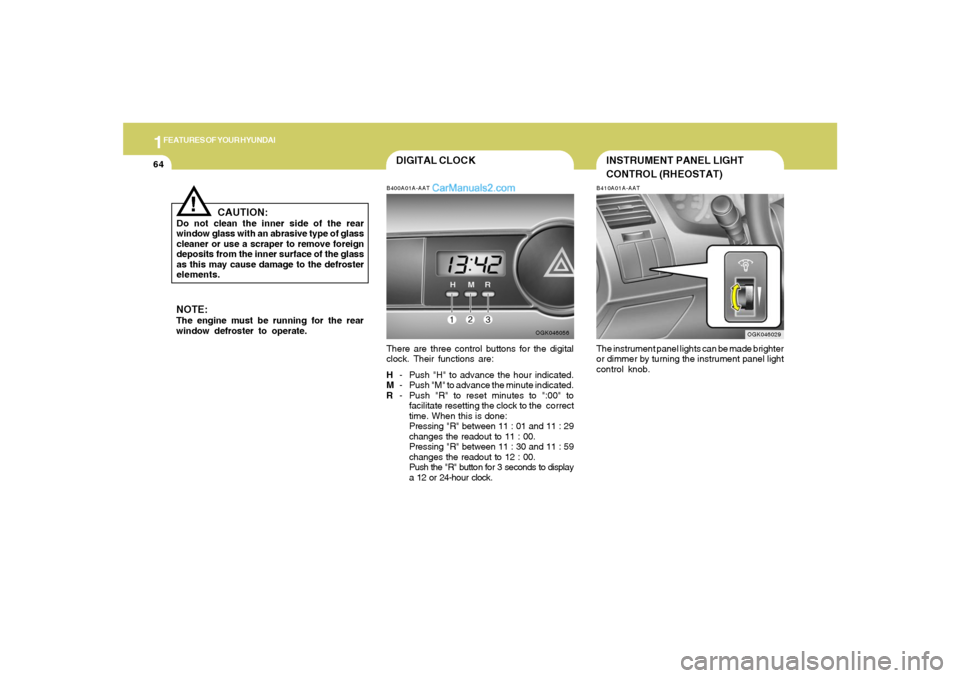
CONTROL (RHEOSTAT)B410A01A-AATThe instrument panel lights can be made brighter
or dimmer by turning the instrument panel light
control knob.
OGK046029
DIGITAL CLOCKB400A01A-AATThere are three control buttons for the digital
clock. Their functions are:
H- Push "H" to advance the hour indicated.
M- Push "M" to advance the minute indicated.
R- Push "R" to reset minutes to ":00" to
facilitate resetting the clock to the correct
time. When this is done:
Pressing "R" between 11 : 01 and 11 : 29
changes the readout to 11 : 00.
Pressing "R" between 11 : 30 and 11 : 59
changes the readout to 12 : 00.
Push the "R" button for 3 seconds to display
a 12 or 24-hour clock.
OGK046056
NOTE:The engine must be running for the rear
window defroster to operate.
CAUTION:
Do not clean the inner side of the rear
window glass with an abrasive type of glass
cleaner or use a scraper to remove foreign
deposits from the inner surface of the glass
as this may cause damage to the defroster
elements.
!
Page 82 of 268
1FEATURES OF YOUR HYUNDAI70
B510D01HP-AATOutside Rearview Mirror Heater
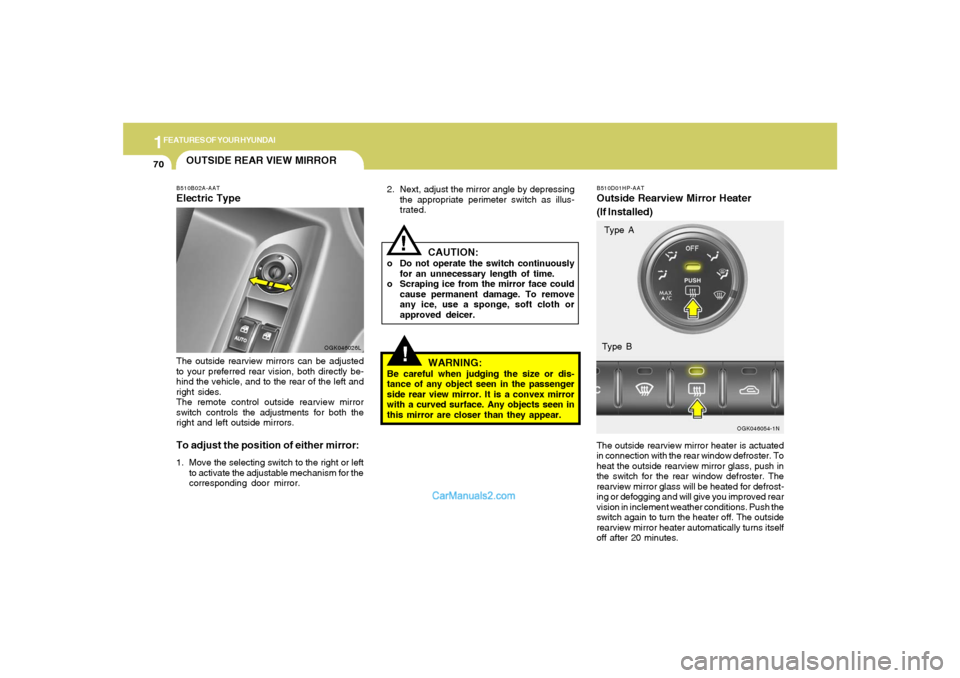
(If Installed)The outside rearview mirror heater is actuated
in connection with the rear window defroster. To
heat the outside rearview mirror glass, push in
the switch for the rear window defroster. The
rearview mirror glass will be heated for defrost-
ing or defogging and will give you improved rear
vision in inclement weather conditions. Push the
switch again to turn the heater off. The outside
rearview mirror heater automatically turns itself
off after 20 minutes.
OGK046054-1N
Type A
Type B
!
2. Next, adjust the mirror angle by depressing
the appropriate perimeter switch as illus-
trated.
CAUTION:
o Do not operate the switch continuously
for an unnecessary length of time.
o Scraping ice from the mirror face could
cause permanent damage. To remove
any ice, use a sponge, soft cloth or
approved deicer.
WARNING:
Be careful when judging the size or dis-
tance of any object seen in the passenger
side rear view mirror. It is a convex mirror
with a curved surface. Any objects seen in
this mirror are closer than they appear.
!
OUTSIDE REAR VIEW MIRRORB510B02A-AATElectric Type
OGK046026L
The outside rearview mirrors can be adjusted
to your preferred rear vision, both directly be-
hind the vehicle, and to the rear of the left and
right sides.
The remote control outside rearview mirror
switch controls the adjustments for both the
right and left outside mirrors.To adjust the position of either mirror:1. Move the selecting switch to the right or left
to activate the adjustable mechanism for the
corresponding door mirror.
Page 84 of 268
1FEATURES OF YOUR HYUNDAI72
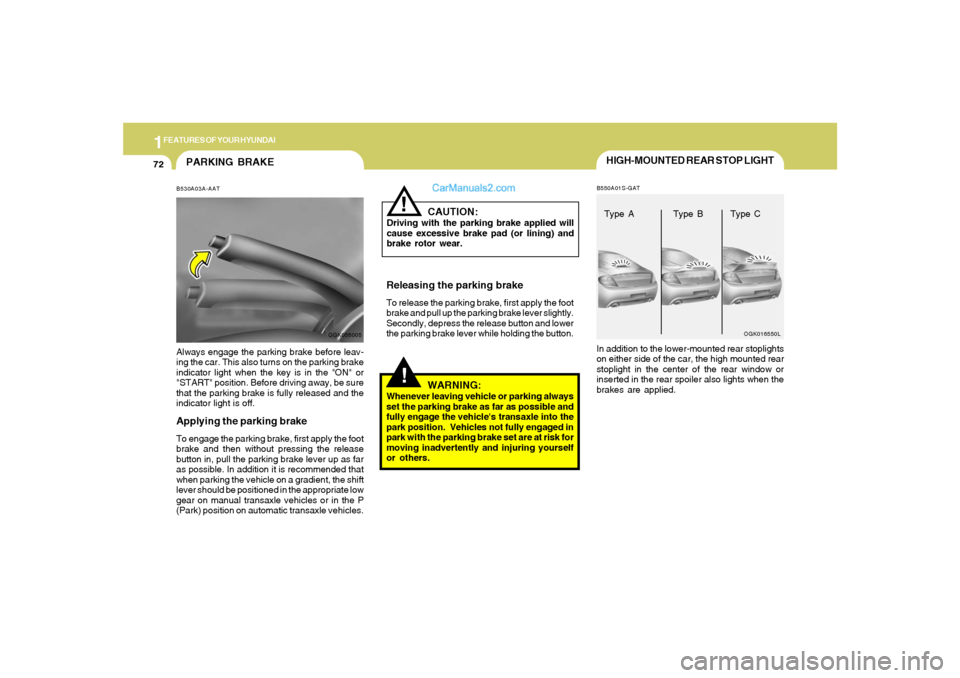
HIGH-MOUNTED REAR STOP LIGHTB550A01S-GATIn addition to the lower-mounted rear stoplights
on either side of the car, the high mounted rear
stoplight in the center of the rear window or
inserted in the rear spoiler also lights when the
brakes are applied.
OGK016550L
Type A Type B Type C
PARKING BRAKEB530A03A-AATAlways engage the parking brake before leav-
ing the car. This also turns on the parking brake
indicator light when the key is in the "ON" or
"START" position. Before driving away, be sure
that the parking brake is fully released and the
indicator light is off.Applying the parking brakeTo engage the parking brake, first apply the foot
brake and then without pressing the release
button in, pull the parking brake lever up as far
as possible. In addition it is recommended that
when parking the vehicle on a gradient, the shift
lever should be positioned in the appropriate low
gear on manual transaxle vehicles or in the P
(Park) position on automatic transaxle vehicles.
OGK056005
!
CAUTION:
Driving with the parking brake applied will
cause excessive brake pad (or lining) and
brake rotor wear.Releasing the parking brakeTo release the parking brake, first apply the foot
brake and pull up the parking brake lever slightly.
Secondly, depress the release button and lower
the parking brake lever while holding the button.
!
WARNING:
Whenever leaving vehicle or parking always
set the parking brake as far as possible and
fully engage the vehicle's transaxle into the
park position. Vehicles not fully engaged in
park with the parking brake set are at risk for
moving inadvertently and injuring yourself
or others.
Page 97 of 268
1
FEATURES OF YOUR HYUNDAI
85
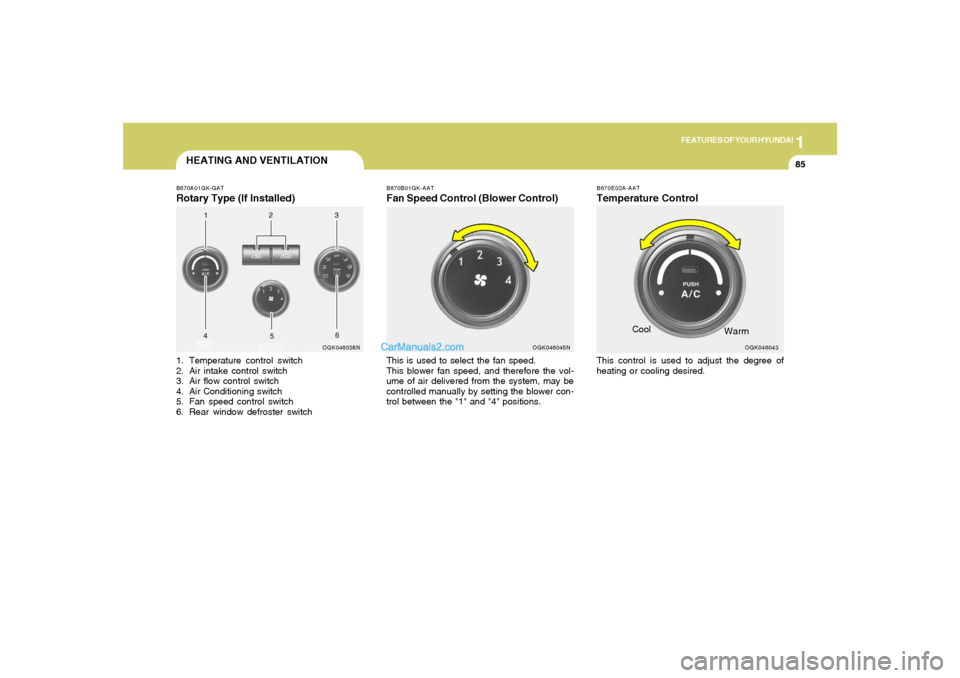
HEATING AND VENTILATIONB670A01GK-GATRotary Type (If Installed)1. Temperature control switch
2. Air intake control switch
3. Air flow control switch
4. Air Conditioning switch
5. Fan speed control switch
6. Rear window defroster switch
OGK046038NB670B01GK-AAT
Fan Speed Control (Blower Control)This is used to select the fan speed.
This blower fan speed, and therefore the vol-
ume of air delivered from the system, may be
controlled manually by setting the blower con-
trol between the "1" and "4" positions.
OGK046045NB670E02A-AAT
Temperature ControlThis control is used to adjust the degree of
heating or cooling desired.Cool
OGK046043
Warm