HYUNDAI TUCSON 2006 Owners Manual
Manufacturer: HYUNDAI, Model Year: 2006, Model line: TUCSON, Model: HYUNDAI TUCSON 2006Pages: 289, PDF Size: 11.55 MB
Page 181 of 289
2
DRIVING YOUR HYUNDAI
30
Cargo capacity:
The cargo capacity of your vehicle will
increase or decrease depending on the
weight and the number of occupants
and the tongue load, if your vehicle is
equipped with a trailer.
Steps for Determining Correct Load
Limit
(1)Locate the statement "The combined
weight of occupants and cargo should
never exceed XXX pounds'' on your
vehicle's placard.
(2)Determine the combined weight of
the driver and passengers that will be
riding in your vehicle.
(3)Subtract the combined weight of the
driver and passengers from XXX
kilograms or XXX pounds.(4)The resulting figure equals the avail-
able amount of cargo and luggage
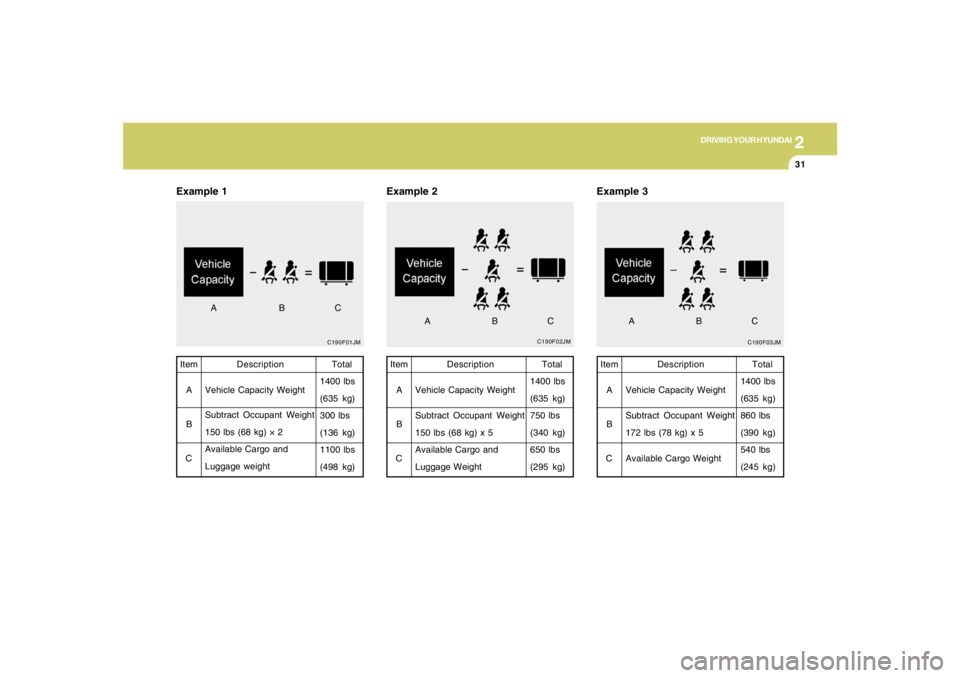
load capacity. For example, if the
"XXX" amount equals 1400 lbs, and
there will be five 150 lb. passengers
in your vehicle, the amount of avail-
able cargo and luggage load capac-
ity is 650 lbs. (1400-750 (5 x 150) =
650 lbs.)
(5)Determine the combined weight of
luggage and cargo being loaded on
the vehicle. That weight may not
safely exceed the available cargo
and luggage load capacity calcu-
lated in Step 4.
(6)If your vehicle will be towing a trailer,
load from your trailer will be trans-
ferred to your vehicle. Consult this
manual to determine how this re-
duces the available cargo and lug-
gage load capacity of your vehicle. Seating capacity:
Total: 5 persons
(Front seat: 2 persons,
Rear seat: 3 persons)
Seating capacity is the maximum num-
ber of occupants including a driver,
your vehicle may carry.
However the seating capacity may be
reduced based upon the weight of all of
the occupants, and the weight of the
cargo being carried or towed. Do not
overload the vehicle as there is a limit
to the total weight, or load limit including
occupants and cargo, the vehicle can
carry.
Towing capacity:
Towing capacity is the maximum trailer
weight including its cargo weight, your
vehicle can tow. See the section "Trailer
or Vehicle Towing" for specifications
about the trailer weight.
Page 182 of 289
2
DRIVING YOUR HYUNDAI
31
C190F01JMTotal
1400 lbs
(635 kg)
300 lbs
(136 kg)
1100 lbs
(498 kg)
Example 1Item
A
B
CDescription
Vehicle Capacity Weight
Subtract Occupant Weight
150 lbs (68 kg) × 2
Available Cargo and
Luggage weight
ABC
C190F03JMTotal
1400 lbs
(635 kg)
860 lbs
(390 kg)
540 lbs
(245 kg) Item
A
B
CDescription
Vehicle Capacity Weight
Subtract Occupant Weight
172 lbs (78 kg) x 5
Available Cargo Weight
Example 3
ABC
C190F02JM
Example 2
Total
1400 lbs
(635 kg)
750 lbs
(340 kg)
650 lbs
(295 kg) Item
A
B
CDescription
Vehicle Capacity Weight
Subtract Occupant Weight
150 lbs (68 kg) x 5
Available Cargo and
Luggage Weight
ABC
Page 183 of 289
2
DRIVING YOUR HYUNDAI
32
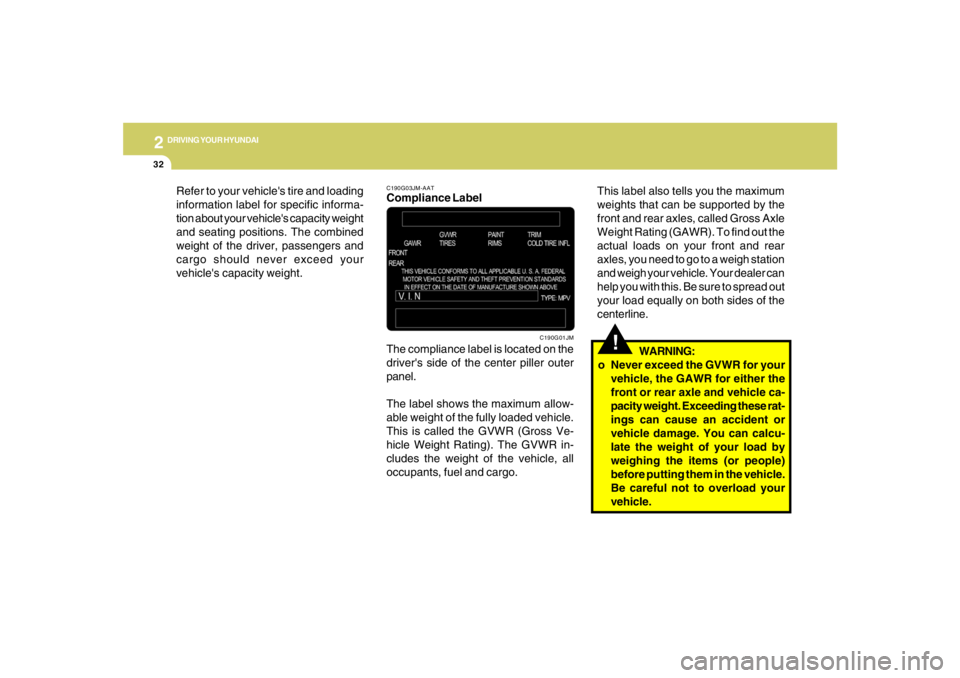
C190G03JM-AATCompliance Label
The compliance label is located on the
driver's side of the center piller outer
panel.
The label shows the maximum allow-
able weight of the fully loaded vehicle.
This is called the GVWR (Gross Ve-
hicle Weight Rating). The GVWR in-
cludes the weight of the vehicle, all
occupants, fuel and cargo.
C190G01JM
!
This label also tells you the maximum
weights that can be supported by the
front and rear axles, called Gross Axle
Weight Rating (GAWR). To find out the
actual loads on your front and rear
axles, you need to go to a weigh station
and weigh your vehicle. Your dealer can
help you with this. Be sure to spread out
your load equally on both sides of the
centerline.
WARNING:
o Never exceed the GVWR for your
vehicle, the GAWR for either the
front or rear axle and vehicle ca-
pacity weight. Exceeding these rat-
ings can cause an accident or
vehicle damage. You can calcu-
late the weight of your load by
weighing the items (or people)
before putting them in the vehicle.
Be careful not to overload your
vehicle. Refer to your vehicle's tire and loading
information label for specific informa-
tion about your vehicle's capacity weight
and seating positions. The combined
weight of the driver, passengers and
cargo should never exceed your
vehicle's capacity weight.
Page 184 of 289
2
DRIVING YOUR HYUNDAI
33
!
WARNING:
o Do not load your vehicle any
heavier than the GVWR, either the
maximum front or rear GAWR and
vehicle capacity weight. If you do,
parts, including tires on your ve-
hicle can break, and it can change
the way your vehicle handles and
braking ability. This could cause
you to lose control and crash.
Also, overloading can shorten the
life of your vehicle.
!
NOTE:
o Overloading your vehicle may
cause damage. Repairs would not
be covered by your warranty. Do
not overload your vehicle.
o Using heavier suspension com-
ponents to get added durability
might not change your weight rat-
ings. Ask your dealer to help you
load your vehicle the right way.
The label will help you decide how much
cargo and installed equipment your
vehicle can carry.
If you carry items inside your vehicle –
like suitcases, tools, packages, or any-
thing else – they more as fast as the
vehicle goes. If you have to stop or turn
quickly, or if there is a crash, the items
will keep going and can cause an injury
if they strikes the driver or a passenger. WARNING:
o Overloading your vehicle can
cause heat buildup in your
vehicle's tires and possible tire
failure that could lead to a crash.
o Overloading your vehicle can
cause increased stopping dis-
tances that could lead to a crash.
o A crash resulting from poor han-
dling vehicle damage, tire failure,
or increased stopping distances
could result in serious injury or
death.
Page 185 of 289
2
DRIVING YOUR HYUNDAI
34
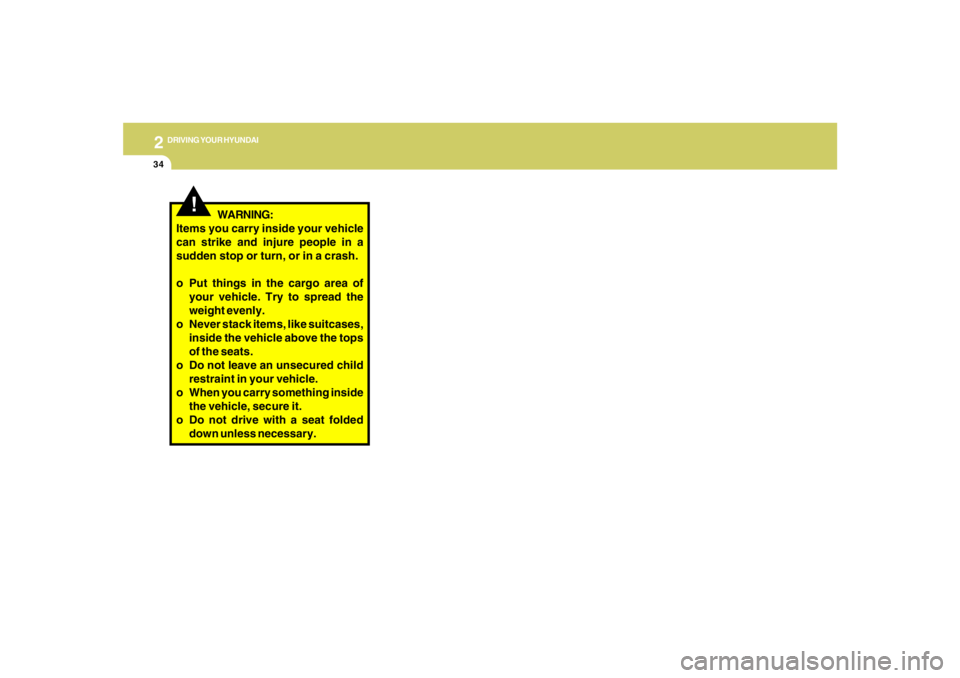
!
WARNING:
Items you carry inside your vehicle
can strike and injure people in a
sudden stop or turn, or in a crash.
o Put things in the cargo area of
your vehicle. Try to spread the
weight evenly.
o Never stack items, like suitcases,
inside the vehicle above the tops
of the seats.
o Do not leave an unsecured child
restraint in your vehicle.
o When you carry something inside
the vehicle, secure it.
o Do not drive with a seat folded
down unless necessary.
Page 186 of 289
If the Engine will not Start .............................................. 3-2
Jump Starting ................................................................ 3-3
If the Engine Overheats ................................................ 3-4
Tire Pressure Monitoring System (TPMS) .................... 3-5
Spare Tire ..................................................................... 3-9
If You Have a Flat Tire ................................................3-10
Changing a Flat Tire ....................................................3-11
If Your Car Must be Towed.........................................3-16
Emergency Towing.....................................................3-18
If You Lose Your Keys................................................3-19
3
3
WHAT TO DO IN AN EMERGENCY
Page 187 of 289
32WHAT TO DO IN AN EMERGENCY
IF THE ENGINE WILL NOT START!
D010A01A-AAT D010B02A-AAT
If Engine Doesn't Turn Over or Turns
Over Slowly
D010C02Y-AATIf Engine Turns Over Normally but Does
Not Start1. Check fuel level.
2. With the key in the "OFF" position, check all
connectors at ignition, coil and spark plugs.
Reconnect any that may be disconnected or
loose.
3. Check the fuel line in the engine compart-
ment.
4. If the engine still does not start, call a Hyundai
dealer or seek other qualified assistance.D010D01A-AATIf Engine Stalls While Driving1. Reduce your speed gradually, keeping a
straight line. Move cautiously off the road to
a safe place.
2. Turn on your emergency flashers.
3. Try to start the engine again. If your vehicle
will not start, contact a Hyundai dealer or
seek other qualified assistance.
WARNING:
If the engine will not start, do not push or
pull the car to start it. This could result in a
collision or cause other damage. In addi-
tion, push or pull starting may cause the
catalytic converter to be overloaded and
create a fire hazard.
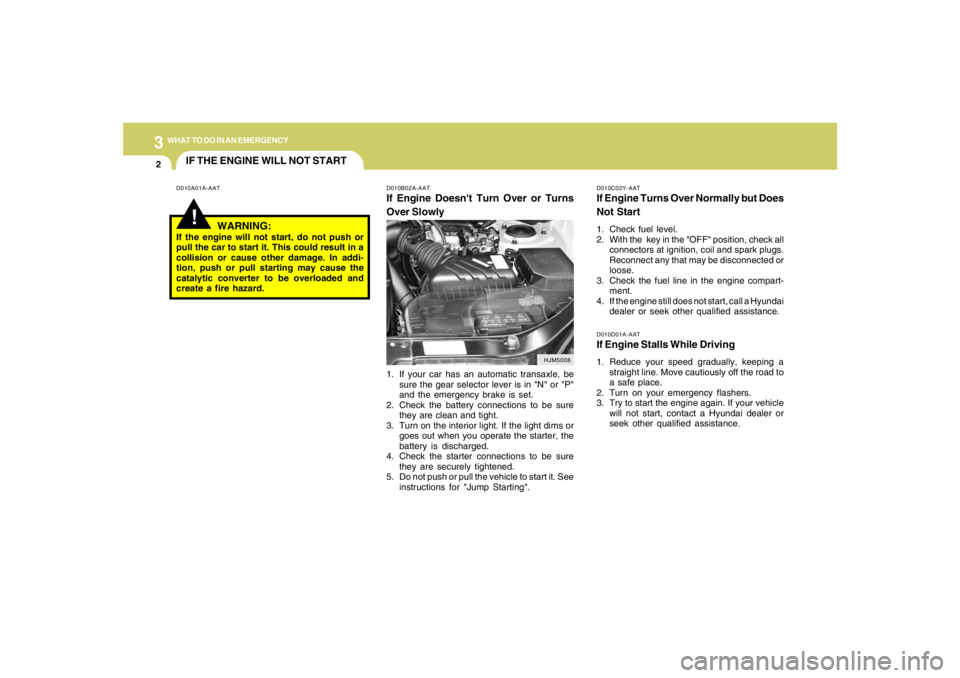
1. If your car has an automatic transaxle, be
sure the gear selector lever is in "N" or "P"
and the emergency brake is set.
2. Check the battery connections to be sure
they are clean and tight.
3. Turn on the interior light. If the light dims or
goes out when you operate the starter, the
battery is discharged.
4. Check the starter connections to be sure
they are securely tightened.
5. Do not push or pull the vehicle to start it. See
instructions for "Jump Starting".
HJM5008
Page 188 of 289
3
WHAT TO DO IN AN EMERGENCY
3
JUMP STARTING!
o If you should accidentally get acid on your
skin or in your eyes, immediately remove
any contaminated clothing and flush the area
with clear water for at least 15 minutes. Then
promptly obtain medical attention. If you
must be transported to an emergency facil-
ity, continue to apply water to the affected
area with a sponge or cloth.
o The gas produced by the battery during the
jump-start operation is highly explosive. Do
not smoke or allow a spark or an open flame
in the vicinity.
o The battery being used to provide the jump
start must be 12-volt. If you cannot deter-
mine that it is a 12-volt battery, do not attempt
to use it for the jump start.
o To jump start a car with a discharged battery,
follow this procedure exactly:
1. If the booster battery is installed in another
vehicle, be sure the two vehicles are not
touching.
2. Turn off all unnecessary lights and acces-
sories in both vehicles.
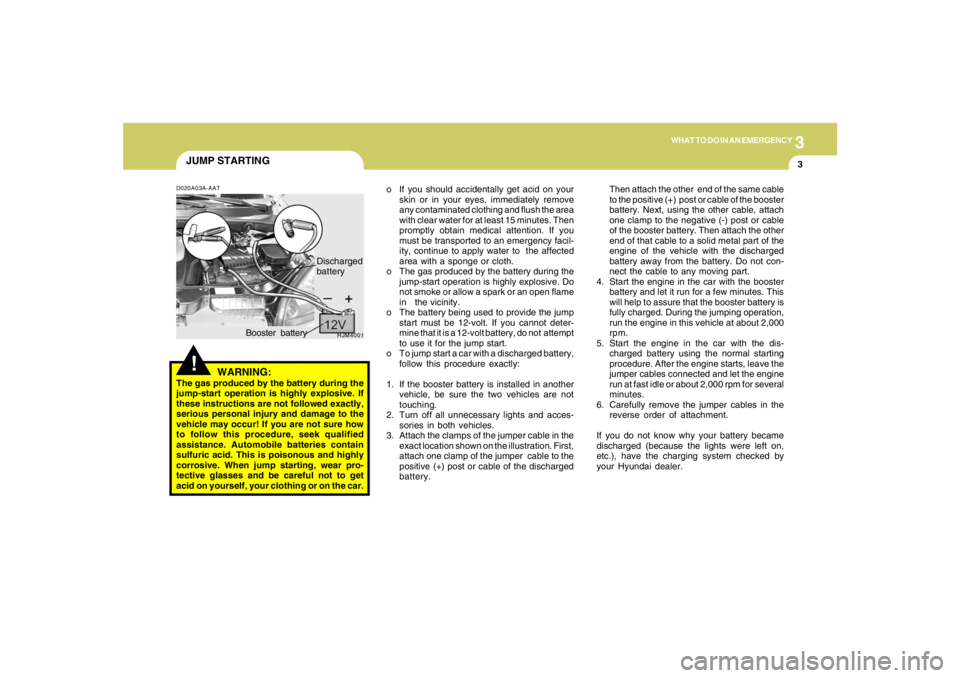
3. Attach the clamps of the jumper cable in the
exact location shown on the illustration. First,
attach one clamp of the jumper cable to the
positive (+) post or cable of the discharged
battery.Then attach the other end of the same cable
to the positive (+) post or cable of the booster
battery. Next, using the other cable, attach
one clamp to the negative (-) post or cable
of the booster battery. Then attach the other
end of that cable to a solid metal part of the
engine of the vehicle with the discharged
battery away from the battery. Do not con-
nect the cable to any moving part.
4. Start the engine in the car with the booster
battery and let it run for a few minutes. This
will help to assure that the booster battery is
fully charged. During the jumping operation,
run the engine in this vehicle at about 2,000
rpm.
5. Start the engine in the car with the dis-
charged battery using the normal starting
procedure. After the engine starts, leave the
jumper cables connected and let the engine
run at fast idle or about 2,000 rpm for several
minutes.
6. Carefully remove the jumper cables in the
reverse order of attachment.
If you do not know why your battery became
discharged (because the lights were left on,
etc.), have the charging system checked by
your Hyundai dealer.
D020A03A-AAT
WARNING:
The gas produced by the battery during the
jump-start operation is highly explosive. If
these instructions are not followed exactly,
serious personal injury and damage to the
vehicle may occur! If you are not sure how
to follow this procedure, seek qualified
assistance. Automobile batteries contain
sulfuric acid. This is poisonous and highly
corrosive. When jump starting, wear pro-
tective glasses and be careful not to get
acid on yourself, your clothing or on the car.
HJM4001
Booster batteryDischarged
battery
Page 189 of 289
34WHAT TO DO IN AN EMERGENCY
IF THE ENGINE OVERHEATS
!!
!
WARNING:
While the engine is running, keep hair,
hands and clothing away from moving parts
such as the fan and drive belts to prevent
injury.
5. If the water pump drive belt is broken or
engine coolant is leaking out, stop the engine
immediately and call the nearest Hyundai
dealer for assistance.
WARNING:
Do not remove the radiator cap when the
engine is hot. This can allow coolant to be
blown out of the opening and cause seri-
ous burns.6. If you cannot find the cause of the overheat-
ing, wait until the engine temperature has
returned to normal. Then, if coolant has been
lost, carefully add coolant to the reservoir
(page 6-9) to bring the fluid level in the
reservoir up to the halfway mark.
7. Proceed with caution, keeping alert for fur-
ther signs of overheating. If overheating
happens again, call a Hyundai dealer for
assistance.
CAUTION:
Serious loss of coolant indicates there is a
leak in the cooling system and this should
be checked as soon as possible by a Hyundai
dealer.
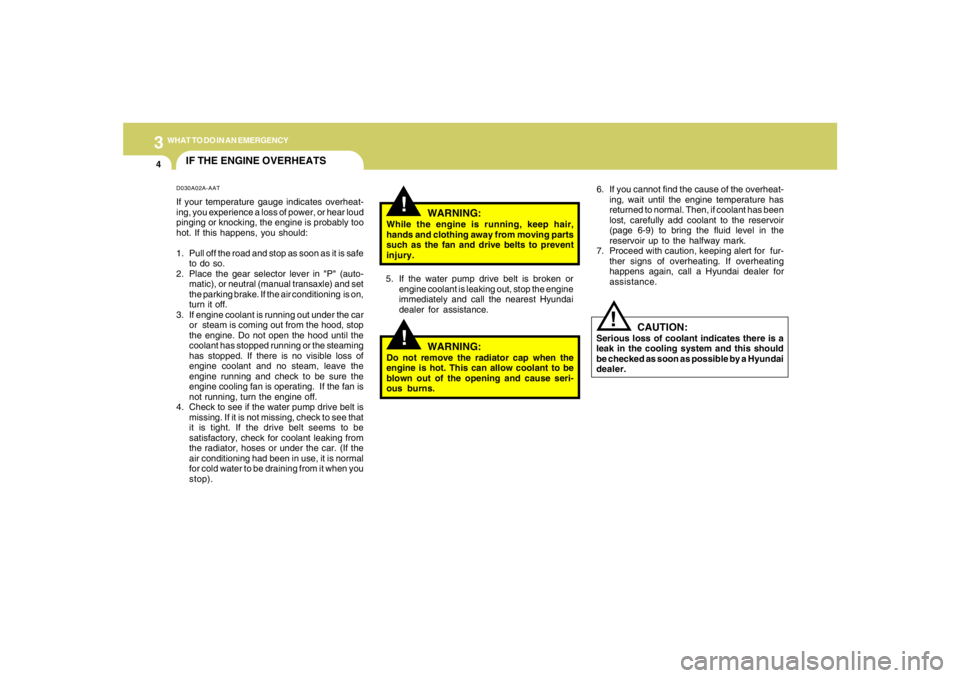
D030A02A-AATIf your temperature gauge indicates overheat-
ing, you experience a loss of power, or hear loud
pinging or knocking, the engine is probably too
hot. If this happens, you should:
1. Pull off the road and stop as soon as it is safe
to do so.
2. Place the gear selector lever in "P" (auto-
matic), or neutral (manual transaxle) and set
the parking brake. If the air conditioning is on,
turn it off.
3. If engine coolant is running out under the car
or steam is coming out from the hood, stop
the engine. Do not open the hood until the
coolant has stopped running or the steaming
has stopped. If there is no visible loss of
engine coolant and no steam, leave the
engine running and check to be sure the
engine cooling fan is operating. If the fan is
not running, turn the engine off.
4. Check to see if the water pump drive belt is
missing. If it is not missing, check to see that
it is tight. If the drive belt seems to be
satisfactory, check for coolant leaking from
the radiator, hoses or under the car. (If the
air conditioning had been in use, it is normal
for cold water to be draining from it when you
stop).
Page 190 of 289
3
WHAT TO DO IN AN EMERGENCY
5
TIRE PRESSURE MONITORING SYS-
TEM (TPMS)
C320A01JM C320A01JM-AAT
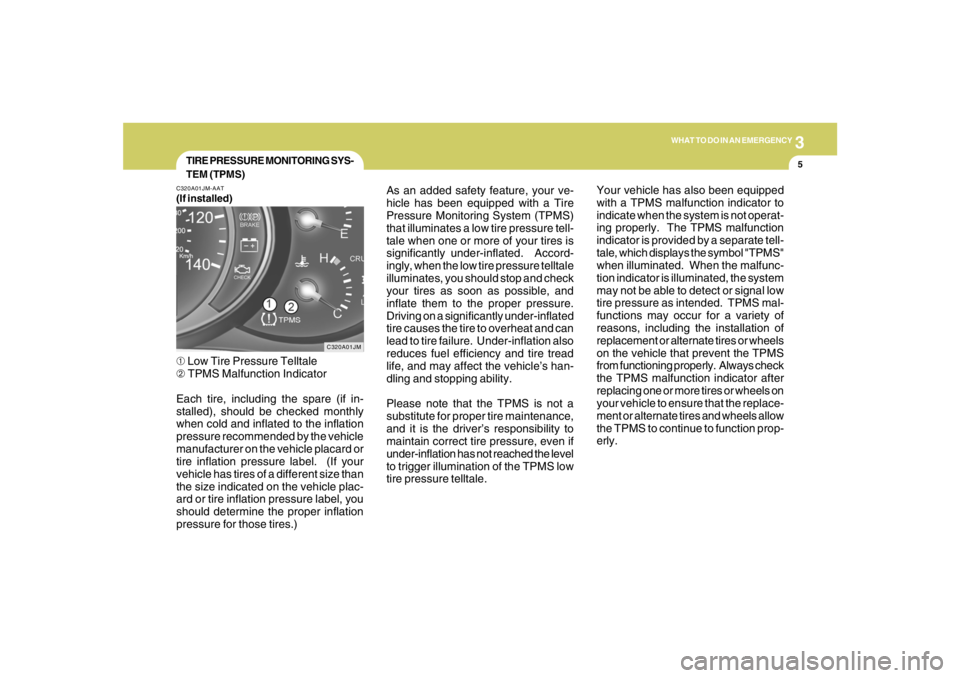
(If installed)➀ Low Tire Pressure Telltale
➁ TPMS Malfunction Indicator
Each tire, including the spare (if in-
stalled), should be checked monthly
when cold and inflated to the inflation
pressure recommended by the vehicle
manufacturer on the vehicle placard or
tire inflation pressure label. (If your
vehicle has tires of a different size than
the size indicated on the vehicle plac-
ard or tire inflation pressure label, you
should determine the proper inflation
pressure for those tires.)As an added safety feature, your ve-
hicle has been equipped with a Tire
Pressure Monitoring System (TPMS)
that illuminates a low tire pressure tell-
tale when one or more of your tires is
significantly under-inflated. Accord-
ingly, when the low tire pressure telltale
illuminates, you should stop and check
your tires as soon as possible, and
inflate them to the proper pressure.
Driving on a significantly under-inflated
tire causes the tire to overheat and can
lead to tire failure. Under-inflation also
reduces fuel efficiency and tire tread
life, and may affect the vehicle’s han-
dling and stopping ability.
Please note that the TPMS is not a
substitute for proper tire maintenance,
and it is the driver’s responsibility to
maintain correct tire pressure, even if
under-inflation has not reached the level
to trigger illumination of the TPMS low
tire pressure telltale.Your vehicle has also been equipped
with a TPMS malfunction indicator to
indicate when the system is not operat-
ing properly. The TPMS malfunction
indicator is provided by a separate tell-
tale, which displays the symbol "TPMS"
when illuminated. When the malfunc-
tion indicator is illuminated, the system
may not be able to detect or signal low
tire pressure as intended. TPMS mal-
functions may occur for a variety of
reasons, including the installation of
replacement or alternate tires or wheels
on the vehicle that prevent the TPMS
from functioning properly. Always check
the TPMS malfunction indicator after
replacing one or more tires or wheels on
your vehicle to ensure that the replace-
ment or alternate tires and wheels allow
the TPMS to continue to function prop-
erly.