HYUNDAI TUCSON 2013 Owners Manual
Manufacturer: HYUNDAI, Model Year: 2013, Model line: TUCSON, Model: HYUNDAI TUCSON 2013Pages: 397, PDF Size: 5.55 MB
Page 131 of 397
451
Features of your vehicle
If the indicator illuminates only for 2seconds and goes out when the
ENGINE START/STOP button is turned
to ON position with the smart key in the
vehicle, have the system checked by an
authorized HYUNDAI dealer.
When the battery is weak, if the ENGINE START/STOP button is
pressed, the indicator will blink and you
are not able to start the engine.
However, you are able to start the
engine by inserting the smart key in
the smart key holder. Also, if the smart
key system related parts have a prob-
lem, the indicator will blink.
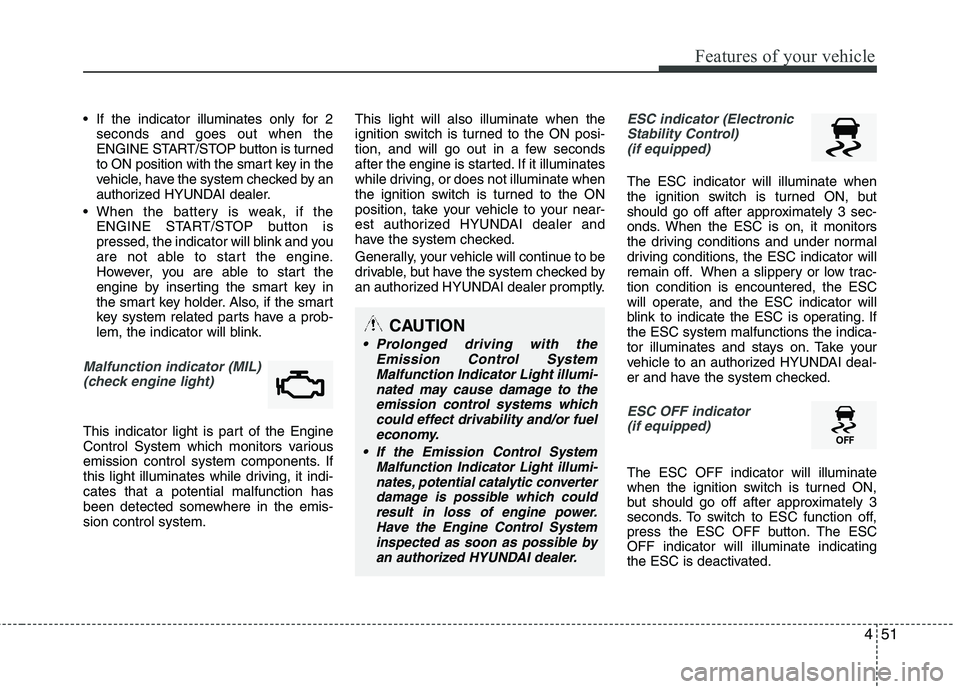
Malfunction indicator (MIL)
(check engine light)
This indicator light is part of the Engine
Control System which monitors various
emission control system components. If
this light illuminates while driving, it indi- cates that a potential malfunction has
been detected somewhere in the emis-sion control system. This light will also illuminate when the
ignition switch is turned to the ON posi-
tion, and will go out in a few seconds
after the engine is started. If it illuminates
while driving, or does not illuminate when
the ignition switch is turned to the ON
position, take your vehicle to your near-
est authorized HYUNDAI dealer and
have the system checked.
Generally, your vehicle will continue to be
drivable, but have the system checked by
an authorized HYUNDAI dealer promptly.
ESC indicator (Electronic
Stability Control)
(if equipped)
The ESC indicator will illuminate when
the ignition switch is turned ON, but
should go off after approximately 3 sec-
onds. When the ESC is on, it monitors
the driving conditions and under normal
driving conditions, the ESC indicator will
remain off. When a slippery or low trac- tion condition is encountered, the ESC
will operate, and the ESC indicator will
blink to indicate the ESC is operating. If the ESC system malfunctions the indica-
tor illuminates and stays on. Take your
vehicle to an authorized HYUNDAI deal-
er and have the system checked.
ESC OFF indicator (if equipped)
The ESC OFF indicator will illuminate
when the ignition switch is turned ON,
but should go off after approximately 3
seconds. To switch to ESC function off,
press the ESC OFF button. The ESCOFF indicator will illuminate indicating
the ESC is deactivated.
CAUTION
Prolonged driving with the
Emission Control SystemMalfunction Indicator Light illumi-nated may cause damage to the
emission control systems whichcould effect drivability and/or fueleconomy.
If the EmissionControl System
Malfunction Indicator Light illumi-
nates, potential catalytic converterdamage is possible which couldresult in loss of engine power.
Have the Engine Control Systeminspected as soon as possible byan authorized HYUNDAI dealer.
Page 132 of 397
Features of your vehicle
52
4
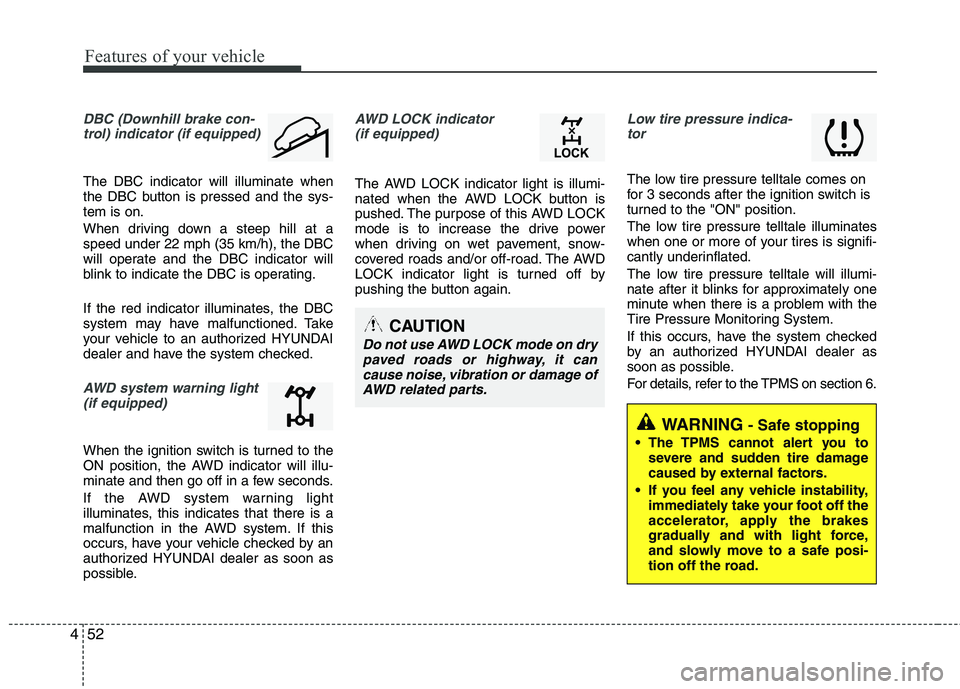
DBC (Downhill brake con-
trol) indicator (if equipped)
The DBC indicator will illuminate when
the DBC button is pressed and the sys-tem is on.
When driving down a steep hill at a speed under 22 mph (35 km/h), the DBC
will operate and the DBC indicator will
blink to indicate the DBC is operating.
If the red indicator illuminates, the DBC
system may have malfunctioned. Take
your vehicle to an authorized HYUNDAI
dealer and have the system checked.
AWD system warning light
(if equipped)
When the ignition switch is turned to the
ON position, the AWD indicator will illu-
minate and then go off in a few seconds.
If the AWD system warning light
illuminates, this indicates that there is a
malfunction in the AWD system. If this
occurs, have your vehicle checked by an
authorized HYUNDAI dealer as soon as
possible.
AWD LOCK indicator (if equipped)
The AWD LOCK indicator light is illumi-
nated when the AWD LOCK button is
pushed. The purpose of this AWD LOCK
mode is to increase the drive power
when driving on wet pavement, snow-
covered roads and/or off-road. The AWD
LOCK indicator light is turned off by
pushing the button again.
Low tire pressure indica-tor
The low tire pressure telltale comes on
for 3 seconds after the ignition switch is
turned to the "ON" position.
The low tire pressure telltale illuminates
when one or more of your tires is signifi-
cantly underinflated.
The low tire pressure telltale will illumi-
nate after it blinks for approximately one
minute when there is a problem with the
Tire Pressure Monitoring System.
If this occurs, have the system checked
by an authorized HYUNDAI dealer as
soon as possible.
For details, refer to the TPMS on section 6.
CAUTION
Do not use AWD LOCK mode on dry
paved roads or highway, it can cause noise, vibration or damage ofAWD related parts.
WARNING- Safe stopping
The TPMS cannot alert you to severe and sudden tire damage
caused by external factors.
If you feel any vehicle instability, immediately take your foot off the
accelerator, apply the brakes
gradually and with light force,
and slowly move to a safe posi-
tion off the road.
Page 133 of 397
453
Features of your vehicle
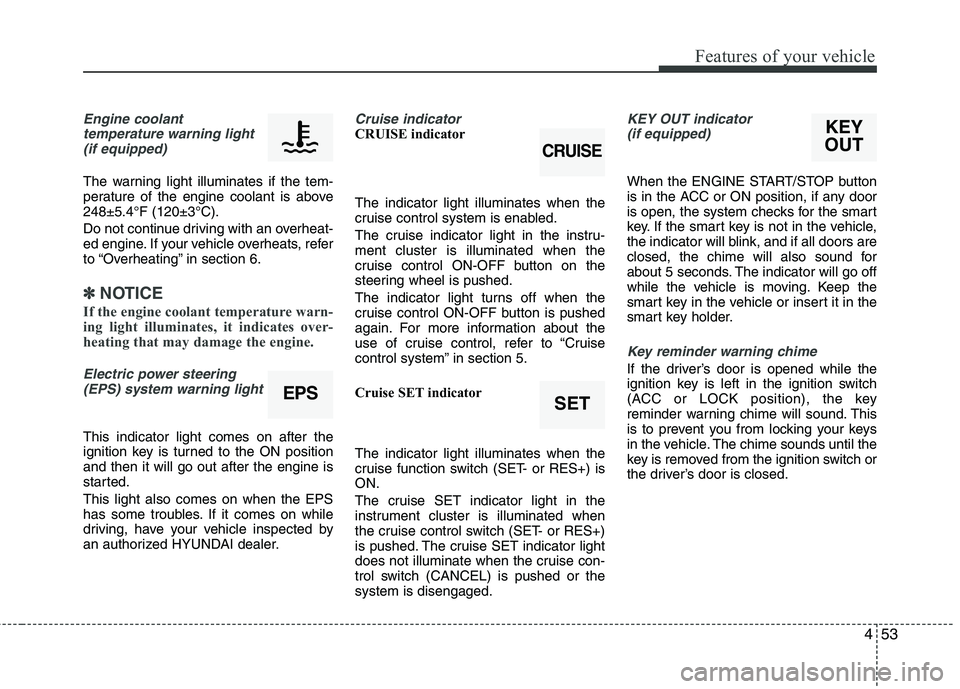
Engine coolanttemperature warning light
(if equipped)
The warning light illuminates if the tem-
perature of the engine coolant is above248±5.4°F (120±3°C).
Do not continue driving with an overheat-
ed engine. If your vehicle overheats, refer
to “Overheating” in section 6.
✽✽ NOTICE
If the engine coolant temperature warn-
ing light illuminates, it indicates over-
heating that may damage the engine.
Electric power steering (EPS) system warning light
This indicator light comes on after the
ignition key is turned to the ON position and then it will go out after the engine is
started. This light also comes on when the EPS
has some troubles. If it comes on while
driving, have your vehicle inspected by
an authorized HYUNDAI dealer.
Cruise indicator CRUISE indicator The indicator light illuminates when the
cruise control system is enabled.
The cruise indicator light in the instru- ment cluster is illuminated when the
cruise control ON-OFF button on the
steering wheel is pushed.
The indicator light turns off when the
cruise control ON-OFF button is pushed
again. For more information about the
use of cruise control, refer to “Cruise
control system” in section 5.
Cruise SET indicator The indicator light illuminates when the
cruise function switch (SET- or RES+) is ON.
The cruise SET indicator light in the
instrument cluster is illuminated when
the cruise control switch (SET- or RES+)
is pushed. The cruise SET indicator light
does not illuminate when the cruise con-
trol switch (CANCEL) is pushed or the system is disengaged.KEY OUT indicator (if equipped)
When the ENGINE START/STOP button
is in the ACC or ON position, if any door
is open, the system checks for the smart
key. If the smart key is not in the vehicle,
the indicator will blink, and if all doors are
closed, the chime will also sound for
about 5 seconds. The indicator will go off
while the vehicle is moving. Keep the
smart key in the vehicle or insert it in the
smart key holder.
Key reminder warning chime
If the driver’s door is opened while the
ignition key is left in the ignition switch
(ACC or LOCK position), the key
reminder warning chime will sound. This
is to prevent you from locking your keys
in the vehicle. The chime sounds until the
key is removed from the ignition switch or
the driver’s door is closed.
EPSSET
CRUISE
KEY
OUT
Page 134 of 397
Features of your vehicle
54
4
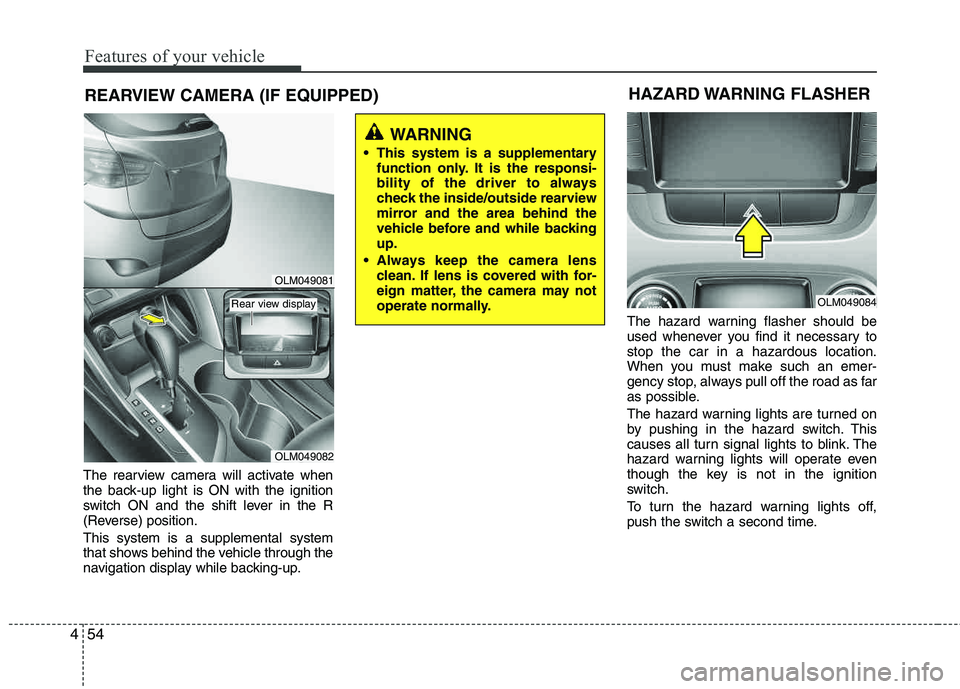
REARVIEW CAMERA (IF EQUIPPED)
The rearview camera will activate when
the back-up light is ON with the ignition
switch ON and the shift lever in the R
(Reverse) position. This system is a supplemental system
that shows behind the vehicle through the
navigation display while backing-up. The hazard warning flasher should be
used whenever you find it necessary to stop the car in a hazardous location.
When you must make such an emer-
gency stop, always pull off the road as far
as possible.
The hazard warning lights are turned on
by pushing in the hazard switch. This
causes all turn signal lights to blink. The
hazard warning lights will operate even
though the key is not in the ignition
switch.
To turn the hazard warning lights off,
push the switch a second time.
WARNING
This system is a supplementary function only. It is the responsi-
bility of the driver to always
check the inside/outside rearview
mirror and the area behind the
vehicle before and while backingup.
Always keep the camera lens clean. If lens is covered with for-
eign matter, the camera may not
operate normally.
HAZARD WARNING FLASHER
OLM049084
OLM049081
OLM049082
Rear view display
Page 135 of 397
455
Features of your vehicle
Battery saver function
The purpose of this feature is to pre-vent the battery from being dis-
charged. The system automatically
turns off the parking lights when the
driver removes the ignition key and
opens the driver-side door (in thatorder).
With this feature, the parking lights will be turned off automatically if the driver
parks on the side of road at night.
If necessary, to keep the lights on
when the ignition key is removed, per-
form the following:
1) Open the driver-side door.
2) Turn the parking lights OFF and ON again using the light switch on the
steering column.
Headlight escort function (if equipped)
The headlights (and/or taillights) remain
on for approximately 20 minutes after the
ignition key is removed or turned to the
ACC or LOCK position. However, if the
driver’s door is opened and closed, the
headlights are turned off after 30 sec-
onds.
The headlights can be turned off by
pressing the lock button on the transmit-
ter (or smart key) twice or turning off the
light switch from the headlight or Autolight position.
LIGHTING
CAUTION
If the driver gets out of the vehicle
through other doors (except dri-ver’s door), the battery saver func-
tion does not operate and the head-light escort function does not turnoff automatically. Therefore, It caus-es the battery to be discharged. In
this case, make sure to turn off thelamp before getting out of the vehi-cle.
Page 136 of 397
Features of your vehicle
56
4
Headlight welcome function
When the headlight switch is in the ON
position or in the AUTO position and all doors (and tailgate) are closed and
locked, if you press the door unlock but-
ton on the transmitter (or smart key), the
headlight will come on for about 15 sec-
onds.
If the headlight switch is in the AUTO
position, the function can only operate at night.
To turn off the headlight immediately, do
one of the following:
Press the door lock button.
Press the unlock button twice within 4
seconds.
Press the unlock button once more after 4 seconds.
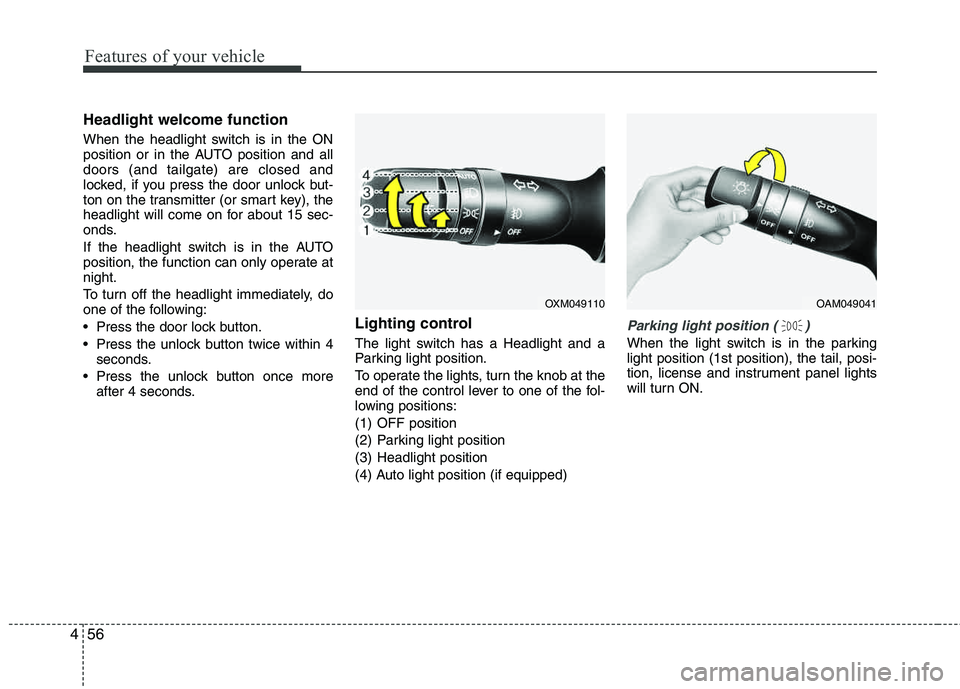
Lighting control
The light switch has a Headlight and a
Parking light position.
To operate the lights, turn the knob at the
end of the control lever to one of the fol-
lowing positions:
(1) OFF position
(2) Parking light position
(3) Headlight position
(4) Auto light position (if equipped)
Parking light position ( )
When the light switch is in the parking light position (1st position), the tail, posi-
tion, license and instrument panel lights
will turn ON.
OAM049041OXM049110
Page 137 of 397
457
Features of your vehicle
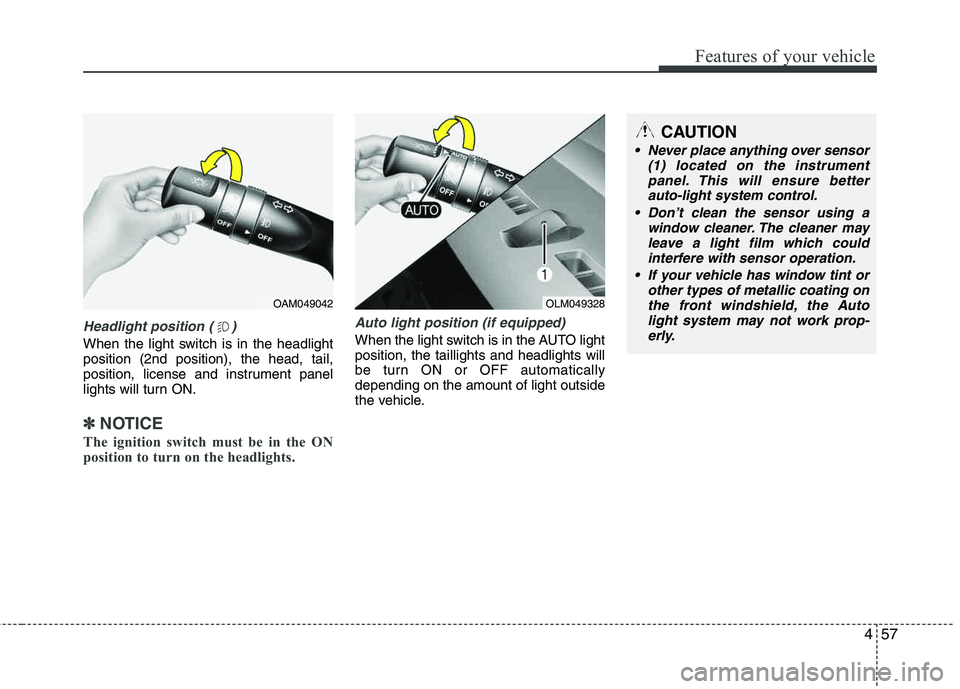
Headlight position ( )
When the light switch is in the headlight position (2nd position), the head, tail,
position, license and instrument panel
lights will turn ON.
✽✽NOTICE
The ignition switch must be in the ON
position to turn on the headlights.
Auto light position (if equipped)
When the light switch is in the AUTO light position, the taillights and headlights will
be turn ON or OFF automaticallydepending on the amount of light outside
the vehicle.
OAM049042OLM049328
CAUTION
Never place anything over sensor (1) located on the instrumentpanel. This will ensure better
auto-light system control.
Don’t clean the sensor using a window cleaner. The cleaner mayleave a light film which could
interfere with sensor operation.
If your vehicle has window tint or other types of metallic coating on
the front windshield, the Auto light system may not work prop-erly.
Page 138 of 397
Features of your vehicle
58
4
High beam operation
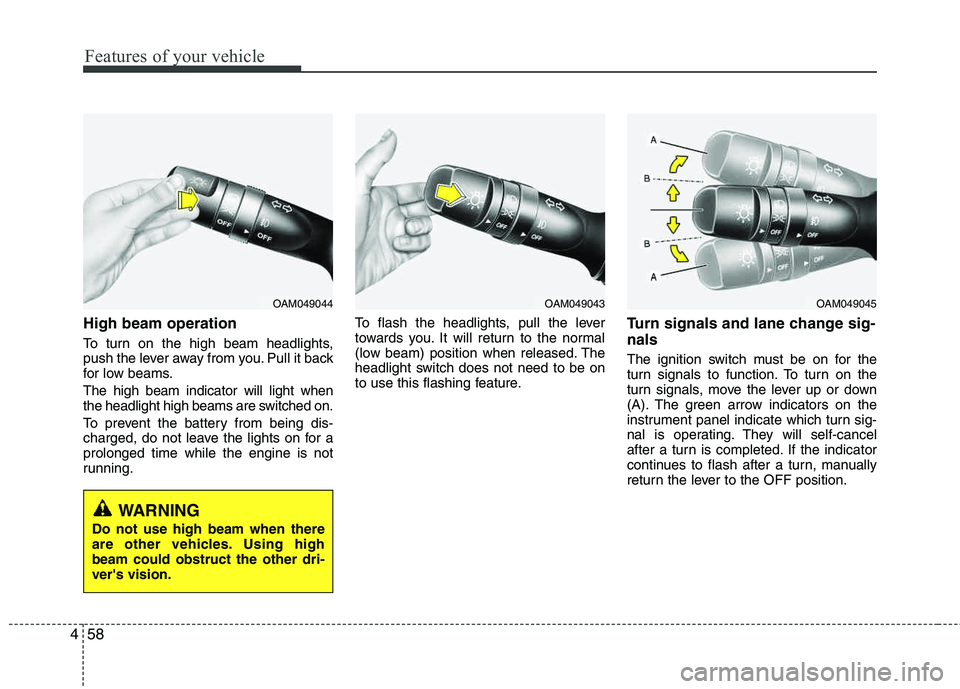
To turn on the high beam headlights,
push the lever away from you. Pull it back
for low beams. The high beam indicator will light when
the headlight high beams are switched on.
To prevent the battery from being dis-
charged, do not leave the lights on for a prolonged time while the engine is not
running. To flash the headlights, pull the lever
towards you. It will return to the normal
(low beam) position when released. The
headlight switch does not need to be on
to use this flashing feature.
Turn signals and lane change sig- nals
The ignition switch must be on for the
turn signals to function. To turn on the
turn signals, move the lever up or down
(A). The green arrow indicators on the
instrument panel indicate which turn sig-
nal is operating. They will self-cancel
after a turn is completed. If the indicator
continues to flash after a turn, manually
return the lever to the OFF position.
OAM049044OAM049043OAM049045
WARNING
Do not use high beam when there
are other vehicles. Using highbeam could obstruct the other dri- ver's vision.
Page 139 of 397
459
Features of your vehicle
To signal a lane change, move the turn
signal lever slightly and hold it in position
(B). The lever will return to the OFF posi-tion when released.
If an indicator stays on and does not
flash or if it flashes abnormally, one of the
turn signal bulbs may be burned out andwill require replacement.
One-touch lane change function (if equipped)
To activate an one-touch lane change
function, move the turn signal lever
slightly for less than 0.5 second and then
release it. The lane change signals will
blink 3 times.
✽✽ NOTICE
If an indicator flash is abnormally quick
or slow, a bulb may be burned out or
have a poor electrical connection in the
circuit.
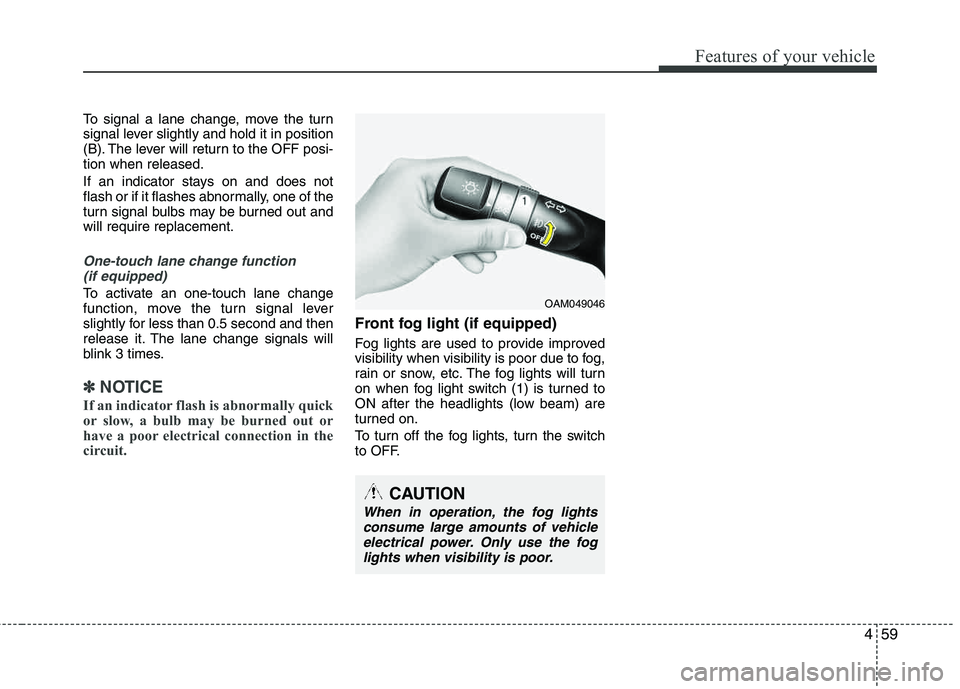
Front fog light (if equipped)
Fog lights are used to provide improved
visibility when visibility is poor due to fog,
rain or snow, etc. The fog lights will turn
on when fog light switch (1) is turned to
ON after the headlights (low beam) are
turned on.
To turn off the fog lights, turn the switch
to OFF.
OAM049046
CAUTION
When in operation, the fog lights consume large amounts of vehicleelectrical power. Only use the foglights when visibility is poor.
Page 140 of 397
Features of your vehicle
60
4
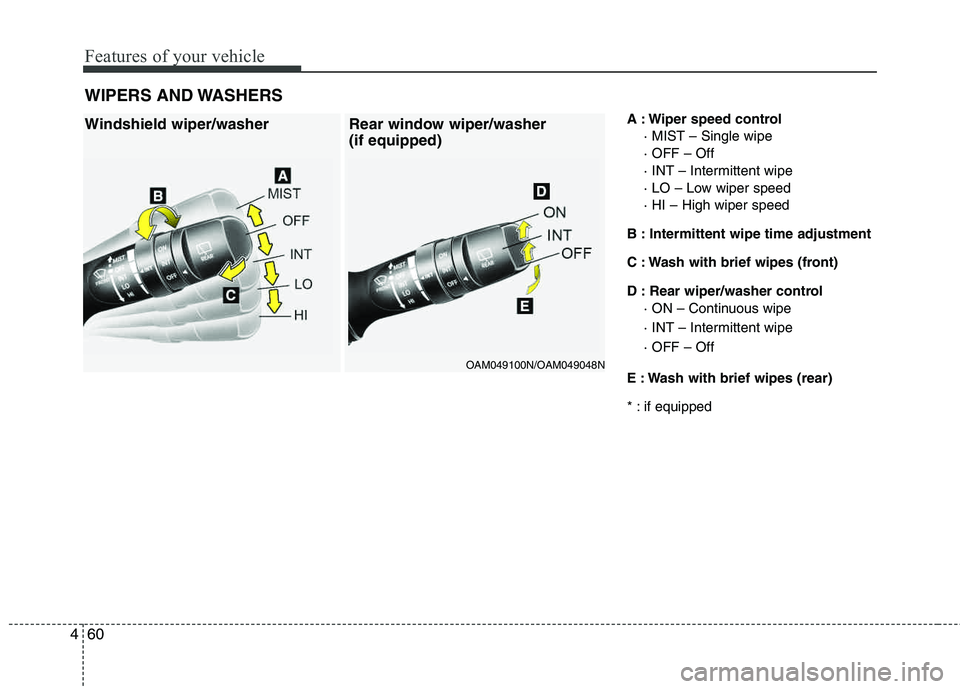
A : Wiper speed control
· MIST – Single wipe · OFF – Off
· INT – Intermittent wipe
· LO – Low wiper speed · HI – High wiper speed
B : Intermittent wipe time adjustment
C : Wash with brief wipes (front)
D : Rear wiper/washer control · ON – Continuous wipe
· INT – Intermittent wipe · OFF – Off
E : Wash with brief wipes (rear)
* : if equipped
WIPERS AND WASHERSWindshield wiper/washer Rear window wiper/washer
(if equipped)
OAM049100N/OAM049048N