steering wheel HYUNDAI TUCSON 2013 Owner's Guide
[x] Cancel search | Manufacturer: HYUNDAI, Model Year: 2013, Model line: TUCSON, Model: HYUNDAI TUCSON 2013Pages: 397, PDF Size: 5.55 MB
Page 246 of 397
Driving your vehicle
38
5
ESC OFF usage
When driving
ESC should be turned on for daily driv-
ing whenever possible.
To turn ESC off while driving, press the ESC OFF button while driving on a flat
road surface.
✽✽ NOTICE
When operating the vehicle on a dynamometer, ensure that the ESC is
turned off (ESC OFF light illuminat-
ed). If the ESC is left on, it may pre-
vent the vehicle speed from increas-
ing, and result in false diagnosis.
Turning the ESC off does not affect
ABS or brake system operation.
Vehicle stability management (VSM) (if equipped)
This system provides further enhance-
ments to vehicle stability and steering
responses when a vehicle is driving on a
slippery road or a vehicle detected
changes in coefficient of friction between
right wheels and left wheels when brak- ing.
VSM operation
When the VSM is in operation, ESC indi-
cator light ( ) blinks.
When the vehicle stability management
is operating properly, you can feel a slight
pulsation in the vehicle. This is only the
effect of brake control and indicates noth-
ing unusual.
The VSM does not operate when:
Driving on bank road such as gradientor incline
Driving rearward
ESC OFF indicator light ( ) remains on the instrument cluster
EPS indicator light remains on the instrument cluster
VSM operation off
If you press the ESC OFF button to turn
off the ESC, the VSM will also cancel and
the ESC OFF indicator light ( ) illumi-
nates.
To turn on the VSM, press the button
again. The ESC OFF indicator light goesout.
Malfunction indicator
The VSM can be deactivated even if you
don’t cancel the VSM operation by press-
ing the ESC OFF button. It indicates thata malfunction has been detected some-
where in the Electric Power Steering sys-
tem or VSM system. If the ESC indicator
light ( ) or EPS warning light remains
on, take your vehicle to an authorized
HYUNDAI dealer and have the system
checked.
✽✽ NOTICE
The VSM is designed to function above approximately 15 km/h (9 mph)
on curves.
The VSM is designed to function
above approximately 30 km/h (18
mph) when a vehicle is braking on a
split-mu road. The split-mu road is
made of surfaces which have different
friction forces.
WARNING
Never press the ESC OFF button while ESC is operating (ESC indica-
tor light blinks). If ESC is turned off while ESC is
operating, the vehicle may slip out
of control.
Page 247 of 397
539
Driving your vehicle
Hill-start assist control (HAC) (if equipped)
A vehicle has the tendency to slip back
on a steep hill when the driver begins to
accelerate after a stop. The Hill-start
Assist Control (HAC) prevents the vehi-
cle from slipping back by operating the
brakes automatically for about 2 sec-
onds. The brakes are released when the
accelerator pedal is depressed or after
about 2 seconds.
✽✽NOTICE
The HAC does not operate when the transaxle shift lever is in the P (Park)
or N (Neutral) position.
The HAC activates even though the ESC is off but it does not activate
when the ESC has malfunctioned.
Downhill brake control (DBC) (if equipped)
The Downhill Brake Control (DBC) helps
the driver descend steep hills and is acti-
vated at speeds less then 22 mph.
DBC defaults to the OFF position when-
ever the ignition is turned on.
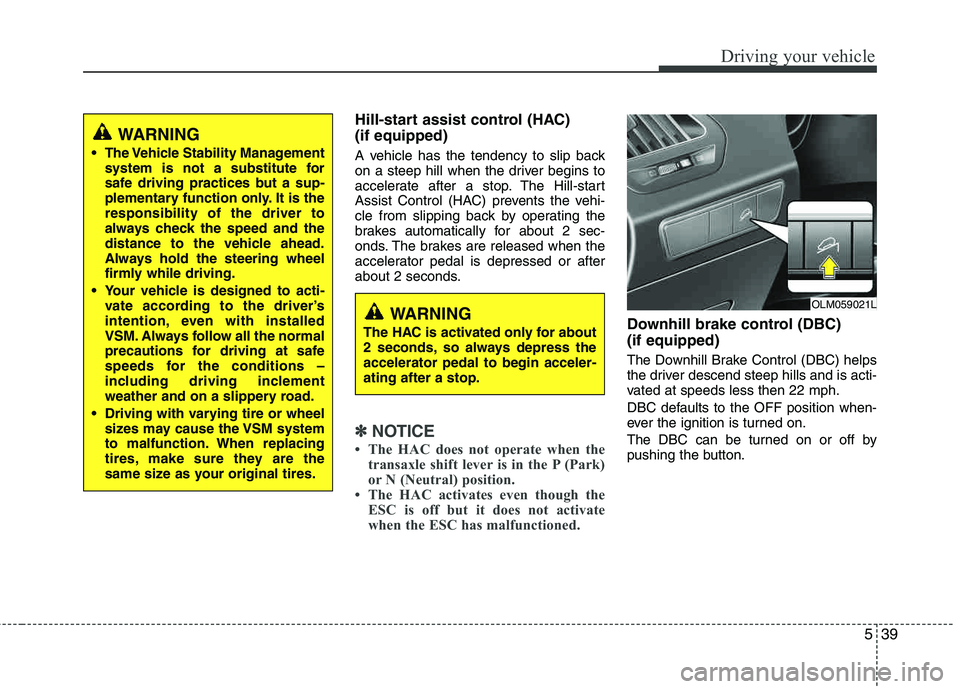
The DBC can be turned on or off by
pushing the button.
OLM059021LWARNING
The HAC is activated only for about
2 seconds, so always depress theaccelerator pedal to begin acceler-ating after a stop.
WARNING
The Vehicle Stability Management system is not a substitute for
safe driving practices but a sup-
plementary function only. It is the responsibility of the driver to
always check the speed and the
distance to the vehicle ahead.
Always hold the steering wheel
firmly while driving.
Your vehicle is designed to acti- vate according to the driver’s
intention, even with installed
VSM. Always follow all the normal
precautions for driving at safe
speeds for the conditions –
including driving inclement
weather and on a slippery road.
Driving with varying tire or wheel sizes may cause the VSM system
to malfunction. When replacing
tires, make sure they are the
same size as your original tires.
Page 251 of 397
543
Driving your vehicle
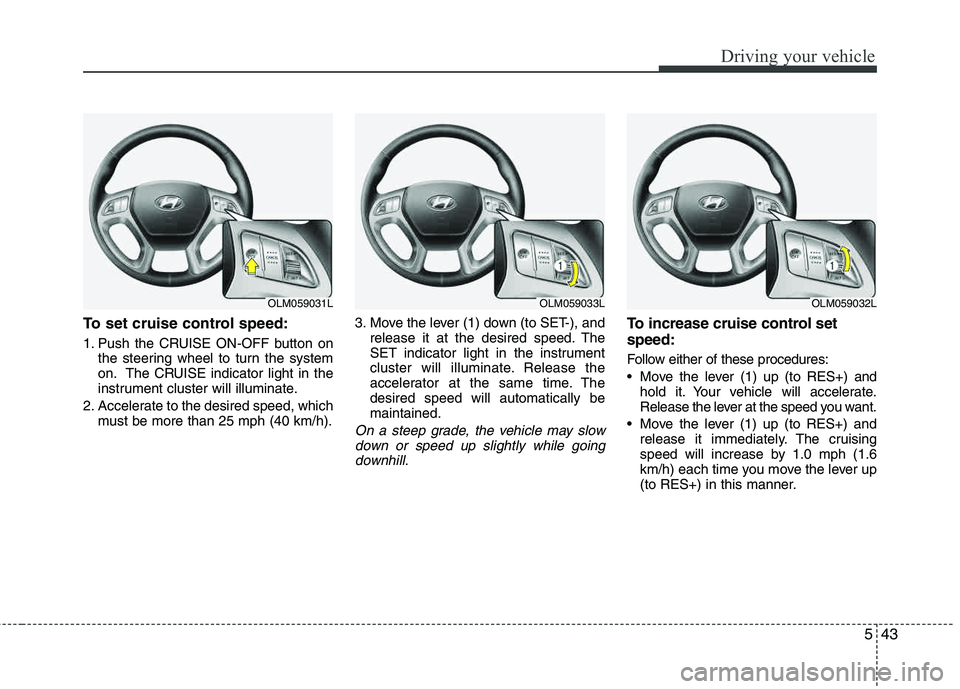
To set cruise control speed:
1. Push the CRUISE ON-OFF button onthe steering wheel to turn the system
on. The CRUISE indicator light in the
instrument cluster will illuminate.
2. Accelerate to the desired speed, which must be more than 25 mph (40 km/h). 3. Move the lever (1) down (to SET-), and
release it at the desired speed. The
SET indicator light in the instrument
cluster will illuminate. Release the
accelerator at the same time. Thedesired speed will automatically bemaintained.
On a steep grade, the vehicle may slow
down or speed up slightly while goingdownhill.
To increase cruise control set speed:
Follow either of these procedures:
Move the lever (1) up (to RES+) and hold it. Your vehicle will accelerate.
Release the lever at the speed you want.
Move the lever (1) up (to RES+) and release it immediately. The cruising
speed will increase by 1.0 mph (1.6
km/h) each time you move the lever up
(to RES+) in this manner.
OLM059031LOLM059033LOLM059032L
Page 252 of 397
Driving your vehicle
44
5
To decrease the cruising speed:
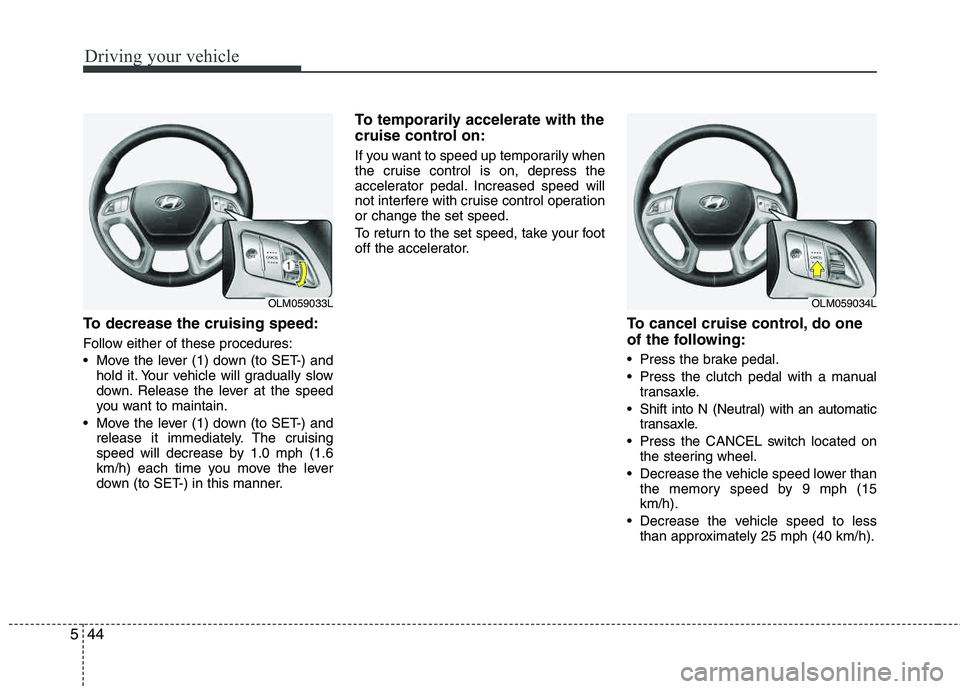
Follow either of these procedures:
Move the lever (1) down (to SET-) and
hold it. Your vehicle will gradually slow
down. Release the lever at the speed
you want to maintain.
Move the lever (1) down (to SET-) and release it immediately. The cruising
speed will decrease by 1.0 mph (1.6
km/h) each time you move the lever
down (to SET-) in this manner.
To temporarily accelerate with the
cruise control on:
If you want to speed up temporarily when
the cruise control is on, depress the
accelerator pedal. Increased speed will
not interfere with cruise control operationor change the set speed.
To return to the set speed, take your foot
off the accelerator.
To cancel cruise control, do one
of the following:
Press the brake pedal.
Press the clutch pedal with a manual
transaxle.
Shift into N (Neutral) with an automatic transaxle.
Press the CANCEL switch located on the steering wheel.
Decrease the vehicle speed lower than the memory speed by 9 mph (15 km/h).
Decrease the vehicle speed to less than approximately 25 mph (40 km/h).
OLM059033LOLM059034L
Page 253 of 397
545
Driving your vehicle
Each of these actions will cancel cruisecontrol operation (the SET indicator light
in the instrument cluster will go off), but itwill not turn the system off. If you wish toresume cruise control operation, moveup the lever (to RES+) located on your
steering wheel. You will return to yourpreviously preset speed.
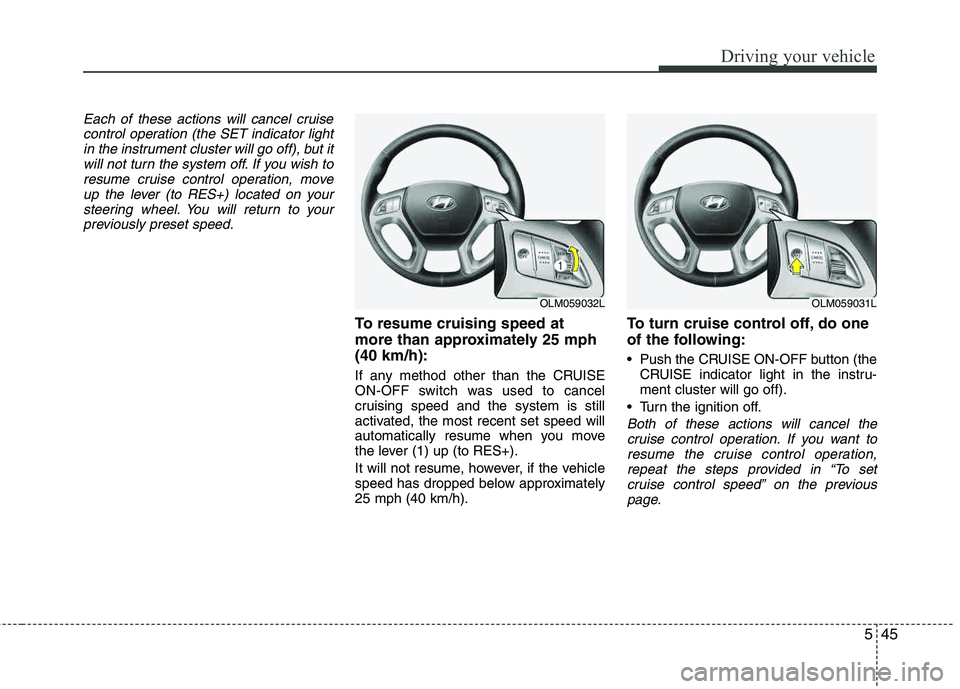
To resume cruising speed at
more than approximately 25 mph(40 km/h):
If any method other than the CRUISE
ON-OFF switch was used to cancel
cruising speed and the system is still
activated, the most recent set speed will
automatically resume when you move
the lever (1) up (to RES+).
It will not resume, however, if the vehicle
speed has dropped below approximately25 mph (40 km/h).
To turn cruise control off, do one
of the following:
Push the CRUISE ON-OFF button (the CRUISE indicator light in the instru- ment cluster will go off).
Turn the ignition off.
Both of these actions will cancel the cruise control operation. If you want to
resume the cruise control operation,repeat the steps provided in “To set cruise control speed” on the previous
page.
OLM059032LOLM059031L
Page 256 of 397
Driving your vehicle
48
5
Remember, your vehicle does not
require extended warm-up. After the
engine has started, allow the engine to
run for 10 to 20 seconds prior to plac-
ing the vehicle in gear. In very cold
weather, however, give your engine a
slightly longer warm-up period.
Don't "lug" or "over-rev" the engine. Lugging is driving too slowly in too high
a gear resulting in the engine bucking.
If this happens, shift to a lower gear.
Over-revving is racing the engine
beyond its safe limit. This can be avoid-
ed by shifting at the recommended
speeds. Use your air conditioning sparingly.
The air conditioning system is operat-
ed by engine power so your fuel econ-
omy is reduced when you use it.
Open windows at high speeds can reduce fuel economy.
Fuel economy is less in crosswinds and headwinds. To help offset some of
this loss, slow down when driving in
these conditions.
Keeping a vehicle in good operating con-
dition is important both for economy and
safety. Therefore, have an authorized
HYUNDAI dealer perform scheduled
inspections and maintenance.
WARNING - Engine off dur- ing motion
Never turn the engine off to coast
down hills or anytime the vehicle is
in motion. The power steering and
power brakes will not function
properly without the engine run-
ning. Instead, keep the engine on
and downshift to an appropriate
gear for engine braking effect. In
addition, turning off the ignition
while driving could engage the
steering wheel lock resulting in
loss of vehicle steering which
could cause serious injury ordeath.
Page 257 of 397
549
Driving your vehicle
Hazardous driving conditions
When hazardous driving conditions are
encountered such as water, snow, ice,
mud, sand, or similar hazards, follow these suggestions:
Drive cautiously and allow extra dis-tance for braking.
Avoid sudden braking or steering. When braking with non-ABS brakes
pump the brake pedal with a light up-
and-down motion until the vehicle is stopped.
If stalled in snow, mud, or sand, use second gear. Accelerate slowly to
avoid spinning the drive wheels.
Use sand, rock salt, tire chains, or other non-slip material under the drive
wheels to provide traction when stalled
in ice, snow, or mud.
Rocking the vehicle
If it is necessary to rock the vehicle to free
it from snow, sand, or mud, first turn the
steering wheel right and left to clear the
area around your front wheels. Then, shift
back and forth between 1st (First) and R
(Reverse) and any forward gear in vehi- cles equipped with an automatic
transaxle. Do not race the engine, and
spin the wheels as little as possible. If you
are still stuck after a few tries, have the
vehicle pulled out by a tow vehicle to
avoid engine overheating and possible
damage to the transaxle.
SPECIAL DRIVING CONDITIONS
1VQA3002
WARNING - ABS
Do not pump the brake pedal on a
vehicle equipped with ABS.
WARNING - Downshifting
Downshifting with an automatic
transaxle, while driving on slipperysurfaces can cause an accident.
The sudden change in tire speed
could cause the tires to skid. Be
careful when downshifting on slip-
pery surfaces.
CAUTION
Prolonged rocking may cause
engine over-heating, transaxle dam- age or failure, and tire damage.
Page 264 of 397
Driving your vehicle
56
5
To keep locks from freezing
To keep the locks from freezing, squirt an
approved de-icer fluid or glycerine into
the key opening. If a lock is covered with
ice, squirt it with an approved de-icing
fluid to remove the ice. If the lock is
frozen internally, you may be able to thaw
it out by using a heated key. Handle the
heated key with care to avoid injury.
Use approved window washer
anti-freeze in system
To keep the water in the window washer
system from freezing, add an approved
window washer anti-freeze solution in
accordance with instructions on the con-
tainer. Window washer anti-freeze is
available from an authorized HYUNDAI
dealer and most auto parts outlets. Donot use engine coolant or other types of
anti-freeze as these may damage the paint finish.
Don't let your parking brake
freeze
Under some conditions your parking
brake can freeze in the engaged position.
This is most likely to happen when there
is an accumulation of snow or ice around
or near the rear brakes or if the brakes
are wet. If there is a risk the parking
brake may freeze, apply it only temporar-
ily while you put the shift lever in P (auto-
matic transaxle) or in first or reverse gear
(manual transaxle) and block the rear
wheels so the car cannot roll. Then
release the parking brake.
Don't let ice and snow accumu- late underneath
Under some conditions, snow and ice
can build up under the fenders and inter-
fere with the steering. When driving in
severe winter conditions where this may
happen, you should periodically check
underneath the vehicle to be sure the
movement of the front wheels and the
steering components is not obstructed.
Carry emergency equipment
Depending on the severity of the weath-
er, you should carry appropriate emer-
gency equipment. Some of the items you
may want to carry include tire chains, tow
straps or chains, flashlight, emergency
flares, sand, a shovel, jumper cables, a
window scraper, gloves, ground cloth,
coveralls, a blanket, etc.
Page 267 of 397
559
Driving your vehicle
Driving with a trailer
Towing a trailer requires a certain
amount of experience. Before setting out
for the open road, you must get to know
your trailer. Acquaint yourself with the
feel of handling and braking with the
added weight of the trailer. And always
keep in mind that the vehicle you are
driving is now a good deal longer and not
nearly so responsive as your vehicle is
by itself.
Before you start, check the trailer hitch
and platform, safety chains, electrical
connector(s), lights, tires and mirror
adjustment. If the trailer has electric
brakes, start your vehicle and trailer mov-
ing and then apply the trailer brake con-
troller by hand to be sure the brakes are
working. This lets you check your electri-
cal connection at the same time.
During your trip, check occasionally to be
sure that the load is secure, and that the
lights and any trailer brakes are still work-ing.
Following distance
Stay at least twice as far behind the vehi-
cle ahead as you would when driving
your vehicle without a trailer. This can
help you avoid situations that require
heavy braking and sudden turns.
Passing
You’ll need more passing distance up
ahead when you’re towing a trailer. And,
because of the increased vehicle length,
you’ll need to go much farther beyond the
passed vehicle before you can return to
your lane. Due to the added load to the
engine when going uphill the vehicle may
also take longer to pass than it would on
flat ground.
Backing up
Hold the bottom of the steering wheel
with one hand. Then, to move the trailer
to the left, just move your hand to the left.
To move the trailer to the right, move your
hand to the right. Always back up slowly
and, if possible, have someone guide
you.
Making turns
When you’re turning with a trailer, make
wider turns than normal. Do this so your
trailer won’t strike soft shoulders, curbs,
road signs, trees, or other objects. Avoid
jerky or sudden maneuvers. Signal well in
advance before turning or lane changes.
Turn signals when towing a trailer
When you tow a trailer, your vehicle has
to have a different turn signal flasher and
extra wiring. The green arrows on your
instrument panel will flash whenever you
signal a turn or lane change. Properly
connected, the trailer lights will also flash
to alert other drivers you’re about to turn,
change lanes, or stop.
When towing a trailer, the green arrows
on your instrument panel will flash for
turns even if the bulbs on the trailer are
burned out. Thus, you may think drivers
behind you are seeing your signals
when, in fact, they are not. It’s important
to check occasionally to be sure the trail-
er bulbs are still working. You must also
check the lights every time you discon-
nect and then reconnect the wires.
Do not connect a trailer lighting system
directly to your vehicle’s lighting system.
Use only an approved trailer wiring har-
ness.
Page 268 of 397
Driving your vehicle
60
5
An authorized HYUNDAI dealer can
assist you in installing the wiring harness.
Driving on grades
Reduce speed and shift to a lower gear
before you start down a long or steep
downgrade. If you don’t shift down, you
might have to use your brakes so much
that they would get hot and no longer
operate efficiently.
On a long uphill grade, shift down and
reduce your speed to around 45 mph (70 km/h) to reduce the possibility of engine
and transaxle overheating.
If your trailer weighs more than the max-
imum trailer weight without trailer brakes
and you have an automatic transaxle,
you should drive in D (Drive) when tow-
ing a trailer.
Operating your vehicle in D (Drive) when
towing a trailer will minimize heat build up
and extend the life of your transaxle.
Parking on hills
Generally, if you have a trailer attached to
your vehicle, you should not park your
vehicle on a hill. People can be seriously
or fatally injured, and both your vehicle
and the trailer can be damaged if they
unexpectedly roll down hill. However, if you ever have to park your
trailer on a hill, here's how to do it:
1. Pull the vehicle into the parking space.
Turn the steering wheel in the direction
of the curb (right if headed down hill, left if headed up hill).
2. If the vehicle has a manual transaxle, place the car in neutral. If the vehicle
has an automatic transaxle, place the
car in P (Park).
3. Set the parking brake and shut off the vehicle.
4. Place chocks under the trailer wheels on the down hill side of the wheels.
5. Start the vehicle, hold the brakes, shift to neutral, release the parking brake
and slowly release the brakes until the
trailer chocks absorb the load.
6. Reapply the brakes, reapply the park- ing brake and shift the vehicle to R
(Reverse) for manual transaxle or P
(Park) automatic transaxle.
CAUTION
When towing a trailer on steep
grades (in excess of 6%) payclose attention to the engine
coolant temperature gauge toensure the engine does not over-heat. If the needle of the coolanttemperature gauge moves across
the dial towards “H” (HOT), pullover and stop as soon as it is safe to do so, and allow the engine to
idle until it cools down. You mayproceed once the engine hascooled sufficiently.
You must decide driving speed depending on trailer weight anduphill grade to reduce the possi-bility of engine and transaxle
overheating.
WARNING
Failure to use an approved trailer wiring harness could result in dam-
age to the vehicle electrical system
and/or personal injury.
WARNING- Parking on a hill
Parking your vehicle on a hill with a
trailer attached could cause serious
injury or death, should the trailer
break loose or brake stops working.