HYUNDAI TUCSON 2014 Owners Manual
Manufacturer: HYUNDAI, Model Year: 2014, Model line: TUCSON, Model: HYUNDAI TUCSON 2014Pages: 542, PDF Size: 7.59 MB
Page 401 of 542
5-65
Driving your vehicle
5
Ready to leave after parking ona hill
1.With the shift lever to P (Park, for automatic transaxle vehicle) or
neutral (for manual transaxle vehi-
cle), apply your brakes and hold
the brake pedal down while you:
and
2.Slowly remove your foot from the brake pedal.
3.Drive slowly until the trailer is clear of the chocks.
4.Stop and have someone pick up and store the chocks.
Maintenance when trailer tow- ing
Your vehicle will need service more
often when you regularly pull a trail-
er. Important items to pay particularattention to include engine oil, auto-
matic transaxle fluid, axle lubricant
and cooling system fluid. Brake con-
dition is another important item to
frequently check. If you’re trailering,
it’s a good idea to review these items
before you start your trip. Don’t forget
to also maintain your trailer and
hitch. Follow the maintenance sched-
ule that accompanied your trailer and
check it periodically. Preferably, con-
duct the check at the start of each
day’s driving. Most importantly, all
hitch nuts and bolts should be tight. To prevent vehicle damage:
Due to higher load during
trailer usage, overheating
might occur on hot days or
during uphill driving. If the
coolant gauge indicates over-
heating, switch off the air con-
ditioner and stop the vehicle
in a safe area to cool down the
engine.
When towing check automatic
transaxle fluid more frequently.
CAUTION
Page 402 of 542
5-66
Driving your vehicle
Two labels on your driver’s door sill
show how much weight your vehicle
was designed to carry: the Tire and
Loading Information Label and the
Certification Label.
Before loading your vehicle, familiar-
ize yourself with the following terms
for determining your vehicle's weight
ratings, from the vehicle's specifica-
tions and the Certification Label:
Base Curb Weight
This is the weight of the vehicle including a full tank of fuel and all
standard equipment. It does not
include passengers, cargo, or option-al equipment.
Vehicle Curb Weight
This is the weight of your new vehicle
when you picked it up from your deal-
er plus any aftermarket equipment.Cargo Weight
This figure includes all weight added
to the Base Curb Weight, includingcargo and optional equipment.
GAW (Gross Axle Weight)
This is the total weight placed on each axle (front and rear) - including
vehicle curb weight and all payload.
GAWR (Gross Axle Weight Rating)
This is the maximum allowable
weight that can be carried by a single
axle (front or rear). These numbers
are shown on the Certification Label.
The total load on each axle must
never exceed its GAWR.
GVW (Gross Vehicle Weight)
This is the Base Curb Weight plus
actual Cargo Weight plus passen-
gers.
GVWR (Gross Vehicle Weight Rating)
This is the maximum allowable
weight of the fully loaded vehicle
(including all options, equipment,
passengers and cargo). The GVWR
is shown on the Certification Label
located on the driver’s door sill.
VV
EEHH IICC LLEE LL OO AADD LL IIMM IITT
Page 403 of 542
5-67
Driving your vehicle
5
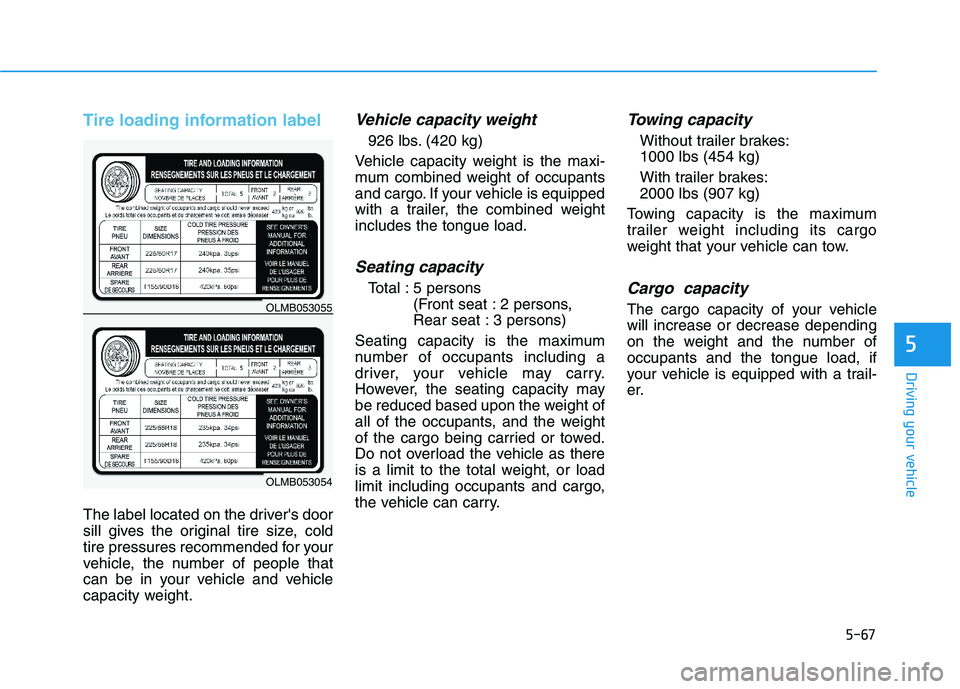
Tire loading information label
The label located on the driver's door
sill gives the original tire size, cold
tire pressures recommended for your
vehicle, the number of people that
can be in your vehicle and vehicle
capacity weight.
Vehicle capacity weight
926 lbs. (420 kg)
Vehicle capacity weight is the maxi-
mum combined weight of occupants
and cargo. If your vehicle is equipped
with a trailer, the combined weightincludes the tongue load.
Seating capacity
Total : 5 persons (Front seat : 2 persons,
Rear seat : 3 persons)
Seating capacity is the maximum
number of occupants including a
driver, your vehicle may carry.
However, the seating capacity may
be reduced based upon the weight of
all of the occupants, and the weight
of the cargo being carried or towed.
Do not overload the vehicle as there
is a limit to the total weight, or load
limit including occupants and cargo,
the vehicle can carry.
Towing capacity
Without trailer brakes:1000 lbs (454 kg)
With trailer brakes: 2000 lbs (907 kg)
Towing capacity is the maximum
trailer weight including its cargo
weight that your vehicle can tow.
Cargo capacity
The cargo capacity of your vehiclewill increase or decrease depending
on the weight and the number ofoccupants and the tongue load, if
your vehicle is equipped with a trail-
er.
OLMB053054
OLMB053055
Page 404 of 542
5-68
Driving your vehicle
Steps for determining correctload limit
1.Locate the statement "The com- bined weight of occupants and
cargo should never exceed XXX kg
or XXX lbs.'' on your vehicle's plac-ard.
2.Determine the combined weight of the driver and passengers that will
be riding in your vehicle.
3.Subtract the combined weight of the driver and passengers from
XXX kg or XXX lbs.
4.The resulting figure equals the available amount of cargo and lug-
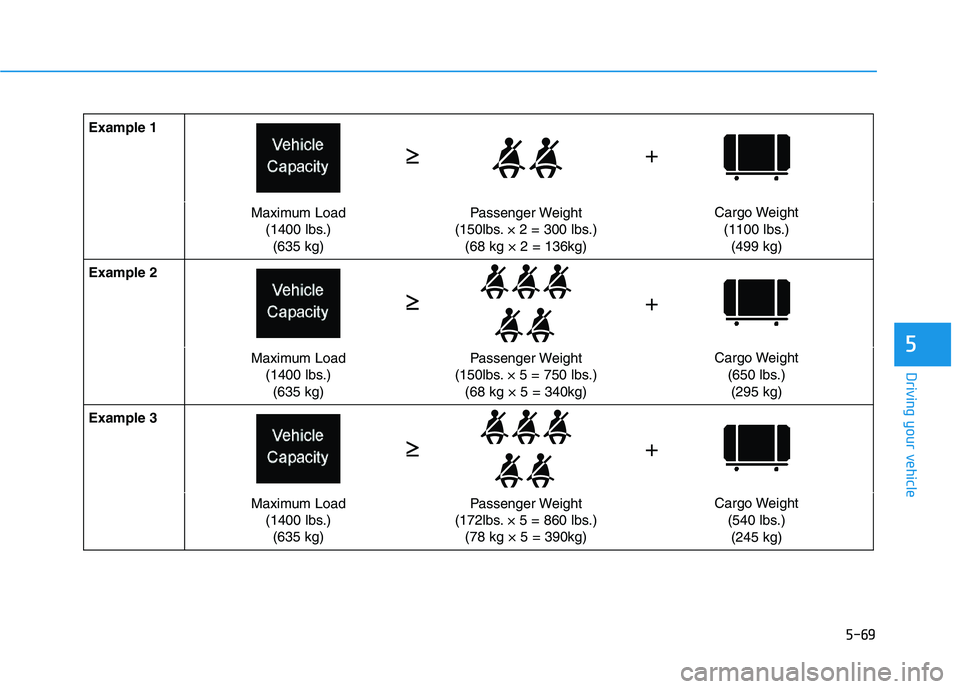
gage load capacity. For example, if
the "XXX" amount equals 1400 lbs.
and there will be five 150 lb. pas-
sengers in your vehicle, the
amount of available cargo and lug-
gage load capacity is 650 lbs.
(1400 - 750 (5 x 150) = 650 lbs.)
5.Determine the combined weight of luggage and cargo being loaded
on the vehicle. That weight may not
safely exceed the available cargoand luggage load capacity calcu-lated in Step 4. 6.If your vehicle will be towing a trail-
er, load from your trailer will be
transferred to your vehicle. Consult
this manual to determine how this
reduces the available cargo and
luggage load capacity of your vehi-cle Do not overload the vehicle asthere is a limit to the total
weight, or load limit, including
occupants and cargo, the vehi-
cle can carry. Overloading can
shorten the life of the vehicle. If
the GVWR or the GAWR is
exceeded, parts on the vehicle
can break, and it can change
the handling of your vehicle.
These could cause you to lose
control and result in an acci-dent.
WARNING
Page 405 of 542
5-69
Driving your vehicle
5
Example 1
Maximum Load(1400 lbs.)(635 kg)Passenger Weight
(150lbs. × 2 = 300 lbs.) (68 kg × 2 = 136kg)Cargo Weight
(1100 lbs.)(499 kg)
Example 2
Maximum Load (1400 lbs.)(635 kg)Passenger Weight
(150lbs. × 5 = 750 lbs.) (68 kg × 5 = 340kg)Cargo Weight
(650 lbs.)
(295 kg)
Example 3
Maximum Load (1400 lbs.)
(635 kg)Passenger Weight
(172lbs. × 5 = 860 lbs.)
(78 kg × 5 = 390kg)Cargo Weight
(540 lbs.)
(245 kg)
+
��
�
�
�
� + +
Page 406 of 542
5-70
Driving your vehicle
Certification label
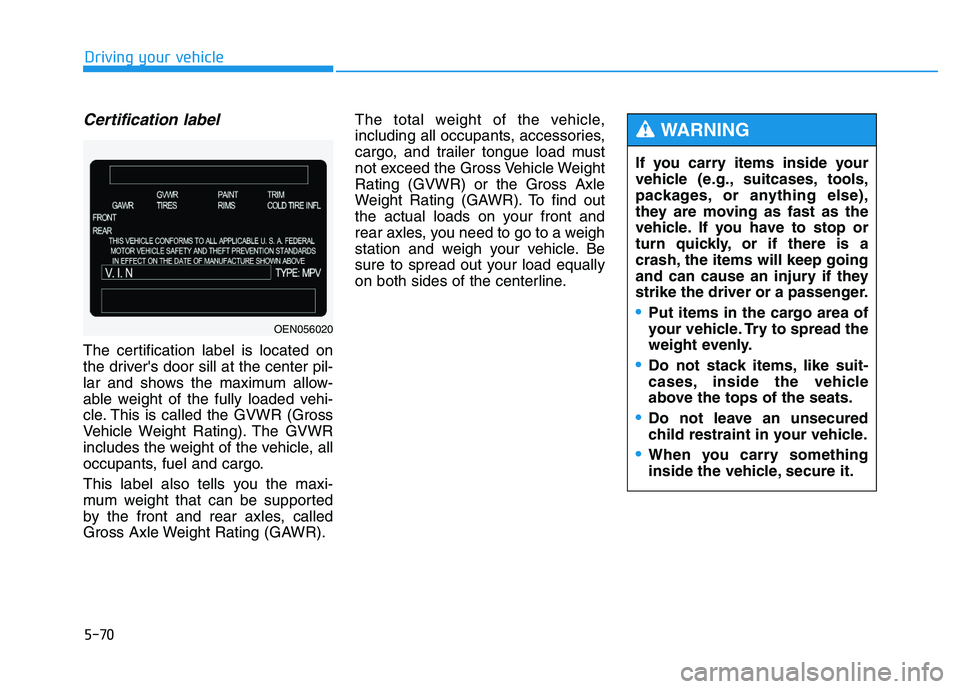
The certification label is located on
the driver's door sill at the center pil-
lar and shows the maximum allow-
able weight of the fully loaded vehi-
cle. This is called the GVWR (Gross
Vehicle Weight Rating). The GVWR
includes the weight of the vehicle, all
occupants, fuel and cargo.
This label also tells you the maxi-
mum weight that can be supported
by the front and rear axles, called
Gross Axle Weight Rating (GAWR).The total weight of the vehicle,
including all occupants, accessories,
cargo, and trailer tongue load must
not exceed the Gross Vehicle WeightRating (GVWR) or the Gross Axle
Weight Rating (GAWR). To find out
the actual loads on your front and
rear axles, you need to go to a weigh
station and weigh your vehicle. Be
sure to spread out your load equally
on both sides of the centerline.
OEN056020
If you carry items inside your
vehicle (e.g., suitcases, tools,
packages, or anything else),
they are moving as fast as the
vehicle. If you have to stop or
turn quickly, or if there is a
crash, the items will keep going
and can cause an injury if they
strike the driver or a passenger.
Put items in the cargo area of
your vehicle. Try to spread the
weight evenly.
Do not stack items, like suit-
cases, inside the vehicle
above the tops of the seats.
Do not leave an unsecured
child restraint in your vehicle.
When you carry something
inside the vehicle, secure it.
WARNING
Page 407 of 542
What to do in an emergency
HAZARD WARNING FLASHER .............................6-2
IN CASE OF AN EMERGENCY WHILE DRIVING ..6-3
If the engine stalls while driving ...................................6-3
If the engine stalls at a crossroad or crossing ........6-3
If you have a flat tire while driving ............................6-3
IF THE ENGINE WILL NOT START ......................6-4
If the engine doesn't turn over or
turns over slowly .............................................................6-4
If the engine turns over normally but doesn't start ...6-4
JUMP STARTING ...................................................6-5
IF THE ENGINE OVERHEATS ................................6-8
TIRE PRESSURE MONITORING SYSTEM
(TPMS) ..................................................................6-10
Low tire pressure telltale ..............................................6-11
TPMS malfunction indicator.........................................6-12
Changing a Tire with TPMS..........................................6-13
IF YOU HAVE A FLAT TIRE ................................6-15
Jack and tools .................................................................6-15
Changing tires .................................................................6-16
TOWING ................................................................6-21
Towing service .................................................................6-21
Removable towing hook ...............................................6-22
Emergency towing .........................................................6-23
Tie-down hook ................................................................6-24
6
Page 408 of 542
6-2
The hazard warning flasher serves
as a warning to other drivers to exer-
cise extreme caution when
approaching, overtaking, or passing
your vehicle.
It should be used whenever emer- gency repairs are being made or
when the vehicle is stopped near the
edge of a roadway.
To turn the hazard warning flasher
on or off, press the hazard warning
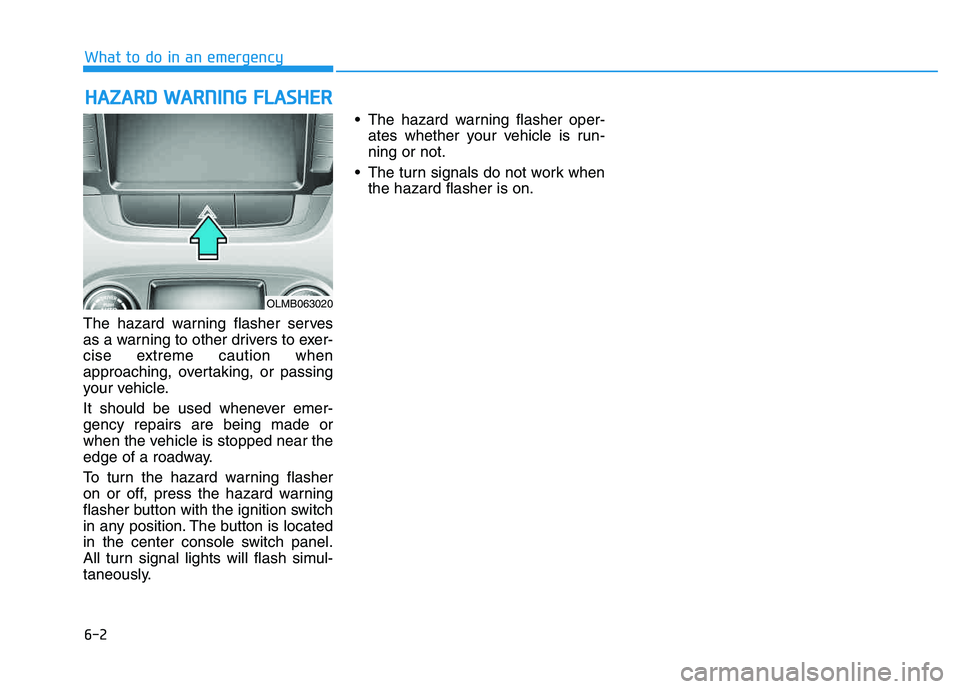
flasher button with the ignition switch
in any position. The button is located
in the center console switch panel.
All turn signal lights will flash simul-
taneously.• The hazard warning flasher oper-
ates whether your vehicle is run-ning or not.
The turn signals do not work when the hazard flasher is on.
HHAAZZAA RRDD WW AARRNN IINN GG FF LLAA SSHH EERR
What to do in an emergency
OLMB063020
Page 409 of 542
6-3
What to do in an emergency
If the engine stalls while driving
Reduce your speed gradually,keeping a straight line. Move cau-
tiously off the road to a safe place.
Turn on your hazard warning flash- er.
Try to start the engine again. If your vehicle will not start, contact an
authorized HYUNDAI dealer or
seek other qualified assistance.
If the engine stalls at a cross-
road or crossing
If the engine stalls at a crossroad or
crossing, if safe to do so, move the
shift lever to the N (Neutral) position
and then push the vehicle to a safelocation.
If you have a flat tire while driving
If a tire goes flat while you are driv- ing:
Take your foot off the acceleratorpedal and let the vehicle slow
down while driving straight ahead.
Do not apply the brakes immedi-ately or attempt to pull off the road
as this may cause loss of vehiclecontrol resulting in an accident.
When the vehicle has slowed to
such a speed that it is safe to do
so, brake carefully and pull off the
road. Drive off the road as far as
possible and park on firm, level
ground. If you are on a divided
highway, do not park in the median
area between the two traffic lanes. When the vehicle is stopped, press
the hazard warning flasher button,
move the shift lever into P (Park),
apply the parking brake, and place
the ignition switch in theLOCK/OFF position.
Have all passengers get out of the vehicle. Be sure they all get out on
the side of the vehicle that is away
from traffic.
When changing a flat tire, follow the instructions provided later in
this chapter.
IINN CC AA SSEE OO FF AA NN EE MM EERR GG EENN CCYY WW HHIILL EE DD RRIIVV IINN GG
6
Page 410 of 542
6-4
IIFF TT HH EE EE NN GGIINN EE WW IILL LL NN OO TT SS TT AA RRTT
What to do in an emergency
If the engine doesn't turn over
or turns over slowly
Be sure the shift lever is in N
(Neutral) or P (Park). The engine
starts only when the shift lever is in
N (Neutral) or P (Park).
Check the battery connections to be sure they are clean and tight.
Turn on the interior light. If the light dims or goes out when you operate
the starter, the battery is drained.
Do not push or pull the vehicle to
start it. This could cause damage to
your vehicle. See instructions for
"Jump Starting" provided in this
chapter.
If the engine turns over nor-
mally but doesn’t start
Check the fuel level and add fuel if necessary.
If the engine still does not start, call
an authorized HYUNDAI dealer or
seek other qualified assistance.
Push or pull starting the vehicle
may cause the catalytic con-
verter to overload which can
lead to damage to the emission
control system.
WARNING