start stop button HYUNDAI TUCSON LIMITED 2017 Owners Manual
[x] Cancel search | Manufacturer: HYUNDAI, Model Year: 2017, Model line: TUCSON LIMITED, Model: HYUNDAI TUCSON LIMITED 2017Pages: 642, PDF Size: 9.78 MB
Page 17 of 642
F17F17
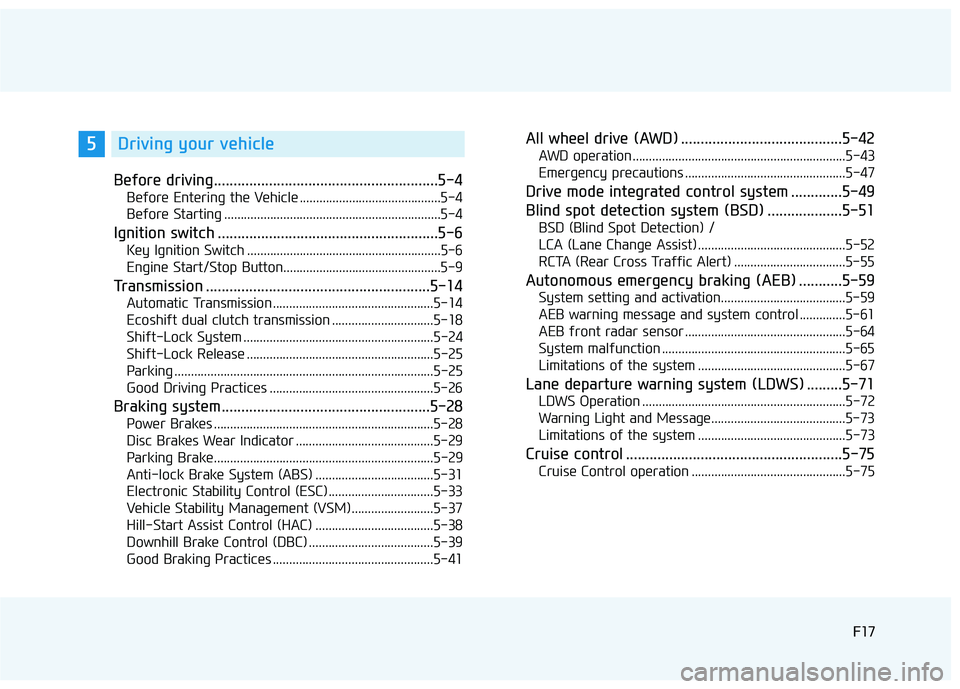
Before driving.........................................................5-4
Before Entering the Vehicle ...........................................5-4
Before Starting ..................................................................5-4
Ignition switch ........................................................5-6
Key Ignition Switch ...........................................................5-6
Engine Start/Stop Button................................................5-9
Transmission .........................................................5-14
Automatic Transmission .................................................5-14
Ecoshift dual clutch transmission ...............................5-18
Shift-Lock System ..........................................................5-24
Shift-Lock Release .........................................................5-25
Parking ...............................................................................5-25
Good Driving Practices ..................................................5-26
Braking system.....................................................5-28
Power Brakes ...................................................................5-28
Disc Brakes Wear Indicator ..........................................5-29
Parking Brake...................................................................5-29
Anti-lock Brake System (ABS) ....................................5-31
Electronic Stability Control (ESC) ................................5-33
Vehicle Stability Management (VSM).........................5-37
Hill-Start Assist Control (HAC) ....................................5-38
Downhill Brake Control (DBC) ......................................5-39
Good Braking Practices .................................................5-41
All wheel drive (AWD) .........................................5-42
AWD operation.................................................................5-43
Emergency precautions .................................................5-47
Drive mode integrated control system .............5-49
Blind spot detection system (BSD) ...................5-51
BSD (Blind Spot Detection) /
LCA (Lane Change Assist) .............................................5-52
RCTA (Rear Cross Traffic Alert) ..................................5-55
Autonomous emergency braking (AEB) ...........5-59
System setting and activation......................................5-59
AEB warning message and system control ..............5-61
AEB front radar sensor .................................................5-64
System malfunction ........................................................5-65
Limitations of the system .............................................5-67
Lane departure warning system (LDWS) .........5-71
LDWS Operation ..............................................................5-72
Warning Light and Message.........................................5-73
Limitations of the system .............................................5-73
Cruise control .......................................................5-75
Cruise Control operation ...............................................5-75
5Driving your vehicle
Page 26 of 642
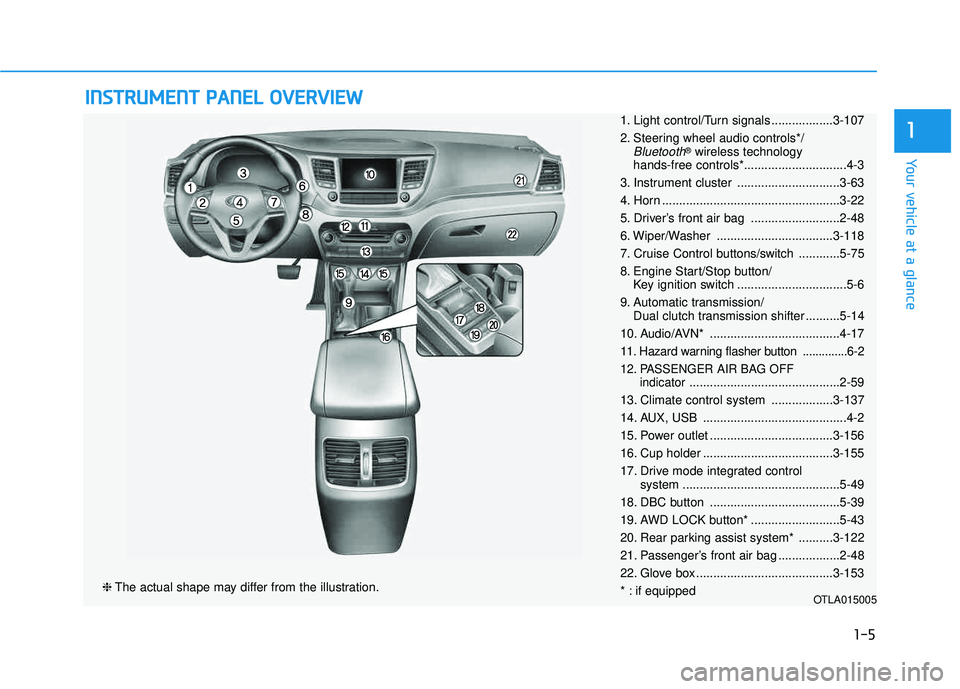
IINN SSTT RR UU MM EENN TT PP AA NN EELL OO VVEERR VV IIEE WW
❈ The actual shape may differ from the illustration.
1-5
Your vehicle at a glance
11. Light control/Turn signals ..................3-107
2. Steering wheel audio controls*/
Bluetooth®
wireless technology
hands-free controls*..............................4-3
3. Instrument cluster ..............................3-63
4. Horn ....................................................3-22
5. Driver’s front air bag ..........................2-48
6. Wiper/Washer ..................................3-118
7. Cruise Control buttons/switch ............5-75
8. Engine Start/Stop button/ Key ignition switch ................................5-6
9. Automatic transmission/ Dual clutch transmission shifter ..........5-14
10. Audio/AVN* ......................................4-17
11. Hazard warning flasher button ..............6-2
12. PASSENGER AIR BAG OFF indicator............................................2-59
13. Climate control system ..................3-137
14. AUX, USB ..........................................4-2
15. Power outlet ....................................3-156
16. Cup holder ......................................3-155
17. Drive mode integrated control system ..............................................5-49
18. DBC button ......................................5-39
19. AWD LOCK button* ..........................5-43
20. Rear parking assist system* ..........3-122
21. Passenger’s front air bag ..................2-48
22. Glove box ........................................3-153
* : if equipped
OTLA015005
Page 81 of 642
2-54
Safety system of your vehicle
10. Side pressure sensors
11. Driver's and front passenger’sseat belt buckle sensors
12. Emergency Fastening Device (EFD)
13. Occupant classification system
The SRSCM continually monitors all SRS components while the Engine
Start/Stop button is in the ON posi-
tion to determine if a crash impact is
severe enough to require air bag
deployment or pre-tensioner seat
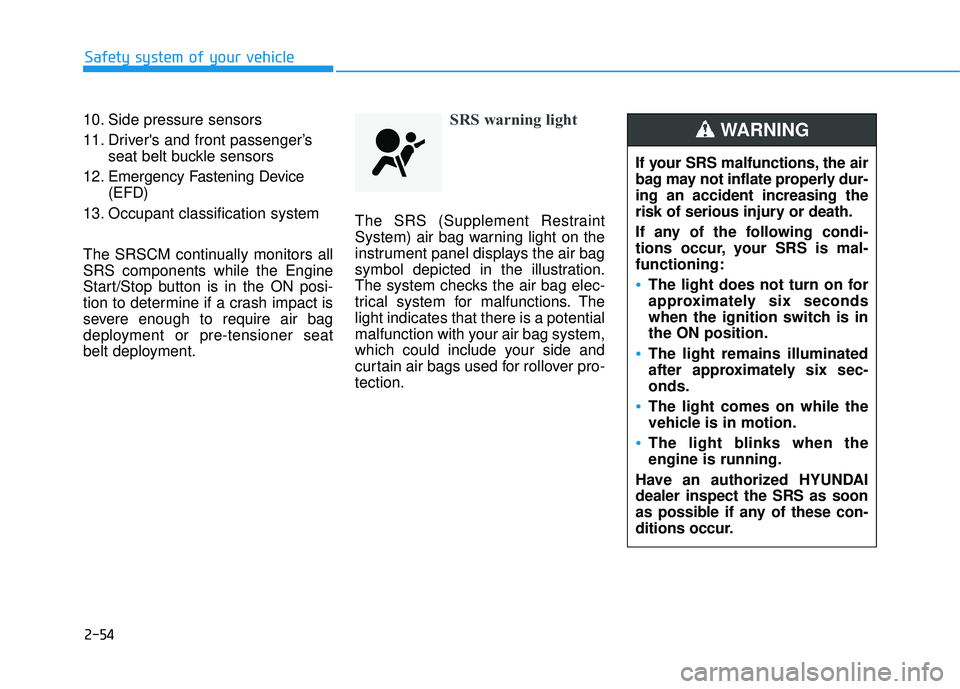
belt deployment.SRS warning light
The SRS (Supplement Restraint
System) air bag warning light on the
instrument panel displays the air bag
symbol depicted in the illustration.
The system checks the air bag elec-
trical system for malfunctions. Thelight indicates that there is a potential
malfunction with your air bag system,
which could include your side and
curtain air bags used for rollover pro-tection.
If your SRS malfunctions, the air
bag may not inflate properly dur-ing an accident increasing the
risk of serious injury or death.
If any of the following condi-
tions occur, your SRS is mal-functioning:
The light does not turn on for
approximately six seconds
when the ignition switch is inthe ON position.
The light remains illuminated
after approximately six sec-onds.
The light comes on while the
vehicle is in motion.
The light blinks when the engine is running.
Have an authorized HYUNDAIdealer inspect the SRS as soon
as possible if any of these con-
ditions occur.
WARNING
Page 96 of 642
2-69
Safety system of your vehicle
2
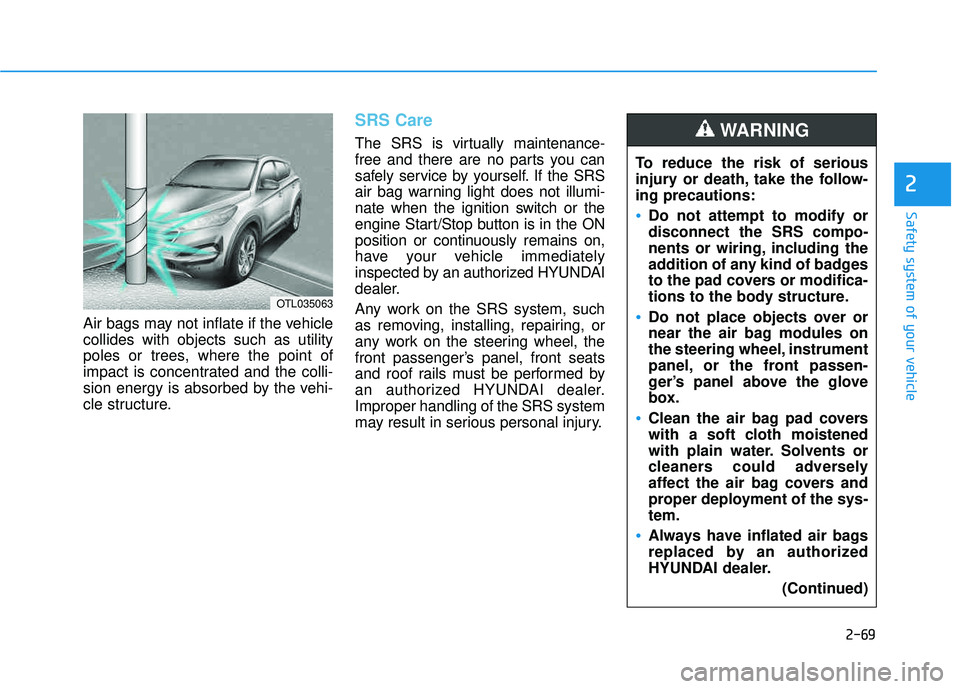
Air bags may not inflate if the vehicle collides with objects such as utility
poles or trees, where the point of
impact is concentrated and the colli-
sion energy is absorbed by the vehi-
cle structure.
SRS Care
The SRS is virtually maintenance-
free and there are no parts you can
safely service by yourself. If the SRS
air bag warning light does not illumi-
nate when the ignition switch or the
engine Start/Stop button is in the ON
position or continuously remains on,
have your vehicle immediately
inspected by an authorized HYUNDAI
dealer.
Any work on the SRS system, such
as removing, installing, repairing, or
any work on the steering wheel, the
front passenger’s panel, front seats
and roof rails must be performed by
an authorized HYUNDAI dealer.Improper handling of the SRS system
may result in serious personal injury.To reduce the risk of serious
injury or death, take the follow-ing precautions:
Do not attempt to modify or disconnect the SRS compo-
nents or wiring, including the
addition of any kind of badges
to the pad covers or modifica-
tions to the body structure.
Do not place objects over or
near the air bag modules on
the steering wheel, instrument
panel, or the front passen-
ger’s panel above the glove
box.
Clean the air bag pad covers
with a soft cloth moistened
with plain water. Solvents or
cleaners could adversely
affect the air bag covers and
proper deployment of the sys-tem.
Always have inflated air bags
replaced by an authorized
HYUNDAI dealer.
(Continued)
WARNING
OTL035063
Page 97 of 642
2-70
Safety system of your vehicle
Additional Safety Precautions
Passengers should not move out of
or change seats while the vehicle is
moving.A passenger who is not
wearing a seat belt during a crash or
emergency stop can be thrown
against the inside of the vehicle,
against other occupants, or be ejected
from the vehicle.
Do not use any accessories on seat belts. Devices claiming to improve
occupant comfort or reposition theseat belt can reduce the protection
provided by the seat belt and increase
the chance of serious injury in a crash
Do not modify the front seats. Modification of the front seats could
interfere with the operation of the sup-
plemental restraint system sensing
components or side air bags.
Do not place items under the front seats. Placing items under the front
seats could interfere with the opera-
tion of the supplemental restraint sys-
tem sensing components and wiring
harnesses.
Do not cause impact to the doors. Impact to the doors when the ignition
switch or the engine Start/Stop button
is in the ON position may cause the air
bags to inflate. Modifications to accommodate disabilities.
If you require modifica-
tion to your vehicle to accommodate
a disability, contact the HYUNDAICustomer Connect Center at 1-877-378-8727.
Adding equipment to or modify-
ing your air bag equipped vehicle
If you modify your vehicle by changing
your vehicle’s frame, bumper system,
front end or side sheet metal or ride
height, this may affect the operation of
your vehicle’s air bag system.
(Continued)
If components of the air bag
system must be discarded, or if
the vehicle must be scrapped,
certain safety precautions
must be observed. Consult an
authorized HYUNDAI dealer for
the necessary information.
Failure to follow these precau-tions could increase the risk of
personal injury.
Page 106 of 642
3-8
Convenient features of your vehicle
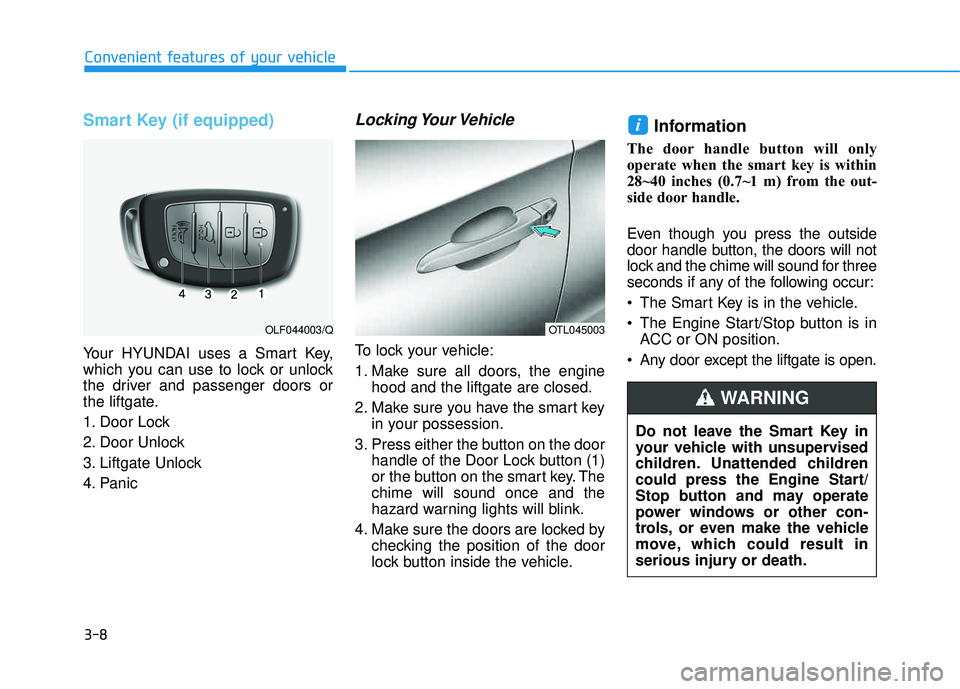
Smart Key (if equipped)
Your HYUNDAI uses a Smart Key,
which you can use to lock or unlock
the driver and passenger doors or
the liftgate.
1. Door Lock
2. Door Unlock
3. Liftgate Unlock
4. Panic
Locking Your Vehicle
To lock your vehicle:
1. Make sure all doors, the enginehood and the liftgate are closed.
2. Make sure you have the smart key in your possession.
3. Press either the button on the door handle of the Door Lock button (1)
or the button on the smart key. Thechime will sound once and the
hazard warning lights will blink.
4. Make sure the doors are locked by checking the position of the door
lock button inside the vehicle.
Information
The door handle button will only
operate when the smart key is within
28~40 inches (0.7~1 m) from the out-
side door handle.
Even though you press the outside
door handle button, the doors will not
lock and the chime will sound for three
seconds if any of the following occur:
The Smart Key is in the vehicle.
The Engine Start/Stop button is inACC or ON position.
Any door except the liftgate is open.
i
OTL045003OLF044003/Q
Do not leave the Smart Key in
your vehicle with unsupervised
children. Unattended children
could press the Engine Start/
Stop button and may operate
power windows or other con-
trols, or even make the vehicle
move, which could result in
serious injury or death.
WARNING
Page 108 of 642
3-10
Convenient features of your vehicle
Panic button
Press the Panic button (4) and hold
for more than one second. The horn
sounds and hazard warning lights
blink for about 30 seconds. To cancel
the panic mode, press any button on
the Smart Key.
Start-up
You can start the engine without
inserting the key.
For more information, refer to the
"Engine Start/Stop Button" sec-
tion in chapter 5.To prevent damaging the smart key:
Keep the smart key in a cool, dry
place to avoid damage or mal-
function. Exposure to moisture
or high temperature may cause
the internal circuit of the smart
key to malfunction which may
not be covered under warranty.
Avoid dropping or throwing the smart key.
Protect the smart key from extreme temperatures.
Mechanical key
If the Smart Key does not operate
normally, you can lock or unlock the
door by using the mechanical key.
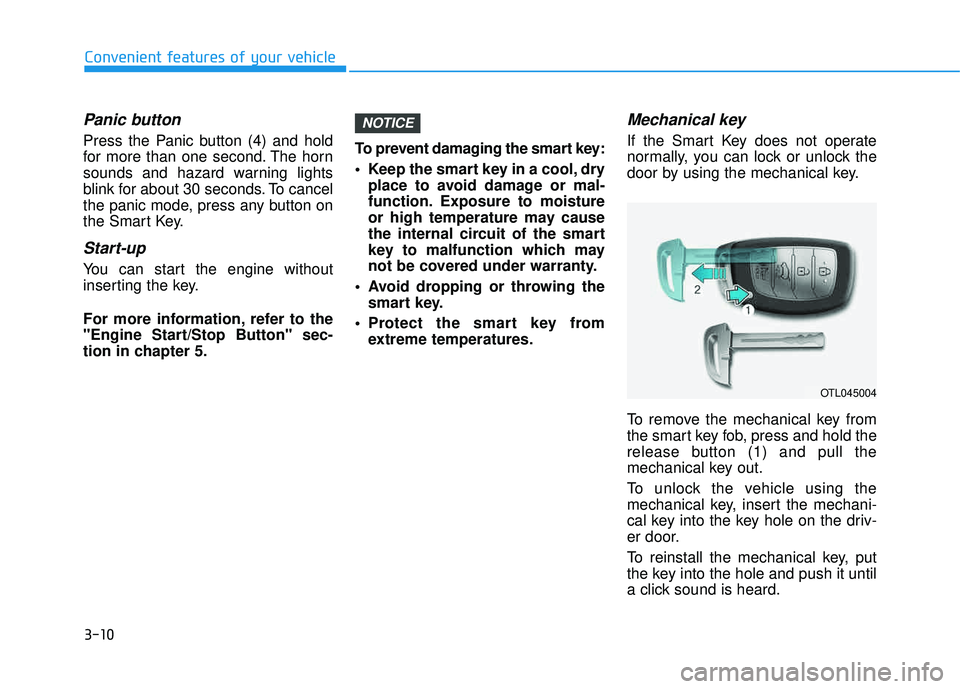
To remove the mechanical key from
the smart key fob, press and hold the
release button (1) and pull the
mechanical key out.
To unlock the vehicle using the
mechanical key, insert the mechani-
cal key into the key hole on the driv-
er door.
To reinstall the mechanical key, put
the key into the hole and push it until
a click sound is heard.
NOTICE
OTL045004
Page 163 of 642
3-65
Convenient features of your vehicle
3
Gauges
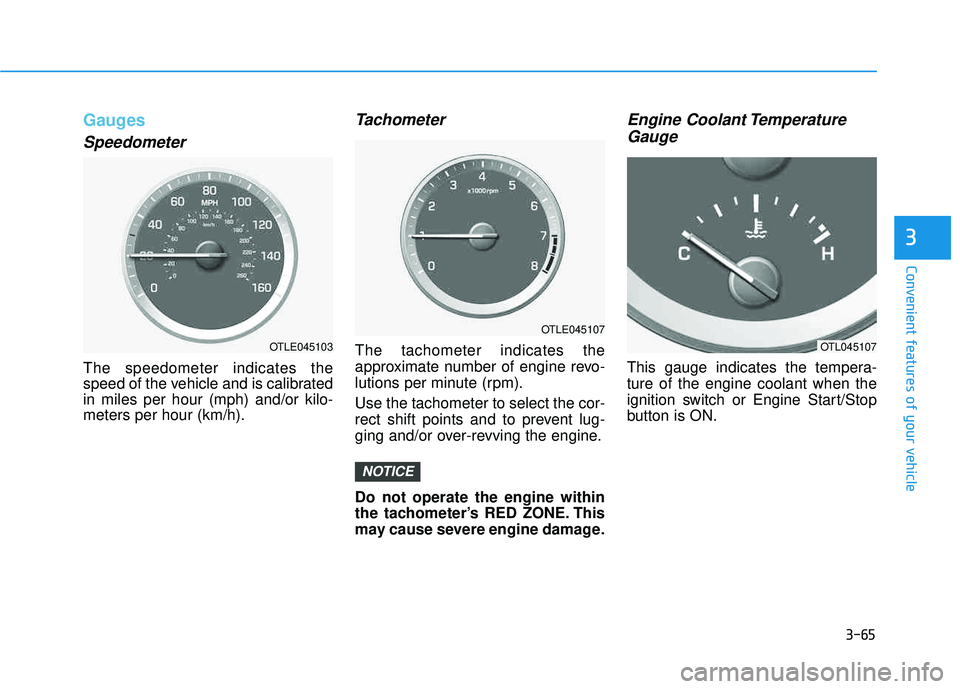
Speedometer
The speedometer indicates the
speed of the vehicle and is calibratedin miles per hour (mph) and/or kilo-meters per hour (km/h).
Tachometer
The tachometer indicates the
approximate number of engine revo-
lutions per minute (rpm). Use the tachometer to select the cor-
rect shift points and to prevent lug-
ging and/or over-revving the engine. Do not operate the engine within
the tachometer’s RED ZONE. This
may cause severe engine damage.
Engine Coolant TemperatureGauge
This gauge indicates the tempera-ture of the engine coolant when the
ignition switch or Engine Start/Stop
button is ON.
NOTICE
OTLE045103
OTLE045107
OTL045107
Page 171 of 642
3-73
Convenient features of your vehicle
3
Information Mode
Service Interval
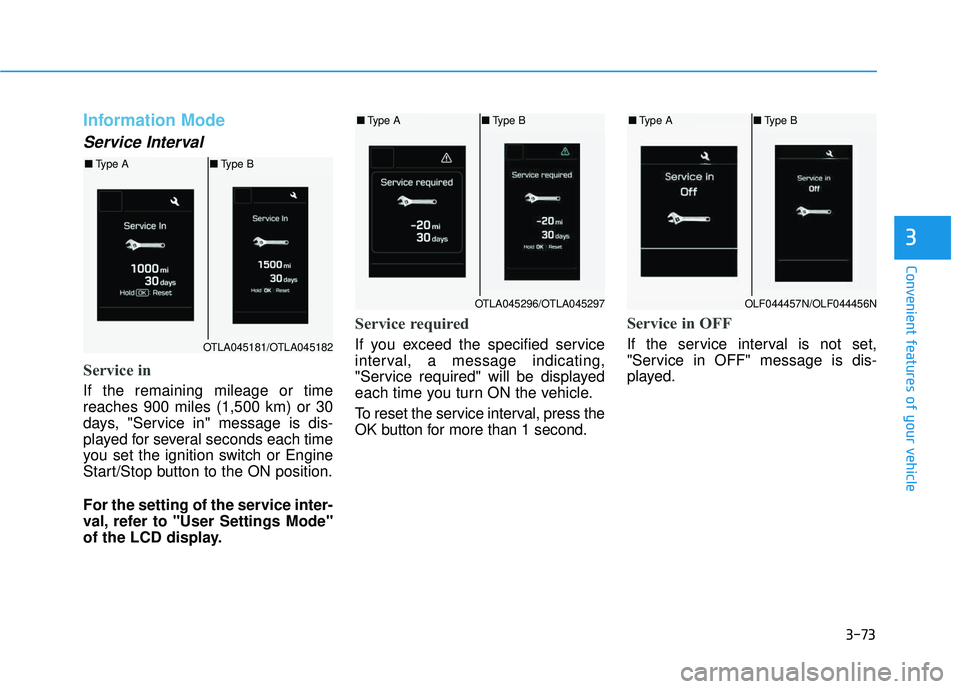
Service in
If the remaining mileage or time reaches 900 miles (1,500 km) or 30
days, "Service in" message is dis-
played for several seconds each time
you set the ignition switch or Engine
Start/Stop button to the ON position.
For the setting of the service inter-
val, refer to "User Settings Mode"
of the LCD display.
Service required
If you exceed the specified service
interval, a message indicating,
"Service required" will be displayed
each time you turn ON the vehicle.
To reset the service interval, press the
OK button for more than 1 second.
Service in OFF
If the service interval is not set,
"Service in OFF" message is dis-
played.OTLA045181/OTLA045182
■Type A ■Type B
OTLA045296/OTLA045297
■Type A ■Type B
OLF044457N/OLF044456N
■Type A ■Type B
Page 179 of 642
3-81
Convenient features of your vehicle
3
Warning Messages (if equipped)
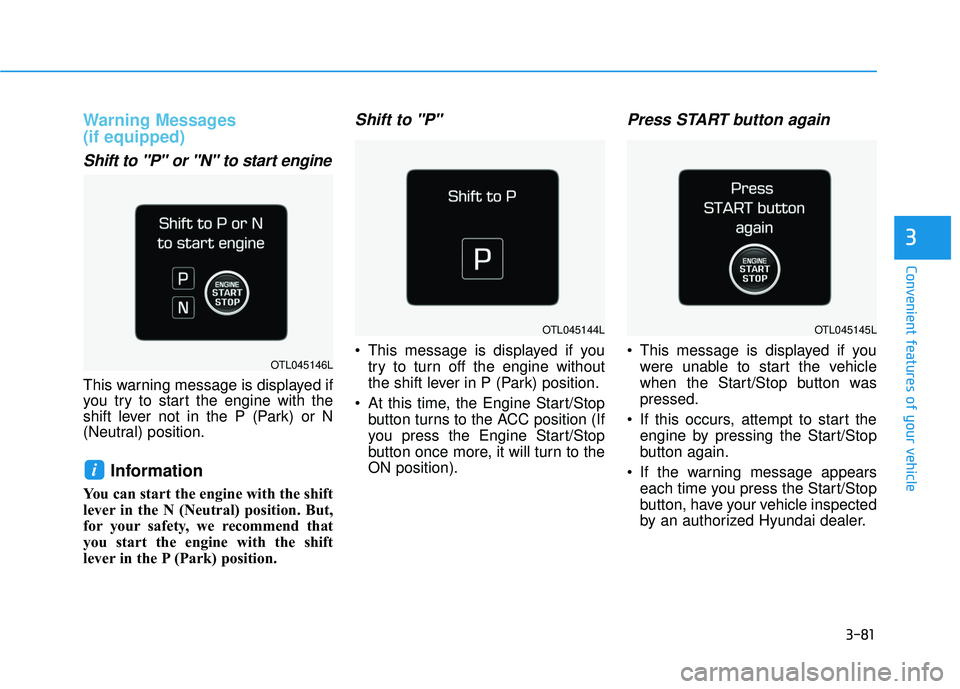
Shift to "P" or "N" to start engine
This warning message is displayed if
you try to start the engine with the
shift lever not in the P (Park) or N
(Neutral) position.
Information
You can start the engine with the shift
lever in the N (Neutral) position. But,
for your safety, we recommend that
you start the engine with the shift
lever in the P (Park) position.
Shift to "P"
This message is displayed if youtry to turn off the engine without
the shift lever in P (Park) position.
At this time, the Engine Start/Stop button turns to the ACC position (If
you press the Engine Start/Stop
button once more, it will turn to theON position).
Press START button again
This message is displayed if youwere unable to start the vehicle
when the Start/Stop button waspressed.
If this occurs, attempt to start the engine by pressing the Start/Stop
button again.
If the warning message appears each time you press the Start/Stop
button, have your vehicle inspected
by an authorized Hyundai dealer.
i
OTL045144L
OTL045146L
OTL045145L