steering wheel HYUNDAI VELOSTER 2015 Owner's Guide
[x] Cancel search | Manufacturer: HYUNDAI, Model Year: 2015, Model line: VELOSTER, Model: HYUNDAI VELOSTER 2015Pages: 384, PDF Size: 25 MB
Page 268 of 384
What to do in an emergency
22 6
It is possible that some tires, espe-
cially with larger punctures or dam-
age to the sidewall, cannot be sealed
completely.
Air pressure loss in the tire may
adversely affect tire performance.
For this reason, you should avoid
abrupt steering or other driving
maneuvers, especially if the vehicle
is heavily loaded or if a trailer is in
use.
The Tire Mobility Kit is not designed
or intended as a permanent tire
repair method and is to be used for
one tire only.
This instruction shows you step by
step how to temporarily seal the
puncture simply and reliably.
Read the section "Notes on the safe
use of the Tire Mobility Kit".Notes on the safe use of the Tire
Mobility Kit
Park your car at the side of the
road so that you can work with the
Tire Mobility Kit away from moving
traffic.
To be sure your vehicle will not
move, even when you're on fairly
level ground, always set your park-
ing brake.
Only use the Tire Mobility Kit for
sealing/inflation passenger car
tires. Only punctured areas located
within the tread region of the tire
can be sealed using the tire mobil-
ity kit.
Do not use on motorcycles, bicy-
cles or any other type of tires.
When the tire and wheel are dam-
aged, do not use Tire Mobility Kit
for your safety.
Use of the Tire Mobility Kit may not
be effective for tire damage larger
than approximately 0.24 in (6 mm).
Please contact the nearest
HYUNDAI dealership if the tire
cannot be made roadworthy with
the Tire Mobility Kit. Do not use the Tire Mobility Kit if a
tire is severely damaged by driving
run flat or with insufficient air pres-
sure.
Do not remove any foreign objects
such as nails or screws that have
penetrated the tire.
Provided the car is outdoors, leave
the engine running. Otherwise
operating the compressor may
eventually drain the car battery.
Never leave the Tire Mobility Kit
unattended while it is being used.
Do not leave the compressor run-
ning for more than 10 min. at a time
or it may overheat.
Do not use the Tire Mobility Kit if
the ambient temperature is below -
22°F (-30°C).
Page 270 of 384
What to do in an emergency
24 6
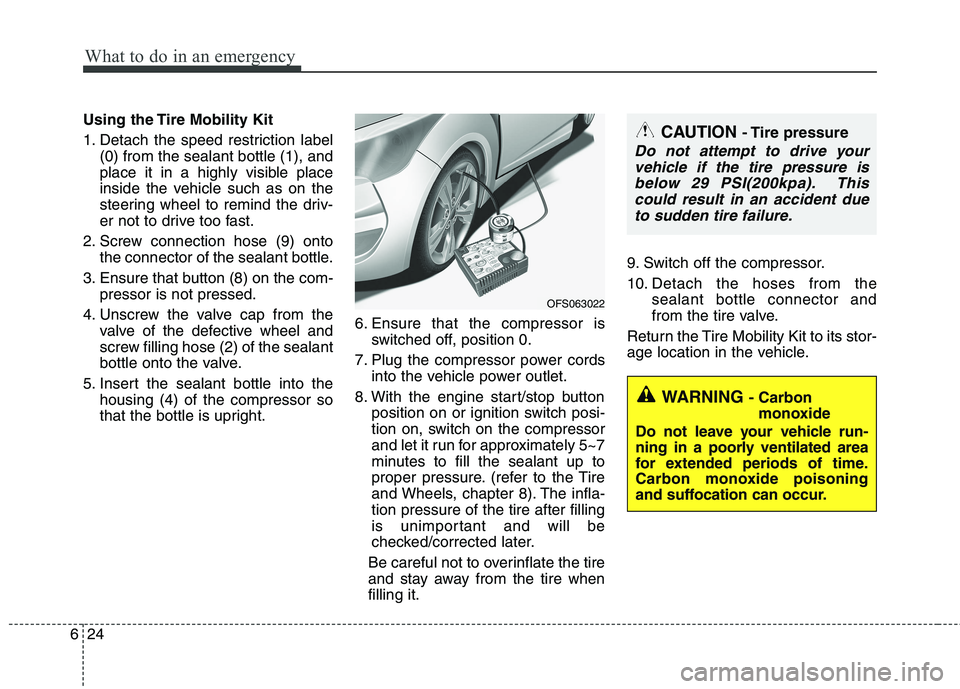
Using the Tire Mobility Kit
1. Detach the speed restriction label
(0) from the sealant bottle (1), and
place it in a highly visible place
inside the vehicle such as on the
steering wheel to remind the driv-
er not to drive too fast.
2. Screw connection hose (9) onto
the connector of the sealant bottle.
3. Ensure that button (8) on the com-
pressor is not pressed.
4. Unscrew the valve cap from the
valve of the defective wheel and
screw filling hose (2) of the sealant
bottle onto the valve.
5. Insert the sealant bottle into the
housing (4) of the compressor so
that the bottle is upright.6. Ensure that the compressor is
switched off, position 0.
7. Plug the compressor power cords
into the vehicle power outlet.
8. With the engine start/stop button
position on or ignition switch posi-
tion on, switch on the compressor
and let it run for approximately 5~7
minutes to fill the sealant up to
proper pressure. (refer to the Tire
and Wheels, chapter 8). The infla-
tion pressure of the tire after filling
is unimportant and will be
checked/corrected later.
Be careful not to overinflate the tire
and stay away from the tire when
filling it.9. Switch off the compressor.
10. Detach the hoses from the
sealant bottle connector and
from the tire valve.
Return the Tire Mobility Kit to its stor-
age location in the vehicle.CAUTION - Tire pressure
Do not attempt to drive your
vehicle if the tire pressure is
below 29 PSI(200kpa). This
could result in an accident due
to sudden tire failure.
WARNING - Carbon
monoxide
Do not leave your vehicle run-
ning in a poorly ventilated area
for extended periods of time.
Carbon monoxide poisoning
and suffocation can occur.
OFS063022
Page 275 of 384
629
What to do in an emergency
If towing service is not available in an
emergency, your vehicle may be tem-
porarily towed using a cable or chain
secured to the emergency towing hook
attached to the front (or under the rear)
of the vehicle.
Use extreme caution when towing the
vehicle. A driver must be in the vehicle to
steer it and operate the brakes.
Towing in this manner may be done only
on hard-surfaced roads for a short dis-
tance and at low speeds. Also, the
wheels, axles, power train, steering and
brakes must all be in good condition.
Do not use the tow hooks to pull a vehi-
cle out of mud, sand or other condi-
tions from which the vehicle cannot be
driven out under its own power.
Avoid towing a vehicle heavier than the
vehicle doing the towing.
The drivers of both vehicles should
communicate with each other frequent-
ly. Before emergency towing, check that
the hook is not broken or damaged.
Fasten the towing cable or chain
securely to the hook.
Do not jerk the hook. Apply steady and
even force.
To avoid damaging the hook, do not
pull from the side or at a vertical angle.
Always pull straight ahead.CAUTION
Attach a towing strap to the tow
hook.
Using a portion of the vehicle
other than the tow hooks for tow-
ing may damage the body of your
vehicle.
Use only a cable or chain specifi-
cally intended for use in towing
vehicles. Securely fasten the
cable or chain to the towing hook
provided.WARNING
Use extreme caution when towing
the vehicle.
Avoid sudden starts or erratic
driving maneuvers which would
place excessive stress on the
emergency towing hook and tow-
ing cable or chain. The hook and
towing cable or chain may break
and cause serious injury or dam-
age.
If the disabled vehicle cannot be
moved, do not forcibly continue
the towing. Contact an authorized
Hyundai dealer or a commercial
tow truck service for assistance.
Tow the vehicle as straight ahead
as possible.
Keep away from the vehicle dur-
ing towing.
Page 276 of 384
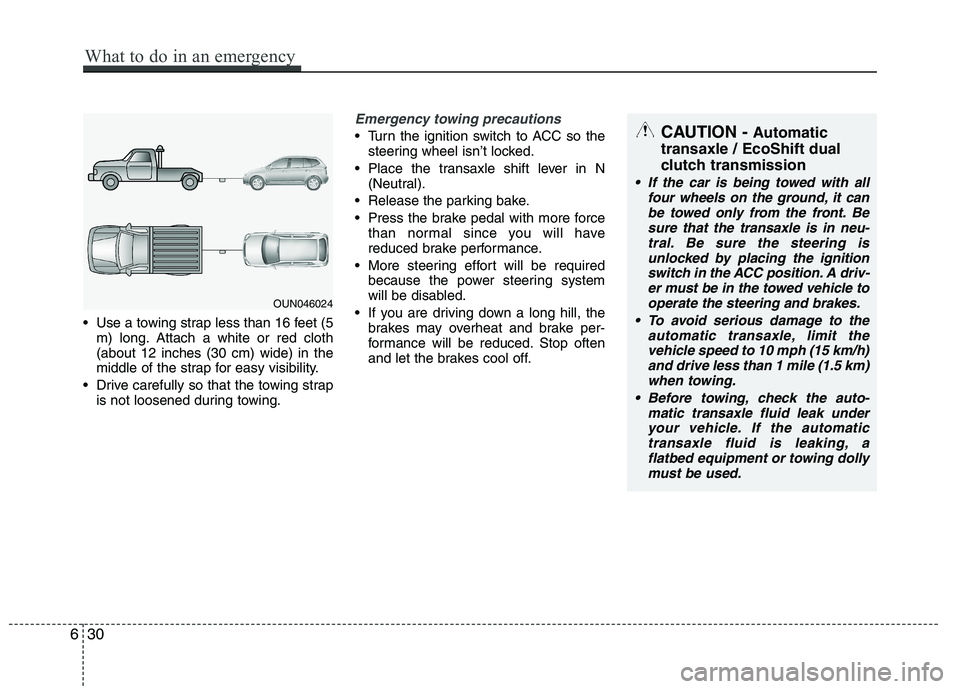
Use a towing strap less than 16 feet (5
m) long. Attach a white or red cloth
(about 12 inches (30 cm) wide) in the
middle of the strap for easy visibility.
Drive carefully so that the towing strap
is not loosened during towing.
Emergency towing precautions
Turn the ignition switch to ACC so the
steering wheel isn’t locked.
Place the transaxle shift lever in N
(Neutral).
Release the parking bake.
Press the brake pedal with more force
than normal since you will have
reduced brake performance.
More steering effort will be required
because the power steering system
will be disabled.
If you are driving down a long hill, the
brakes may overheat and brake per-
formance will be reduced. Stop often
and let the brakes cool off.CAUTION - Automatic
transaxle / EcoShift dual
clutch transmission
If the car is being towed with all
four wheels on the ground, it can
be towed only from the front. Be
sure that the transaxle is in neu-
tral. Be sure the steering is
unlocked by placing the ignition
switch in the ACC position. A driv-
er must be in the towed vehicle to
operate the steering and brakes.
To avoid serious damage to the
automatic transaxle, limit the
vehicle speed to 10 mph (15 km/h)
and drive less than 1 mile (1.5 km)
when towing.
Before towing, check the auto-
matic transaxle fluid leak under
your vehicle. If the automatic
transaxle fluid is leaking, a
flatbed equipment or towing dolly
must be used.
OUN046024
630
What to do in an emergency
Page 281 of 384
75
Maintenance
While operating your vehicle:
Note any changes in the sound of the
exhaust or any smell of exhaust fumes
in the vehicle.
Check for vibrations in the steering
wheel. Notice any increased steering
effort or looseness in the steering
wheel, or change in its straight-ahead
position.
Notice if your vehicle constantly turns
slightly or “pulls” to one side when trav-
eling on smooth, level road.
When stopping, listen and check for
unusual sounds, pulling to one side,
increased brake pedal travel or “hard-
to-push” brake pedal.
If any slipping or changes in the oper-
ation of your transaxle occurs, check
the transaxle fluid level.
Check Automatic transaxle / EcoShift
dual clutch transmission P (Park) func-
tion.
Check parking brake.
Check for fluid leaks under your vehicle
(water dripping from the air conditioning
system during or after use is normal).
At least monthly:
Check coolant level in the engine
coolant reservoir.
Check the operation of all exterior
lights, including the stoplights, turn sig-
nals and hazard warning flashers.
Check the inflation pressures of all
tires including the spare.
At least twice a year
(i.e., every Spring and Fall):
Check radiator, heater and air condi-
tioning hoses for leaks or damage.
Check windshield washer spray and
wiper operation. Clean wiper blades
with clean cloth dampened with wash-
er fluid.
Check headlight alignment.
Check muffler, exhaust pipes, shields
and clamps.
Check the lap/shoulder belts for wear
and function.
Check for worn tires and loose wheel
lug nuts.
At least once a year:
Clean body and door drain holes.
Lubricate door hinges and checks, and
hood hinges.
Lubricate door and hood locks and
latches.
Lubricate door rubber weatherstrips.
Check the air conditioning system.
Inspect and lubricate Automatic
transaxle / EcoShift dual clutch trans-
mission linkage and controls.
Clean battery and terminals.
Check the brake fluid level.
Page 306 of 384
Maintenance
30 7
Parking brake
Inspect the parking brake system includ-
ing the parking brake pedal and cables.
Brake discs, pads, calipers and
rotors
Check the pads for excessive wear, discs
for run out and wear, and calipers for fluid
leakage.
Exhaust pipe and muffler
Visually inspect the exhaust pipes, muf-
fler and hangers for cracks, deterioration,
or damage. Start the engine and listen
carefully for any exhaust gas leakage.
Tighten connections or replace parts as
necessary.
Suspension mounting bolts
Check the suspension connections for
looseness or damage. Retighten to the
specified torque.
Steering gear box, linkage &
boots/lower arm ball joint
With the vehicle stopped and engine off,
check for excessive free-play in the
steering wheel.
Check the linkage for bends or damage.
Check the dust boots and ball joints for
deterioration, cracks, or damage.
Replace any damaged parts.
Drive shafts and boots
Check the drive shafts, boots and clamps
for cracks, deterioration, or damage.
Replace any damaged parts and, if nec-
essary, repack the grease.
Air conditioning refrigerant
Check the air conditioning lines and con-
nections for leakage and damage.
Page 329 of 384
753
Maintenance
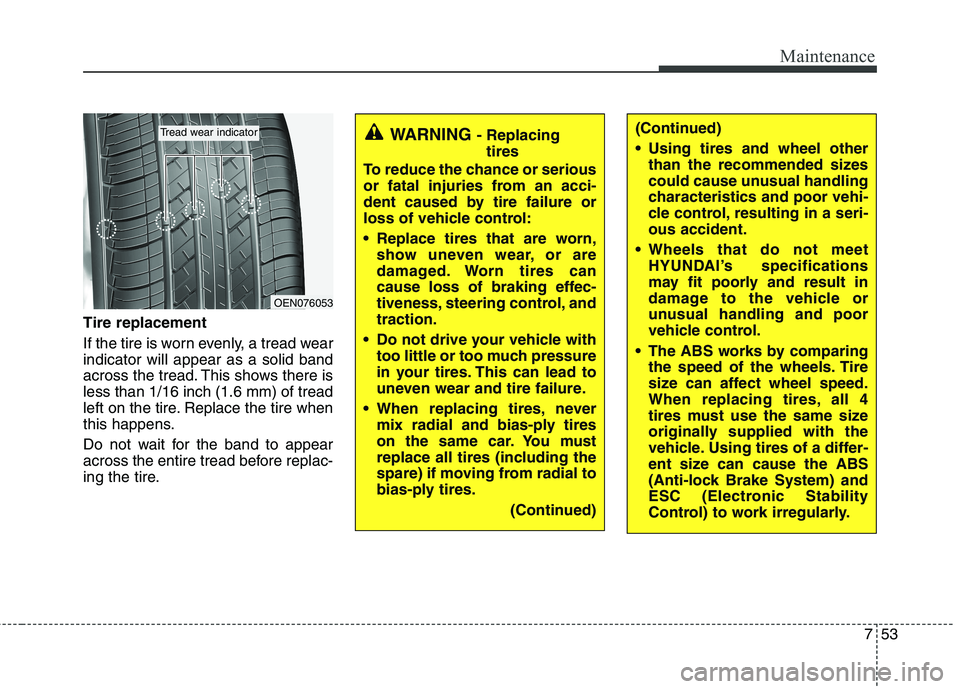
Tire replacement
If the tire is worn evenly, a tread wear
indicator will appear as a solid band
across the tread. This shows there is
less than 1/16 inch (1.6 mm) of tread
left on the tire. Replace the tire when
this happens.
Do not wait for the band to appear
across the entire tread before replac-
ing the tire.
OEN076053
Tread wear indicatorWARNING - Replacing
tires
To reduce the chance or serious
or fatal injuries from an acci-
dent caused by tire failure or
loss of vehicle control:
Replace tires that are worn,
show uneven wear, or are
damaged. Worn tires can
cause loss of braking effec-
tiveness, steering control, and
traction.
Do not drive your vehicle with
too little or too much pressure
in your tires. This can lead to
uneven wear and tire failure.
When replacing tires, never
mix radial and bias-ply tires
on the same car. You must
replace all tires (including the
spare) if moving from radial to
bias-ply tires.
(Continued)(Continued)
Using tires and wheel other
than the recommended sizes
could cause unusual handling
characteristics and poor vehi-
cle control, resulting in a seri-
ous accident.
Wheels that do not meet
HYUNDAI’s specifications
may fit poorly and result in
damage to the vehicle or
unusual handling and poor
vehicle control.
The ABS works by comparing
the speed of the wheels. Tire
size can affect wheel speed.
When replacing tires, all 4
tires must use the same size
originally supplied with the
vehicle. Using tires of a differ-
ent size can cause the ABS
(Anti-lock Brake System) and
ESC (Electronic Stability
Control) to work irregularly.
Page 344 of 384
Maintenance
68 7
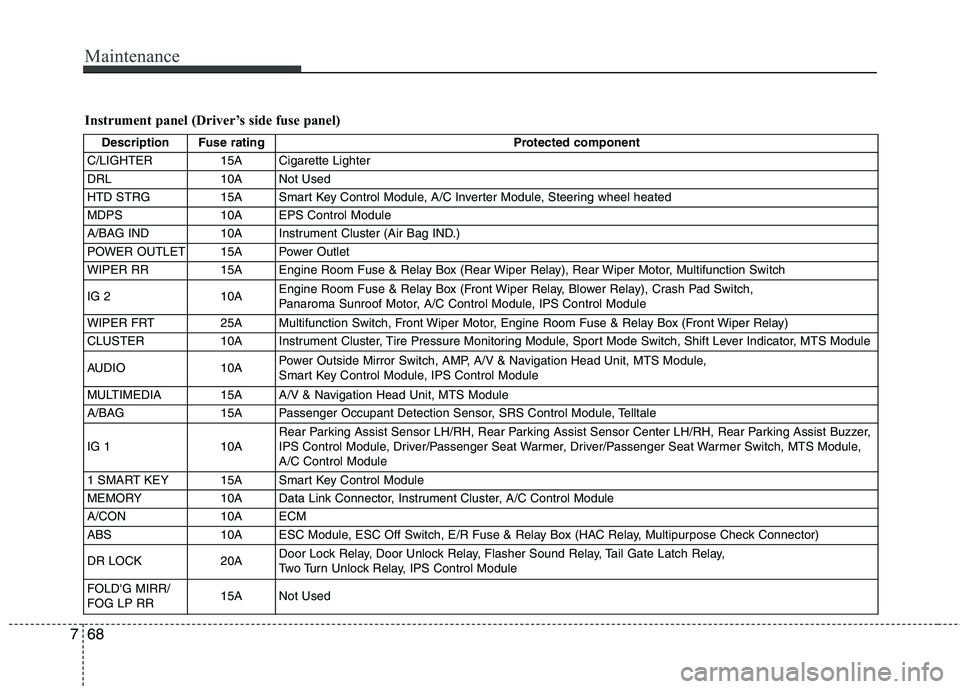
Instrument panel (Driver’s side fuse panel)
Description Fuse rating Protected component
C/LIGHTER 15A Cigarette Lighter
DRL 10A Not Used
HTD STRG 15A Smart Key Control Module, A/C Inverter Module, Steering wheel heated
MDPS 10A EPS Control Module
A/BAG IND 10A Instrument Cluster (Air Bag IND.)
POWER OUTLET 15A Power Outlet
WIPER RR 15A Engine Room Fuse & Relay Box (Rear Wiper Relay), Rear Wiper Motor, Multifunction Switch
IG 2 10AEngine Room Fuse & Relay Box (Front Wiper Relay, Blower Relay), Crash Pad Switch,
Panaroma Sunroof Motor, A/C Control Module, IPS Control Module
WIPER FRT 25A Multifunction Switch, Front Wiper Motor, Engine Room Fuse & Relay Box (Front Wiper Relay)
CLUSTER 10A Instrument Cluster, Tire Pressure Monitoring Module, Sport Mode Switch, Shift Lever Indicator, MTS Module
AUDIO 10APower Outside Mirror Switch, AMP, A/V & Navigation Head Unit, MTS Module,
Smart Key Control Module, IPS Control Module
MULTIMEDIA 15A A/V & Navigation Head Unit, MTS Module
A/BAG 15A Passenger Occupant Detection Sensor, SRS Control Module, Telltale
IG 1 10ARear Parking Assist Sensor LH/RH, Rear Parking Assist Sensor Center LH/RH, Rear Parking Assist Buzzer,
IPS Control Module, Driver/Passenger Seat Warmer, Driver/Passenger Seat Warmer Switch, MTS Module,
A/C Control Module
1 SMART KEY 15A Smart Key Control Module
MEMORY 10A Data Link Connector, Instrument Cluster, A/C Control Module
A/CON 10A ECM
ABS 10A ESC Module, ESC Off Switch, E/R Fuse & Relay Box (HAC Relay, Multipurpose Check Connector)
DR LOCK 20ADoor Lock Relay, Door Unlock Relay, Flasher Sound Relay, Tail Gate Latch Relay,
Two Turn Unlock Relay, IPS Control Module
FOLD'G MIRR/
FOG LP RR15A Not Used
Page 361 of 384
785
Maintenance
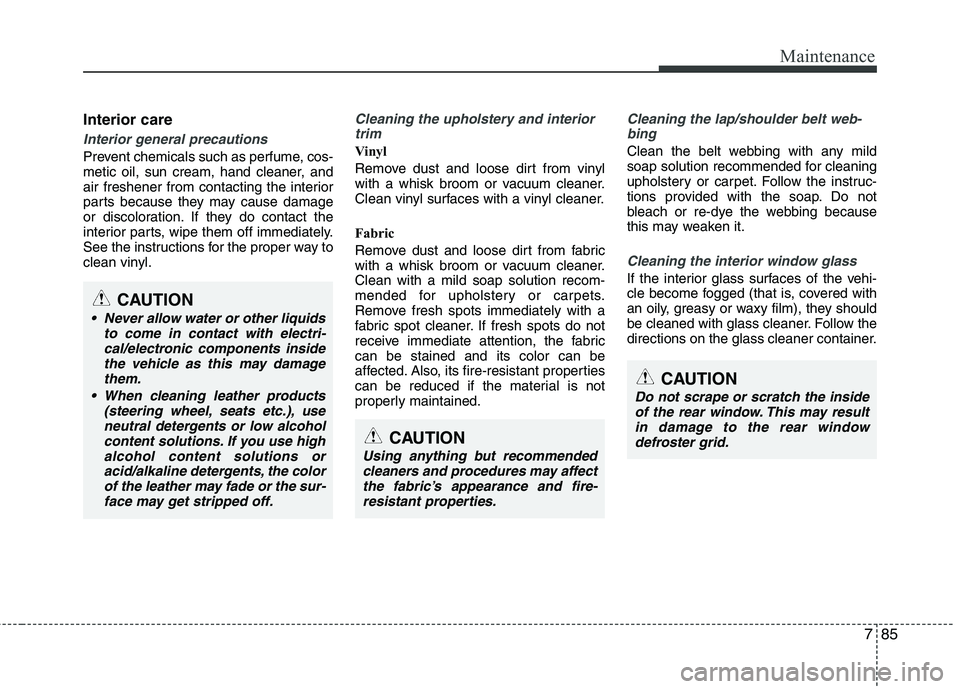
Interior care
Interior general precautions
Prevent chemicals such as perfume, cos-
metic oil, sun cream, hand cleaner, and
air freshener from contacting the interior
parts because they may cause damage
or discoloration. If they do contact the
interior parts, wipe them off immediately.
See the instructions for the proper way to
clean vinyl.
Cleaning the upholstery and interior
trim
Vinyl
Remove dust and loose dirt from vinyl
with a whisk broom or vacuum cleaner.
Clean vinyl surfaces with a vinyl cleaner.
Fabric
Remove dust and loose dirt from fabric
with a whisk broom or vacuum cleaner.
Clean with a mild soap solution recom-
mended for upholstery or carpets.
Remove fresh spots immediately with a
fabric spot cleaner. If fresh spots do not
receive immediate attention, the fabric
can be stained and its color can be
affected. Also, its fire-resistant properties
can be reduced if the material is not
properly maintained.
Cleaning the lap/shoulder belt web-
bing
Clean the belt webbing with any mild
soap solution recommended for cleaning
upholstery or carpet. Follow the instruc-
tions provided with the soap. Do not
bleach or re-dye the webbing because
this may weaken it.
Cleaning the interior window glass
If the interior glass surfaces of the vehi-
cle become fogged (that is, covered with
an oily, greasy or waxy film), they should
be cleaned with glass cleaner. Follow the
directions on the glass cleaner container.
CAUTION
Never allow water or other liquids
to come in contact with electri-
cal/electronic components inside
the vehicle as this may damage
them.
When cleaning leather products
(steering wheel, seats etc.), use
neutral detergents or low alcohol
content solutions. If you use high
alcohol content solutions or
acid/alkaline detergents, the color
of the leather may fade or the sur-
face may get stripped off.
CAUTION
Using anything but recommended
cleaners and procedures may affect
the fabric’s appearance and fire-
resistant properties.
CAUTION
Do not scrape or scratch the inside
of the rear window. This may result
in damage to the rear window
defroster grid.
Page 383 of 384
I7
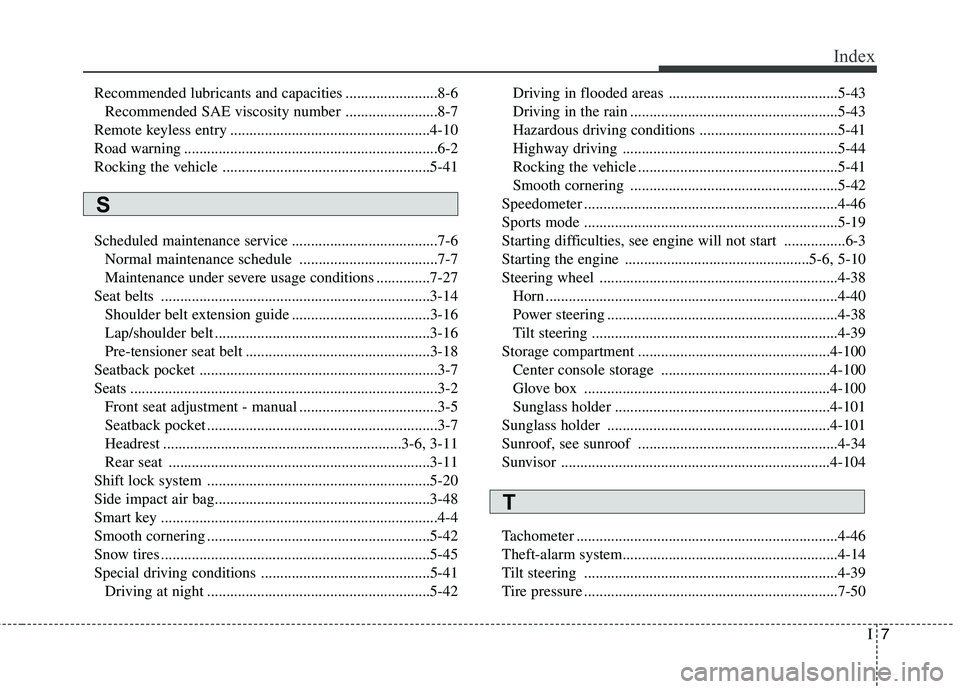
Index
Recommended lubricants and capacities ........................8-6
Recommended SAE viscosity number ........................8-7
Remote keyless entry ....................................................4-10
Road warning ..................................................................6-2
Rocking the vehicle ......................................................5-41
Scheduled maintenance service ......................................7-6
Normal maintenance schedule ....................................7-7
Maintenance under severe usage conditions ..............7-27
Seat belts ......................................................................3-14
Shoulder belt extension guide ....................................3-16
Lap/shoulder belt ........................................................3-16
Pre-tensioner seat belt ................................................3-18
Seatback pocket ..............................................................3-7
Seats ................................................................................3-2
Front seat adjustment - manual ....................................3-5
Seatback pocket ............................................................3-7
Headrest ..............................................................3-6, 3-11
Rear seat ....................................................................3-11
Shift lock system ..........................................................5-20
Side impact air bag........................................................3-48
Smart key ........................................................................4-4
Smooth cornering ..........................................................5-42
Snow tires ......................................................................5-45
Special driving conditions ............................................5-41
Driving at night ..........................................................5-42Driving in flooded areas ............................................5-43
Driving in the rain ......................................................5-43
Hazardous driving conditions ....................................5-41
Highway driving ........................................................5-44
Rocking the vehicle ....................................................5-41
Smooth cornering ......................................................5-42
Speedometer ..................................................................4-46
Sports mode ..................................................................5-19
Starting difficulties, see engine will not start ................6-3
Starting the engine ................................................5-6, 5-10
Steering wheel ..............................................................4-38
Horn ............................................................................4-40
Power steering ............................................................4-38
Tilt steering ................................................................4-39
Storage compartment ..................................................4-100
Center console storage ............................................4-100
Glove box ................................................................4-100
Sunglass holder ........................................................4-101
Sunglass holder ..........................................................4-101
Sunroof, see sunroof ....................................................4-34
Sunvisor ......................................................................4-104
Tachometer ....................................................................4-46
Theft-alarm system........................................................4-14
Tilt steering ..................................................................4-39
Tire pressure ..................................................................7-50
S
T