HYUNDAI VELOSTER N 2022 Owners Manual
Manufacturer: HYUNDAI, Model Year: 2022, Model line: VELOSTER N, Model: HYUNDAI VELOSTER N 2022Pages: 446, PDF Size: 9.71 MB
Page 181 of 446
3-103
Convenient features of your vehicle
3
Defogging logic
To reduce the probability of fogging
up the inside of the windshield, the
air intake or air conditioning are con-
trolled automatically according to
certain conditions such as or
positions. To cancel or reset the
defogging logic, do the following.
Manual climate control system
1. Turn the ignition switch to the ON
position.
2. Press the defroster button ( ).
3. Press the air intake control button
at least 5 times within 3 seconds.
The LED indicator on the A/C ON
button will blink 3 times to indicate
that the defogging logic has been
disabled.
Repeat the steps again to re-enable
the defogging logic.
If the battery has been discharged or
disconnected, it resets to the defog
logic status.
Automatic climate control system
1. Turn the ignition switch to the ON
position.
2. Press the defroster button ( ).
3. While pressing the air conditioning
button (A/C), press the air intake
control button at least 5 times with-
in 3 seconds.
The Automatic Temperature Control
information screen will blink 3 times
to indicate that the defogging logic
has been disabled.
Repeat the steps again to re-enable
the defogging logic.
If the battery has been discharged or
disconnected, it resets to the defog
logic status.
Rear Window Defroster
To prevent damage to the rear
window defroster conducting ele-
ments bonded to the inside sur-
face of the rear window, never use
sharp instruments or window
cleaners containing abrasives to
clean the window.
If you want to defrost and defog
the front windshield, refer to the
"Windshield Defrosting and
Defogging" section in this chapter.
NOTICE
Page 182 of 446
3-104
Convenient features of your vehicle
The defroster heats the window to
remove frost, fog and thin ice from
the interior and exterior of the rear
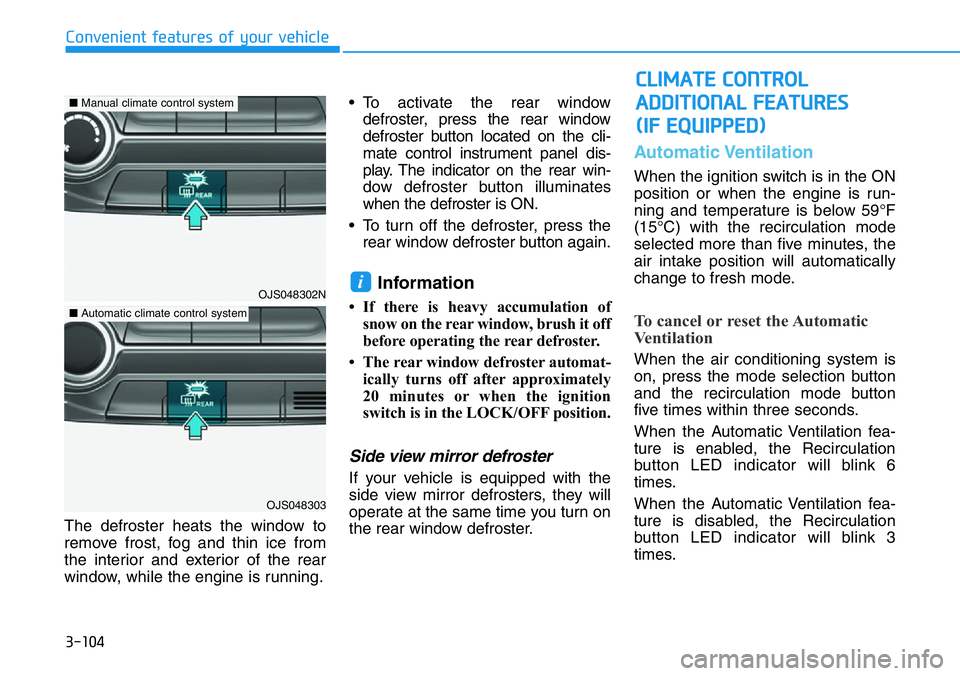
window, while the engine is running.• To activate the rear window
defroster, press the rear window
defroster button located on the cli-
mate control instrument panel dis-
play. The indicator on the rear win-
dow defroster button illuminates
when the defroster is ON.
• To turn off the defroster, press the
rear window defroster button again.
Information
• If there is heavy accumulation of
snow on the rear window, brush it off
before operating the rear defroster.
• The rear window defroster automat-
ically turns off after approximately
20 minutes or when the ignition
switch is in the LOCK/OFF position.
Side view mirror defroster
If your vehicle is equipped with the
side view mirror defrosters, they will
operate at the same time you turn on
the rear window defroster.
Automatic Ventilation
When the ignition switch is in the ON
position or when the engine is run-
ning and temperature is below 59°F
(15°C) with the recirculation mode
selected more than five minutes, the
air intake position will automatically
change to fresh mode.
To cancel or reset the Automatic
Ventilation
When the air conditioning system is
on, press the mode selection button
and the recirculation mode button
five times within three seconds.
When the Automatic Ventilation fea-
ture is enabled, the Recirculation
button LED indicator will blink 6
times.
When the Automatic Ventilation fea-
ture is disabled, the Recirculation
button LED indicator will blink 3
times.
i
CLIMATE CONTROL
ADDITIONAL FEATURES
(IF EQUIPPED)
OJS048302N
OJS048303
■Manual climate control system
■Automatic climate control system
Page 183 of 446
3-105
Convenient features of your vehicle
3
STORAGE COMPARTMENT
To avoid possible theft, do not
leave valuables in the storage
compartments.
Center Console Storage
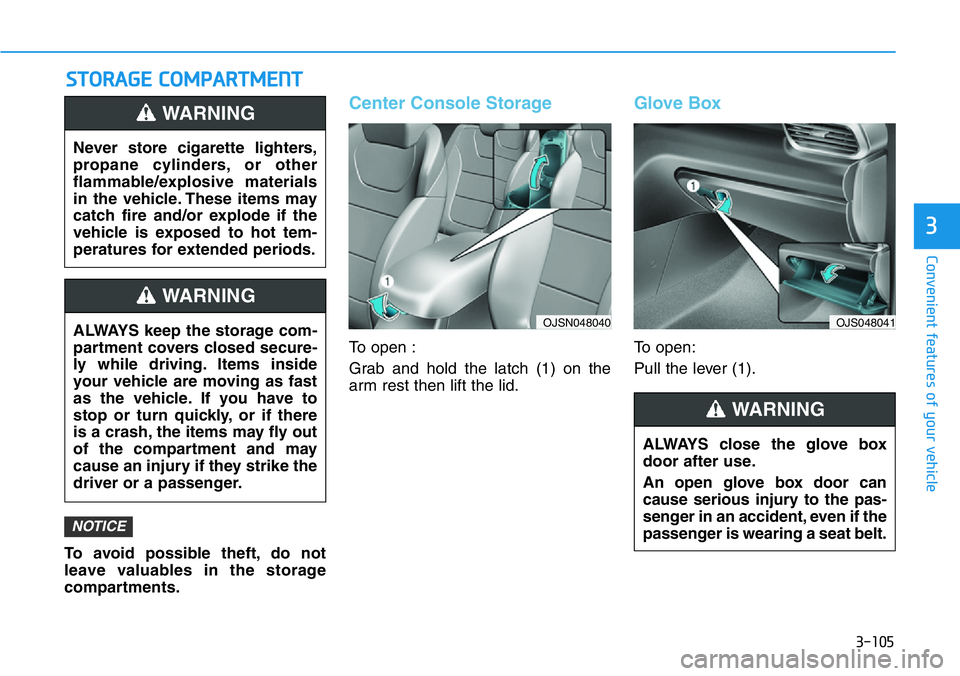
To open :
Grab and hold the latch (1) on the
arm rest then lift the lid.
Glove Box
To open:
Pull the lever (1).
NOTICE
Never store cigarette lighters,
propane cylinders, or other
flammable/explosive materials
in the vehicle. These items may
catch fire and/or explode if the
vehicle is exposed to hot tem-
peratures for extended periods.
WARNING
ALWAYS keep the storage com-
partment covers closed secure-
ly while driving. Items inside
your vehicle are moving as fast
as the vehicle. If you have to
stop or turn quickly, or if there
is a crash, the items may fly out
of the compartment and may
cause an injury if they strike the
driver or a passenger.
WARNING
ALWAYS close the glove box
door after use.
An open glove box door can
cause serious injury to the pas-
senger in an accident, even if the
passenger is wearing a seat belt.
WARNING
OJSN048040 OJS048041
Page 184 of 446
3-106
Convenient features of your vehicle
Sunglass Holder
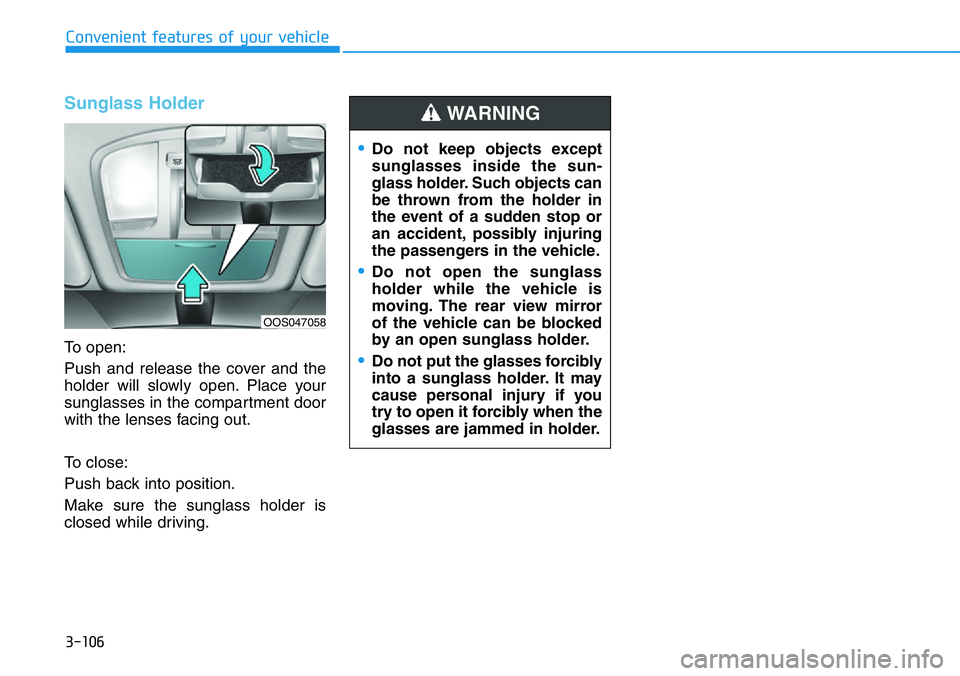
To open:
Push and release the cover and the
holder will slowly open. Place your
sunglasses in the compartment door
with the lenses facing out.
To close:
Push back into position.
Make sure the sunglass holder is
closed while driving.
•Do not keep objects except
sunglasses inside the sun-
glass holder. Such objects can
be thrown from the holder in
the event of a sudden stop or
an accident, possibly injuring
the passengers in the vehicle.
•Do not open the sunglass
holder while the vehicle is
moving. The rear view mirror
of the vehicle can be blocked
by an open sunglass holder.
•Do not put the glasses forcibly
into a sunglass holder. It may
cause personal injury if you
try to open it forcibly when the
glasses are jammed in holder.
WARNING
OOS047058
Page 185 of 446
3-107
Convenient features of your vehicle
3
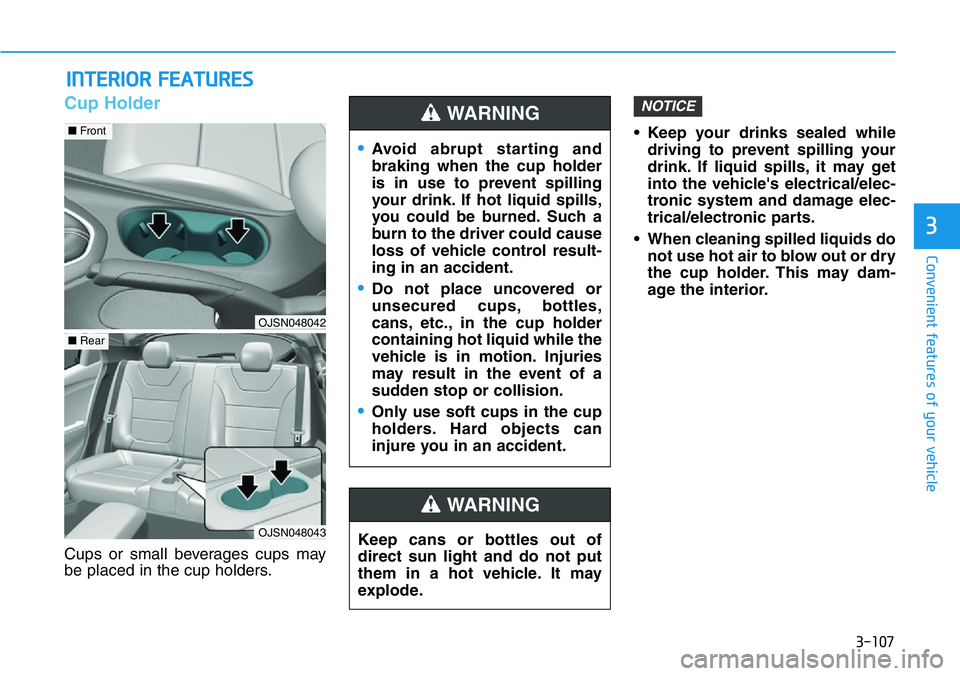
Cup Holder
Cups or small beverages cups may
be placed in the cup holders.• Keep your drinks sealed while
driving to prevent spilling your
drink. If liquid spills, it may get
into the vehicle's electrical/elec-
tronic system and damage elec-
trical/electronic parts.
• When cleaning spilled liquids do
not use hot air to blow out or dry
the cup holder. This may dam-
age the interior.
NOTICE
INTERIOR FEATURES
Keep cans or bottles out of
direct sun light and do not put
them in a hot vehicle. It may
explode.
WARNING
Page 186 of 446
3-108
Convenient features of your vehicle
Sunvisor
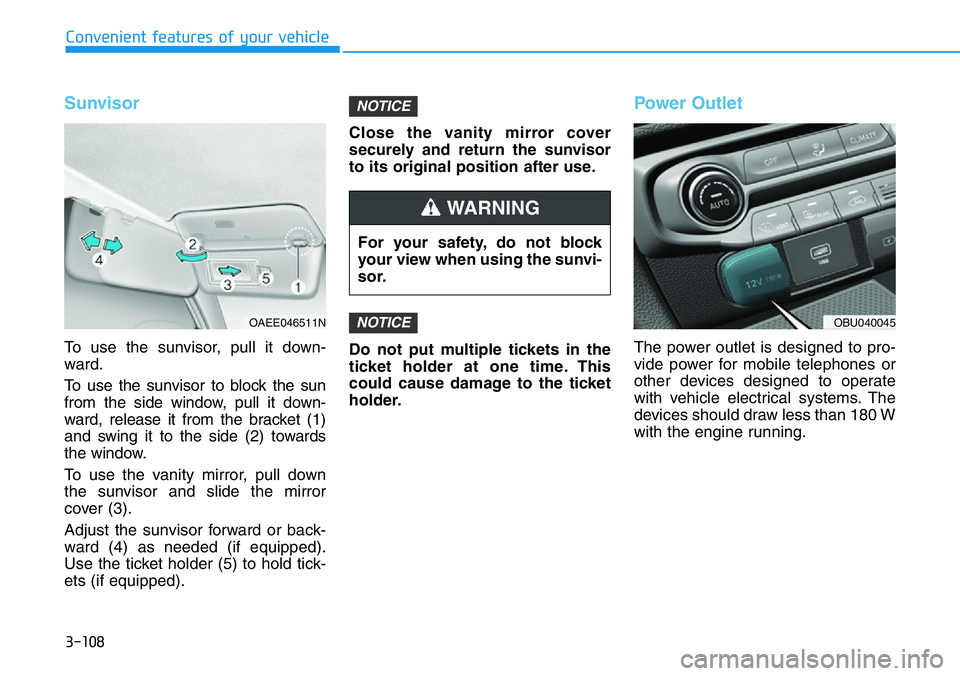
To use the sunvisor, pull it down-
ward.
To use the sunvisor to block the sun
from the side window, pull it down-
ward, release it from the bracket (1)
and swing it to the side (2) towards
the window.
To use the vanity mirror, pull down
the sunvisor and slide the mirror
cover (3).
Adjust the sunvisor forward or back-
ward (4) as needed (if equipped).
Use the ticket holder (5) to hold tick-
ets (if equipped).Close the vanity mirror cover
securely and return the sunvisor
to its original position after use.
Do not put multiple tickets in the
ticket holder at one time. This
could cause damage to the ticket
holder.
Power Outlet
The power outlet is designed to pro-
vide power for mobile telephones or
other devices designed to operate
with vehicle electrical systems. The
devices should draw less than 180 W
with the engine running.
NOTICE
NOTICE
For your safety, do not block
your view when using the sunvi-
sor.
WARNING
OAEE046511NOBU040045
Page 187 of 446
3-109
Convenient features of your vehicle
3
To prevent damage to the Power
Outlets :
• Use the power outlet only when
the engine is running and
remove the accessory plug after
use. Using the accessory plug
for prolonged periods of time
with the engine off could cause
the battery to discharge.
• Only use 12V electric acces-
sories which are less than 180 W
in electric capacity.
• Adjust the air-conditioner or
heater to the lowest operating
level when using the power outlet.
• Close the cover when not in use.• Some electronic devices can
cause electronic interference
when plugged into a vehicle's
power outlet. These devices may
cause excessive audio static
and malfunctions in other elec-
tronic systems or devices used
in your vehicle.
• Push the plug in as far as it will
go. If good contact is not made,
the plug may overheat and the
fuse may open.
• Plug in battery equipped electri-
cal/electronic devices with
reverse current protection. The
current from the battery may
flow into the vehicle's electri-
cal/electronic system and cause
system malfunction.
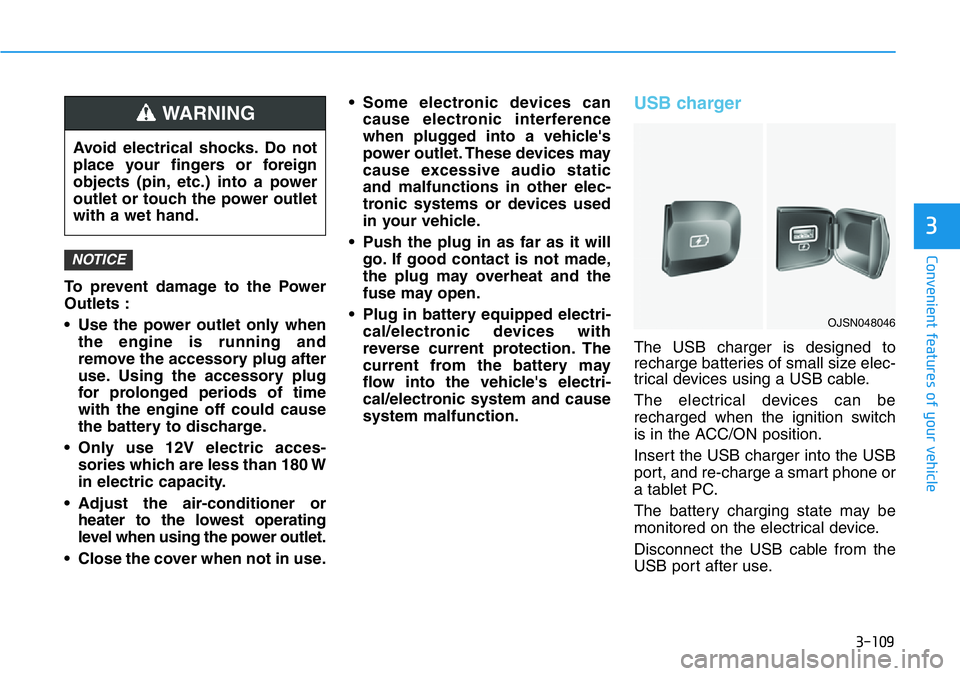
USB charger
The USB charger is designed to
recharge batteries of small size elec-
trical devices using a USB cable.
The electrical devices can be
recharged when the ignition switch
is in the ACC/ON position.
Insert the USB charger into the USB
port, and re-charge a smart phone or
a tablet PC.
The battery charging state may be
monitored on the electrical device.
Disconnect the USB cable from the
USB port after use.
NOTICE
Avoid electrical shocks. Do not
place your fingers or foreign
objects (pin, etc.) into a power
outlet or touch the power outlet
with a wet hand.
WARNING
OJSN048046
Page 188 of 446
3-110
Convenient features of your vehicle
• A smart phone or a tablet PC may
get warmer during the re-charging
process. It does not indicate any
malfunction with the charging sys-
tem.
• A smart phone or a tablet PC,
which adopts a different re-charg-
ing method, may not be properly
re-charged. In this case, use an
exclusive charger of your device.
• The charging terminal is only to
recharge a device. Do not use the
charging terminal either to turn ON
an audio or to play media in the
infotainment system.
Clock
Vehicles with display audio
system
Select the [SETUP]button on the
audio system ➟Select [Date/Time].
• Set time: Set the time displayed on
the audio screen.
• Time format: Choose between 12-
hour and 24-hour time formats.
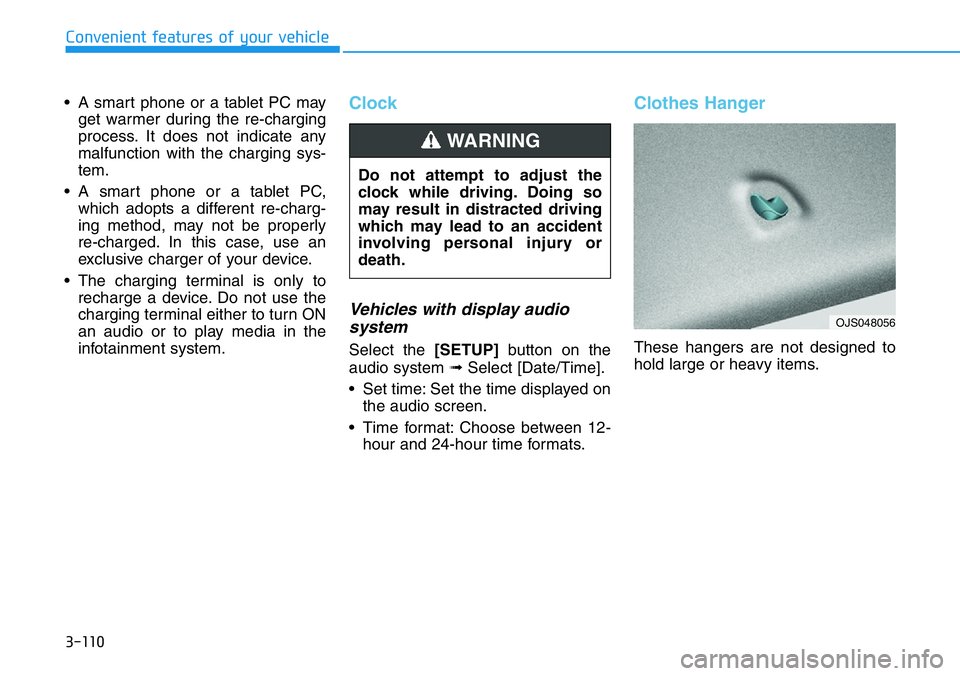
Clothes Hanger
These hangers are not designed to
hold large or heavy items. Do not attempt to adjust the
clock while driving. Doing so
may result in distracted driving
which may lead to an accident
involving personal injury or
death.
WARNING
OJS048056
Page 189 of 446
3-111
Convenient features of your vehicle
3
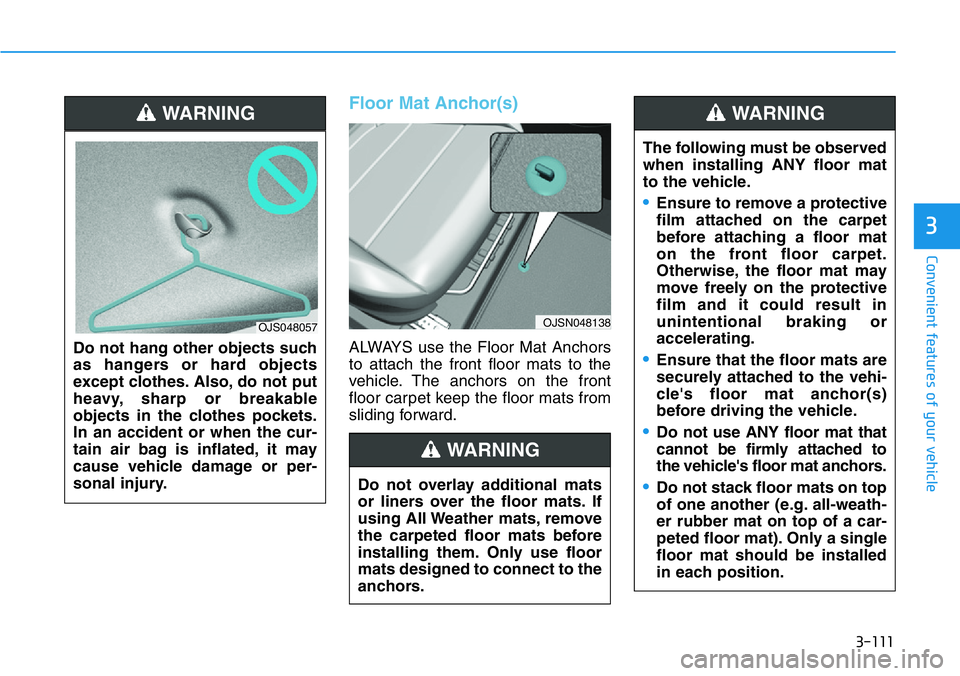
Floor Mat Anchor(s)
ALWAYS use the Floor Mat Anchors
to attach the front floor mats to the
vehicle. The anchors on the front
floor carpet keep the floor mats from
sliding forward. Do not hang other objects such
as hangers or hard objects
except clothes. Also, do not put
heavy, sharp or breakable
objects in the clothes pockets.
In an accident or when the cur-
tain air bag is inflated, it may
cause vehicle damage or per-
sonal injury.
OJS048057
Do not overlay additional mats
or liners over the floor mats. If
using All Weather mats, remove
the carpeted floor mats before
installing them. Only use floor
mats designed to connect to the
anchors.
WARNING
OJSN048138
WARNING
The following must be observed
when installing ANY floor mat
to the vehicle.
•Ensure to remove a protective
film attached on the carpet
before attaching a floor mat
on the front floor carpet.
Otherwise, the floor mat may
move freely on the protective
film and it could result in
unintentional braking or
accelerating.
•Ensure that the floor mats are
securely attached to the vehi-
cle's floor mat anchor(s)
before driving the vehicle.
•Do not use ANY floor mat that
cannot be firmly attached to
the vehicle's floor mat anchors.
•Do not stack floor mats on top
of one another (e.g. all-weath-
er rubber mat on top of a car-
peted floor mat). Only a single
floor mat should be installed
in each position.
WARNING
Page 190 of 446
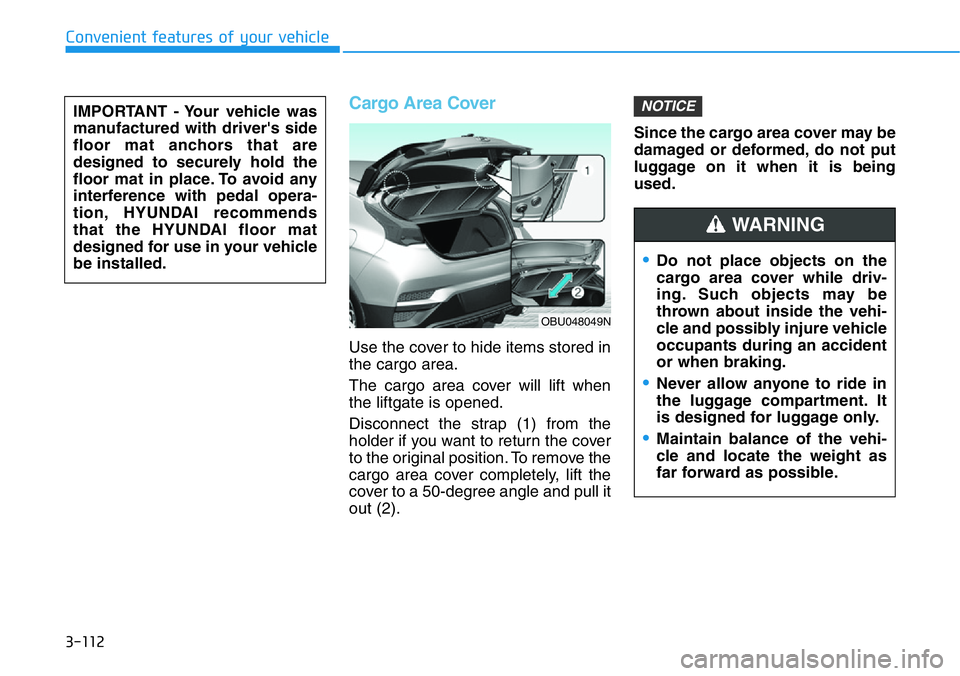
Cargo Area Cover
Use the cover to hide items stored in
the cargo area.
The cargo area cover will lift when
the liftgate is opened.
Disconnect the strap (1) from the
holder if you want to return the cover
to the original position. To remove the
cargo area cover completely, lift the
cover to a 50-degree angle and pull it
out (2).Since the cargo area cover may be
damaged or deformed, do not put
luggage on it when it is being
used.
NOTICE
•Do not place objects on the
cargo area cover while driv-
ing. Such objects may be
thrown about inside the vehi-
cle and possibly injure vehicle
occupants during an accident
or when braking.
•Never allow anyone to ride in
the luggage compartment. It
is designed for luggage only.
•Maintain balance of the vehi-
cle and locate the weight as
far forward as possible.
WARNING
OBU048049N
IMPORTANT - Your vehicle was
manufactured with driver's side
floor mat anchors that are
designed to securely hold the
floor mat in place. To avoid any
interference with pedal opera-
tion, HYUNDAI recommends
that the HYUNDAI floor mat
designed for use in your vehicle
be installed.
Convenient features of your vehicle
3-112