parking brake HYUNDAI VERACRUZ 2007 Owners Manual
[x] Cancel search | Manufacturer: HYUNDAI, Model Year: 2007, Model line: VERACRUZ, Model: HYUNDAI VERACRUZ 2007Pages: 441, PDF Size: 7.99 MB
Page 16 of 441
17
Introduction
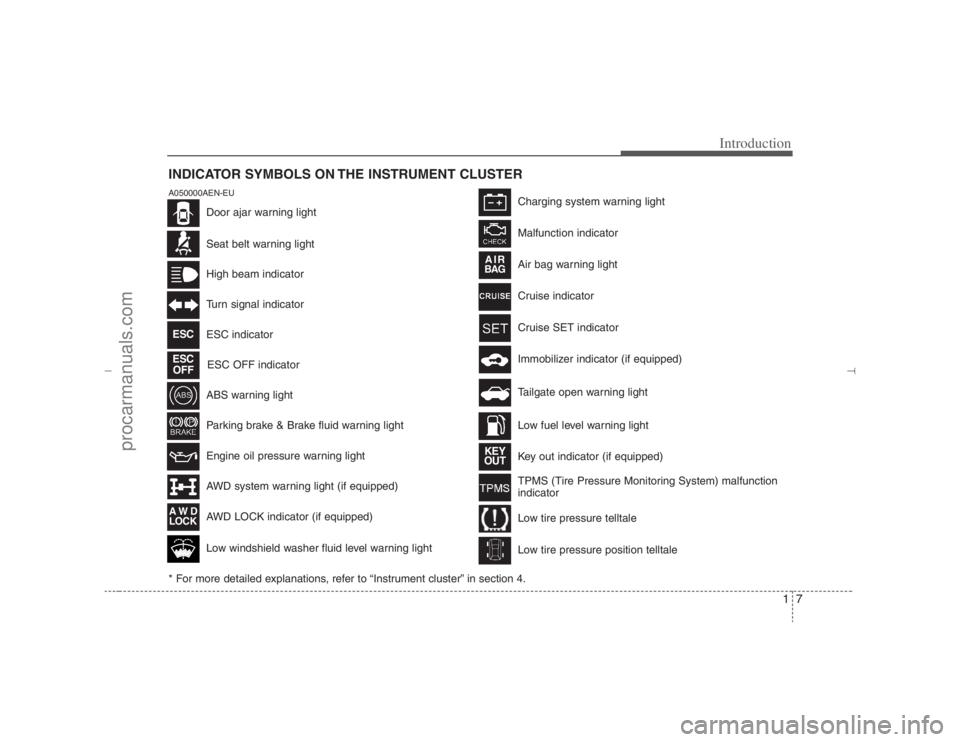
INDICATOR SYMBOLS ON THE INSTRUMENT CLUSTER
Seat belt warning lightHigh beam indicatorTurn signal indicatorABS warning lightParking brake & Brake fluid warning lightEngine oil pressure warning lightAWD system warning light (if equipped)
AWD LOCK indicator (if equipped) ESC indicator
ESC OFF indicator
Malfunction indicator
Air bag warning lightCruise indicator Cruise SET indicatorImmobilizer indicator (if equipped) Tailgate open warning light Low fuel level warning light
* For more detailed explanations, refer to “Instrument cluster” in section 4.Charging system warning light
Low windshield washer fluid level warning light
A050000AEN-EU
Door ajar warning light
Key out indicator (if equipped)
KEY
OUT
AW D
LOCK
AIRBAG
ESCESC
OFF
TPMS (Tire Pressure Monitoring System) malfunction
indicator Low tire pressure telltaleLow tire pressure position telltale
EN hma 1.qxd 11/27/2006 6:32 PM Page 7
procarmanuals.com
Page 18 of 441
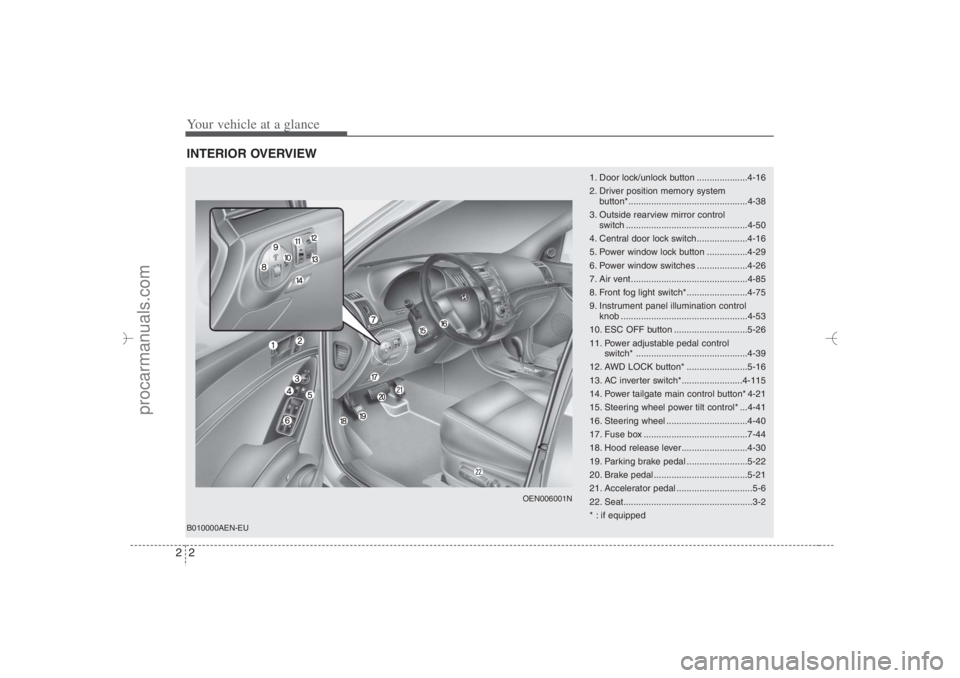
Your vehicle at a glance2 2INTERIOR OVERVIEW
1. Door lock/unlock button ....................4-16
2. Driver position memory system
button*...............................................4-38
3. Outside rearview mirror control
switch ................................................4-50
4. Central door lock switch....................4-16
5. Power window lock button ................4-29
6. Power window switches ....................4-26
7. Air vent ..............................................4-85
8. Front fog light switch*........................4-75
9. Instrument panel illumination control
knob ..................................................4-53
10. ESC OFF button .............................5-26
11. Power adjustable pedal control
switch* ............................................4-39
12. AWD LOCK button* ........................5-16
13. AC inverter switch*........................4-115
14. Power tailgate main control button* 4-21
15. Steering wheel power tilt control* ...4-41
16. Steering wheel ................................4-40
17. Fuse box .........................................7-44
18. Hood release lever ..........................4-30
19. Parking brake pedal ........................5-22
20. Brake pedal .....................................5-21
21. Accelerator pedal ..............................5-6
22. Seat...................................................3-2
* : if equipped
OEN006001N
B010000AEN-EU
EN hma 2.qxd 11/27/2006 5:09 PM Page 2
procarmanuals.com
Page 19 of 441
23
Your vehicle at a glance
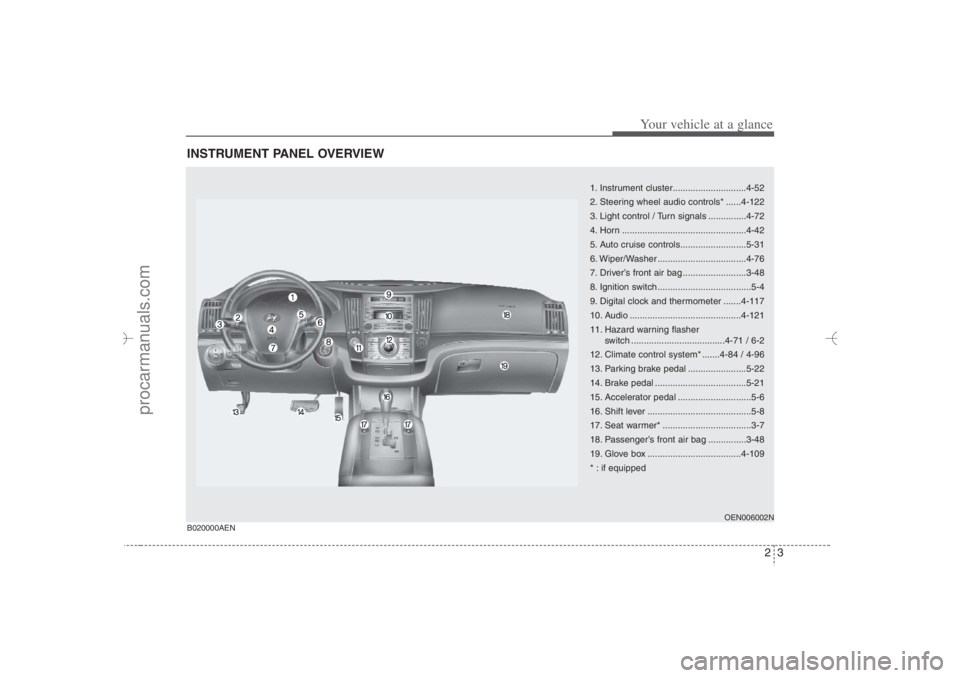
INSTRUMENT PANEL OVERVIEW
1. Instrument cluster.............................4-52
2. Steering wheel audio controls* ......4-122
3. Light control / Turn signals ...............4-72
4. Horn .................................................4-42
5. Auto cruise controls..........................5-31
6. Wiper/Washer ...................................4-76
7. Driver’s front air bag .........................3-48
8. Ignition switch .....................................5-4
9. Digital clock and thermometer .......4-117
10. Audio ............................................4-121
11. Hazard warning flasher
switch .....................................4-71 / 6-2
12. Climate control system* .......4-84 / 4-96
13. Parking brake pedal .......................5-22
14. Brake pedal ....................................5-21
15. Accelerator pedal .............................5-6
16. Shift lever .........................................5-8
17. Seat warmer* ...................................3-7
18. Passenger’s front air bag ...............3-48
19. Glove box .....................................4-109
* : if equipped
OEN006002N
B020000AEN
EN hma 2.qxd 11/27/2006 5:10 PM Page 3
procarmanuals.com
Page 37 of 441
317
Safety features of your vehicle
CAUTION
- Rear seat belts
When returning the rear (2nd and/or
3rd row) seatbacks to the upright
position, remember to return the
rear shoulder belts to their proper
position. Routing the seat belt web-
bing through the rear seat belt
guides will help keep the belts from
being trapped behind or under the
seats.
CAUTION -
Damaging rear
seat belt buckles
When you fold the rear (2nd and/or
3rd row) seatback, insert the buckle
in the pocket between the rear seat-
back and cushion. Doing so can
prevent the buckle from being dam-
aged by the rear seatback.
WARNING
- Cargo
Cargo should always be secured to
prevent it from being thrown about
the vehicle in a collision and caus-
ing injury to the vehicle occupants.
Do not place objects in the rear
(2nd and/or 3rd row) seats, since
they cannot be properly secured
and may hit the front seat occu-
pants in a collision.
WARNING -
Cargo loading
Make sure the engine is off, the
automatic transaxle is in P (Park)
and the parking brake is securely
applied whenever loading or
unloading cargo. Failure to take
these steps may allow the vehicle
to move if the shift lever is inadver-
tently moved to another position.
EN hma 3.qxd 11/27/2006 5:15 PM Page 17
procarmanuals.com
Page 97 of 441
415
Features of your vehicle
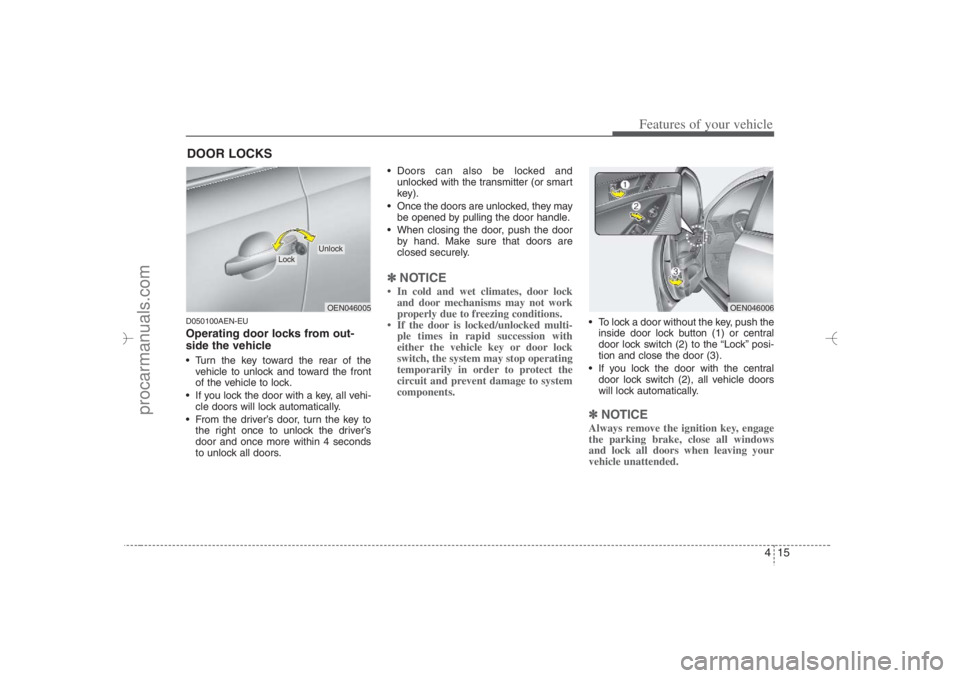
D050100AEN-EUOperating door locks from out-
side the vehicle Turn the key toward the rear of the
vehicle to unlock and toward the front
of the vehicle to lock.
If you lock the door with a key, all vehi-
cle doors will lock automatically.
From the driver’s door, turn the key to
the right once to unlock the driver’s
door and once more within 4 seconds
to unlock all doors. Doors can also be locked and
unlocked with the transmitter (or smart
key).
Once the doors are unlocked, they may
be opened by pulling the door handle.
When closing the door, push the door
by hand. Make sure that doors are
closed securely.
✽ ✽
NOTICE• In cold and wet climates, door lock
and door mechanisms may not work
properly due to freezing conditions.
• If the door is locked/unlocked multi-
ple times in rapid succession with
either the vehicle key or door lock
switch, the system may stop operating
temporarily in order to protect the
circuit and prevent damage to system
components.
To lock a door without the key, push the
inside door lock button (1) or central
door lock switch (2
) to the “Lock” posi-
tion and close the door (3).
If you lock the door with the central
door lock switch (2), all vehicle doors
will lock automatically.✽ ✽
NOTICEAlways remove the ignition key, engage
the parking brake, close all windows
and lock all doors when leaving your
vehicle unattended.
DOOR LOCKS
OEN046005
Lock
Unlock
OEN046006
EN hma 4~83.qxd 11/28/2006 3:24 PM Page 15
procarmanuals.com
Page 99 of 441
417
Features of your vehicle
When pushing down on the front por-
tion (1) of the switch, all vehicle doors
will lock.
When pushing down on the rear por-
tion (2) of the switch, all vehicle doors
will unlock.
If the key is in the ignition switch and
any front door is open, the doors will
not lock when the front portion (1) of
central door lock switch is pressed.
WARNING
- Unlocked
vehicles
Leaving your vehicle unlocked can
invite theft or possible harm to you
or others from someone hiding in
your vehicle while you are gone.
Always remove the ignition key,
engage the parking brake, close all
windows and lock all doors when
leaving your vehicle unattended.
WARNING
- Unattended
children
An enclosed vehicle can become
extremely hot, causing death or
severe injury to unattended chil-
dren or animals who cannot escape
the vehicle. Furthermore, children
might operate features of the vehi-
cle that could injure them, or they
could encounter other harm, possi-
bly from someone gaining entry to
the vehicle. Never leave children or
animals unattended in your vehicle.
WARNING -
Doors
The doors should always be fully
closed and locked while the vehi-
cle is in motion to prevent acci-
dental opening of the door.
Locked doors will also discour-
age potential intruders when the
vehicle stops or slows.
Be careful when opening doors
and watch for vehicles, motorcy-
cles, bicycles or pedestrians
approaching the vehicle in the
path of the door. Opening a door
when something is approaching
can cause damage or injury.
EN hma 4~83.qxd 11/28/2006 3:24 PM Page 17
procarmanuals.com
Page 121 of 441
439
Features of your vehicle
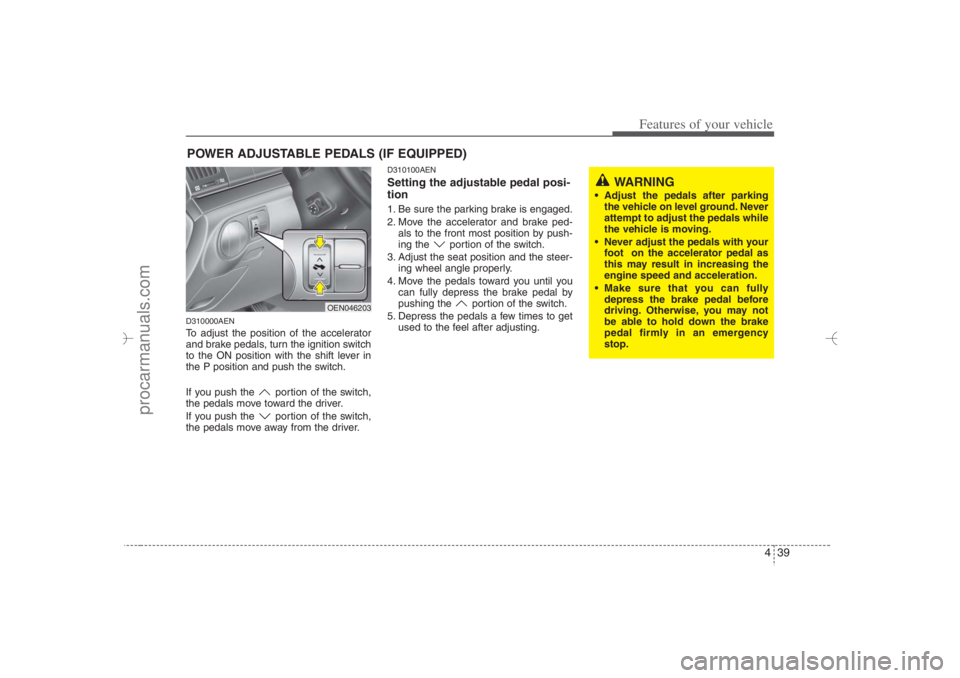
D310000AENTo adjust the position of the accelerator
and brake pedals, turn the ignition switch
to the ON position with the shift lever in
the P position and push the switch.
If you push the portion of the switch,
the pedals move toward the driver.
If you push the portion of the switch,
the pedals move away from the driver.
D310100AENSetting the adjustable pedal posi-
tion1. Be sure the parking brake is engaged.
2. Move the accelerator and brake ped-
als to the front most position by push-
ing the portion of the switch.
3. Adjust the seat position and the steer-
ing wheel angle properly.
4. Move the pedals toward you until you
can fully depress the brake pedal by
pushing the portion of the switch.
5. Depress the pedals a few times to get
used to the feel after adjusting.
POWER ADJUSTABLE PEDALS (IF EQUIPPED)
OEN046203
WARNING
Adjust the pedals after parking
the vehicle on level ground. Never
attempt to adjust the pedals while
the vehicle is moving.
Never adjust the pedals with your
foot on the accelerator pedal as
this may result in increasing the
engine speed and acceleration.
Make sure that you can fully
depress the brake pedal before
driving. Otherwise, you may not
be able to hold down the brake
pedal firmly in an emergency
stop.
EN hma 4~83.qxd 11/28/2006 3:34 PM Page 39
procarmanuals.com
Page 141 of 441
459
Features of your vehicle
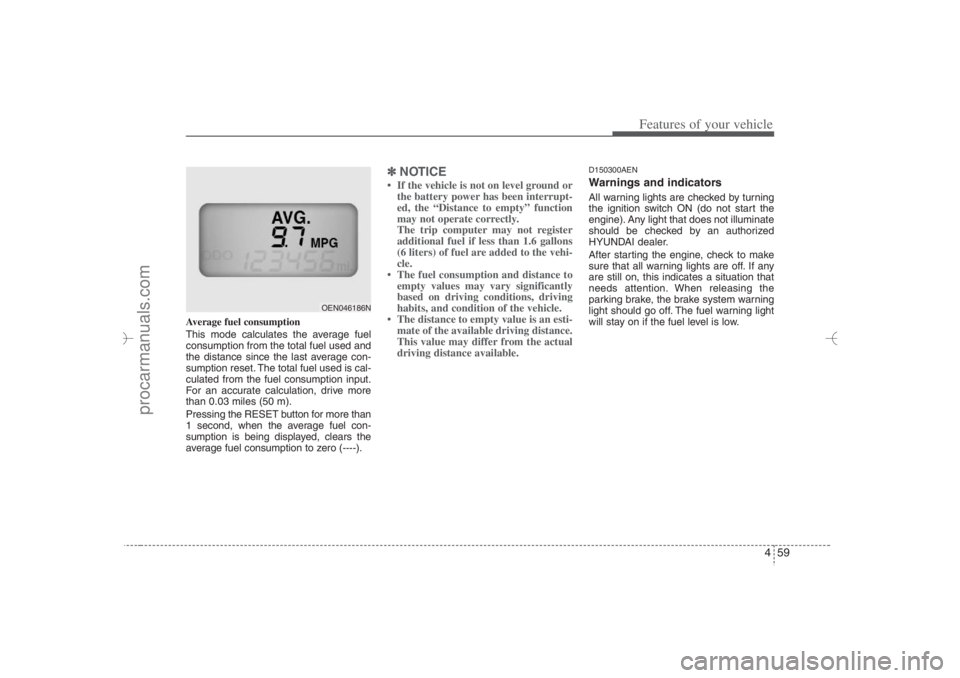
Average fuel consumption
This mode calculates the average fuel
consumption from the total fuel used and
the distance since the last average con-
sumption reset. The total fuel used is cal-
culated from the fuel consumption input.
For an accurate calculation, drive more
than 0.03 miles (50 m).
Pressing the RESET button for more than
1 second, when the average fuel con-
sumption is being displayed, clears the
average fuel consumption to zero (----).
✽ ✽
NOTICE• If the vehicle is not on level ground or
the battery power has been interrupt-
ed, the “Distance to empty” function
may not operate correctly.
The trip computer may not register
additional fuel if less than 1.6 gallons
(6 liters) of fuel are added to the vehi-
cle.
• The fuel consumption and distance to
empty values may vary significantly
based on driving conditions, driving
habits, and condition of the vehicle.
• The distance to empty value is an esti-
mate of the available driving distance.
This value may differ from the actual
driving distance available.
D150300AENWarnings and indicatorsAll warning lights are checked by turning
the ignition switch ON (do not start the
engine). Any light that does not illuminate
should be checked by an authorized
HYUNDAI dealer.
After starting the engine, check to make
sure that all warning lights are off. If any
are still on, this indicates a situation that
needs attention. When releasing the
parking brake, the brake system warning
light should go off. The fuel warning light
will stay on if the fuel level is low.
OEN046186N
EN hma 4~83.qxd 11/28/2006 3:37 PM Page 59
procarmanuals.com
Page 144 of 441
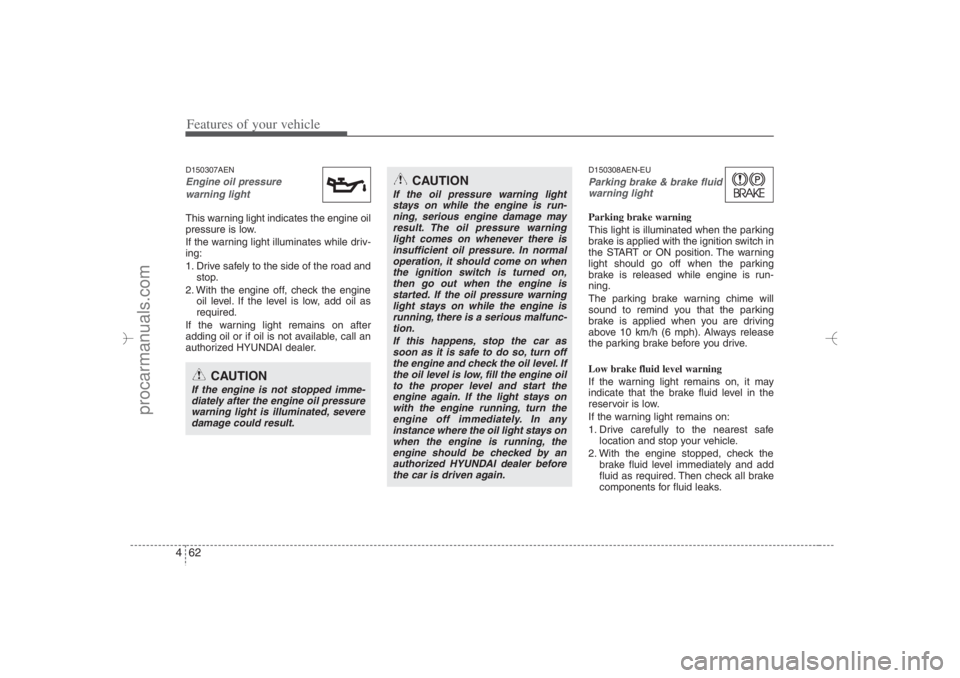
Features of your vehicle62 4D150307AENEngine oil pressure
warning lightThis warning light indicates the engine oil
pressure is low.
If the warning light illuminates while driv-
ing:
1. Drive safely to the side of the road and
stop.
2. With the engine off, check the engine
oil level. If the level is low, add oil as
required.
If the warning light remains on after
adding oil or if oil is not available, call an
authorized HYUNDAI dealer.
D150308AEN-EUParking brake & brake fluid
warning lightParking brake warning
This light is illuminated when the parking
brake is applied with the ignition switch in
the START or ON position. The warning
light should go off when the parking
brake is released while engine is run-
ning.
The parking brake warning chime will
sound to remind you that the parking
brake is applied when you are driving
above 10 km/h (6 mph). Always release
the parking brake before you drive.
Low brake fluid level warning
If the warning light remains on, it may
indicate that the brake fluid level in the
reservoir is low.
If the warning light remains on:
1. Drive carefully to the nearest safe
location and stop your vehicle.
2. With the engine stopped, check the
brake fluid level immediately and add
fluid as required. Then check all brake
components for fluid leaks.
CAUTION
If the oil pressure warning light
stays on while the engine is run-
ning, serious engine damage may
result. The oil pressure warning
light comes on whenever there is
insufficient oil pressure. In normal
operation, it should come on when
the ignition switch is turned on,
then go out when the engine is
started. If the oil pressure warning
light stays on while the engine is
running, there is a serious malfunc-
tion.
If this happens, stop the car as
soon as it is safe to do so, turn off
the engine and check the oil level. If
the oil level is low, fill the engine oil
to the proper level and start the
engine again. If the light stays on
with the engine running, turn the
engine off immediately. In any
instance where the oil light stays on
when the engine is running, the
engine should be checked by an
authorized HYUNDAI dealer before
the car is driven again.
CAUTION
If the engine is not stopped imme-
diately after the engine oil pressure
warning light is illuminated, severe
damage could result.
EN hma 4~83.qxd 11/28/2006 3:37 PM Page 62
procarmanuals.com
Page 145 of 441
463
Features of your vehicle
3. Do not drive the vehicle if leaks are
found, the warning light remains on or
the brakes do not operate properly.
Have the vehicle towed to any author-
ized HYUNDAI dealer for a brake sys-
tem inspection and necessary repairs.
Your vehicle is equipped with dual-diago-
nal braking systems. This means you still
have braking on two wheels even if one
of the dual systems should fail. With only
one of the dual systems working, more
than normal pedal travel and greater
pedal pressure are required to stop the
car. Also, the car will not stop in as short
a distance with only a portion of the
brake system working. If the brakes fail
while you are driving, shift to a lower gear
for additional engine braking and stop the
car as soon as it is safe to do so.
To check bulb operation, check whether
the parking brake and brake fluid warning
light illuminates when the ignition switch
is in the ON position.
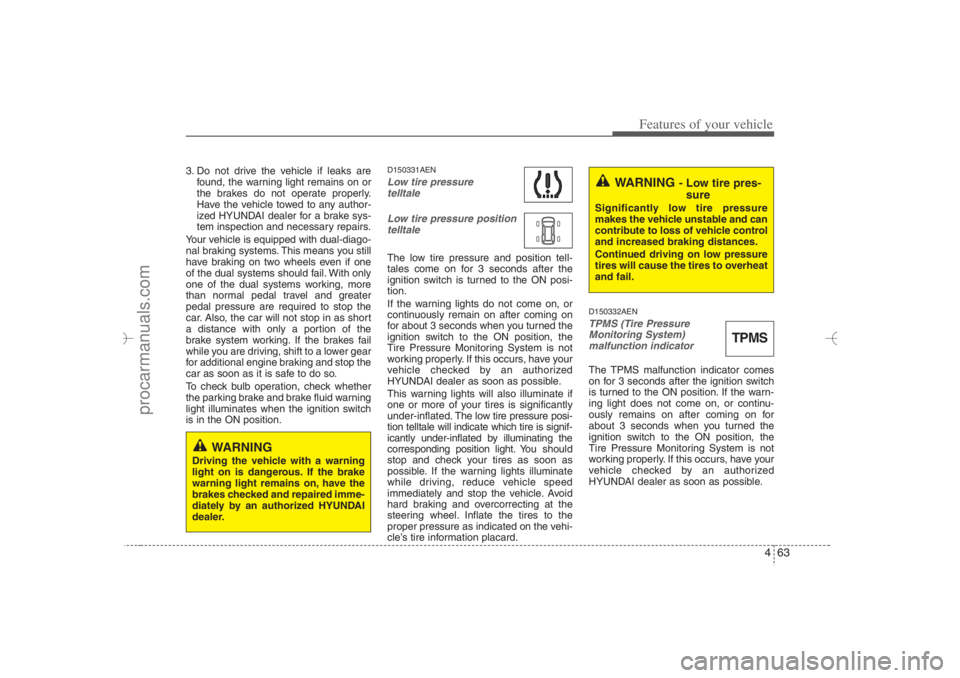
D150331AENLow tire pressure
telltale
Low tire pressure position
telltale The low tire pressure and position tell-
tales come on for 3 seconds after the
ignition switch is turned to the ON posi-
tion.
If the warning lights do not come on, or
continuously remain on after coming on
for about 3 seconds when you turned the
ignition switch to the ON position, the
Tire Pressure Monitoring System is not
working properly. If this occurs, have your
vehicle checked by an authorized
HYUNDAI dealer as soon as possible.
This warning lights will also illuminate if
one or more of your tires is significantly
under-inflated.The low tire pressure posi-
tion telltale will indicate which tire is signif-
icantly under-inflated by illuminating the
corresponding position light. You should
stop and check your tires as soon as
possible. If the warning lights illuminate
while driving, reduce vehicle speed
immediately and stop the vehicle. Avoid
hard braking and overcorrecting at the
steering wheel. Inflate the tires to the
proper pressure as indicated on the vehi-
cle’s tire information placard.
D150332AENTPMS (Tire Pressure
Monitoring System)
malfunction indicator The TPMS malfunction indicator comes
on for 3 seconds after the ignition switch
is turned to the ON position. If the warn-
ing light does not come on, or continu-
ously remains on after coming on for
about 3 seconds when you turned the
ignition switch to the ON position, the
Tire Pressure Monitoring System is not
working properly. If this occurs, have your
vehicle checked by an authorized
HYUNDAI dealer as soon as possible.
WARNING
- Low tire pres-
sure
Significantly low tire pressure
makes the vehicle unstable and can
contribute to loss of vehicle control
and increased braking distances.
Continued driving on low pressure
tires will cause the tires to overheat
and fail.
TPMS
WARNING
Driving the vehicle with a warning
light on is dangerous. If the brake
warning light remains on, have the
brakes checked and repaired imme-
diately by an authorized HYUNDAI
dealer.
EN hma 4~83.qxd 11/28/2006 3:37 PM Page 63
procarmanuals.com