HYUNDAI VERACRUZ 2012 Owners Manual
Manufacturer: HYUNDAI, Model Year: 2012, Model line: VERACRUZ, Model: HYUNDAI VERACRUZ 2012Pages: 429, PDF Size: 7.11 MB
Page 231 of 429
4147
Features of your vehicle
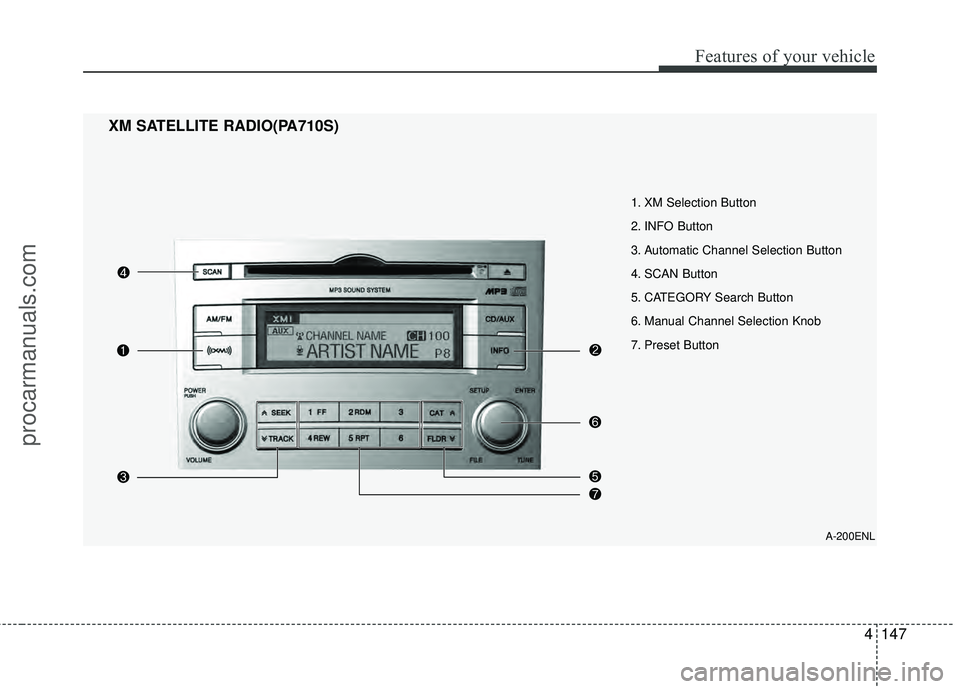
1. XM Selection Button
2. INFO Button
3. Automatic Channel Selection Button
4. SCAN Button
5. CATEGORY Search Button
6. Manual Channel Selection Knob
7. Preset Button
XM SATELLITE RADIO(PA710S)
A-200ENL
procarmanuals.com
Page 232 of 429
Features of your vehicle
148
4
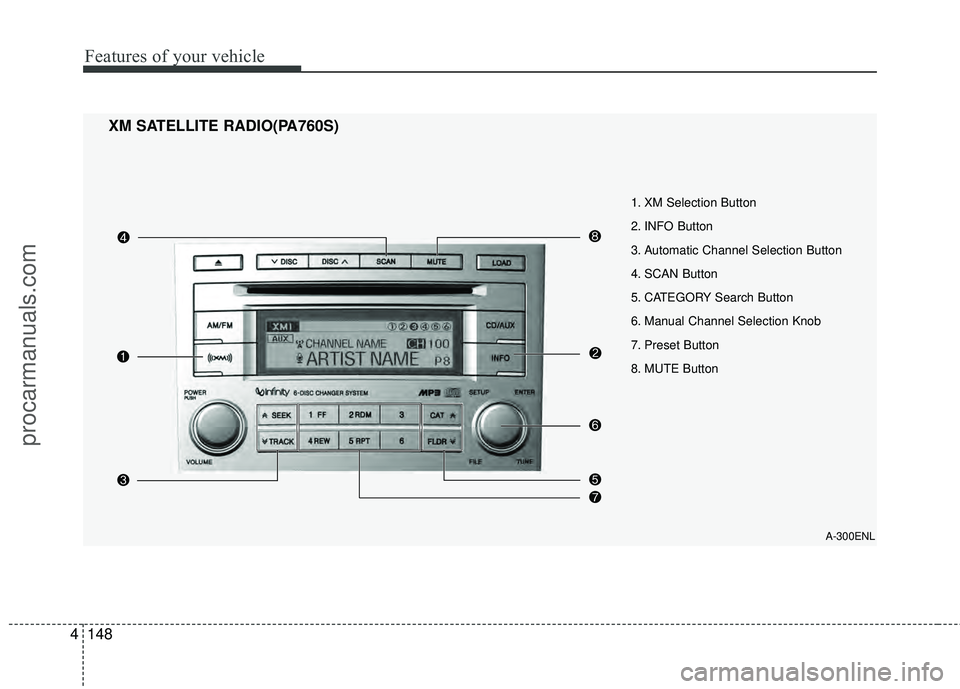
XM SATELLITE RADIO(PA760S)
A-300ENL
1. XM Selection Button
2. INFO Button
3. Automatic Channel Selection Button
4. SCAN Button
5. CATEGORY Search Button
6. Manual Channel Selection Knob
7. Preset Button
8. MUTE Button
procarmanuals.com
Page 233 of 429
4149
Features of your vehicle
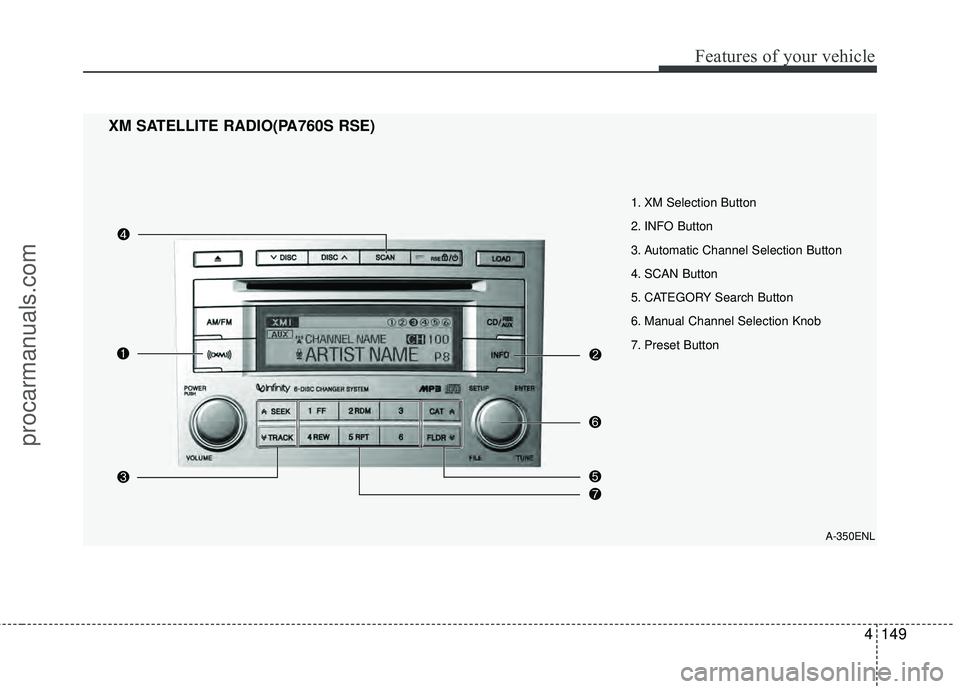
XM SATELLITE RADIO(PA760S RSE)
A-350ENL
1. XM Selection Button
2. INFO Button
3. Automatic Channel Selection Button
4. SCAN Button
5. CATEGORY Search Button
6. Manual Channel Selection Knob
7. Preset Button
procarmanuals.com
Page 234 of 429
Features of your vehicle
150
4
1. XM Selection Button
Turns to XM Satellite Radio Mode. XM
mode toggles in order to XM1 ➟ XM2 ➟XM3 ➟ XM1... when the button is
pressed each time.
2. INFO Button
Displays the information of the current
channel in the order of Artist/Song title ➟Category/Channel name ➟ Current Play
Channel ➟ Artist/Song title ➟ Category/
Channel name... when the button is
pressed each time. If it can not display
the whole text information, rotate the
tune button to see the next page.
3. Automatic Channel Selection Button
] button for less than
0.8 second to select previous channel.
] button for less than 0.8 second to select next channel.
Seek or Tune to XM channel 0 to display the Radio ID.
4. SCAN Button
Press to hear a brief sampling of all
channels.
To cancel the scan mode, press the but-
ton once again.
5. CATEGORY Search Button
Push [FLDR ] button to search previ-ous category.
] button to search next category. To listen to the displayed cat-
egory, press the TUNE/ENTER knob. To
scan channel in displayed category,
press the scan button.
To search channel in displayed category,
press seek buttons or turn the tune but-
ton clockwise/counterclockwise.(CATE-
GORY icon will be turned on in Category
mode)
6. Manual Channel Selection Knob
While listening to XM broadcast, rotate
this control to the right or left to search
other channels while listening to current
channel. (Turn to the right to searchhigh-
er channels and left, lower channels.)
7. Preset Button
Push [1]~[6] buttons less than 0.8 sec-
ond to play the channel saved in each
button. Push Preset button for 0.8 sec-
ond or longer to save current channel to
the respective button with a beep.
8. MUTE Button
Press [MUTE] button to stop sound and
“Audio Mute” is displayed on the LCD.
procarmanuals.com
Page 235 of 429
4151
Features of your vehicle
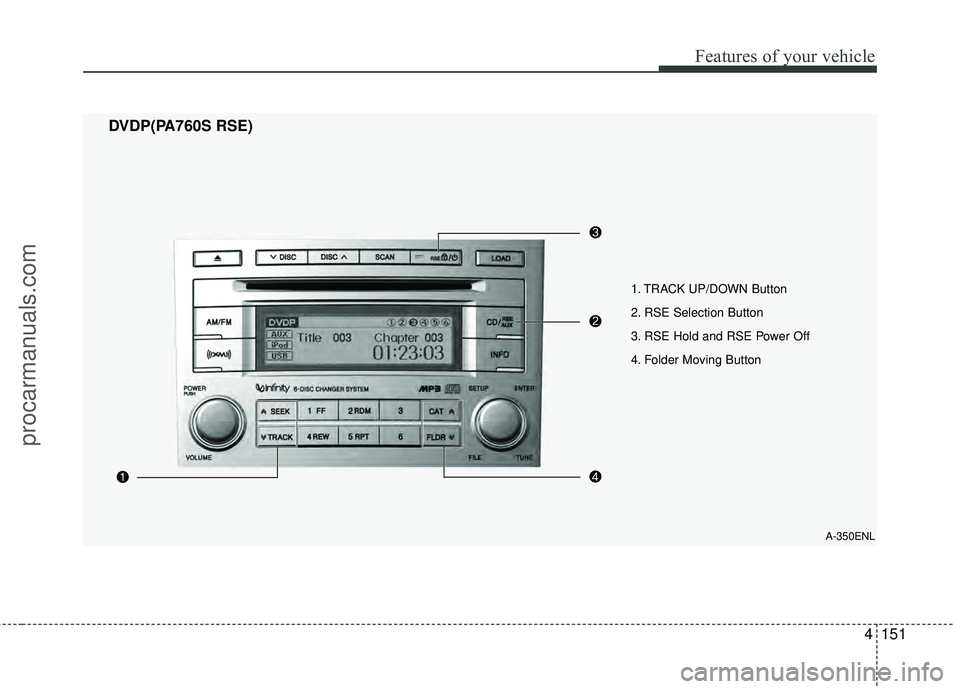
DVDP(PA760S RSE)
A-350ENL
1. TRACK UP/DOWN Button
2. RSE Selection Button
3. RSE Hold and RSE Power Off
4. Folder Moving Button
procarmanuals.com
Page 236 of 429
![HYUNDAI VERACRUZ 2012 Owners Manual Features of your vehicle
152
4
In case RSE is loaded DVD disc and con-
nected auxiliary device at RSE unit that
is located the rear seat.
1. TRACK UP/DOWN Button
] button for less than
0.8 second to HYUNDAI VERACRUZ 2012 Owners Manual Features of your vehicle
152
4
In case RSE is loaded DVD disc and con-
nected auxiliary device at RSE unit that
is located the rear seat.
1. TRACK UP/DOWN Button
] button for less than
0.8 second to](/img/35/57927/w960_57927-235.png)
Features of your vehicle
152
4
In case RSE is loaded DVD disc and con-
nected auxiliary device at RSE unit that
is located the rear seat.
1. TRACK UP/DOWN Button
] button for less than
0.8 second to play from the beginning
of current song.
] button for less than 0.8 second and press again within 1
seconds to play the previous song.
] button for 0.8 or longer to initiate reverse direction high
speed sound search of current song.
] button for less than 0.8 second to play the next song.
] button for 0.8 or longer to initiate high speed sound search of
current song.
2. RSE Selection Button
When you press this button, the system
will switch to RSE mode and you will be
able to listen to the source played in the
RSE unit. (If RSE unit has no disc, can
not select)
3. RSE Hold and RSE Power Off
If you press and hold this button for less
than 0.8 second, the LED of the button
will light and RSE unit will be locked. If
you press and hold this button for more
than 0.8 second, RSE unit will be turned
off with a beep and [RSE] will disappear
from LCD.
4. Folder Moving Button
], button child folder ofthe current folder and displays the first
song in the folder.
] button parent folder and displays the first song in the folder.
CAUTION - Using RSE device
When listening to the CD on the
Audio H/UNIT in RSE, the mode can-not be converted to USB on theAudio H/UNIT and will be dis-played on the LCD.
procarmanuals.com
Page 237 of 429
4153
Features of your vehicle
D320000AEN
Important Safety Information
It is always important to operate your
vehicle in a safe manner and to avoid dis-
traction while driving. This manual pro-
vides information that will help you safely
operate your Rear Seat Entertainment
System (RSE). Please read it completely
before using the system.
This device complies with part 15 of
the FCC rules.
Operation is subject to the following two
conditions:
1. This device may not cause harmfulinterference, and
2. This device must accept any interfer- ence received, including interference
that may cause undesired operation.
Welcome
The Rear Seat Entertainment System is
a compact, built-in, easy-to-use enter-
tainment system designed to provide
family fun while you are on the road.
Enjoy great quality sound from the vehi-
cle speakers, or have a private, quiet lis-
tening with the wireless headphones.
The overhead display unit is mounted to
the ceiling in the rear passenger area of
the vehicle, allowing rear-seat passen-
gers to play DVD movies, video CDs or
music CDs. Users may also plug in a
game platform or VHS player into an aux-
iliary input to show the programs through
the RSE display. The RSE can also
access to the vehicle's front radio pro-
grams.
System Overview
Connections / Setup
Your Rear Seat Entertainment system
will play DVD movies, video CDs, music
CDs or music MP3 discs and Mix CD
(Regarding Mix CD, only the CD track
can be played by system.), and is
designed to make your time on the road
more enjoyable. Please follow these
instructions carefully to get the most out
of your RSE.
REAR SEAT ENTERTAINMENT SYSTEM (RSE) (IF EQUIPPED)
CAUTION
Avoid having food or drinks near, in or on the RSE, the wirelessheadphones or the remote con-troller.
Direct sunlight may interfere with the headphone's operation andperformance.
Normal RSE operation cannot be guaranteed with unofficiallyduplicated discs.
(Continued)
WARNING
Changes or modifications not
expressly approved by the party
responsible for compliance could
void the user's authority to operate
the equipment.
procarmanuals.com
Page 238 of 429
Features of your vehicle
154
4
✽
✽
NOTICE
The RSE requires a few seconds of set
up time after the ignition switch is
turned ON or to ACC mode.
Your RSE system is already set up and
ready for use, and can be turned on by
pushing the POWER/VOLUME knob on
the RSE control panel or the POWER
ON/OFF button on the remote
controller. The vehicle's ignition must be
turned on or in accessory power mode.
The RSE system can also be turned OFF
by the Audio Unit.
Components
Your RSE consists of several compo-
nents:
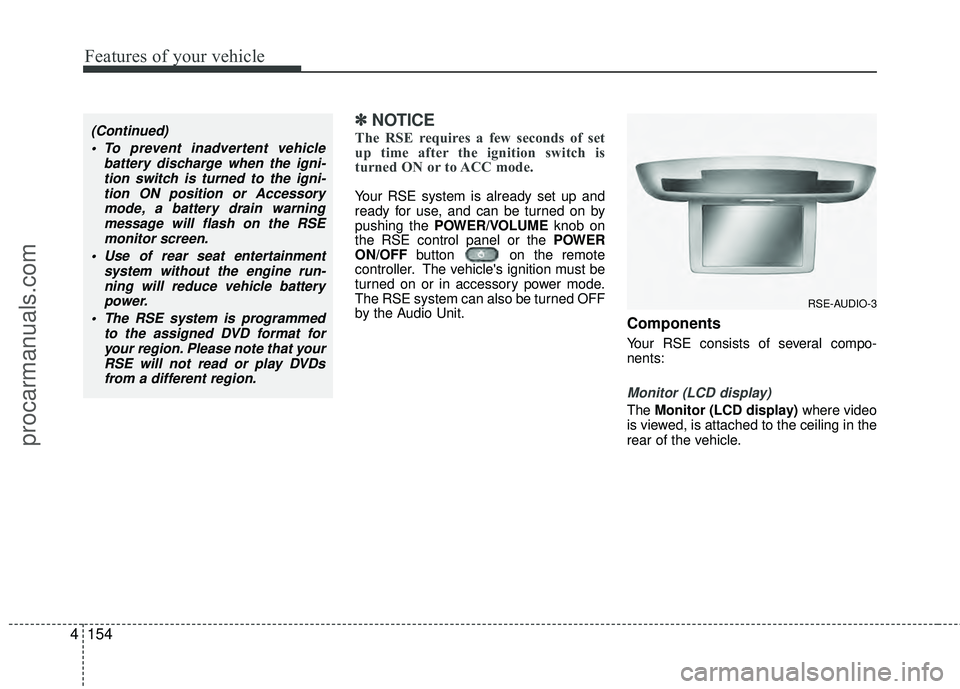
Monitor (LCD display)
The Monitor (LCD display) where video
is viewed, is attached to the ceiling in the
rear of the vehicle.
(Continued)
To prevent inadvertent vehicle battery discharge when the igni-tion switch is turned to the igni-tion ON position or Accessorymode, a battery drain warningmessage will flash on the RSEmonitor screen.
Use of rear seat entertainment system without the engine run-ning will reduce vehicle battery power.
The RSE system is programmed to the assigned DVD format foryour region. Please note that yourRSE will not read or play DVDsfrom a different region.
RSE-AUDIO-3
procarmanuals.com
Page 239 of 429
4155
Features of your vehicle
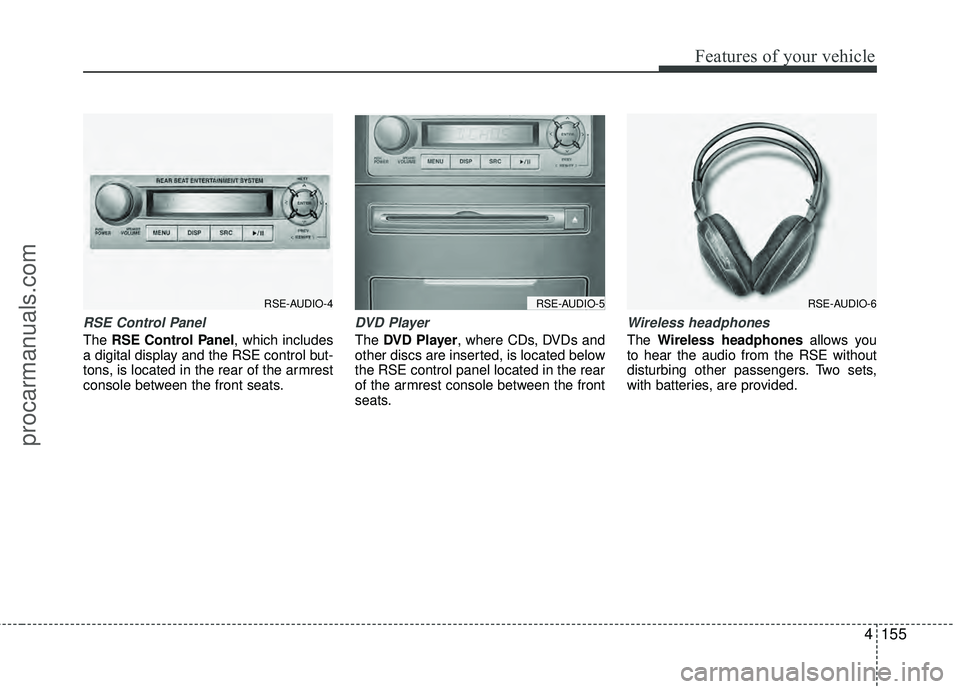
RSE Control Panel
The RSE Control Panel, which includes
a digital display and the RSE control but-
tons, is located in the rear of the armrest
console between the front seats.
DVD Player
The DVD Player, where CDs, DVDs and
other discs are inserted, is located below
the RSE control panel located in the rear
of the armrest console between the front
seats.
Wireless headphones
The Wireless headphones allows you
to hear the audio from the RSE without
disturbing other passengers. Two sets,
with batteries, are provided.
RSE-AUDIO-4RSE-AUDIO-5RSE-AUDIO-6
procarmanuals.com
Page 240 of 429
Features of your vehicle
156
4
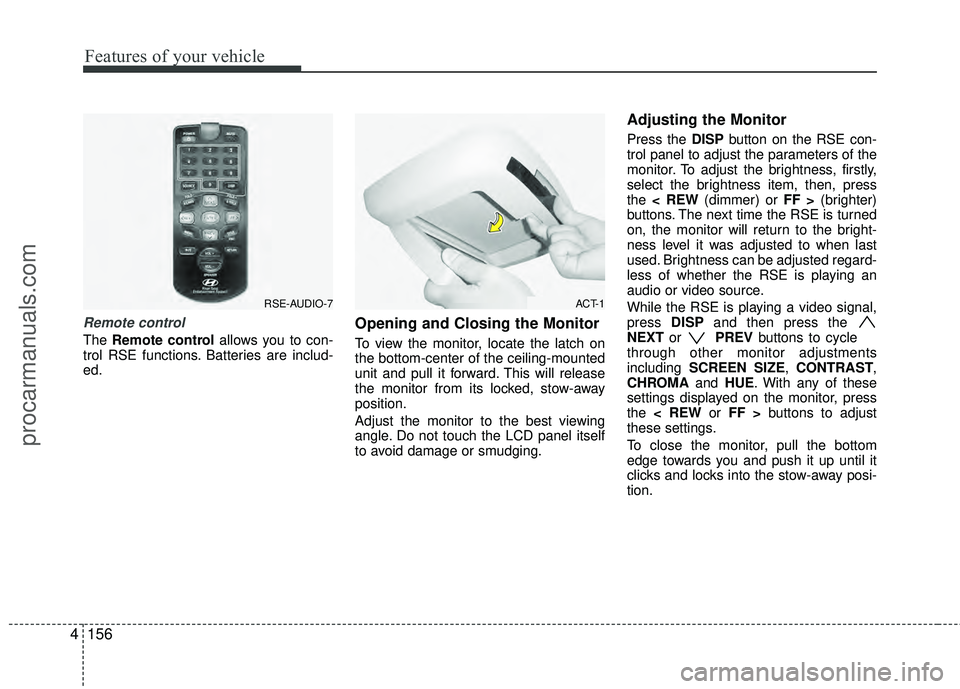
Remote control
The Remote control allows you to con-
trol RSE functions. Batteries are includ-
ed.
Opening and Closing the Monitor
To view the monitor, locate the latch on
the bottom-center of the ceiling-mounted
unit and pull it forward. This will release
the monitor from its locked, stow-away
position.
Adjust the monitor to the best viewing
angle. Do not touch the LCD panel itself
to avoid damage or smudging.
Adjusting the Monitor
Press the DISP button on the RSE con-
trol panel to adjust the parameters of the
monitor. To adjust the brightness, firstly,
select the brightness item, then, press
the < REW (dimmer) or FF > (brighter)
buttons. The next time the RSE is turned
on, the monitor will return to the bright-
ness level it was adjusted to when last
used. Brightness can be adjusted regard-
less of whether the RSE is playing an
audio or video source.
While the RSE is playing a video signal,
press DISPand then press the
NEXT or PREVbuttons to cycle
through other monitor adjustments
including SCREEN SIZE, CONTRAST,
CHROMA and HUE. With any of these
settings displayed on the monitor, press
the < REW or FF > buttons to adjust
these settings.
To close the monitor, pull the bottom
edge towards you and push it up until it
clicks and locks into the stow-away posi-
tion.
RSE-AUDIO-7ACT-1
procarmanuals.com