INFINITI EX 2012 Owners Manual
EX 2012
INFINITI
INFINITI
https://www.carmanualsonline.info/img/42/41062/w960_41062-0.png
INFINITI EX 2012 Owners Manual
Trending: ground clearance, mirror controls, open hood, fuel consumption, ECO mode, mirror, heating
Page 131 of 506
2-58Instruments and controls
4. A chime sounds when the setting iscompleted.
Once the welcome light function is active,
the puddle light
*Aand the passenger
cabin illumination will illuminate when you
approach the vehicle with the Intelligent
Key (within approximately 3.3 feet (1 m) of
the antenna built inside the door handles)
and the following conditions are met.
. All doors are closed and locked.
. The ignition switch is in the LOCK or OFF
position.
. The Intelligent Key is outside the
vehicle.
. The puddle light operates within a set
duration.
The welcome light function will be deacti-
vated automatically if it does not operate
within a set duration to prevent battery
discharge. Note that the duration is set to
14 days.
GUID-830CFA4B-7BC2-4EB5-B729-3DEBD5B2F404
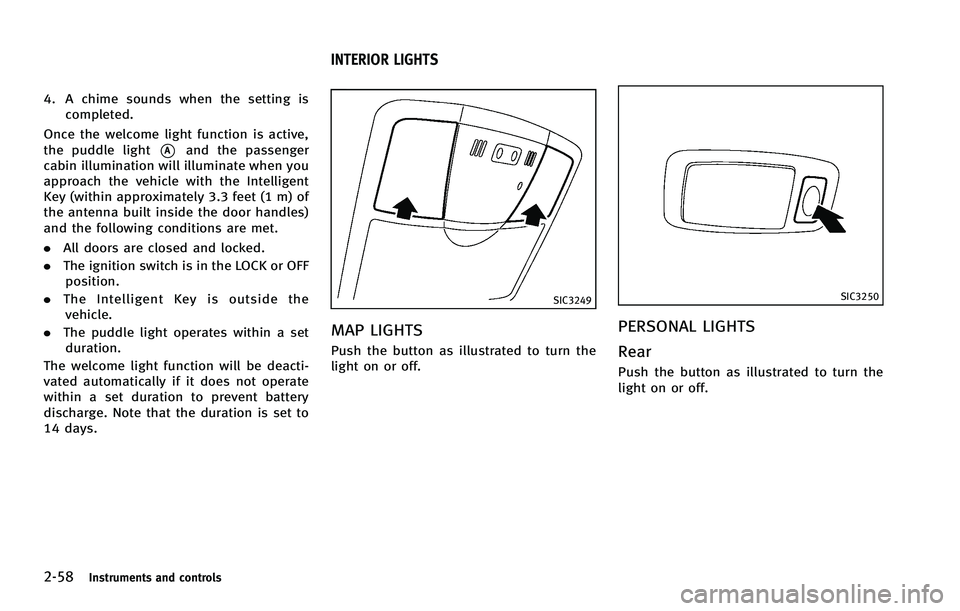
SIC3249
MAP LIGHTSGUID-90C1CDC9-88EE-483F-A6B5-9B7CF87C9FA8
SIC3250
PERSONAL LIGHTSGUID-427C090A-E791-4E67-B530-6B20EBFA79D8
Page 132 of 506
SIC3251
INTERIOR LIGHT CONTROL SWITCHGUID-D0E2EF38-2D5D-4501-AA23-4F24DD8B41E1
CAUTION
Do not use for extended periods of time with
the engine stopped. This could result in a
discharged battery.
Instruments and controls2-59
Page 133 of 506
2-60Instruments and controls
GUID-E3368CF8-A3EF-4DAC-9176-8558DF7C9907
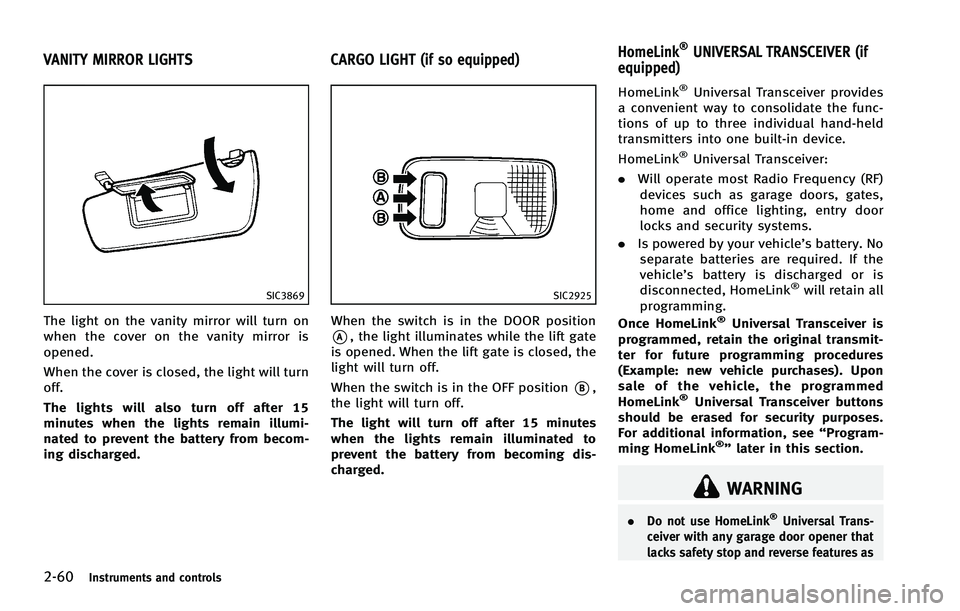
SIC3869
The light on the vanity mirror will turn on
when the cover on the vanity mirror is
opened.
When the cover is closed, the light will turn
off.
The lights will also turn off after 15
minutes when the lights remain illumi-
nated to prevent the battery from becom-
ing discharged.
GUID-65B14C49-101C-46AA-9AC8-BE69E9C5943F
SIC2925
When the switch is in the DOOR position
*A, the light illuminates while the lift gate
is opened. When the lift gate is closed, the
light will turn off.
When the switch is in the OFF position
*B,
the light will turn off.
The light will turn off after 15 minutes
when the lights remain illuminated to
prevent the battery from becoming dis-
charged.
GUID-BBDE6354-59FD-4B7D-831F-DCCDCD8C2E6F
WARNING
. Do not use HomeLink®Universal Trans-
ceiver with any garage door opener that
lacks safety stop and reverse features as
VANITY MIRROR LIGHTS CARGO LIGHT (if so equipped) HomeLink®UNIVERSAL TRANSCEIVER (if
equipped)
Page 134 of 506
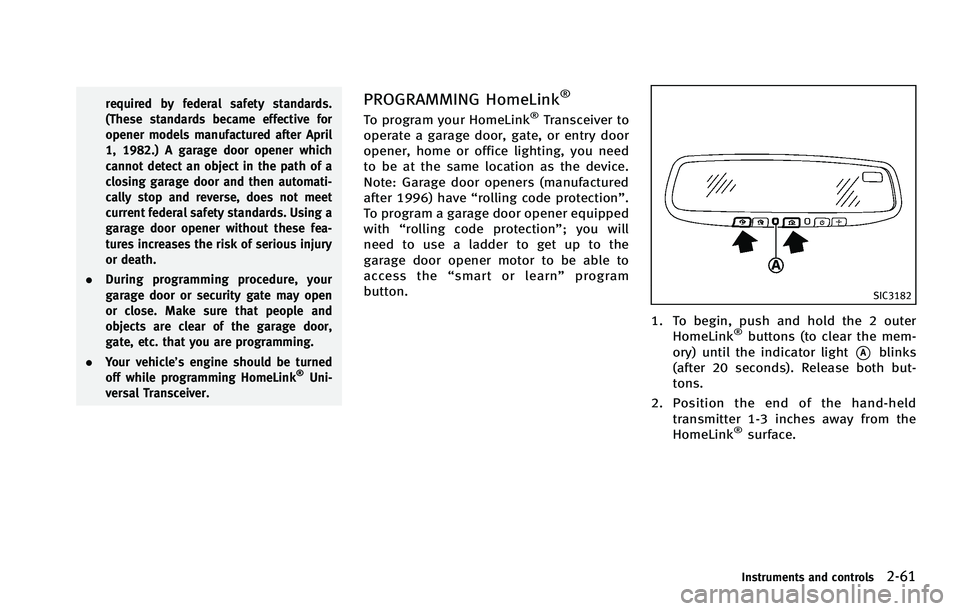
SIC3182
1. To begin, push and hold the 2 outerHomeLink®buttons (to clear the mem-
ory) until the indicator light
*Ablinks
(after 20 seconds). Release both but-
tons.
2. Position the end of the hand-held
transmitter 1-3 inches away from the
HomeLink
®surface.
Instruments and controls2-61
Page 135 of 506

2-62Instruments and controls
SIC3183
3. Using both hands, simultaneously pushand hold both the HomeLink®button
you want to program and the hand-held
transmitter button.
DO NOT release the buttons until step 4
has been completed.
4. Hold down both buttons until the
indicator light on HomeLink
®flashes,
changing from a “slow blink”to a
“rapid blink”. This could take up to 90
seconds. When the indicator light
blinks rapidly, both buttons may be
released. The rapidly flashing light
indicates successful programming. To
activate the garage door or other programmed device, push and hold
the programmed HomeLink
®button -
releasing when the device begins to
activate.
5. If the indicator light on HomeLink
®
blinks rapidly for two seconds and then
turns solid, HomeLink®has picked up a
“rolling code” garage door opener
signal. You will need to proceed with
the next steps to train HomeLink
®,
completing the programming may re-
quire a ladder and another person for
convenience.
6. Push and release the program button located on the garage door opener’s
motor to activate the “training mode”.
This button is usually located near the
antenna wire that hangs down from the
motor. If the wire originates from under
a light lens, you will need to remove the
lens to access the training button.
NOTE:
Once you have pushed and released
the training button on the garage door
opener’s motor and the “training light”
is lit, you have 30 seconds in which to
perform step 7. For convenience, use
the help of a second person to assist
when performing this step. 7. Quickly (within 30 seconds of pushing
and releasing the garage door opener
training button) and firmly push and
release the HomeLink
®button you’ve
just programmed. Push and release the
HomeLink
®button up to three times to
complete the training.
8. Your HomeLink
®button should now be
programmed. To program the remaining
HomeLink
®buttons for additional door
or gate openers, follow steps 2 through
8 only.
NOTE:
Do not repeat step 1 unless you want to
“clear” all previously programmed
HomeLink
®buttons.
If you have any questions or are having
difficulty programming your HomeLink
®
buttons, please refer to the HomeLink®
web site at: www.homelink.com or call 1-
800-355-3515.
Page 136 of 506
PROGRAMMING HomeLink®FOR
CANADIAN CUSTOMERS
GUID-5972CEF8-27E4-49AA-A5E0-06E4B93FE8B9
Page 137 of 506
2-64Instruments and controls
device can be activated by pushing the
HomeLink®button that was just pro-
grammed. This procedure will not affect
any other programmed HomeLink
®but-
tons.
IF YOUR VEHICLE IS STOLENGUID-EFCC4826-DE8D-4D28-803D-A0688F03DA1C
Page 138 of 506
3 Pre-driving checks and adjustments
Keys...
Page 139 of 506
3-2Pre-driving checks and adjustments
GUID-EA126302-6FAF-4C72-BECE-5E088F00D216
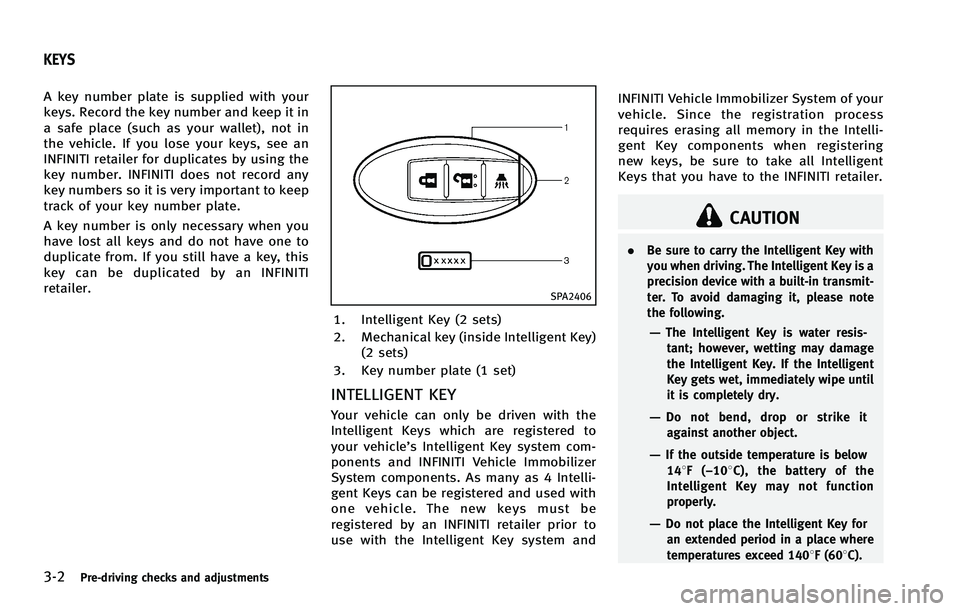
SPA2406
1. Intelligent Key (2 sets)
2. Mechanical key (inside Intelligent Key)(2 sets)
3. Key number plate (1 set)
INTELLIGENT KEYGUID-D8C37A9F-307A-45AF-A8B2-7046DB78DA9B
CAUTION
. Be sure to carry the Intelligent Key with
you when driving. The Intelligent Key is a
precision device with a built-in transmit-
ter. To avoid damaging it, please note
the following.
—The Intelligent Key is water resis-
tant; however, wetting may damage
the Intelligent Key. If the Intelligent
Key gets wet, immediately wipe until
it is completely dry.
—Do not bend, drop or strike itagainst another object.
—If the outside temperature is below 148F (−108C), the battery of the
Intelligent Key may not function
properly.
—Do not place the Intelligent Key foran extended period in a place where
temperatures exceed 1408F (608C).
KEYS
Page 140 of 506
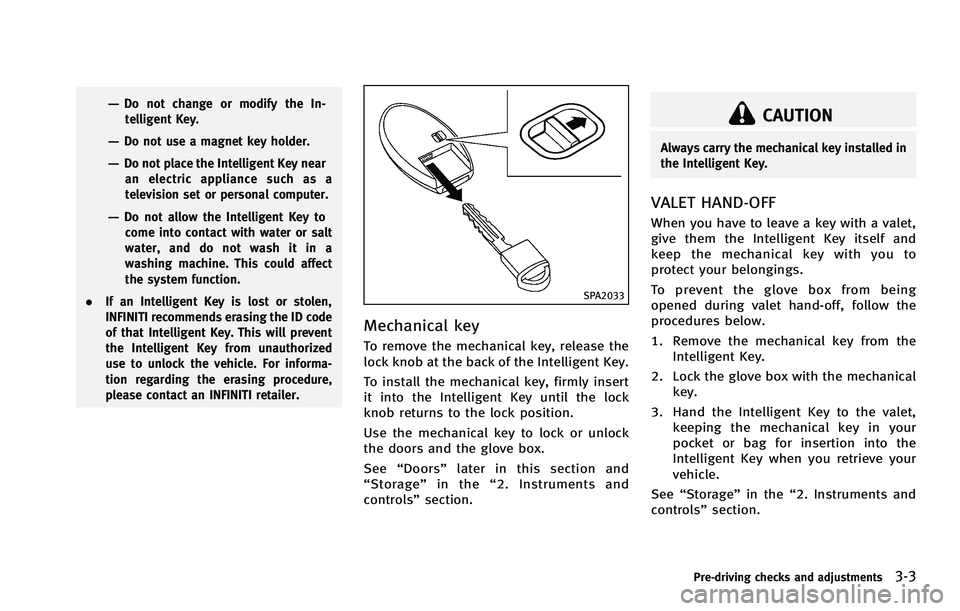
SPA2033
Mechanical keyGUID-A10BCDDF-7D0A-4CAE-BAB8-A8F8C4D4AACD
CAUTION
Always carry the mechanical key installed in
the Intelligent Key.
VALET HAND-OFFGUID-A099C12D-9FC8-46D0-B227-F50EC3E02AAF
Trending: remote control, seat memory, air filter, cabin filter, battery location, instrument panel, reset
