fuel filler INFINITI G35 2003 Owners Manual
[x] Cancel search | Manufacturer: INFINITI, Model Year: 2003, Model line: G35, Model: INFINITI G35 2003Pages: 256, PDF Size: 3.37 MB
Page 60 of 256

The low fuel warning light comes on when
the fuel tank is getting low. Refuel as soon
as it is convenient, preferably before the
gauge reaches E. There will be a small
reserve of fuel in the tank when the fuel
gauge needle reaches E.
The indicates that the fuel filler lid is
located on the passenger's side of the vehicle.
CAUTIONO If the vehicle runs out of fuel, the
malfunction indicator lamp
(MIL) may come on. Refuel as soon as
possible. After a few driving trips, the
lamp should turn off. If the lamp
remains on after a few driving trips,
have the vehicle inspected by an au-
thorized INFINITI retailer.
O For additional information, see the
ªMalfunction indicator lamp (MIL)º
later in this section.
Push COMP switch to turn the display on or off
when the ignition key is in the ON position. The
heading direction will be displayed. N: north
E: east
S: south
W: west
m : vehicle direction
The above example shows the display
changes from ªEastº to ªEast-southeastº.
If the compass unit does not receive any
correct signal for 10 minutes, the compass will
display the bar ª-- -- --º. Have the vehicle
inspected by an authorized INFINITI retailer.
SIC1842BCOMPASS DISPLAY
2-6 Instruments and controls
Z 02.7.29/V35-D/V5.0
X
Page 66 of 256

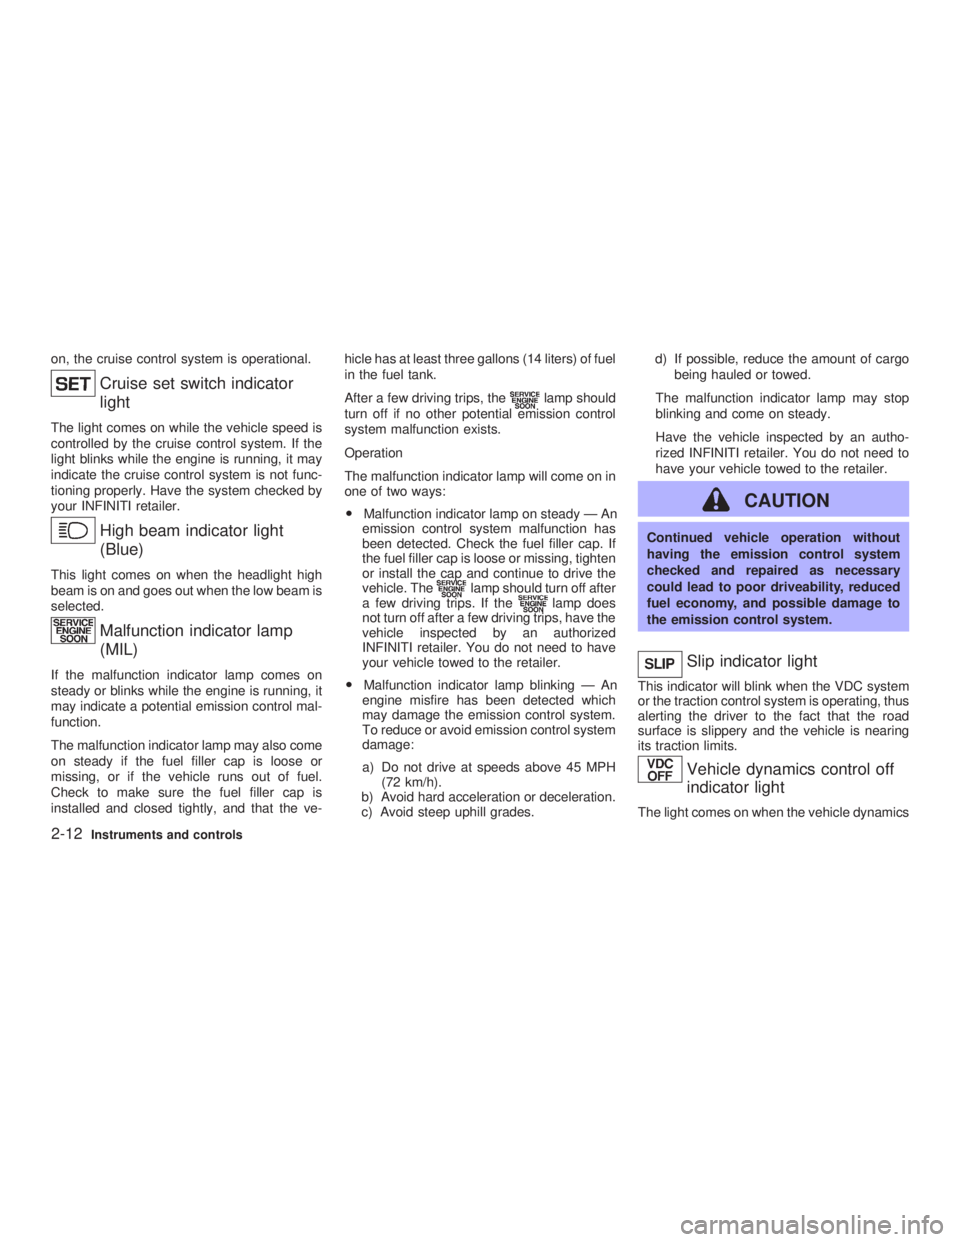
on, the cruise control system is operational.
Cruise set switch indicator
lightThe light comes on while the vehicle speed is
controlled by the cruise control system. If the
light blinks while the engine is running, it may
indicate the cruise control system is not func-
tioning properly. Have the system checked by
your INFINITI retailer.
High beam indicator light
(Blue)This light comes on when the headlight high
beam is on and goes out when the low beam is
selected.
Malfunction indicator lamp
(MIL)If the malfunction indicator lamp comes on
steady or blinks while the engine is running, it
may indicate a potential emission control mal-
function.
The malfunction indicator lamp may also come
on steady if the fuel filler cap is loose or
missing, or if the vehicle runs out of fuel.
Check to make sure the fuel filler cap is
installed and closed tightly, and that the ve- hicle has at least three gallons (14 liters) of fuel
in the fuel tank.
After a few driving trips, the lamp should
turn off if no other potential emission control
system malfunction exists.
Operation
The malfunction indicator lamp will come on in
one of two ways:
O Malfunction indicator lamp on steady Ð An
emission control system malfunction has
been detected. Check the fuel filler cap. If
the fuel filler cap is loose or missing, tighten
or install the cap and continue to drive the
vehicle. The lamp should turn off after
a few driving trips. If the lamp does
not turn off after a few driving trips, have the
vehicle inspected by an authorized
INFINITI retailer. You do not need to have
your vehicle towed to the retailer.
O Malfunction indicator lamp blinking Ð An
engine misfire has been detected which
may damage the emission control system.
To reduce or avoid emission control system
damage:
a) Do not drive at speeds above 45 MPH
(72 km/h).
b) Avoid hard acceleration or deceleration.
c) Avoid steep uphill grades. d) If possible, reduce the amount of cargo
being hauled or towed.
The malfunction indicator lamp may stop
blinking and come on steady.
Have the vehicle inspected by an autho-
rized INFINITI retailer. You do not need to
have your vehicle towed to the retailer.
CAUTION Continued vehicle operation without
having the emission control system
checked and repaired as necessary
could lead to poor driveability, reduced
fuel economy, and possible damage to
the emission control system.
Slip indicator light This indicator will blink when the VDC system
or the traction control system is operating, thus
alerting the driver to the fact that the road
surface is slippery and the vehicle is nearing
its traction limits.
Vehicle dynamics control off
indicator light The light comes on when the vehicle dynamics
2-12 Instruments and controls
Z 02.7.29/V35-D/V5.0
X
Page 95 of 256

3 Pre-driving checks and adjustments Keys .......................................................................... 3-2
Doors ......................................................................... 3-3
Locking with key (Driver's side) ........................... 3-3
Windows open/close with key .............................. 3-3
Locking with inside lock knob............................... 3-4
Locking with power door lock switch.................... 3-4
Child safety rear door lock ................................... 3-5
Remote keyless entry system ................................... 3-5
How to use remote keyless entry system ............ 3-5
Battery replacement ............................................. 3-8
Hood ........................................................................ 3-10
Trunk lid .................................................................. 3-10
Opener operation ............................................... 3-11
Interior trunk lid release ..................................... 3-12
Secondary trunk lid release ............................... 3-13 Fuel filler lid ............................................................. 3-14
Opening the filler lid ........................................... 3-14
Fuel filler cap ...................................................... 3-14
Steering wheel ........................................................ 3-16
Tilt operation....................................................... 3-16
Sun visors ............................................................... 3-16
Mirrors ..................................................................... 3-17
Automatic anti-glare inside mirror (if so
equipped)............................................................ 3-17
Outside mirrors ................................................... 3-18
Automatic seat positioner (if so equipped) ............. 3-19
Automatic seat positioner operation ................... 3-19
Procedure for storing memory............................ 3-19
Cancel switch ..................................................... 3-21
Z 02.7.29/V35-D/V5.0
X
Page 97 of 256

WARNINGO Always have the doors locked while
driving. Along with the use of seat
belts, this provides greater safety in
the event of an accident by helping to
prevent persons from being thrown
from the vehicle. This also helps keep
children and others from unintention-
ally opening the doors, and will help
keep out intruders.
O Before opening any door, always look
for and avoid oncoming traffic.
O Do not leave children unattended in-
side the vehicle. They could unknow-
ingly activate switches or controls.
Unattended children could become
involved in serious accidents.
LOCKING WITH KEY (Driver's side)
Power The power door lock system allows you to lock
or unlock all doors, trunk lid and fuel filler lid
simultaneously.
O Turning the driver's door key to the front of
the vehicle will lock all doors, trunk lid and
fuel filler lid.
O Turning the driver's door key one time to
the rear of the vehicle will unlock the driv-
er's door. From that position, returning the
key to neutral (where the key can only be
removed and inserted) and turning it to the rear again within 5 seconds will unlock all
doors, fuel filler lid and trunk lid.
WINDOWS OPEN/CLOSE WITH
KEY Turn the driver's door key to the unlock posi-
tion and hold for about 1 second, all door
windows will begin to lower.
To stop opening, turn the key to the neutral
position.
To close all door windows, turn the key to the
lock position and hold for about 1 second.
To stop closing, turn the key to the neutral
position.
The rear door windows will operate 0.5 sec-
onds after the front windows' operation (if so
equipped).
In the event of a hand in the way, or other
obstruction, the auto reverse function will acti-
vate. SPA1421
DOORS
Pre-driving checks and adjustments
3-3
Z 02.11.1/V35-D/V5.0
X
Page 99 of 256

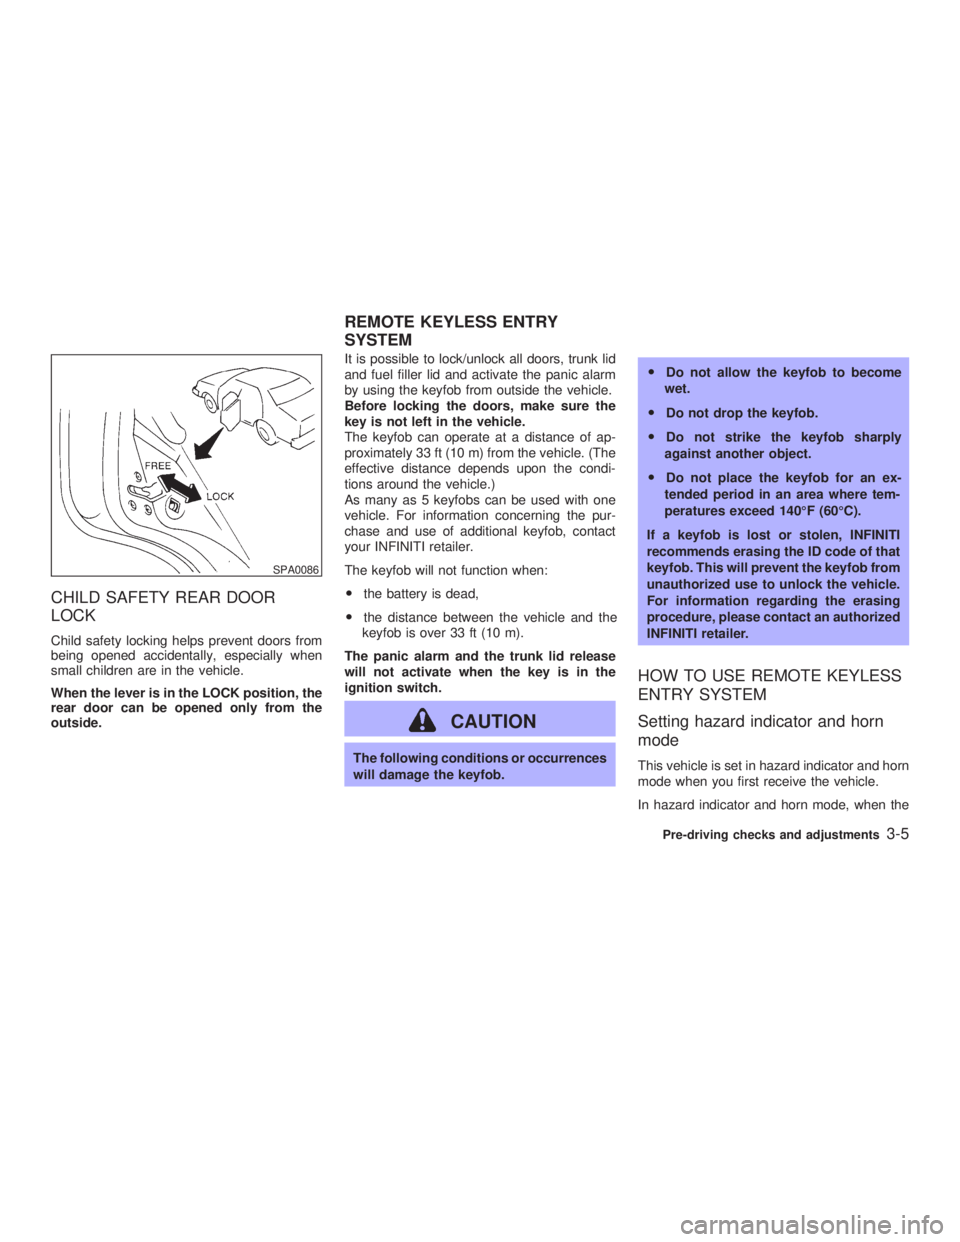
CHILD SAFETY REAR DOOR
LOCK Child safety locking helps prevent doors from
being opened accidentally, especially when
small children are in the vehicle.
When the lever is in the LOCK position, the
rear door can be opened only from the
outside. It is possible to lock/unlock all doors, trunk lid
and fuel filler lid and activate the panic alarm
by using the keyfob from outside the vehicle.
Before locking the doors, make sure the
key is not left in the vehicle.
The keyfob can operate at a distance of ap-
proximately 33 ft (10 m) from the vehicle. (The
effective distance depends upon the condi-
tions around the vehicle.)
As many as 5 keyfobs can be used with one
vehicle. For information concerning the pur-
chase and use of additional keyfob, contact
your INFINITI retailer.
The keyfob will not function when:
O the battery is dead,
O the distance between the vehicle and the
keyfob is over 33 ft (10 m).
The panic alarm and the trunk lid release
will not activate when the key is in the
ignition switch.
CAUTION The following conditions or occurrences
will damage the keyfob. O Do not allow the keyfob to become
wet.
O Do not drop the keyfob.
O Do not strike the keyfob sharply
against another object.
O Do not place the keyfob for an ex-
tended period in an area where tem-
peratures exceed 140ÉF (60ÉC).
If a keyfob is lost or stolen, INFINITI
recommends erasing the ID code of that
keyfob. This will prevent the keyfob from
unauthorized use to unlock the vehicle.
For information regarding the erasing
procedure, please contact an authorized
INFINITI retailer.
HOW TO USE REMOTE KEYLESS
ENTRY SYSTEM
Setting hazard indicator and horn
mode This vehicle is set in hazard indicator and horn
mode when you first receive the vehicle.
In hazard indicator and horn mode, when theSPA0086
REMOTE KEYLESS ENTRY
SYSTEM
Pre-driving checks and adjustments
3-5
Z 02.7.29/V35-D/V5.0
X
Page 100 of 256

LOCK button is pushed, the hazard indicator
flashes twice and the horn chirps once. When
the UNLOCK button is pushed, the hazard
indicator flashes once.
If hazard indicator and horn mode is not nec-
essary, you can switch to hazard indicator only
mode by following the switching procedure.
In hazard indicator only mode, when the LOCK
button is pushed, the hazard indicator flashes
twice. When the UNLOCK button is pushed,
neither the hazard indicator nor the horn oper-
ates.
(Switching procedure)
Push the LOCK and UNLOCK buttons on the
keyfob simultaneously for more than 2 sec-
onds to switch from one mode to the other.
When pushing the buttons to set hazard indi-
cator only mode, the hazard indicator flashes 3
times.
When pushing the buttons to set hazard indi-
cator and horn mode, the hazard indicator
flashes once and the horn chirps once.
Locking doors 1. Remove the ignition key.*1,*2
2. Close all the doors.*3
3. Push the LOCK button on the keyfob.
4. All the doors, trunk lid and fuel filler lid will
lock.
All of the doors will lock when the LOCK
button on the keyfob is pushed even
though a door remains open and/or the
ignition key is in the ON position.
5. The hazard indicator flashes twice and the
horn chirps once. O When the LOCK button is pushed with all
doors locked, the hazard indicator flashes
twice and the horn chirps once as a re-
minder that the doors are already locked.
*1: Doors lock with the keyfob while a key is in
the ignition switch. However, the panic
alarm and the trunk lid release will not
activate when the key is in the ignition
switch.
*2: Doors lock with the keyfob while the igni-
tion switch is in the ON position. However,
the hazard indicator and horn will not
function.
*3: Doors lock with the keyfob while any door SPA1260
3-6 Pre-driving checks and adjustments
Z 02.7.29/V35-D/V5.0
X
Page 101 of 256

is open. However, the hazard indicator
and horn will not function.
Unlocking doors 1. Push the UNLOCK button on the keyfob
once.
O The driver's door and fuel filler lid unlock
O The hazard indicator flashes once if all
doors are completely closed with the igni-
tion key in any position except the ON
position.
O The interior light turns on and the light timer
activates for 30 seconds when the switch is
in the DOOR position with the ignition key in
any position except the ON position. 2. Push the UNLOCK button on the keyfob
again within 5 seconds.
O All doors unlock
O Trunk lid unlocks (For models equipped
with type B release switch on the lid, see
later in this section.)
O The hazard indicator flashes once if all
doors are completely closed.
All doors will be locked automatically unless
one of the following operations is performed
within 1 minute of pressing the UNLOCK but-
ton.
O any door is opened
O Trunk lid opens (For models equipped with
type B release switch on the lid, see later in
this section.)
O the ignition switch is turned to the ON
position
The interior light can be turned off without
waiting for 30 seconds by turning the ignition
switch to the ON position or by locking the
doors with the keyfob.
Opening the windows Push the UNLOCK button on the keyfob.
The driver's door will unlock. SPA1433
Pre-driving checks and adjustments
3-7
Z 02.7.29/V35-D/V5.0
X
Page 108 of 256

OPENING THE FILLER LID To open the fuel filler lid, unlock it using one of
the following operations, then push the right-
hand side of the lid (Sedan), the left-hand side
of the lid (Coupe).
O Press the unlock button on the keyfob once.
O Insert the key into the door lock cylinder
and turn the door key clockwise twice.
O Press the power door lock switch to the
unlock side.
To lock, close the fuel filler lid and lock the
doors. FUEL FILLER CAP The fuel filler cap is a ratcheting type. Tighten
the cap clockwise until ratcheting clicks are
heard.
Put the fuel filler cap on the cap holder while
refueling.
WARNING O Gasoline is extremely flammable and
highly explosive under certain condi-
tions. You could be burned or seri-SPA1427B SPA1562 SPA1428A
FUEL FILLER LID
3-14 Pre-driving checks and adjustments
Z 02.7.29/V35-D/V5.0
X
Page 109 of 256

ously injured if it is misused or mis-
handled. Always stop the engine and
do not smoke or allow open flames or
sparks near the vehicle when refuel-
ing.
O Fuel may be under pressure. Turn the
cap a quarter turn, and wait for any
hissing sound to stop to prevent fuel
from spraying out and possible per-
sonal injury. Then remove the cap.
O Do not attempt to top off the fuel tank after the fuel pump nozzle shuts off
automatically.
Continued refueling may cause fuel
overflow, resulting in fuel spray and
possibly a fire.
O Use only an original equipment type
fuel filler cap as a replacement. It has
a built-in safety valve needed for
proper operation of the fuel system
and emission control system. An in-
correct cap can result in a serious
malfunction and possible injury. It
could also cause the malfunc-
tion indicator lamp to come on.
O Do not fill a portable fuel container in
the vehicle or trailer. Static electricity
can cause an explosion of flammable
liquid, vapor or gas in any vehicle or
trailer. To reduce the risk of serious
injury or death when filling portable
fuel containers:
Ð Always place the container on the
ground when filling.
Ð Do not use electronic devices
while filling.
Ð Keep the pump nozzle in contact
with the container while you are
filling it. Ð Use only approved portable fuel
containers for flammable liquid.
O Never pour fuel into the throttle body
to attempt to start your vehicle.
CAUTION O If fuel is spilled on the car body, flush
it away with water to avoid paint dam-
age.
O Tighten until the fuel filler cap clicks.
Failure to tighten the fuel filler cap
properly may cause the
mal-
function indicator lamp (MIL) to illu-
minate. If the
lamp illuminates
because the fuel filler cap is loose or
missing, tighten or install the cap and
continue to drive the vehicle. The
lamp should turn off after a few
driving trips. If the
lamp does
not turn off after a few driving trips,
have the vehicle inspected by an au-
thorized INFINITI retailer.SPA1563
Pre-driving checks and adjustments
3-15
Z 02.7.29/V35-D/V5.0
X
Page 249 of 256

Fuel
Capacities and recommended fuel/lubricants/
fluids .......................................................... 10-2
filler cap ..................................................... 3-14
filler lid ....................................................... 3-14
Fuel economy ............................................ 5-17
Fuel octane rating ..................................... 10-3
Fuel recommendation................................ 10-3
Gauge .......................................................... 2-5
Fuses .............................................................. 8-20
Fusible links .................................................... 8-20
G
Garage door opener, HomeLink Universal
Transceiver ..................................................... 2-37
Gas cap .......................................................... 3-14
Gauge ............................................................... 2-3
Engine coolant temperature gauge ............. 2-5
Fuel gauge .................................................. 2-5
Odometer..................................................... 2-4
Speedometer ............................................... 2-4
Tachometer ................................................. 2-4
General maintenance ....................................... 9-2
Glasses case .................................................. 2-26
Glove box........................................................ 2-27
Glove box lock ................................................ 2-27
H
Hazard warning flasher switch........................ 2-20
Head restraints ................................................. 1-9 Headlights
Bulb replacement ...................................... 8-25
Headlight switch ........................................ 2-17
Xenon headlights ..................................... 2-17
Heated seats................................................... 2-21
Heater
Engine coolant heater ............................... 5-24
Heater and air conditioner (automatic) ....... 4-3
HomeLink Universal Transceiver .................. 2-37
Hood, release ................................................. 3-10
Horn ................................................................ 2-21
How to stop alarm, Vehicle security ............... 2-14
I
Ignition switch ................................................... 5-4
Automatic transmission models ........... 5-4, 5-8
Key positions ............................................... 5-6
Manual transmission models ............. 5-5, 5-12
Immobilizer system ......................................... 2-14
In-cabin microfilter ............................................ 4-5
Indicator lights................................................. 2-11
Infiniti Vehicle Immobilizer System, Engine
start ................................................................... 5-6
Inside Automatic anti-glare mirror................... 3-17
Inspection/maintenance (I/M) test................. 10-21
Installing front bumper cover ........................ 10-12
Instrument panel ............................................... 2-2
Instrument pocket ........................................... 2-25
Interior light ..................................................... 2-35
Interior light replacement ................................ 8-26
Interior trunk lid release .................................. 3-12
ISOFIX child restraint ..................................... 1-40 J
Jump starting .................................................... 6-7
K
Keyless entry (See remote keyless entry
system) ............................................................. 3-5
Keys .................................................................. 3-2
L
Label, Air conditioner specification label ...... 10-12
Label, Emission control information label ..... 10-11
Label, F.M.V.S.S. certification label.............. 10-10
Labels
Air bag warning labels............................... 1-23
Engine serial number .............................. 10-10
Vehicle identification number (VIN)........... 10-9
LATCH system................................................ 1-40
License plate, Installing front license plate... 10-13
Light
Air bag warning light ................................. 1-23
Bulb replacement ...................................... 8-23
Flashing signal .......................................... 2-19
Fog light switch ......................................... 2-20
Headlight switch ........................................ 2-17
Headlights Bulb replacement .................... 8-25
Interior light................................................ 2-35
Map light .................................................... 2-35
Rear personal light .................................... 2-36
Replacement ............................................. 8-23
Trunk light.................................................. 2-37
11-3
Z 02.7.29/V35-D/V5.0
X