ignition INFINITI M HYBRID 2013 Quick Reference Guide
[x] Cancel search | Manufacturer: INFINITI, Model Year: 2013, Model line: M HYBRID, Model: INFINITI M HYBRID 2013Pages: 30, PDF Size: 2.55 MB
Page 6 of 30

4
new system features
valet Alert – u se valet Alert to set up a 0.2 mile radius around your vehicle.
•
Activate alerts by pressing the “c onnect to voice Menu” button on the Infiniti c onnection
screen or by pressing the
key on the map screen.
•
At the prompt, say “v alet Alert” and then “Activate” or “d eactivate”.
For more information, refer to the “Viewing technical information (section 7)” of your navigation System Owner’s Manual.
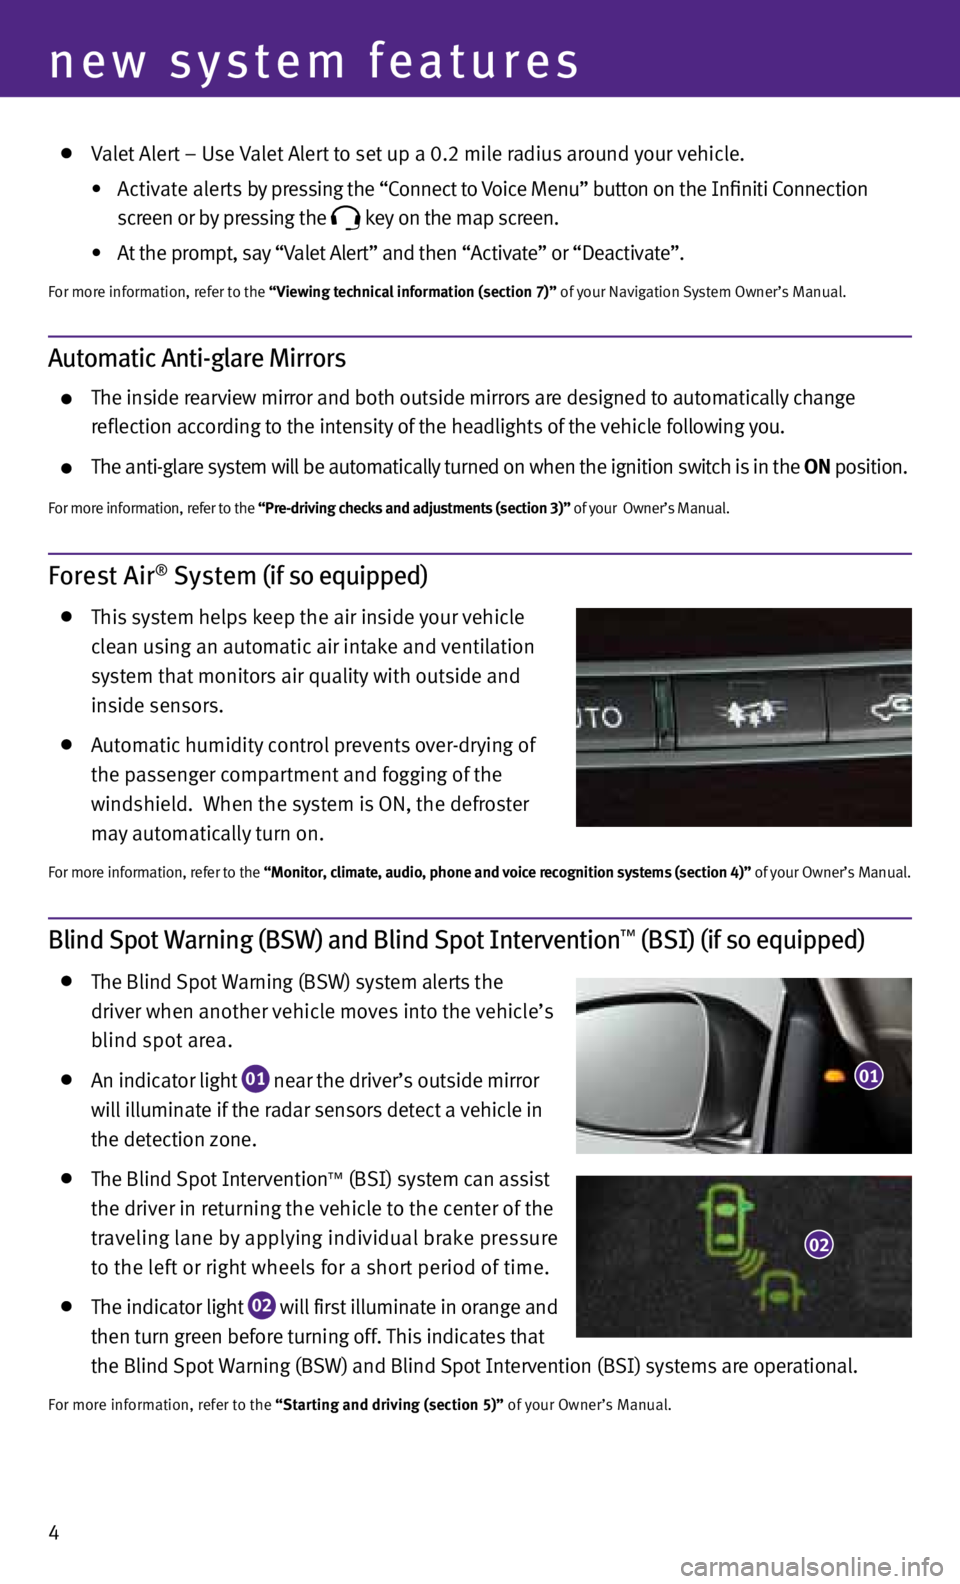
Forest Air® System (if so equipped)
this system helps keep the air inside your vehicle
clean using an automatic air intake and ventilation
system that monitors air quality with outside and
inside sensors.
Automatic humidity control prevents over-drying of
the passenger compartment and fogging of the
windshield. when the system is On, the defroster
may automatically turn on.
For more information, refer to the “Monitor, climate, audio, phone and voice recognition systems (section 4)” of your Owner’s Manual.
Blind Spot Warning (BSW) and Blind Spot Intervention™ (BSI) (if so equipped)
the Blind Spot warning (BSw) system alerts the
driver when another vehicle moves into the vehicle’s
blind spot area.
An indicator light
01 near the driver’s outside mirror
will illuminate if the radar sensors detect a vehicle in
the detection zone.
the Blind Spot Intervention™ (BSI) system can assist
the driver in returning the vehicle to the center of the
traveling lane by applying individual brake pressure
to the left or right wheels for a short period of time.
the indicator light
02 will first illuminate in orange and
then turn green before turning off. this indicates that
the Blind Spot warning (BSw) and Blind Spot Intervention (BSI) systems are operational.
For more information, refer to the “Starting and driving (section 5)” of your Owner’s Manual.
01
02
Automatic Anti-glare Mirrors
the inside rearview mirror and both outside mirrors are designed to automatically change
reflection according to the intensity of the headlights of the vehicle following you.
the anti-glare system will be automatically turned on when the ignition switch is in the ON position.
For more information, refer to the “Pre-driving checks and adjustments (section 3)” of your Owner’s Manual.
Page 8 of 30

6
essential information
Direct Response Hybrid™ System Warning Light
this light will illuminate when the ignition switch is in
the ON position and will turn off when the hybrid
system is started.
the light will also illuminate when a malfunction
occurs in the electric motor or hybrid system.
when this light illuminates while driving, immediately
stop the vehicle in a safe location and contact an I nFI nIt I retailer.
If the hybrid system warning light blinks while driving, it may indicate that the Li-ion battery
charge is low and you cannot continue to drive.
do not allow the vehicle to coast when the Li-ion battery is low or when the hybrid system
warning light blinks while driving. the engine will not automatically start to charge the Li-ion
battery while the vehicle is coasting.
For more information, refer to the “Instruments and controls (section 2)” of your Owner’s Manual.
Hybrid Awareness
your vehicle is virtually silent in the electric mode. If you exit your vehicle while it is ON, but the
engine is not running, the engine will automatically start, informing you that the car is still ON.
do not store your InFInItI Intelligent k ey™ within detection range of the vehicle. this may
cause welcome lights and other functions to activate creating unwanted battery drain.
the hybrid system is designed for optimum efficiency and performance. the electric mode
may vary with driving conditions and driver input. A full battery display does not indicate the
vehicle should be in the electric mode.
For more information, refer to the “Hybrid System Overview” section of your Owner’s Manual.
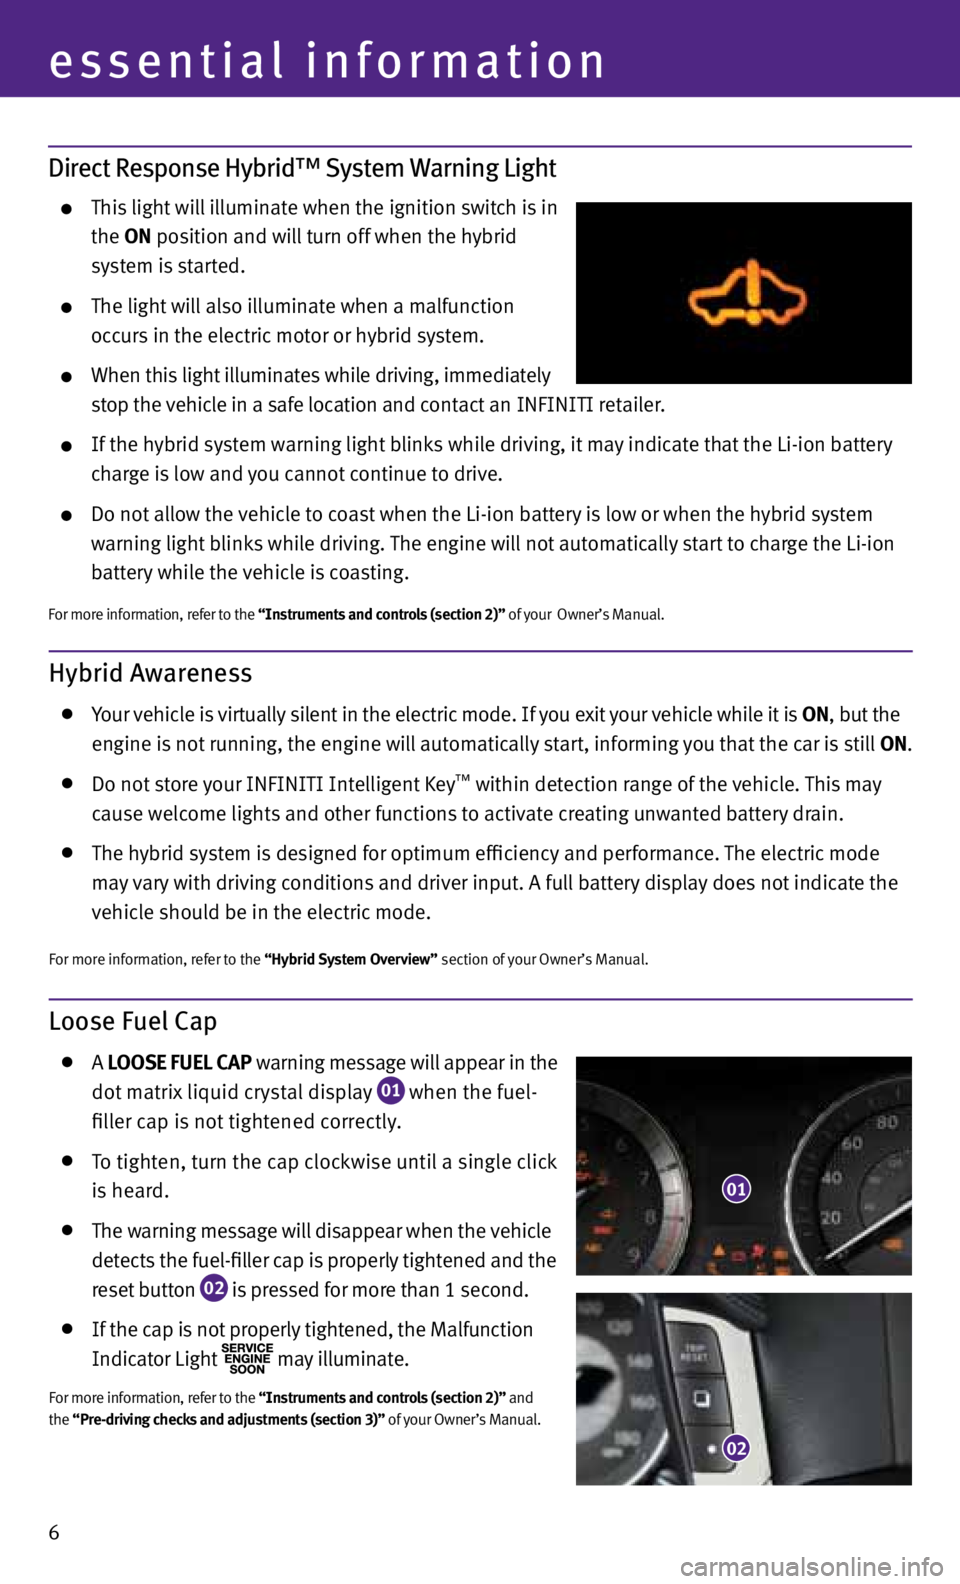
Loose Fuel Cap
A LOOSE FUEL CAP warning message will appear in the
dot matrix liquid crystal display
01 when the fuel-
filler cap is not tightened correctly.
to tighten, turn the cap clockwise until a single click
is heard.
the warning message will disappear when the vehicle
detects the fuel-filler cap is properly tightened and the
reset button
02 is pressed for more than 1 second.
If the cap is not properly tightened, the Malfunction
Indicator Light
may illuminate.
For more information, refer to the “Instruments and controls (section 2)” and
the
“Pre-driving checks and adjustments (section 3)” of your Owner’s Manual.
01
02
Page 11 of 30

9
first drive features
INFINITI Intelligent Key™ System
the InFInItI Intelligent k ey™ system allows you to
lock or unlock your vehicle, open your trunk and start
the engine.
nO te: It is important to make sure the Intelligent k ey is
with you (that is, in your pocket or purse).
the operating range of the Intelligent k ey is within
31.5 in (80 cm) from each request switch.
to lock the vehicle, push either door handle request
switch
01 once or press the
button
02 on the keyfob.
to unlock the vehicle, perform one of the following procedures:
• Push either door handle request switch
01 once;
the corresponding
door will unlock. p ush the door handle request switch
01 again within
1 minute; all other doors will unlock, or
• Press the
button
03 on the keyfob to unlock the driver’s side door.
press the
button again; all other doors will unlock.
to open the trunk, press the button
04 for more than 1 second.
the Intelligent k ey can also be used to activate the panic alarm by pressing
and holding the
button
05 for more than 1 second. Once activated, the
panic alarm and headlights will stay on for 25 seconds.
InteLLIGent key BAtteRy dIScHARGe
If the battery of the Intelligent k ey is discharged, or
environmental conditions interfere with the Intelligent
k ey operation, start the engine according to the
following procedure:
1. Move the shift lever to the P (P ARk) position.
2. Firmly apply the foot brake.
3. touch the ignition switch with the Intelligent k ey and a chime will sound.
4. w ithin 10 seconds after the chime sounds, push the ignition switch while depressing the
brake pedal and the engine will start.
For more information, refer to the “Pre-driving checks and adjustments (section 3)”, “Starting and driving (section 5)” and
the “Maintenance and do-it yourself (section 8)” of your Owner’s Manual.
01
02
03
04
05
Page 13 of 30

11
Automatic Drive Positioner
two positions for the driver’s seat, steering column
and outside mirrors can be stored in the automatic
drive positioner
01 memory.
Follow these procedures to set the memory positions:
• Confirm the shift lever is in the P (PARk) position.
• Push the ignition switch to the ON position.
• Adjust the driver’s seat, steering column and outside mirrors to the desired positions using
the adjusting switches for each feature.
• Push the SE t switch and within 5 seconds, push the memory switch (1 or 2) for at least
1 second.
• The indicator light on the memory switch you select will illuminate for approximately 5 seconds.
• The driver’s seat, steering column and outside mirror positions are now set to your preference.
these memorized positions can also be linked to your InFInItI Intelligent k ey™.
For more information, refer to the “Pre-driving checks and adjustments (section 3)” of your Owner’s Manual.
01
Outside Mirror Control Switch
to select the right or left side mirror, move the control
switch
01 right or left.
Adjust each mirror to the desired position using the
switch
02 .
to fold the outside rearview mirrors, push the switch
03 to the
position. to unfold the outside
rearview mirrors, push the switch
03 to the
position.
ReveRS e tIL t-dO wn FeA tuRe
when backing up the vehicle, the right or left outside mirror can be selected to automatically
turn downward.
1. push the ignition switch to the ON position.
2. Move the shift lever to the R (REVERSE) position.
3. choose the right or left outside mirror by operating the outside mirror control switch
01 .
4. the outside mirror surfaces move downward.
when one of the following conditions has occurred, the outside mirror surfaces will return to
their original positions.
• the shift lever is moved to any position other than R (REVERSE).
• the outside mirror control switch is set to the center “neutral” position.
• the ignition switch is pushed to the OFF position.
For more information, refer to the “Pre-driving checks and adjustments (section 3)” of your Owner’s Manual.
01
0203
Page 16 of 30

12
first drive features
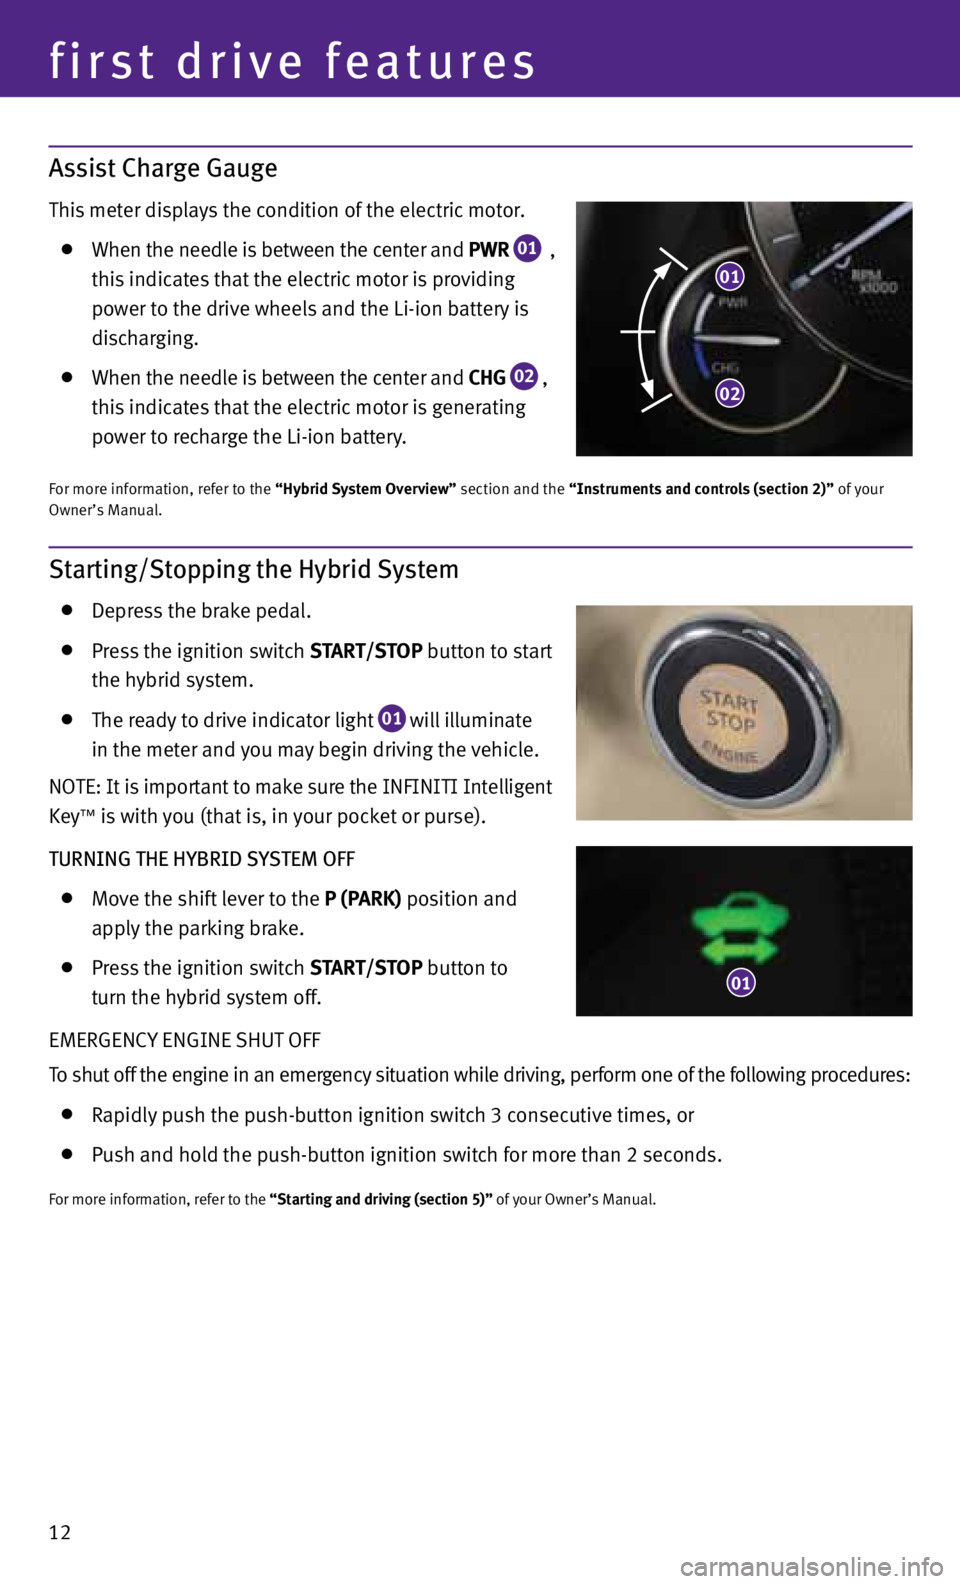
Assist Charge Gauge
this meter displays the condition of the electric motor.
when the needle is between the center and PWR
01 ,
this indicates that the electric motor is providing
power to the drive wheels and the Li-ion battery is
discharging.
when the needle is between the center and CHG
02 ,
this indicates that the electric motor is generating
power to recharge the Li-ion battery.
For more information, refer to the “Hybrid System Overview” section and the “Instruments and controls (section 2)” of your
Owner’s Manual.
Starting/Stopping the Hybrid System
depress the brake pedal.
press the ignition switch S tAR t/S tOP button to start
the hybrid system.
the ready to drive indicator light
01 will illuminate
in the meter and you may begin driving the vehicle.
nOte: It is important to make sure the InFInItI Intelligent
key
™ is with you (that is, in your pocket or purse).
TURNING THE HYBRID SYSTEM OFF
Move the shift lever to the P (PARk) position and
apply the parking brake.
press the ignition switch S tAR t/S tOP button to
turn the hybrid system off.
eMeRGency enGIne SHut OFF
t o shut off the engine in an emergency situation while driving, perform one of the following procedures:
Rapidly push the push-button ignition switch 3 consecutive times, or
push and hold the push-button ignition switch for more than 2 seconds.
For more information, refer to the “Starting and driving (section 5)” of your Owner’s Manual.
01
02
01
Page 17 of 30

13
Headlight Control Switch
HeAdLIGHt cOntROL
turn the headlight control switch to the
position
01 to turn on the front parking, side marker, tail, license
plate and instrument panel lights. turn the switch to
the
position
02 to turn on the headlights.
A ut OLIGHt S yS teM
the autolight system will automatically turn the headlights on when it is dark and off when it is
light. the system will keep the headlights on for a period of time after you turn the ignition off
and all doors are closed.
to activate the autolight system, turn the headlight control switch to the AU tO position
03
then push the ignition switch to ON.
to deactivate the autolight system, turn the headlight
control switch to the OFF,
01 or
position
02 .
HIGH BeAM S eLect
push the headlight control switch forward
04 to
select the high beam function. the blue indicator light
illuminates in the instrument panel. p ull the
headlight switch back to the original position to
select the low beam. the blue indicator light goes off.
pull and release the headlight control switch
05 to
flash the headlight high beams on and off.
FOG LIGHt S wItcH
nO te: the headlights must be on and the low beams
selected for the fog lights to operate.
turn the switch (inside collar) to the
position
06
to turn the fog lights on.
turn the switch (inside collar)
to the OFF position to
turn the fog lights off.
For more information, refer to the “Instruments and controls (section 2)” of
your Owner’s Manual.
03
01
02
04
05
06
Page 18 of 30

14
first drive features
Windshield Wiper/Washer Switch
Move the lever to the following positions to operate
the windshield wipers:
01 Mist (MISt) - One sweep operation of the wipers.
02 Auto (A U tO ) - Operates the rain-sensing wipers
intermittently. the intermittent speed can be
adjusted by twisting the time control ring
03 .
04 Low (LO) - wipers operate at a continuous
low-speed.
05 High (HI) - wipers operate at a continuous
high-speed.
06 p ull the lever toward you to activate the washer.
the wipers will operate several times.
RAIn-S enSInG A utO wIpeR S yS teM
the rain-sensing auto wiper system can automatically turn on the wipers and adjust the wiper
speed depending on the rainfall and the vehicle speed.
to set the rain-sensing auto wiper system, push the lever down to the AU tO position
02 . the
wiper will sweep once while the ignition switch is in the ON position.
the rain sensor sensitivity level can be adjusted by turning the time control ring
03 toward the
front (high sensitivity) or toward the rear (low sensitivity).
For more information, refer to the “Instruments and controls (section 2)” of your Owner’s Manual.
MISt
OFF
AU tO
LO
HI
02
04
05
01
03
06