oil filter INFINITI QX50 2021 Owner's Manual
[x] Cancel search | Manufacturer: INFINITI, Model Year: 2021, Model line: QX50, Model: INFINITI QX50 2021Pages: 542, PDF Size: 3.51 MB
Page 3 of 542
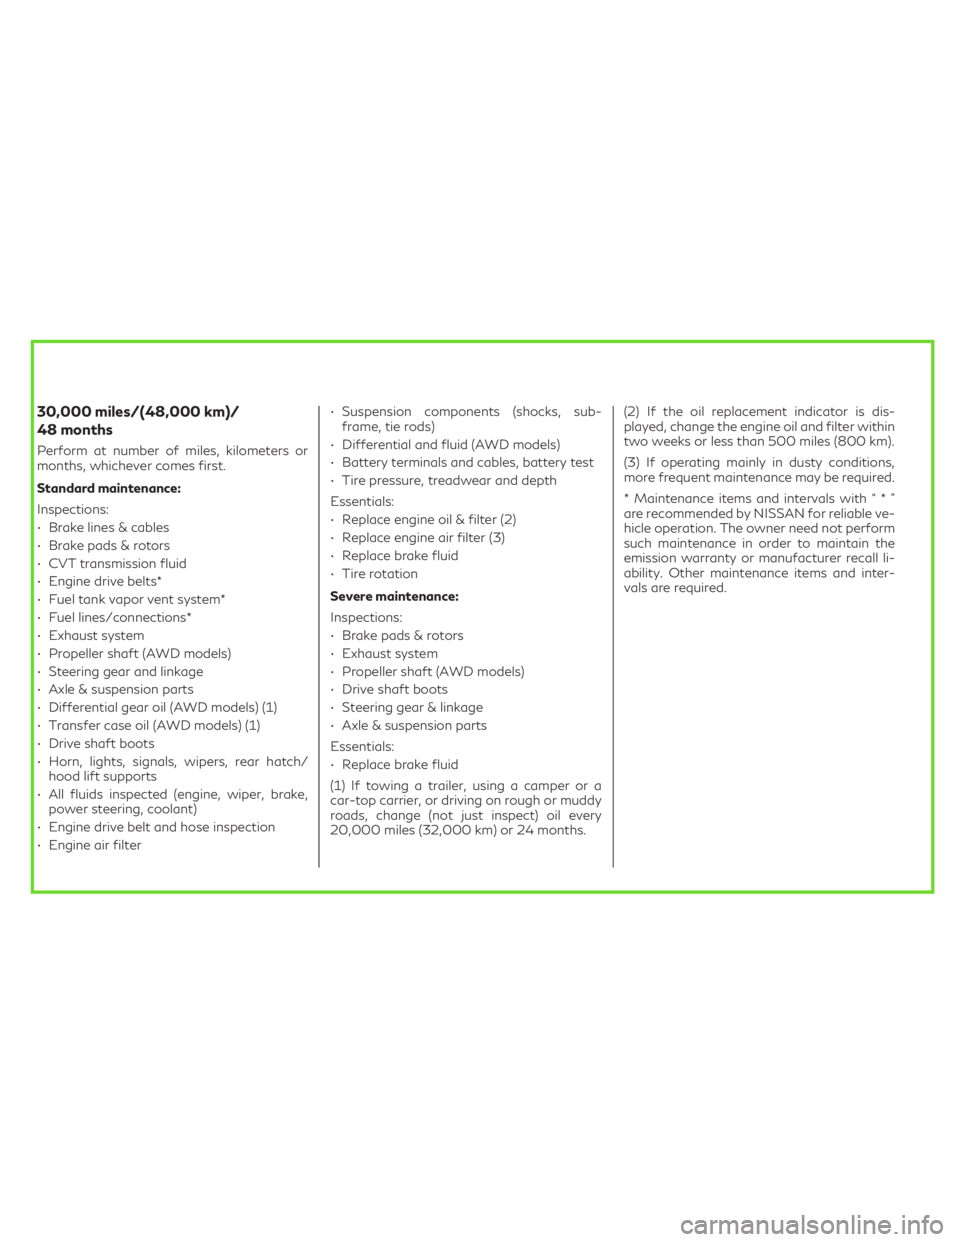
30,000 miles/(48,000 km)/
48 months
Perform at number of miles, kilometers or
months, whichever comes first.
Standard maintenance:
Inspections:
• Brake lines & cables
• Brake pads & rotors
• CVT transmission fluid
• Engine drive belts*
• Fuel tank vapor vent system*
• Fuel lines/connections*
• Exhaust system
• Propeller shaft (AWD models)
• Steering gear and linkage
• Axle & suspension parts
• Differential gear oil (AWD models) (1)
• Transfer case oil (AWD models) (1)
• Drive shaft boots
• Horn, lights, signals, wipers, rear hatch/
hood lift supports
• All fluids inspected (engine, wiper, brake,
power steering, coolant)
• Engine drive belt and hose inspection
• Engine air filter• Suspension components (shocks, sub-
frame, tie rods)
• Differential and fluid (AWD models)
• Battery terminals and cables, battery test
• Tire pressure, treadwear and depth
Essentials:
• Replace engine oil & filter (2)
• Replace engine air filter (3)
• Replace brake fluid
• Tire rotation
Severe maintenance:
Inspections:
• Brake pads & rotors
• Exhaust system
• Propeller shaft (AWD models)
• Drive shaft boots
• Steering gear & linkage
• Axle & suspension parts
Essentials:
• Replace brake fluid
(1) If towing a trailer, using a camper or a
car-top carrier, or driving on rough or muddy
roads, change (not just inspect) oil every
20,000 miles (32,000 km) or 24 months.(2) If the oil replacement indicator is dis-
played, change the engine oil and filter within
two weeks or less than 500 miles (800 km).
(3) If operating mainly in dusty conditions,
more frequent maintenance may be required.
* Maintenance items and intervals with“*”
are recommended by NISSAN for reliable ve-
hicle operation. The owner need not perform
such maintenance in order to maintain the
emission warranty or manufacturer recall li-
ability. Other maintenance items and inter-
vals are required.
Page 18 of 542

2.0L 4 cylinder (KR20DDET engine model)
1. Engine coolant reservoir (P. 8-15)
2. Drive belt location (P. 8-15)
3. Air filter (P. 8-15)4. Brake fluid reservoir (P. 8-10)
5. Battery (P. 8-12)
6. Fuse/Fusible link box (P. 8-15)7. Windshield-washer fluid reservoir
(P. 8-11)
8. Engine oil filler cap (P. 8-6)
9. Engine oil dipstick (P. 8-6)
Refer to the page number indicated in paren-
theses for operating details.
LDI3173
ENGINE COMPARTMENT CHECK
LOCATIONS
0-8Illustrated table of contents
Page 387 of 542
• Recirculating the cool air in the cabinwhen the A/C is on reduces cooling
load.
4. Drive at Economical Speeds and
Distances
• Observing the speed limit and not ex- ceeding 60 mph (97 km/h) (where le-
gally allowed) can improve fuel effi-
ciency due to reduced aerodynamic
drag.
• Maintaining a safe following distance behind other vehicles reduces unneces-
sary braking.
• Safely monitoring traffic to anticipate changes in speed permits reduced brak-
ing and smooth acceleration changes.
• Select a gear range suitable to road conditions.
5. Use Cruise Control
• Using cruise control during highway driving helps maintain a steady speed.
• Cruise control is particularly effective in providing fuel savings when driving on
flat terrains.
6. Plan for the Shortest Route
• Utilize a map or navigation system to determine the best route to save time. 7.
Avoid Idling
• Shutting off your engine when safe for stops exceeding 30–60 seconds saves
fuel and reduces emissions.
8. Buy an Automated Pass for Toll Roads
• Automated passes permit drivers to use special lanes to maintain cruising speed
through the toll and avoid stopping and
starting.
9. Winter Warm Up
• Limit idling time to minimize impact to fuel economy.
• Vehicles typically need no more than 30 seconds of idling at start-up to effec-
tively circulate the engine oil before
driving.
• Your vehicle will reach its ideal operat- ing temperature more quickly while driv-
ing versus idling.
10. Keeping your Vehicle Cool
• Park your vehicle in a covered parking area or in the shade whenever possible.
• When entering a hot vehicle, opening the windows will help to reduce the in-
side temperature faster, resulting in re-
duced demand on your A/C system. • Keep your engine tuned up.
• Follow the recommended scheduled
maintenance.
• Keep the tires inflated to the correct pres- sure. Low tire pressure increases tire wear
and lowers fuel economy.
• Keep all the wheels in correct alignment. Improper alignment increases tire wear and
lowers fuel economy.
• Use the recommended viscosity engine oil. For additional information, see “Engine oil
and oil filter recommendations” (P. 10-6).
INCREASING FUEL ECONOMY
Starting and driving5-145
Page 431 of 542
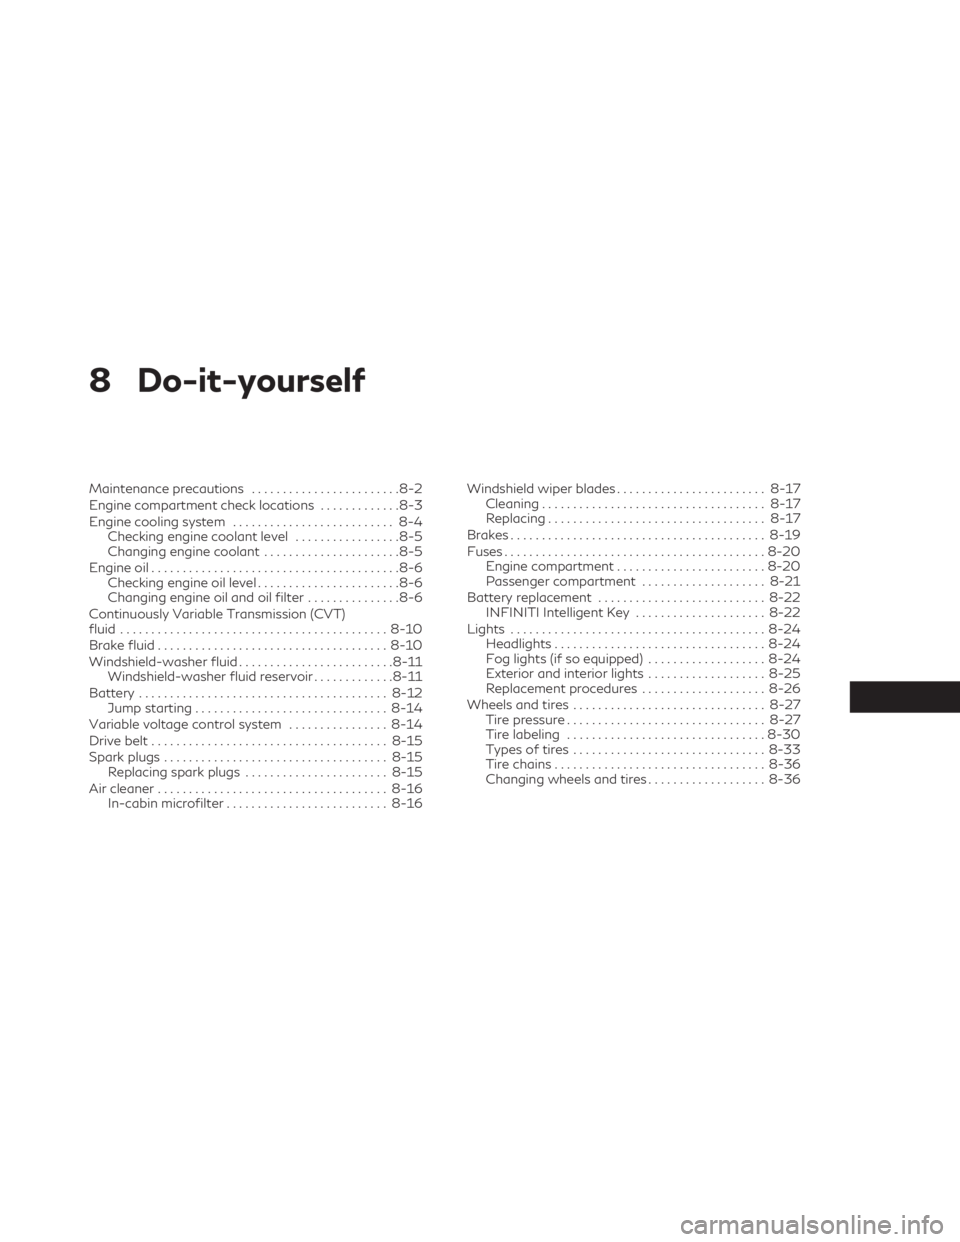
8 Do-it-yourself
Maintenance precautions........................8-2
Engine compartment check locations .............8-3
Engine cooling system .......................... 8-4
Checking engine coolant level .................8-5
Changing engine coolant ......................8-5
Engine oil ........................................8-6
Checking engine oil level .......................8-6
Changing engine oil and oil filter ...............8-6
Continuously Variable Transmission (CVT)
fluid ........................................... 8-10
Brake fluid ..................................... 8-10
Windshield-washer fluid ......................... 8-11
Windshield-washer fluid reservoir .............8-11
Battery ........................................ 8-12
Jump starting ............................... 8-14
Variable voltage control system ................8-14
Drive belt ...................................... 8-15
Spark plugs .................................... 8-15
Replacing spark plugs ....................... 8-15
Air cleaner ..................................... 8-16
In-cabin microfilter .......................... 8-16Windshield wiper blades
........................ 8-17
Cleaning .................................... 8-17
Replacing ................................... 8-17
Brakes ......................................... 8-19
Fuses .......................................... 8-20
Engine compartment ........................ 8-20
Passenger compartment ....................8-21
Battery replacement ........................... 8-22
INFINITI Intelligent Key .....................8-22
Lights ......................................... 8-24
Headlights .................................. 8-24
Fog lights (if so equipped) ...................8-24
Exterior and interior lights ...................8-25
Replacement procedures ....................8-26
Wheels and tires ............................... 8-27
Tire pressure ................................ 8-27
Tire labeling ................................ 8-30
Types
of tires ............................... 8-33
Tire chains .................................. 8-36
Changing wheels and tires ...................8-36
Page 432 of 542
When performing any inspection or mainte-
nance work on your vehicle, always take care
to prevent serious accidental injury to your-
self or damage to the vehicle. The following
are general precautions which should be
closely observed.
WARNING
• Park the vehicle on a level surface, apply
the parking brake securely and block the
wheels to prevent the vehicle from mov-
ing. Move the shift lever to P (Park).
• Be sure the ignition switch is in the OFF
or LOCK position when performing any
parts replacement or repairs.
• If you must work with the engine run-
ning, keep your hands, clothing, hair and
tools away from moving fans, belts and
any other moving parts.
• It is advisable to secure or remove any
loose clothing and remove any jewelry,
such as rings, watches, etc. before work-
ing on your vehicle.
• Always wear eye protection whenever
you work on your vehicle.
• Your vehicle is equipped with an auto-
matic engine cooling fan. It may come on
at any time without warning, even if the
ignition switch is in the OFF position and the engine is not running. To avoid injury,
always disconnect the negative battery
cable before working near the fan.
• If you must run the engine in an enclosed
space such as a garage, be sure there is
proper ventilation for exhaust gases to
escape.
• Never get under the vehicle while it is
supported only by a jack. If it is necessary
to work under the vehicle, support it
with safety stands.
•
Keep smoking materials, flame and sparks
away from the fuel tank and battery.
• Because the fuel lines on gasoline engine
models are under high pressure even
when the engine is off, it is recommended
that you visit an INFINITI retailer for ser-
vice of the fuel filter or fuel lines.
CAUTION
• Do not work under the hood while the
engine is hot. Turn the engine off and
wait until it cools down.
• Avoid contact with used engine oil and
coolant. Improperly disposed engine oil,
engine coolant and/or other vehicle flu-
ids can damage the environment. Always
conform to local regulations for disposal
of vehicle fluid. •
Never leave the engine or Continuously
Variable Transmission (CVT) related
component harnesses disconnected
while the ignition switch is in the ON
position.
• Never connect or disconnect the battery
or any transistorized component while
the ignition switch is in the ON position.
NOTE:
If the battery is completely drained the
transmission will not manually shift to other
positions.
This “Do-it-yourself” section gives instruc-
tions regarding only those items which are
relatively easy for an owner to perform.
A Genuine INFINITI service manual is also
available. For additional information, see
“Owner’s Manual/Service Manual order in-
formation” (P. 10-33).
You should be aware that incomplete or im-
proper servicing may result in operating diffi-
culties or excessive emissions, and could af-
fect warranty coverage. If in doubt about any
servicing, it is recommended that you have it
done by an INFINITI retailer.
MAINTENANCE PRECAUTIONS
8-2Do-it-yourself
Page 436 of 542

CHECKING ENGINE OIL LEVEL
1. Park the vehicle on a level surface andapply the parking brake.
2. Start the engine and let it idle until it reaches operating temperature.
3. Turn off the engine. Wait more than 10
minutes for the oil to drain back into the
oil pan.
4. Remove the dipstick and wipe it clean. Reinsert it all the way. 5. Remove the dipstick again and check the
oil level. It should be between the H (High)
and L (Low) marksOB. This is the normal
operating oil level range. If the oil level is
below the L (Low) mark
OA, remove the oil
filler cap and pour recommended oil
through the opening. Do not fill oil level
above H (High) mark
OC.
6. Recheck the oil level with the dipstick.
It is normal to add some oil between oil main-
tenance intervals or during the break-in pe-
riod, depending on the severity of operating
conditions.
CAUTION
Oil level should be checked regularly. Oper-
ating the engine with an insufficient
amount of oil can damage the engine, and
such damage is not covered by warranty.
CHANGING ENGINE OIL AND OIL
FILTER
For additional information on engine oil and
oil filter change, refer to the instructions out-
lined in this section.
Vehicle set-up
1. Park the vehicle on a level surface and apply the parking brake.
2. Run the engine until it reaches operating temperature.
3. Turn the engine off and wait for 15 minutes.
4. Raise and support the vehicle using a suit- able floor jack and safety jack stands.
• Place the safety jack stands under the ve- hicle jack-up points.
• A suitable adapter should be attached to the jack stand saddle.LDI3158LDI0371
ENGINE OIL
8-6Do-it-yourself
Page 438 of 542

Removal of engine protectors
1. Remove clipsOAand under-engine
protector.
Engine oil and filter
1. Place a large drain pan under the drain plug and oil filter.
2. Remove the oil filler cap.
3. Remove the drain plug with a wrench by turning it counterclockwise and com-
pletely drain the oil.
LDI3377
O3Oil filter
LDI3444
O4Under engine protector
LDI3445
8-8Do-it-yourself
Page 439 of 542

CAUTION
Be careful not to burn yourself, as the en-
gine oil is hot.
WARNING
• Prolonged and repeated contact with
used engine oil may cause skin cancer.
• Try to avoid direct skin contact with
used oil. If skin contact is made, wash
thoroughly with soap or hand cleaner as
soon as possible.
• Keep used engine oil out of reach of
children.
4. Loosen the oil filter with an oil filter wrench by turning it counterclockwise.
Remove the oil filter by turning it by hand.
5. Wipe the engine oil filter mounting sur- face with a clean rag.
CAUTION
Be sure to remove any old gasket material
remaining on the sealing surface of the en-
gine. Failure to do so could lead to an oil
leak and engine damage. •
The dipstick must be inserted in place to
prevent oil spillage from the dipstick hole
when filling the engine with oil.
6. Coat the gasket on the new filter with clean engine oil.
7. Screw in the oil filter clockwise until a slight resistance is felt, then tighten addi-
tionally more than 2/3 turn.
Oil filter tightening torque: 14.7 to 20.6 N·m (11 to 15 ft-lb)
8. Clean and re-install the drain plug with a new washer. Securely tighten the drain
plug with a wrench. Do not use excessive
force.
Drain plug tightening torque: 29.4 to 39.2 N·m (22 to 29 ft-lb)
9. Refill the engine with the recommended oil through the oil filler opening, and install
the oil filler cap securely.
For additional information about drain and
refill capacity, see “Recommended fluids/
lubricants and capacities” (P. 10-2). The drain
and refill capacity depends on the oil tem-
perature and drain time. Use these specifica-
tions for reference only. Always use the dip-
stick to determine the proper amount of oil in
the engine. 10. Start the engine and check for leakage
around the drain plug and the oil filter.
Correct as required. Turn the engine off
and wait more than 15 minutes. Check
the oil level with the dipstick. Add engine
oil if necessary.
After the operation
1. Reinstall engine protectors in reverse or-der of removal.
2. Lower the vehicle carefully to the ground.
3. Reset the oil control system. For addi- tional information, see “Vehicle informa-
tion display” (P. 2-19)
• Dispose of waste oil and filter properly.
• Check your local regulations.
Do-it-yourself8-9
Page 476 of 542

NOTE:
INFINITI does not advocate the use of non-
OEM approved aftermarket flushing sys-
tems and strongly advises against perform-
ing these services on an INFINITI product.
Many of the aftermarket flushing systems
use non-OEM approved chemicals or sol-
vents, the use of which has not been vali-
dated by INFINITI.
For recommended fuel, lubricants, fluids,
grease, and refrigerant, see “Recommended
fluids/lubricants and capacities” (P. 10-2).
EMISSION CONTROL SYSTEM
MAINTENANCE:
Drive belt*:Check engine drive belt for wear,
fraying or cracking and for proper tension.
Replace any damaged drive belt.
Engine air filter: Replace at specified inter-
vals. When driving for prolonged periods in
dusty conditions, check/replace the filter
more frequently.
Engine coolant*: Replace coolant at the
specified interval. When adding or replacing
coolant, be sure to use only Genuine NISSAN
Long Life Antifreeze/Coolant (blue) or
equivalent with the proper mixture. (For ad- ditional information on the proper mixture for
your area, see “Engine cooling system”
(P. 8-4).)
NOTE: Mixing any other type of coolant or
the use of non-distilled water may reduce
the recommended service interval of the
coolant.
Engine oil and oil filter:
Replace engine oil
and oil filter at the specified intervals. For
recommended oil grade and viscosity, see
“Recommended fluids/lubricants and capaci-
ties” (P. 10-2).
Engine valve clearance*: Inspect only if valve
noise increases. Adjust valve clearance if
necessary.
Evaporative emissions control vapor lines*:
Check vapor lines for leaks or looseness.
Tighten connections or replace parts as
necessary.
Fuel lines*: Check the fuel hoses, piping and
connections for leaks, looseness, or deterio-
ration. Tighten connections or replace parts
as necessary.
Spark plugs: Replace at specified intervals.
Install new plugs of the same type as origi-
nally equipped.
CHASSIS AND BODY
MAINTENANCE:
Brake lines and cables: Visually inspect for
proper installation. Check for chafing, cracks,
deterioration, and signs of leaking. Replace
any deteriorated or damaged parts
immediately.
Brake pads and rotors: Check for wear, de-
terioration and fluid leaks. Replace any dete-
riorated or damaged parts immediately.
Exhaust system: Visually inspect the exhaust
pipes, muffler and hangers for leaks, cracks,
deterioration, and damage. Tighten connec-
tions or replace parts as necessary.
In-cabin microfilter: Replace at specified in-
tervals. When driving for prolonged periods in
dusty conditions, replace the filter more
frequently.
Propeller shaft(s): Check for damage, loose-
ness, and grease leakage. (AWD)
Steering gear and linkage, axle and suspen-
sion parts, drive shaft boots: Check for dam-
age, looseness, and leakage of oil or grease.
Under severe driving conditions, inspect more
frequently.
9-6Maintenance and schedules
Page 478 of 542
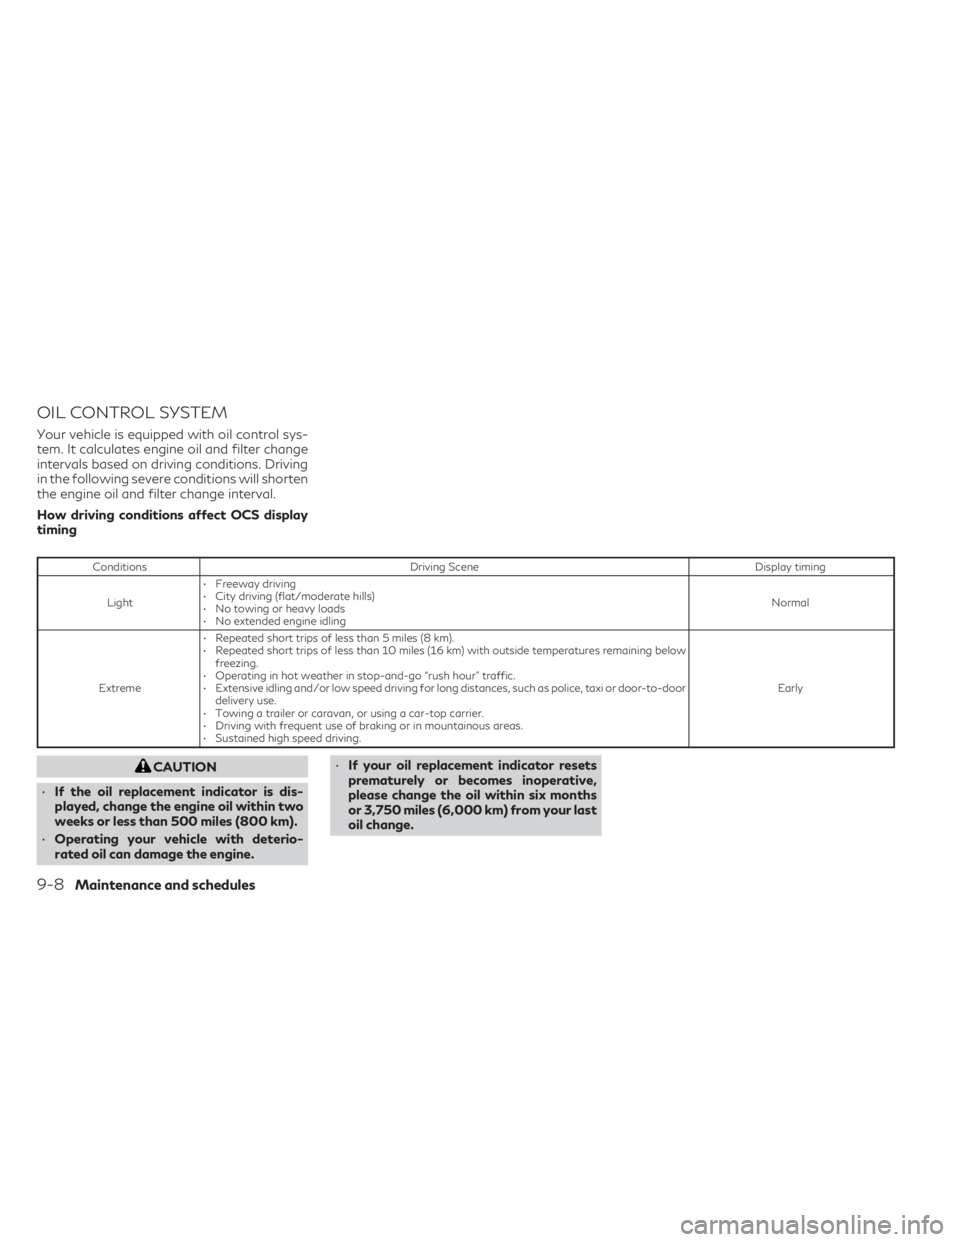
OIL CONTROL SYSTEM
Your vehicle is equipped with oil control sys-
tem. It calculates engine oil and filter change
intervals based on driving conditions. Driving
in the following severe conditions will shorten
the engine oil and filter change interval.
How driving conditions affect OCS display
timing
ConditionsDriving Scene Display timing
Light • Freeway driving
• City driving (flat/moderate hills)
• No towing or heavy loads
• No extended engine idling Normal
Extreme • Repeated short trips of less than 5 miles (8 km).
• Repeated short trips of less than 10 miles (16 km) with outside temperatures remaining below
freezing.
• Operating in hot weather in stop-and-go “rush hour” traffic.
• Extensive idling and/or low speed driving for long distances, such as police, taxi or door-to-door delivery use.
• Towing a trailer or caravan, or using a car-top carrier.
• Driving with frequent use of braking or in mountainous areas.
• Sustained high speed driving. Early
CAUTION
• If the oil replacement indicator is dis-
played, change the engine oil within two
weeks or less than 500 miles (800 km).
• Operating your vehicle with deterio-
rated oil can damage the engine. •
If your oil replacement indicator resets
prematurely or becomes inoperative,
please change the oil within six months
or 3,750 miles (6,000 km) from your last
oil change.
9-8Maintenance and schedules