key INFINITI QX50 2022 User Guide
[x] Cancel search | Manufacturer: INFINITI, Model Year: 2022, Model line: QX50, Model: INFINITI QX50 2022Pages: 540, PDF Size: 6.58 MB
Page 133 of 540

• If they are not removed completely, wipewith water first and then wipe with a dry
cloth. Otherwise, water stains may
remain.
• It is not recommended to use acids or alka- lis (acidic/alkaline detergents, etc.) and
organic solvents (ethanol, etc.), since the
screen quality may deteriorate by the
residue.
• It is not recommended to use tissues and wet wipes since they may damage the
screen.
• If the displayed image appears distorted, it is recommended that you have the system
checked by an INFINITI retailer or qualified
workshop.
• The HUD has a special windshield to allow the image to be displayed clearly. If your
windshield needs replacing, it is recom-
mended that you visit an INFINITI retailer.
HOW TO USE THE HUD
To turn the HUD system on, push the HUD
switch. To turn the HUD off, push the switch
again.
If the HUD system is turned off, it will remain
off even if the vehicle is restarted.
To adjust the HUD settings when the system
is on:
1. Press the MENU button below the lower display.
2. Touch the “Settings” key and then the “Head Up Display” key. 3. Adjust the positioning of the HUD on the
windshield by touching the arrows, and
the brightness by touching the brightness
keys. To change what items are shown in
the HUD, touch the “Display items” key.
The following items (if so equipped) may
be turned on or off:
– Driving Aids
– Navigation
– Traffic Sign Recognition
NOTE:
The emergency information may appear
even if the display contents are turned off.
DRIVER ASSISTANCE/
NAVIGATION LINKING
The HUD will display driver assistance and
navigation information
O3.
The driver assistance display will display
warning situations for the following systems:
• FEB with Pedestrian Detection
•LDW
• PFCW
• Hands-free warning (for vehicles with Pro- PILOT Assist) (if so equipped)
LIC3829
Instruments and controls2-49
Page 140 of 540

GLOVE BOX
Open the glove box by pulling the handle. Use
the master key when locking
O1or unlocking
O2the glove box.
WARNING
Keep glove box lid closed while driving to
help prevent injury in an accident or a sud-
den stop.
CONSOLE BOX
To open the console box, press down on the
latch. The latch will release.
To close, push the lid down until the lock
latches.
OVERHEAD SUNGLASSES
STORAGE
To open the sunglasses holder, pushO1and
release.
Only store one pair of sunglasses in the
holder.
WARNING
Keep the sunglasses holder closed while
driving to avoid obstructing the driver’s
view and to help prevent an accident.
LIC3902LIC3836LIC3837
2-56Instruments and controls
Page 145 of 540

The roof rack crossbars may be installed or
removed. Use an L shaped allen key to install
and remove the crossbars.1. Manually remove the protective covers
from the roof side rails.2. Using an allen key, unturn the screw to
remove the plastic cover.
LIC3890LIC4561
Instruments and controls2-61
Page 146 of 540

3. Use an allen key to loosen the clamp screw. 4. Open the clamp approximately two inchesto minimize potential scratching of the roof
side rails.5. Determine crossbar orientation by locating
the arrow that points to the front of the
vehicle.
LIC4593LIC3893LIC3894
2-62Instruments and controls
Page 147 of 540

6. Align the pins on the passenger and driver
side inner clamp with the holes in the roof
side rails.7. While holding the inner clamp, use an allen
key to tighten the clamping screw.
8. Tighten both the driver and passenger side
clamping screw.
NOTE:
Using an allen key, tighten to 10 N•m (7.4
ft.-lbs.).
LIC3895LIC4594LIC4595
Instruments and controls2-63
Page 148 of 540

9. Tighten both the driver and passenger side
shoulder screw.
NOTE:
Using an allen key, tighten to 10 N•m (7.4
ft.-lbs.).10. Assemble the plastic cover. Slide the
cover over the crossbar.
11. Ensure the cover is in the final position.
LIC4562LIC3898LIC3899
2-64Instruments and controls
Page 149 of 540

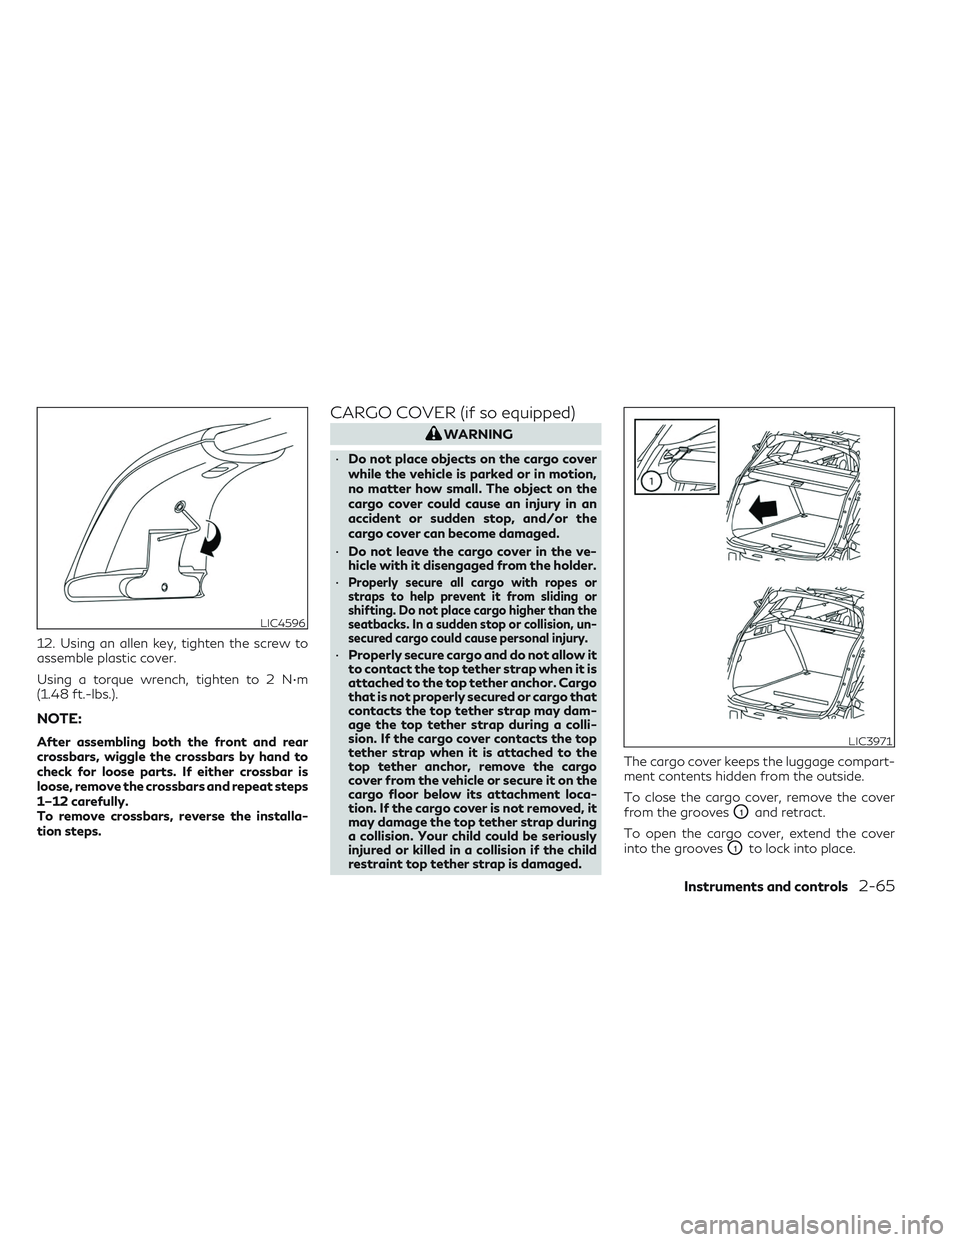
12. Using an allen key, tighten the screw to
assemble plastic cover.
Using a torque wrench, tighten to 2 N•m
(1.48 ft.-lbs.).
NOTE:
After assembling both the front and rear
crossbars, wiggle the crossbars by hand to
check for loose parts. If either crossbar is
loose, remove the crossbars and repeat steps
1–12 carefully.
To remove crossbars, reverse the installa-
tion steps.
CARGO COVER (if so equipped)
WARNING
• Do not place objects on the cargo cover
while the vehicle is parked or in motion,
no matter how small. The object on the
cargo cover could cause an injury in an
accident or sudden stop, and/or the
cargo cover can become damaged.
• Do not leave the cargo cover in the ve-
hicle with it disengaged from the holder.
•
Properly secure all cargo with ropes or
straps to help prevent it from sliding or
shifting. Do not place cargo higher than the
seatbacks. In a sudden stop or collision, un-
secured cargo could cause personal injury.
• Properly secure cargo and do not allow it
to contact the top tether strap when it is
attached to the top tether anchor. Cargo
that is not properly secured or cargo that
contacts the top tether strap may dam-
age the top tether strap during a colli-
sion. If the cargo cover contacts the top
tether strap when it is attached to the
top tether anchor, remove the cargo
cover from the vehicle or secure it on the
cargo floor below its attachment loca-
tion. If the cargo cover is not removed, it
may damage the top tether strap during
a collision. Your child could be seriously
injured or killed in a collision if the child
restraint top tether strap is damaged. The cargo cover keeps the luggage compart-
ment contents hidden from the outside.
To close the cargo cover, remove the cover
from the grooves
O1and retract.
To open the cargo cover, extend the cover
into the grooves
O1to lock into place.
LIC4596
LIC3971
Instruments and controls2-65
Page 155 of 540

WARNING
• To avoid personal injury, keep your
hands, fingers and head away from the
sunshade arm, the arm rail and sunshade
inlet port.
• Do not allow children near the sunshade
system. They could be injured.
• Do not place objects on or near the sun-
shade. This could cause improper opera-
tion or damage it.
• Do not pull or push the sunshade. This
could cause improper operation or dam-
age it.
CAUTION
• Do not place objects (such as newspa-
pers, handkerchiefs, etc.) on the sun-
shade inlet port. Doing so may entangle
these objects in the sunshade when it is
extending or retracting, causing im-
proper operation or damage to the
sunshade.
• Do not push the sunshade arm with your
hands, etc., as this may deform it. Im-
proper operation or damage to the sun-
shade may result. •
Do not put any object into the sunshade
inlet port as this may result in improper
operation or damage the sunshade.
• Do not hang any object on the arm rail as
this may result in improper operation or
damage the sunshade.
• Do not forcefully pull the sunshade. Do-
ing so may elongate the sunshade. Im-
proper operation or damage to the sun-
shade may result.
The interior lights will automatically turn on
and stay on for a period of time when:
• The doors are unlocked by the IntelligentKey, a key or the request switch while all
doors are closed and the ignition switch is
in the OFF position.
• The doors and/or liftgate is opened.
• The switch is individually pushed.
When the ON switch
O1is pushed, the inte-
rior lights illuminate.
When the DOOR/OFF switch
O2is pushed,
the interior lights do not illuminate unless
individually pushed.
LIC3841
INTERIOR LIGHTS
Instruments and controls2-71
Page 163 of 540

3 Pre-driving checks and adjustments
Keys.............................................3-2
INFINITI Intelligent Key .......................3-2
INFINITI Vehicle Immobilizer System
keys ..........................................3-4
Doors ...........................................3-4
Locking with key ..............................3-4
Locking with inside lock knob ..................3-5
Locking with power door lock switch ..........3-5
Automatic door locks .........................3-5
Child safety rear door lock .....................3-6
INFINITI Intelligent Key System ...................3-6
Operating range ..............................3-8
Door locks/unlocks precaution ................3-8
INFINITI Intelligent Key operation .............3-9
How to use the remote keyless entry
function .................................... 3-13
Warning signals ............................. 3-16
Troubleshooting guide ......................3-16
Log-in function ............................. 3-18
Remote Engine Start (if so equipped) ...........3-18
Remote Engine Start operating range ........3-19
Remote starting the vehicle ..................3-19
Extending engine run time ...................3-20
Canceling a Remote Engine Start ............3-20
Conditions the Remote Engine Start will
not work ................................... 3-20Hood
.......................................... 3-21
Liftgate ....................................... 3-22
Operating the power liftgate ................3-22
Motion-Activated Liftgate
(if so equipped) ............................. 3-25
Power liftgate main switch ..................3-26
Liftgate release ............................. 3-27
Liftgate position setting .....................3-28
Fuel-filler door ................................. 3-28
Opening the fuel-filler door ..................3-28
Fuel-filler cap ............................... 3-29
Steering wheel ................................. 3-31
Manual operation (if so equipped) ...........3-31
Automatic operation (if so equipped) .........3-31
Sun visors ..................................... 3-32
Vanity mirrors .............................. 3-33
Card holder ................................. 3-33
Mirrors ........................................ 3-33
Automatic
anti-glare rearview mirror ........3-33
Outside mirrors ............................. 3-35
Memory Seat (if so equipped) ...................3-37
Memory storage function ...................3-37
Entry/exit function .......................... 3-38
Setting memory function ....................3-39
System operation ........................... 3-39
Page 164 of 540

INFINITI INTELLIGENT KEY
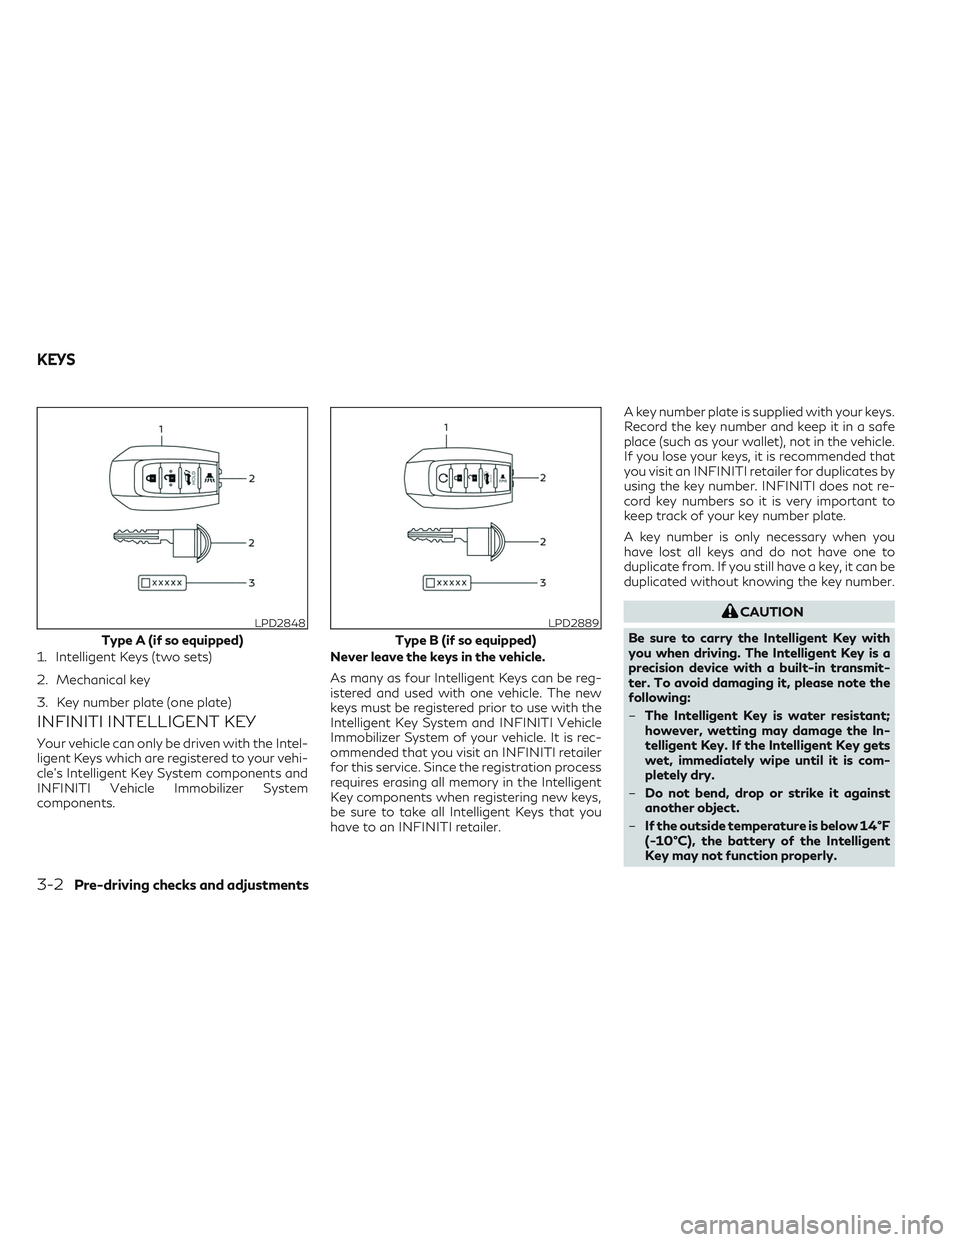
Your vehicle can only be driven with the Intel-
ligent Keys which are registered to your vehi-
cle’s Intelligent Key System components and
INFINITI Vehicle Immobilizer System
components.Never leave the keys in the vehicle.
As many as four Intelligent Keys can be reg-
istered and used with one vehicle. The new
keys must be registered prior to use with the
Intelligent Key System and INFINITI Vehicle
Immobilizer System of your vehicle. It is rec-
ommended that you visit an INFINITI retailer
for this service. Since the registration process
requires erasing all memory in the Intelligent
Key components when registering new keys,
be sure to take all Intelligent Keys that you
have to an INFINITI retailer.A key number plate is supplied with your keys.
Record the key number and keep it in a safe
place (such as your wallet), not in the vehicle.
If you lose your keys, it is recommended that
you visit an INFINITI retailer for duplicates by
using the key number. INFINITI does not re-
cord key numbers so it is very important to
keep track of your key number plate.
A key number is only necessary when you
have lost all keys and do not have one to
duplicate from. If you still have a key, it can be
duplicated without knowing the key number.
CAUTION
Be sure to carry the Intelligent Key with
you when driving. The Intelligent Key is a
precision device with a built-in transmit-
ter. To avoid damaging it, please note the
following:
– The Intelligent Key is water resistant;
however, wetting may damage the In-
telligent Key. If the Intelligent Key gets
wet, immediately wipe until it is com-
pletely dry.
– Do not bend, drop or strike it against
another object.
– If the outside temperature is below 14°F
(-10°C), the battery of the Intelligent
Key may not function properly.LPD2848
Type A (if so equipped)
1. Intelligent Keys (two sets)
2. Mechanical key
3. Key number plate (one plate)
LPD2889
Type B (if so equipped)
KEYS
3-2Pre-driving checks and adjustments