center console INFINITI QX80 2018 Infiniti Connection
[x] Cancel search | Manufacturer: INFINITI, Model Year: 2018, Model line: QX80, Model: INFINITI QX80 2018Pages: 284, PDF Size: 1.34 MB
Page 26 of 284

2. Getting started
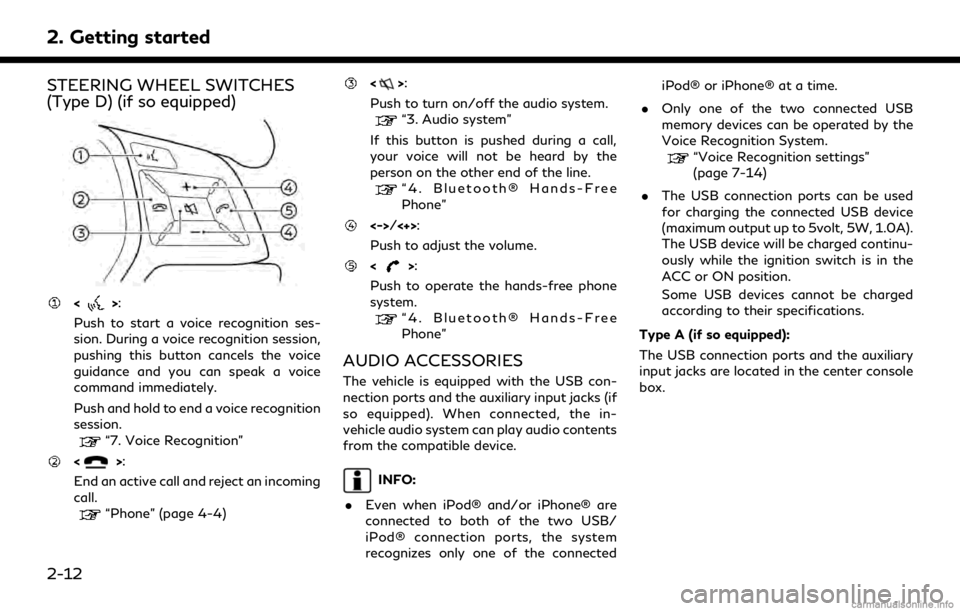
STEERING WHEEL SWITCHES
(Type D) (if so equipped)
<>:
Push to start a voice recognition ses-
sion. During a voice recognition session,
pushing this button cancels the voice
guidance and you can speak a voice
command immediately.
Push and hold to end a voice recognition
session.
“7. Voice Recognition”
<>:
End an active call and reject an incoming
call.
“Phone” (page 4-4)
<>:
Push to turn on/off the audio system.
“3. Audio system”
If this button is pushed during a call,
your voice will not be heard by the
person on the other end of the line.
“4. Bluetooth® Hands-Free
Phone”
<->/<+>:
Push to adjust the volume.
<>:
Push to operate the hands-free phone
system.
“4. Bluetooth® Hands-Free
Phone”
AUDIO ACCESSORIES
The vehicle is equipped with the USB con-
nection ports and the auxiliary input jacks (if
so equipped). When connected, the in-
vehicle audio system can play audio contents
from the compatible device.
INFO:
. Even when iPod® and/or iPhone® are
connected to both of the two USB/
iPod® connection ports, the system
recognizes only one of the connected iPod® or iPhone® at a time.
. Only one of the two connected USB
memory devices can be operated by the
Voice Recognition System.
“Voice Recognition settings”
(page 7-14)
. The USB connection ports can be used
for charging the connected USB device
(maximum output up to 5volt, 5W, 1.0A).
The USB device will be charged continu-
ously while the ignition switch is in the
ACC or ON position.
Some USB devices cannot be charged
according to their specifications.
Type A (if so equipped):
The USB connection ports and the auxiliary
input jacks are located in the center console
box.
2-12
Page 106 of 284

3. Audio system
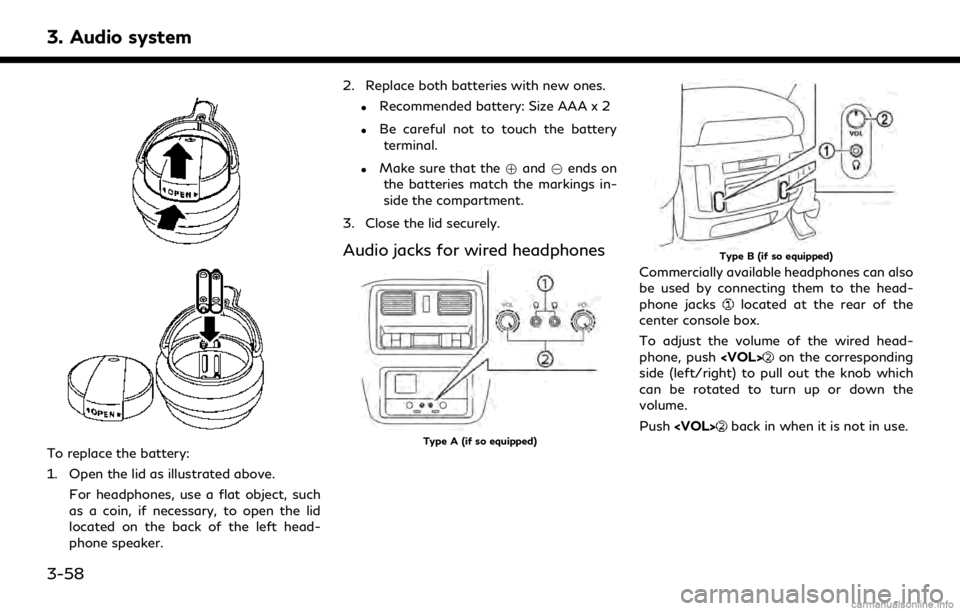
To replace the battery:
1. Open the lid as illustrated above.For headphones, use a flat object, such
as a coin, if necessary, to open the lid
located on the back of the left head-
phone speaker. 2. Replace both batteries with new ones.
.Recommended battery: Size AAA x 2
.Be careful not to touch the battery
terminal.
.Make sure that the +and 7ends on
the batteries match the markings in-
side the compartment.
3. Close the lid securely.
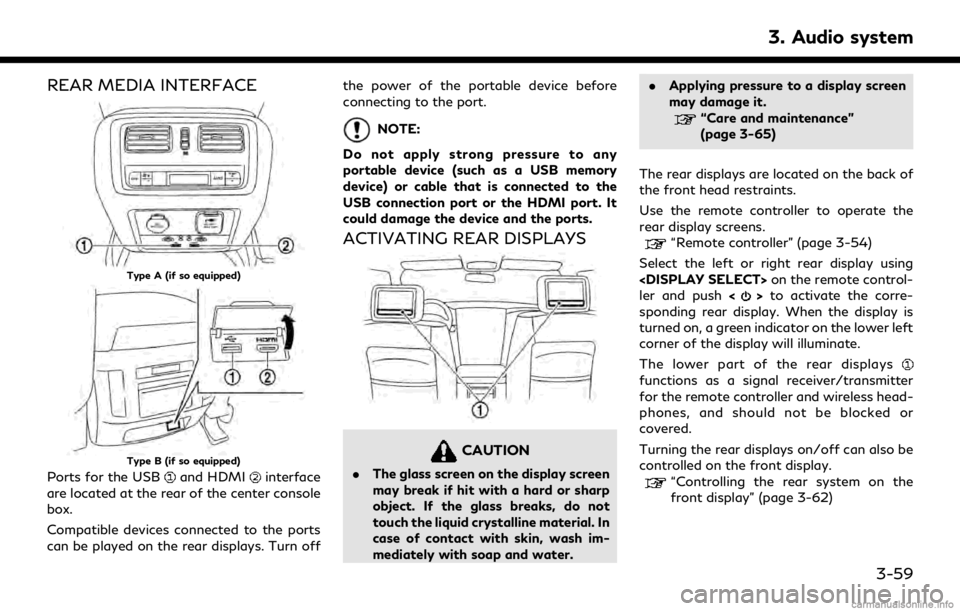
Audio jacks for wired headphones
Type A (if so equipped)
Type B (if so equipped)
Commercially available headphones can also
be used by connecting them to the head-
phone jacks
located at the rear of the
center console box.
To adjust the volume of the wired head-
phone, push
on the corresponding
side (left/right) to pull out the knob which
can be rotated to turn up or down the
volume.
Push
back in when it is not in use.
3-58
Page 107 of 284

REAR MEDIA INTERFACE
Type A (if so equipped)
Type B (if so equipped)
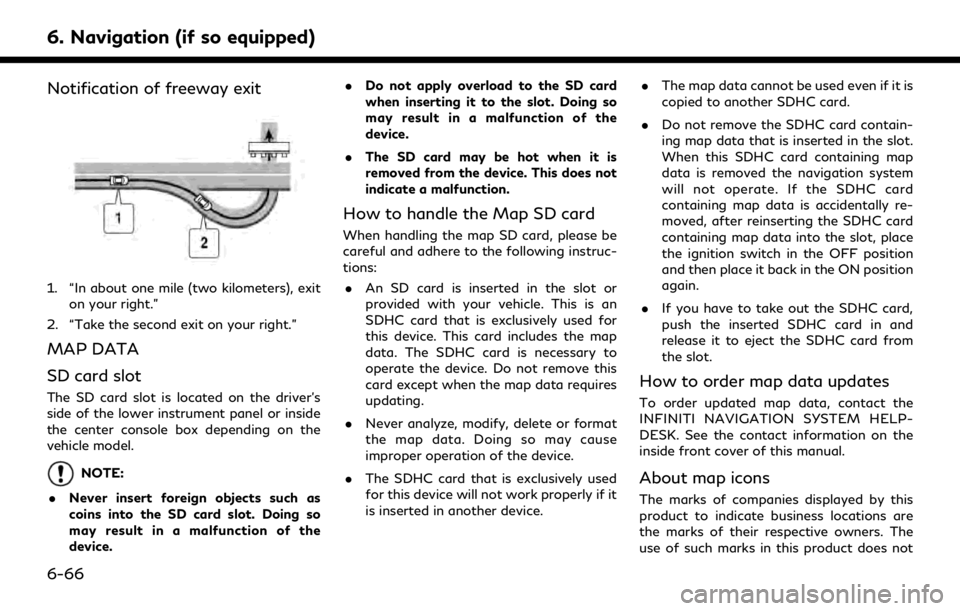
Ports for the USBand HDMIinterface
are located at the rear of the center console
box.
Compatible devices connected to the ports
can be played on the rear displays. Turn off the power of the portable device before
connecting to the port.
NOTE:
Do not apply strong pressure to any
portable device (such as a USB memory
device) or cable that is connected to the
USB connection port or the HDMI port. It
could damage the device and the ports.
ACTIVATING REAR DISPLAYS
CAUTION
. The glass screen on the display screen
may break if hit with a hard or sharp
object. If the glass breaks, do not
touch the liquid crystalline material. In
case of contact with skin, wash im-
mediately with soap and water. .
Applying pressure to a display screen
may damage it.
“Care and maintenance”
(page 3-65)
The rear displays are located on the back of
the front head restraints.
Use the remote controller to operate the
rear display screens.
“Remote controller” (page 3-54)
Select the left or right rear display using
ler and push <
>to activate the corre-
sponding rear display. When the display is
turned on, a green indicator on the lower left
corner of the display will illuminate.
The lower part of the rear displays
functions as a signal receiver/transmitter
for the remote controller and wireless head-
phones, and should not be blocked or
covered.
Turning the rear displays on/off can also be
controlled on the front display.
“Controlling the rear system on the
front display” (page 3-62)
3. Audio system
3-59
Page 228 of 284

6. Navigation (if so equipped)
Notification of freeway exit
1. “In about one mile (two kilometers), exiton your right.”
2. “Take the second exit on your right.”
MAP DATA
SD card slot
The SD card slot is located on the driver’s
side of the lower instrument panel or inside
the center console box depending on the
vehicle model.
NOTE:
. Never insert foreign objects such as
coins into the SD card slot. Doing so
may result in a malfunction of the
device. .
Do not apply overload to the SD card
when inserting it to the slot. Doing so
may result in a malfunction of the
device.
. The SD card may be hot when it is
removed from the device. This does not
indicate a malfunction.
How to handle the Map SD card
When handling the map SD card, please be
careful and adhere to the following instruc-
tions:
. An SD card is inserted in the slot or
provided with your vehicle. This is an
SDHC card that is exclusively used for
this device. This card includes the map
data. The SDHC card is necessary to
operate the device. Do not remove this
card except when the map data requires
updating.
. Never analyze, modify, delete or format
the map data. Doing so may cause
improper operation of the device.
. The SDHC card that is exclusively used
for this device will not work properly if it
is inserted in another device. .
The map data cannot be used even if it is
copied to another SDHC card.
. Do not remove the SDHC card contain-
ing map data that is inserted in the slot.
When this SDHC card containing map
data is removed the navigation system
will not operate. If the SDHC card
containing map data is accidentally re-
moved, after reinserting the SDHC card
containing map data into the slot, place
the ignition switch in the OFF position
and then place it back in the ON position
again.
. If you have to take out the SDHC card,
push the inserted SDHC card in and
release it to eject the SDHC card from
the slot.
How to order map data updates
To order updated map data, contact the
INFINITI NAVIGATION SYSTEM HELP-
DESK. See the contact information on the
inside front cover of this manual.
About map icons
The marks of companies displayed by this
product to indicate business locations are
the marks of their respective owners. The
use of such marks in this product does not
6-66