warning light INFINITI QX80 2020 Workshop Manual
[x] Cancel search | Manufacturer: INFINITI, Model Year: 2020, Model line: QX80, Model: INFINITI QX80 2020Pages: 516, PDF Size: 2.01 MB
Page 195 of 516

JVP0567X
1. Pull the hood lock release handlelocated below the instrument panel; the
hood will then spring up slightly.
2. Pull the lever
sideways at the front of
the hood with your fingertips and raise
the hood.
3. When closing the hood, slowly close the hood down and make sure it locks into
place.
WARNING
.Make sure the hood is completely
closed and latched before driving. Failure to do so could cause the hood
to fly open and result in an accident.
. If you see steam or smoke coming
from the engine compartment, to
avoid injury do not open the hood.
WARNING
.Always be sure the liftgate has been
closed securely to prevent it from
opening while driving.
. Do not drive with the liftgate open.
This could allow dangerous exhaust
gases to be drawn into the vehicle.
See “Exhaust gas (carbon monoxide)”
(P.5-4).
. Do not leave children unattended
inside the vehicle. They could un-
knowingly activate switches or con-
trols. Unattended children could
become involved in serious accidents.
. Always be sure that hands and feet
are clear of the door frame to avoid
injury while closing the liftgate.
Pre-driving checks and adjustments3-21
HOOD LIFTGATE
Page 201 of 516

.Push the power door lock switch to the
UNLOCK position.
To lock, close the fuel-filler door securely
and lock all doors by operating the door
handle request switch, the LOCK button on
the Intelligent Key, the mechanical key or the
power door lock switch.
FUEL-FILLER CAP
WARNING
. Gasoline is extremely flammable and
highly explosive under certain condi-
tions. You could be burned or ser-
iously injured if it is misused or
mishandled. Always stop engine and
do not smoke or allow open flames or
sparks near the vehicle when refuel-
ing.
. Do not attempt to top off the fuel
tank after the fuel pump nozzle shuts
off automatically. Continued refuel-
ing may cause fuel overflow, resulting
in fuel spray and possibly a fire.
. Use only an original equipment type
fuel-filler cap as a replacement. It has
a built-in safety valve needed for
proper operation of the fuel system
and emission control system. An in-
correct cap can result in a serious malfunction and possible injury. It
could also cause the malfunction
indicator light to come on.
. Never pour fuel into the throttle body
to attempt to start your vehicle.
. Do not fill a portable fuel container in
the vehicle or trailer. Static electricity
can cause an explosion of flammable
liquid, vapor or gas in any vehicle or
trailer. To reduce the risk of serious
injury or death when filling portable
fuel containers:
— Always place the container on the ground when filling.
— Do not use electronic devices when filling.
— Keep the pump nozzle in contact with the container while you are
filling it.
— Use only approved portable fuel containers for flammable liquid.
CAUTION
. If fuel is spilled on the vehicle body,
flush it away with water to avoid
paint damage. .
Insert the cap straight into the fuel-
filler tube, then tighten until the fuel-
filler cap clicks. Failure to tighten the
fuel-filler cap properly may cause the
malfunction indicator light (MIL)
to illuminate. If thelight illumi-
nates because the fuel-filler cap is
loose or missing, tighten or install the
cap and continue to drive the vehicle.
The
light should turn off after a
few driving trips. If thelight does
not turn off after a few driving trips,
have the vehicle inspected. It is
recommended you visit an INFINITI
retailer for this service.
. The Loose Fuel Cap warning will
appear if the fuel-filler cap is not
properly tightened. It may take a few
driving trips for the message to be
displayed. Failure to tighten the fuel-
filler cap properly after the Loose
Fuel Cap warning appears may cause
the
Malfunction Indicator Light
(MIL) to illuminate.
Turn the cap counterclockwise to remove.
To tighten, turn the cap clockwise until a
single click is heard.
Pre-driving checks and adjustments3-27
Page 205 of 516

dicator light will turn off. Push the “I” switchto turn the system on.
Do not allow any object to cover the sensors
or apply glass cleaner on them. Doing so
will reduce the sensitivity of the sensor,
resulting in improper operation.
For the HomeLink
®Universal Transceiver
operation, see “HomeLink®Universal Trans-
ceiver (Type A)” (P.2-71).
Smart Rearview Mirror (if so
equipped)
WARNING
. Failure to follow the warnings and
instructions for proper use of the
Smart Rearview Mirror could result
in serious injury or death.
— The Smart Rearview Mirror is a convenience feature but it is not a
substitute for proper vehicle op-
eration. The system has areas
where objects cannot be viewed.
Check the blind spot of the Smart
Rearview Mirror before vehicle
operation. The driver is always
responsible for safe driving.
— Do not disassemble or modify the Smart Rearview Mirror, the cam- era unit or wirings. If you do, it
may result in accidents or fire. In
case you notice smoke or smell
coming from the Smart Rearview
Mirror, stop using the system
immediately. It is recommended
that you see an INFINITI retailer
for servicing.
— Do not operate the Smart Rear- view Mirror while driving. Doing
so can be a distraction and it could
lose control of your vehicle and
cause an accident or serious in-
jury.
— Do not gaze into the Smart Rear- view Mirror display during driv-
ing. It may cause a distraction and
it could lose control of your vehi-
cle and cause an accident or
serious injury.
— Do not put a cigarette or flames to the Smart Rearview Mirror, the
camera unit or wirings. It may
cause a fire.
. Be sure to adjust the Smart Rearview
Mirror before driving. Switch the
system to the conventional rearview
mirror mode and be properly seated
on the driver’s seat. Then adjust the
mirror so as to see the rear window properly. Driving without adjusting
the mirror may cause difficulty in
watching the display at Smart Rear-
view Mirror mode (camera view
mode) due to the reflection from the
surface of the mirror.
. If the Smart Rearview Mirror mal-
functions, immediately switch the
system to the conventional rearview
mirror mode.
. When strong light (for example, sun-
light or high beams from following
vehicles) enters the camera, a light
beam or a glaring light may appear on
the monitor screen of the Smart
Rearview Mirror. In that case, switch
the system to the conventional rear-
view mirror mode appropriately.
. If dirt, rain or snow accumulates on
the exterior glass surface covering
the camera, the Smart Rearview
Mirror may not display objects
clearly. Use of the rear window
wiper/washer may improve visibility,
but if not, switch the Smart Rearview
Mirror to the conventional rearview
mirror mode until a time the glass
covering the camera can be cleaned.
Pre-driving checks and adjustments3-31
Page 210 of 516

3-36Pre-driving checks and adjustments
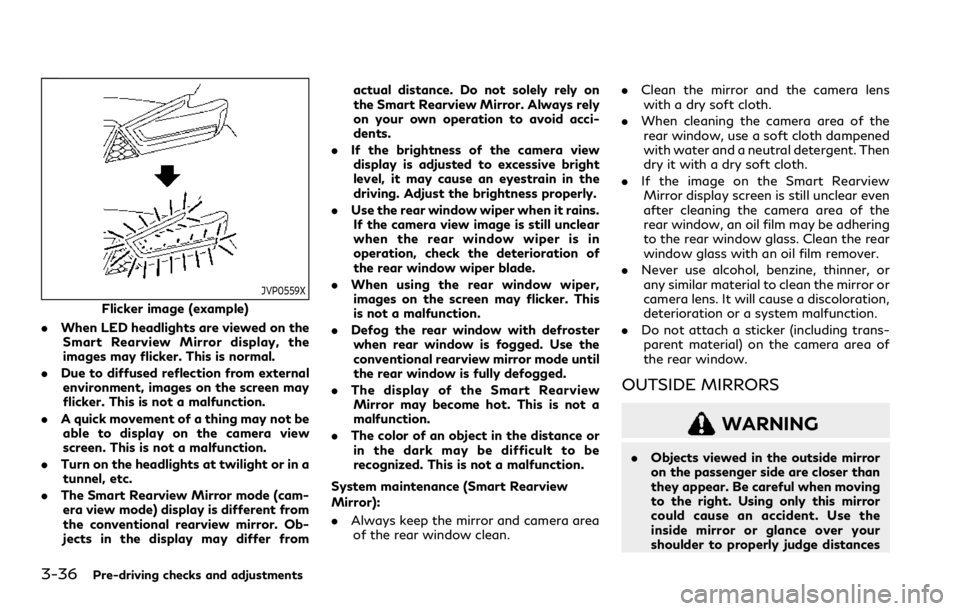
JVP0559X
Flicker image (example)
. When LED headlights are viewed on the
Smart Rearview Mirror display, the
images may flicker. This is normal.
. Due to diffused reflection from external
environment, images on the screen may
flicker. This is not a malfunction.
. A quick movement of a thing may not be
able to display on the camera view
screen. This is not a malfunction.
. Turn on the headlights at twilight or in a
tunnel, etc.
. The Smart Rearview Mirror mode (cam-
era view mode) display is different from
the conventional rearview mirror. Ob-
jects in the display may differ from actual distance. Do not solely rely on
the Smart Rearview Mirror. Always rely
on your own operation to avoid acci-
dents.
. If the brightness of the camera view
display is adjusted to excessive bright
level, it may cause an eyestrain in the
driving. Adjust the brightness properly.
. Use the rear window wiper when it rains.
If the camera view image is still unclear
when the rear window wiper is in
operation, check the deterioration of
the rear window wiper blade.
. When using the rear window wiper,
images on the screen may flicker. This
is not a malfunction.
. Defog the rear window with defroster
when rear window is fogged. Use the
conventional rearview mirror mode until
the rear window is fully defogged.
. The display of the Smart Rearview
Mirror may become hot. This is not a
malfunction.
. The color of an object in the distance or
in the dark may be difficult to be
recognized. This is not a malfunction.
System maintenance (Smart Rearview
Mirror):
. Always keep the mirror and camera area
of the rear window clean. .
Clean the mirror and the camera lens
with a dry soft cloth.
. When cleaning the camera area of the
rear window, use a soft cloth dampened
with water and a neutral detergent. Then
dry it with a dry soft cloth.
. If the image on the Smart Rearview
Mirror display screen is still unclear even
after cleaning the camera area of the
rear window, an oil film may be adhering
to the rear window glass. Clean the rear
window glass with an oil film remover.
. Never use alcohol, benzine, thinner, or
any similar material to clean the mirror or
camera lens. It will cause a discoloration,
deterioration or a system malfunction.
. Do not attach a sticker (including trans-
parent material) on the camera area of
the rear window.
OUTSIDE MIRRORS
WARNING
. Objects viewed in the outside mirror
on the passenger side are closer than
they appear. Be careful when moving
to the right. Using only this mirror
could cause an accident. Use the
inside mirror or glance over your
shoulder to properly judge distances
Page 222 of 516

4-6Monitor, climate, audio, phone and voice recognition systems
course linesare displayed. When the
steering wheel turns about 90 degrees or
more, a line is displayed only on the
opposite side of the turn.
WAE0245X
Bird’s-eye view:
The bird’s-eye view shows the overhead
view of the vehicle which helps confirm the
vehicle position and the predictive course to
a parking space.
The vehicle icon
shows the position of the
vehicle. Note that the distance between
objects viewed in the bird’s-eye view differs
from the actual distance.
The areas that the cameras cannot cover
are indicated in black.
After the ignition switch is placed in the ON
position, the unviewable area
is high-
lighted in yellow for a few seconds after the
bird’s-eye view is displayed. Predictive course lines (
and) indicate the
predictive course when operating the vehi-
cle. The predictive course lines (
and) will
be displayed on the monitor when the
steering wheel is turned. The predictive
course lines (
and) will move depending
on how much the steering wheel is turned.
WARNING
. Objects in the bird’s-eye view will
appear farther than the actual dis-
tance.
. Tall objects, such as a curb or vehicle,
may be misaligned or not displayed at
the seam of the views.
. Objects that are above the camera
cannot be displayed.
. The view for the bird’s-eye view may
be misaligned when the camera posi-
tion alters.
. A line on the ground may be mis-
aligned and is not seen as being
straight at the seam of the views.
The misalignment will increase as the
line proceeds away from the vehicle.
Page 228 of 516

4-12Monitor, climate, audio, phone and voice recognition systems
Available setting items:
Setting itemAction
Camera BCI Turn the Back-up Collision Intervention (BCI) system on/off. (See “Back-up
Collision Intervention (BCI)” (P.5-52).)
MOD Turn the MOD system on/off. (See “Moving Object Detection (MOD)” (P.4-
21).)
MOD Volume The volume setting of the MOD detection warning chime can be adjusted.
Unviewable Area Reminder When this item is turned on, the unviewable area is highlighted in yellow for
several seconds after the bird’s-eye view is displayed for the first time when the
ignition switch is placed in the ON position.
Predictive Course Lines When this item is turned on, the predictive course lines are displayed in the
front, rear and bird’s-eye view screen.
Auto Show Sonar Image The automatic sonar display can be turned on/off.
Display Settings
(Available only
when camera screen
is displayed on the
upper display.) Brightness
Adjust display settings by touching the “+”/“-” key.
Contrast
Tint
Color
Black Level
NOTE:
Do not adjust any of the Around View®Monitor settings while the vehicle is moving. Make sure the parking brake is firmly applied.
Page 240 of 516

4-24Monitor, climate, audio, phone and voice recognition systems
MOD function settings
The MOD function settings can be changed
using the following procedures.
1. Push the MENU button.
2. Touch the “Settings” key on the lowerdisplay.
3. Touch the “Camera” key.
4. Touch the “Camera” key.
Available setting items:
MOD:
When this item is turned on, the MOD
system is activated. When this item is turned
off (indicator turns off), the MOD system is
deactivated.
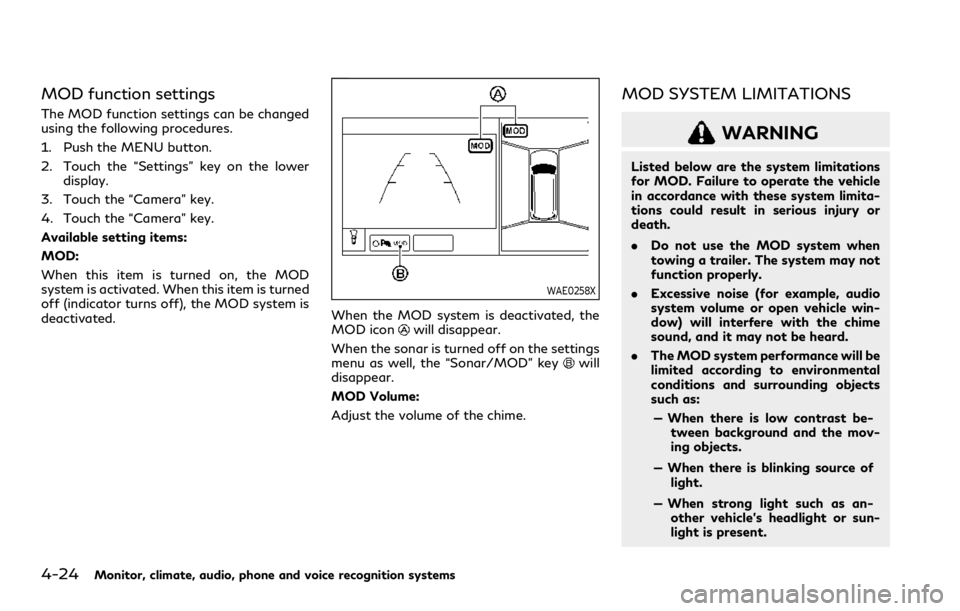
WAE0258X
When the MOD system is deactivated, the
MOD iconwill disappear.
When the sonar is turned off on the settings
menu as well, the “Sonar/MOD” key
will
disappear.
MOD Volume:
Adjust the volume of the chime.
MOD SYSTEM LIMITATIONS
WARNING
Listed below are the system limitations
for MOD. Failure to operate the vehicle
in accordance with these system limita-
tions could result in serious injury or
death.
. Do not use the MOD system when
towing a trailer. The system may not
function properly.
. Excessive noise (for example, audio
system volume or open vehicle win-
dow) will interfere with the chime
sound, and it may not be heard.
. The MOD system performance will be
limited according to environmental
conditions and surrounding objects
such as:
— When there is low contrast be- tween background and the mov-
ing objects.
— When there is blinking source of light.
— When strong light such as an- other vehicle’s headlight or sun-
light is present.
Page 252 of 516

4-36Monitor, climate, audio, phone and voice recognition systems
IN-CABIN MICROFILTER
Models without Advanced Climate Control
System:
The climate control system is equipped with
an in-cabin microfilter which collects dirt,
pollen, dust, etc.
Models with Advanced Climate Control
System:
The climate control system is equipped with
a natural grape seed polyphenol filter which
collects and neutralizes dirt, pollen, dust, etc.
To make sure the air conditioner heats,
defogs, and ventilates efficiently, replace
the filter in accordance with the specified
maintenance intervals listed in the “9. Main-
tenance and schedules” section. If replace-
ment is required, it is recommended you visit
an INFINITI retailer for this service.
The filter should be replaced if the air flow
decreases significantly or if windows fog up
easily when operating the heater or air
conditioner.
SERVICING CLIMATE CONTROL
The climate control system in your vehicle is
charged with a refrigerant designed with the
environment in mind.This refrigerant will
not harm the earth’s ozone layer. However,
special charging equipment and lubricant are
required when servicing your air conditioner.
Using improper refrigerants or lubricants will
cause severe damage to your climate control
system. (See “Capacities and recommended
fluids/lubricants” (P.10-2) for climate con-
trol system refrigerant and lubricant recom-
mendations.)
An INFINITI retailer will be able to service
your environmentally friendly climate control
system.
WARNING
The system contains refrigerant under
high pressure. To avoid personal injury,
any air conditioner service should be
done only by an experienced technician
with the proper equipment.
WINDOW ANTENNA
The antenna pattern is printed inside the 3rd
row seat window.
CAUTION
. Do not place metalized film near the
3rd row seat window or attach any
metal parts to it. This may cause poor
reception or noise.
. When cleaning the inside of the 3rd
row seat window, be careful not to
scratch or damage the 3rd row seat
window antenna. Lightly wipe along
the antenna with a dampened soft
cloth.
ANTENNA
Page 257 of 516

4WD shift switch .................................................... 5-116
4WD shift indicator ................................................ 5-117
4WD warning light ................................................. 5-117
Hill Start Assist system ............................................... 5-119
Parking/parking on hills ............................................. 5-120
TOW mode ..................................................................... 5-121
SNOW mode .................................................................. 5-121
Power steering .............................................................. 5-122
Brake system .................................................................. 5-122 Braking precautions ................................................ 5-122
Parking brake break-in .......................................... 5-122
Brake assist .................................................................... 5-123 Brake assist ............................................................... 5-123
Anti-lock Braking System (ABS) ......................... 5-123 Vehicle Dynamic Control (VDC) system ............... 5-124
Vehicle Dynamic Control (VDC)
OFF switch ............................................................. 5-126
Cold weather driving ................................................... 5-127
Freeing a frozen door lock ................................. 5-127
Antifreeze ................................................................ 5-127
Battery ..................................................................... 5-127
Draining of coolant water .................................. 5-127
Tire equipment ....................................................... 5-127
Special winter equipment ................................... 5-127
Driving on snow or ice ......................................... 5-127
Engine block heater (if so equipped) .............. 5-128
Page 260 of 516

5-6Starting and driving
not detect a sudden drop in tire pressure
(for example, a flat tire while driving).
. The low tire pressure warning light does
not automatically turn off when the tire
pressure is adjusted. After the tire is
inflated to the recommended pressure,
the vehicle must be driven at speeds
above 16 MPH (25 km/h) to activate the
TPMS and turn off the low tire pressure
warning light. Use a tire pressure gauge
to check the tire pressure.
. The “Tire Pressure Low Add Air” warning
appears in the vehicle information dis-
play when the low tire pressure warning
light is illuminated and low tire pressure
is detected. The “Tire Pressure Low Add
Air” warning turns off when the low tire
pressure warning light turns off.
The “Tire Pressure Low Add Air” warning
appears each time the ignition switch is
placed in the ON position as long as the
low tire pressure warning light remains
illuminated.
The “Tire Pressure Low Add Air” warning
does not appear if the low tire pressure
warning light illuminates to indicate a
TPMS malfunction.
. Tire pressure rises and falls depending on
the heat caused by the vehicle’s opera-
tion and the outside temperature. Do not
reduce the tire pressure after driving
because the tire pressure rises after driving. Low outside temperature can
lower the temperature of the air inside
the tire which can cause a lower tire
inflation pressure. This may cause the
low tire pressure warning light to illumi-
nate. If the warning light illuminates in
low ambient temperature, check the tire
pressure for all four tires.
. You can also check the pressure of all
tires (except the spare tire) on the vehicle
information display. (See “10. Tire pres-
sures” (P.2-30).)
For additional information, see “Low tire
pressure warning light” (P.2-14) and “Tire
Pressure Monitoring System (TPMS) ” (P.6-
3).
WARNING
. If the low tire pressure warning light
illuminates while driving, avoid sud-
den steering maneuvers or abrupt
braking, reduce vehicle speed, pull
off the road to a safe location and
stop the vehicle as soon as possible.
Driving with under-inflated tires may
permanently damage the tires and
increase the likelihood of tire failure.
Serious vehicle damage could occur
and may lead to an accident and
could result in serious personal injury. Check the tire pressure for all four
tires. Adjust the tire pressure to the
recommended COLD tire pressure
shown on the Tire and Loading
Information label to turn the low tire
pressure warning light OFF. If the
light still illuminates while driving
after adjusting the tire pressure, a
tire may be flat or the TPMS may be
malfunctioning. If you have a flat tire,
replace it with a spare tire as soon as
possible. If no tire is flat and all tires
are properly inflated, it is recom-
mended you consult an INFINITI
retailer.
. Since the spare tire is not equipped
with the TPMS, when a spare tire is
mounted or a wheel is replaced, the
TPMS will not function and the low
tire pressure warning light will flash
for approximately 1 minute. The light
will remain on after 1 minute. Have
your tires replaced and/or TPMS
system reset as soon as possible. It
is recommended you visit an INFINITI
retailer for these services.
. Replacing tires with those not origin-
ally specified by INFINITI could affect
the proper operation of the TPMS.
. Do not inject any tire liquid or aerosol
tire sealant into the tires, as this may