ISUZU KB P190 2007 Workshop Repair Manual
KB P190 2007
ISUZU
ISUZU
https://www.carmanualsonline.info/img/61/57177/w960_57177-0.png
ISUZU KB P190 2007 Workshop Repair Manual
Page 5509 of 6020
ELECTRICAL-BODY AND CHASSIS 8A-571
CIRCUIT DIAGRAM 4JA1T(L) (RHD) Sheet 1/2
RTW 78AXF009101
BACK TO CHAPTER INDEX
TO MODEL INDEXISUZU KB P190 2007
Page 5510 of 6020
8A-572 ELECTRICAL-BODY AND CHASSIS
CIRCUIT DIAGRAM 4JA1T(L) (RHD) Sheet 2/2
RTW 78AXF009201
BACK TO CHAPTER INDEX TO MODEL INDEXISUZU KB P190 2007
Page 5511 of 6020
ELECTRICAL-BODY AND CHASSIS 8A-573
CIRCUIT DIAGRAM C24SE (LHD) Sheet 1/2
RTW 680XF015701
BACK TO CHAPTER INDEX
TO MODEL INDEXISUZU KB P190 2007
Page 5512 of 6020
8A-574 ELECTRICAL-BODY AND CHASSIS
CIRCUIT DIAGRAM C24SE (LHD) Sheet 2/2
RTW 680XF015801
BACK TO CHAPTER INDEX
TO MODEL INDEXISUZU KB P190 2007
Page 5513 of 6020
ELECTRICAL-BODY AND CHASSIS 8A-575
CIRCUIT DIAGRAM 4JJ1-TC / 4JK1-TC (LHD) Sheet 1/2
RTW 78AXF029701
BACK TO CHAPTER INDEX
TO MODEL INDEXISUZU KB P190 2007
Page 5514 of 6020
8A-576 ELECTRICAL-BODY AND CHASSIS
CIRCUIT DIAGRAM 4JJ1-TC / 4JK1-TC (LHD) Sheet 2/2
RTW 78AXF029801
BACK TO CHAPTER INDEX
TO MODEL INDEXISUZU KB P190 2007
Page 5515 of 6020
ELECTRICAL-BODY AND CHASSIS 8A-577
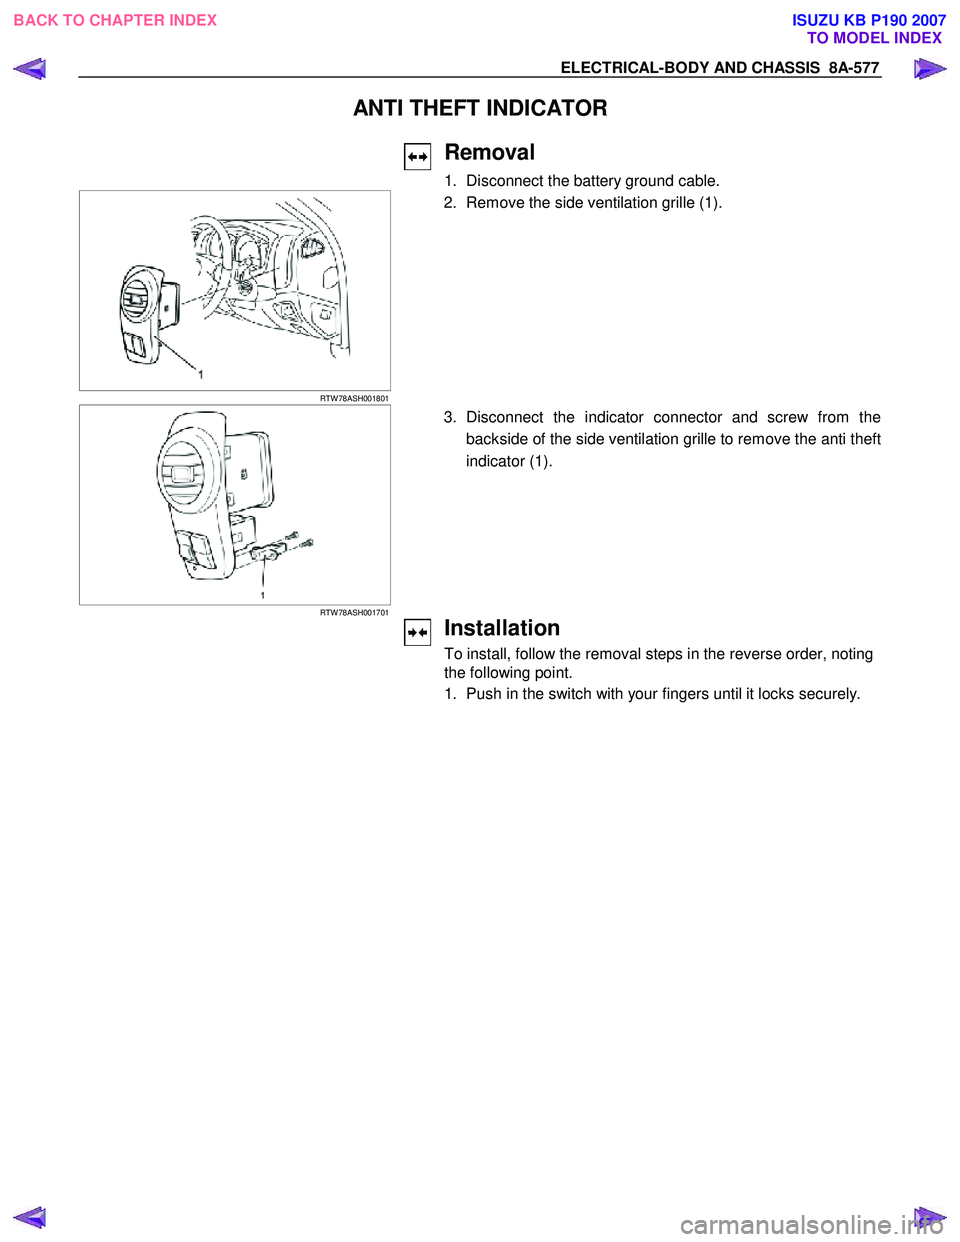
ANTI THEFT INDICATOR
Removal
1. Disconnect the battery ground cable.
RTW 78ASH001801
2. Remove the side ventilation grille (1).
RTW 78ASH001701
3. Disconnect the indicator connector and screw from the
backside of the side ventilation grille to remove the anti theft
indicator (1).
Installation
To install, follow the removal steps in the reverse order, noting
the following point.
1. Push in the switch with your fingers until it locks securely.
BACK TO CHAPTER INDEX TO MODEL INDEXISUZU KB P190 2007
Page 5516 of 6020
8A-578 ELECTRICAL-BODY AND CHASSIS
KEYLESS ENTRY CONTROL UNIT
Removal
1. Remove the glove box.
RTW 580SH001601
2. Disconnect the glove box lamp connector.
RTW 580SH001701
3. Remove the glove box cover.
RTW 580SH001801
4. Remove the bolt of antitheft and keyless entry control unit.
5. Disconnect the antitheft and keyless entry control unitconnector.
6. Remove the antitheft and keyless entry control unit.
Installation
Follow the removal procedure in the reverse order to install the
antitheft and keyless entry control unit.
Connector
Be absolutely sure that the antitheft and keyless entry control
unit harness connector is correctly installed.
This will prevent a poor contact and an open circuit.
BACK TO CHAPTER INDEX TO MODEL INDEXISUZU KB P190 2007
Page 5517 of 6020
ELECTRICAL-BODY AND CHASSIS 8A-579
Remote key
Remove Key Assembly
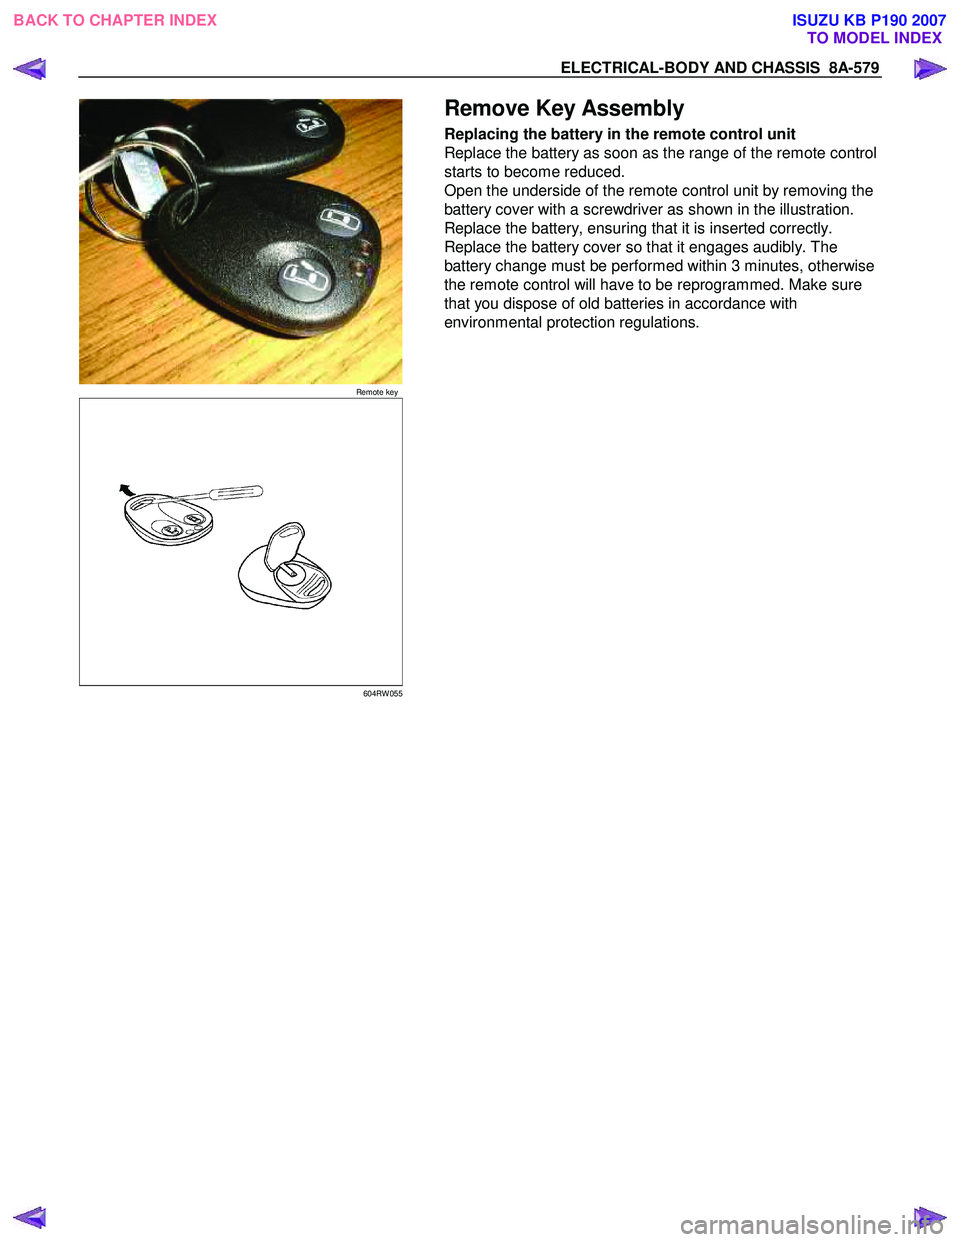
Replacing the battery in the remote control unit
Replace the battery as soon as the range of the remote control
starts to become reduced.
Open the underside of the remote control unit by removing the
battery cover with a screwdriver as shown in the illustration.
Replace the battery, ensuring that it is inserted correctly.
Replace the battery cover so that it engages audibly. The
battery change must be performed within 3 minutes, otherwise
the remote control will have to be reprogrammed. Make sure
that you dispose of old batteries in accordance with
environmental protection regulations.
604RW 055
BACK TO CHAPTER INDEX TO MODEL INDEXISUZU KB P190 2007
Page 5518 of 6020
8A-580 ELECTRICAL-BODY AND CHASSIS
TECH-2 OPERATION AND PROGRAMING
KEYLESS ENTRY
General Description
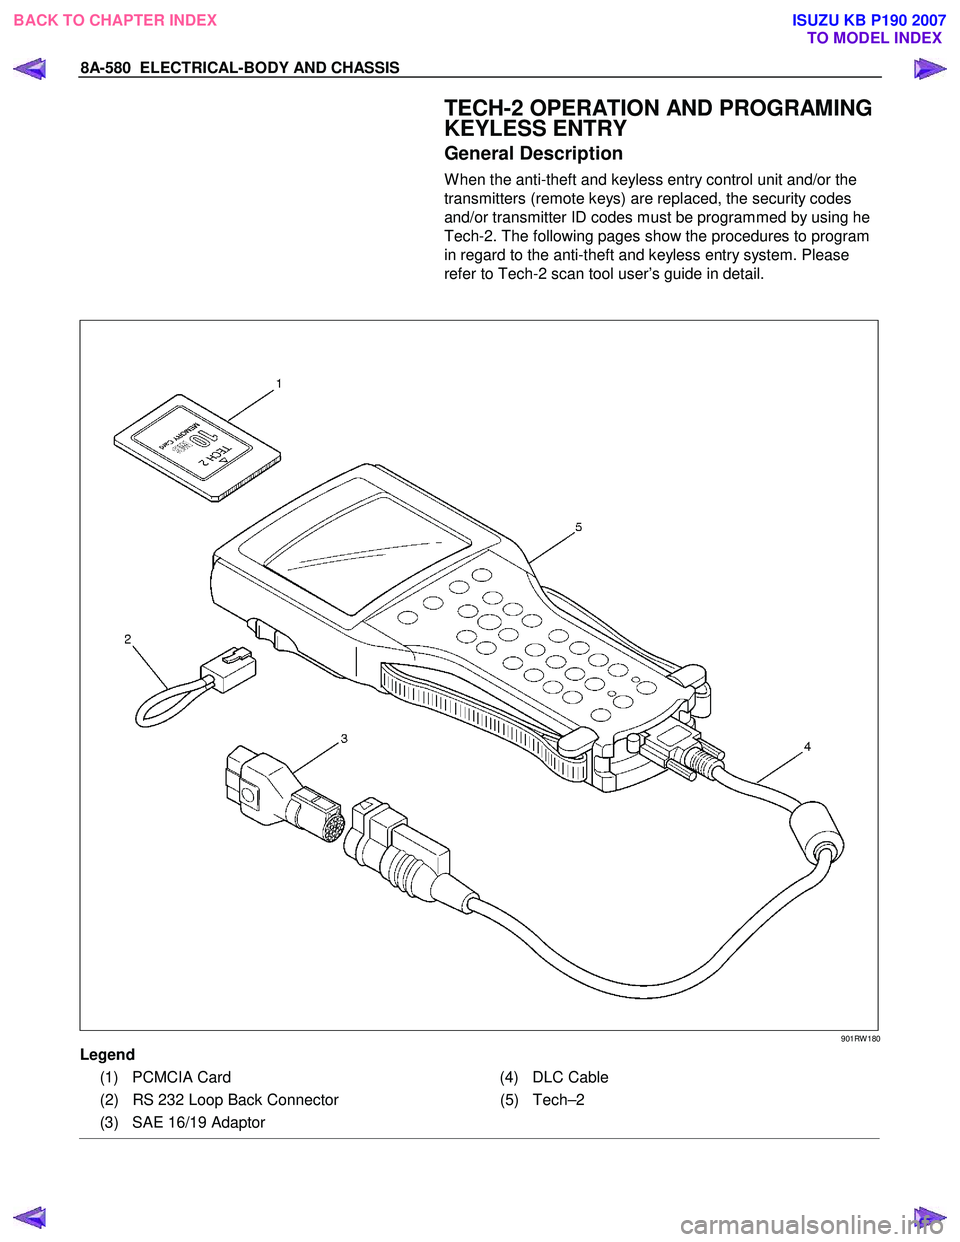
W hen the anti-theft and keyless entry control unit and/or the
transmitters (remote keys) are replaced, the security codes
and/or transmitter ID codes must be programmed by using he
Tech-2. The following pages show the procedures to program
in regard to the anti-theft and keyless entry system. Please
refer to Tech-2 scan tool user’s guide in detail.
901RW 180
Legend
(1) PCMCIA Card (4) DLC Cable
(2) RS 232 Loop Back Connector (5)Tech–2
(3) SAE 16/19 Adaptor
BACK TO CHAPTER INDEX TO MODEL INDEXISUZU KB P190 2007


