storage JAGUAR XF 2010 1.G Owners Manual
[x] Cancel search | Manufacturer: JAGUAR, Model Year: 2010, Model line: XF, Model: JAGUAR XF 2010 1.GPages: 225, PDF Size: 8 MB
Page 3 of 225
R
english-en (10, 18, 21 & 25)
Contents
3
Introduction...................................... 2
Entering the vehicle .......................... 4
Exiting the vehicle............................. 9
Front seats...................................... 12
Rear seats ...................................... 17
Head restraints ............................... 20
Steering wheel ................................ 22
Occupant safety .............................. 23
Exterior lights ................................. 36
Interior lights .................................. 39
Wipers and washers ....................... 40
Windows ........................................ 42
Mirrors ........................................... 44
Blind spot monitoring ..................... 46
Garage door opener........................ 48
Warning lamps ............................... 51
Message centre .............................. 56
Touch screen .................................. 58
Heating and ventilation ................... 63
Luggage compartment ................... 67
Towing ........................................... 69
Storage compartments ................... 72
Starting the engine ......................... 74
Intelligent stop/start ....................... 79
Gearbox .......................................... 81
Stability control .............................. 83
Brakes ............................................ 87
Tyre pressure monitoring system... 89
Parking aids.................................... 92
Cruise control ................................. 94
Adaptive cruise control ................... 96
Automatic speed limiter................ 103
Audio/video overview ................... 104
Radio ............................................ 109DAB radio ..................................... 111
Portable media ............................. 113
CD player...................................... 119
Television ..................................... 122
Video media player ....................... 124
Voice control ................................ 126
Telephone..................................... 128
Navigation system ........................ 134
Tyre repair kit ............................... 147
Fuel and refuelling ........................ 152
Maintenance ................................. 158
Fluid level checks ......................... 168
Technical specifications ............... 175
Vehicle battery.............................. 182
Tyres ............................................ 185
Fuses ............................................ 188
Wheel changing............................ 194
Vehicle recovery ........................... 197
After a collision ............................ 198
Vehicle identification .................... 200
Type approval ............................... 202
Controls overview......................... 224
Page 72 of 225
L
(FM8) SEMCON JLR OWNER GUIDE VER 1.00 EURO
LANGUAGE: english-en; MARQUE: jaguar; MODEL: XF
Storage compartments
72
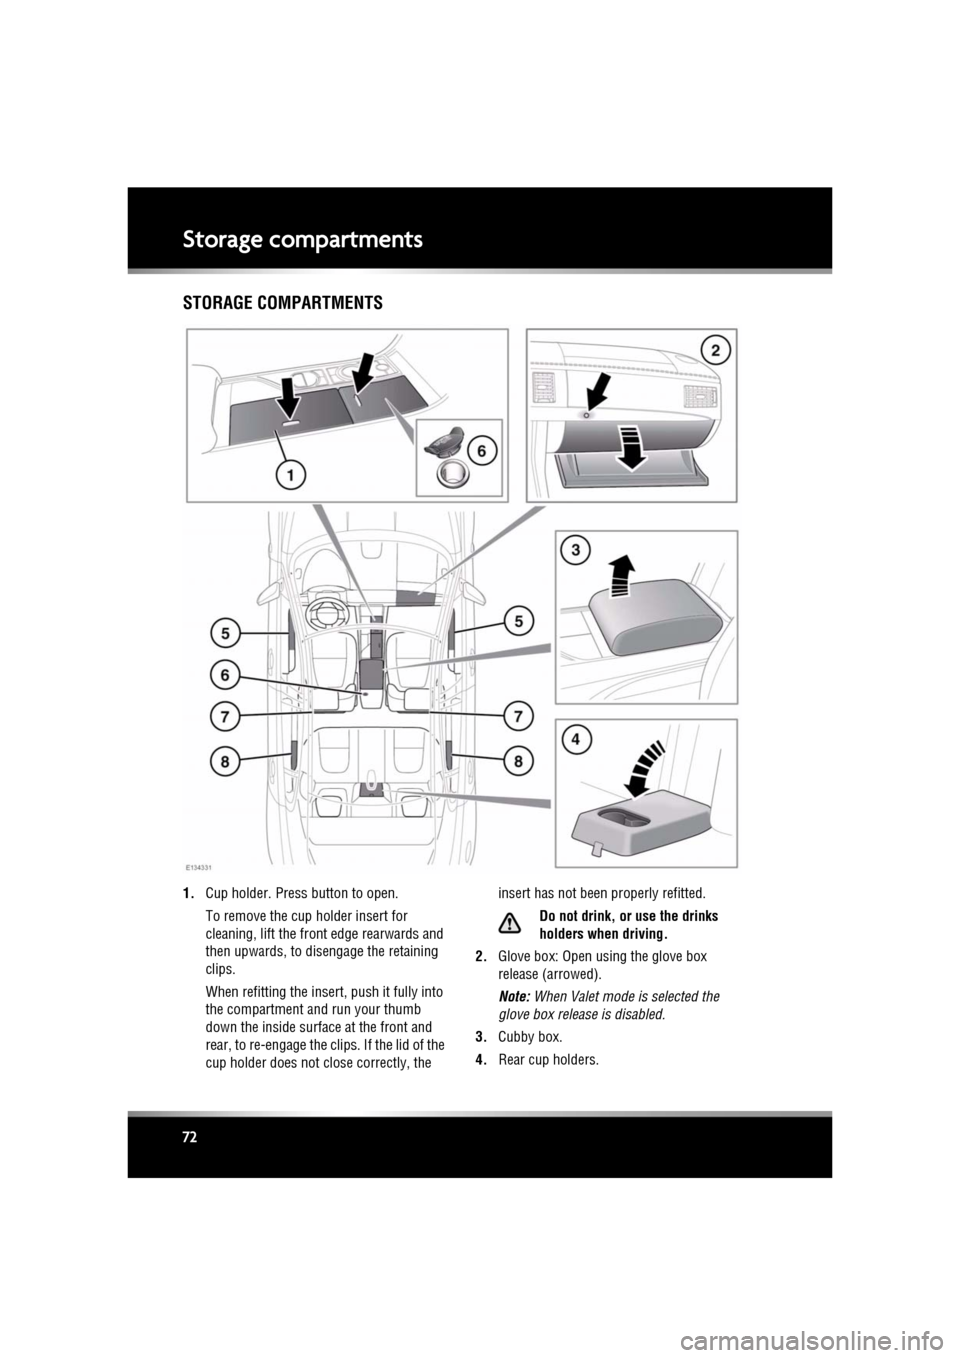
Storage compartmentsSTORAGE COMPARTMENTS
1. Cup holder. Press button to open.
To remove the cup holder insert for
cleaning, lift the front edge rearwards and
then upwards, to disengage the retaining
clips.
When refitting the insert , push it fully into
the compartment and run your thumb
down the inside surface at the front and
rear, to re-engage the clips. If the lid of the
cup holder does not close correctly, the insert has not been properly refitted.
Do not drink, or use the drinks
holders when driving.
2. Glove box: Open using the glove box
release (arrowed).
Note: When Valet mode is selected the
glove box relea se is disabled.
3. Cubby box.
4. Rear cup holders.
Page 73 of 225
R
(FM8) SEMCON JLR OWNER GUIDE VER 1.00 EURO
LANGUAGE: english-en; MARQUE: jaguar; MODEL: XF
Storage compartments
73
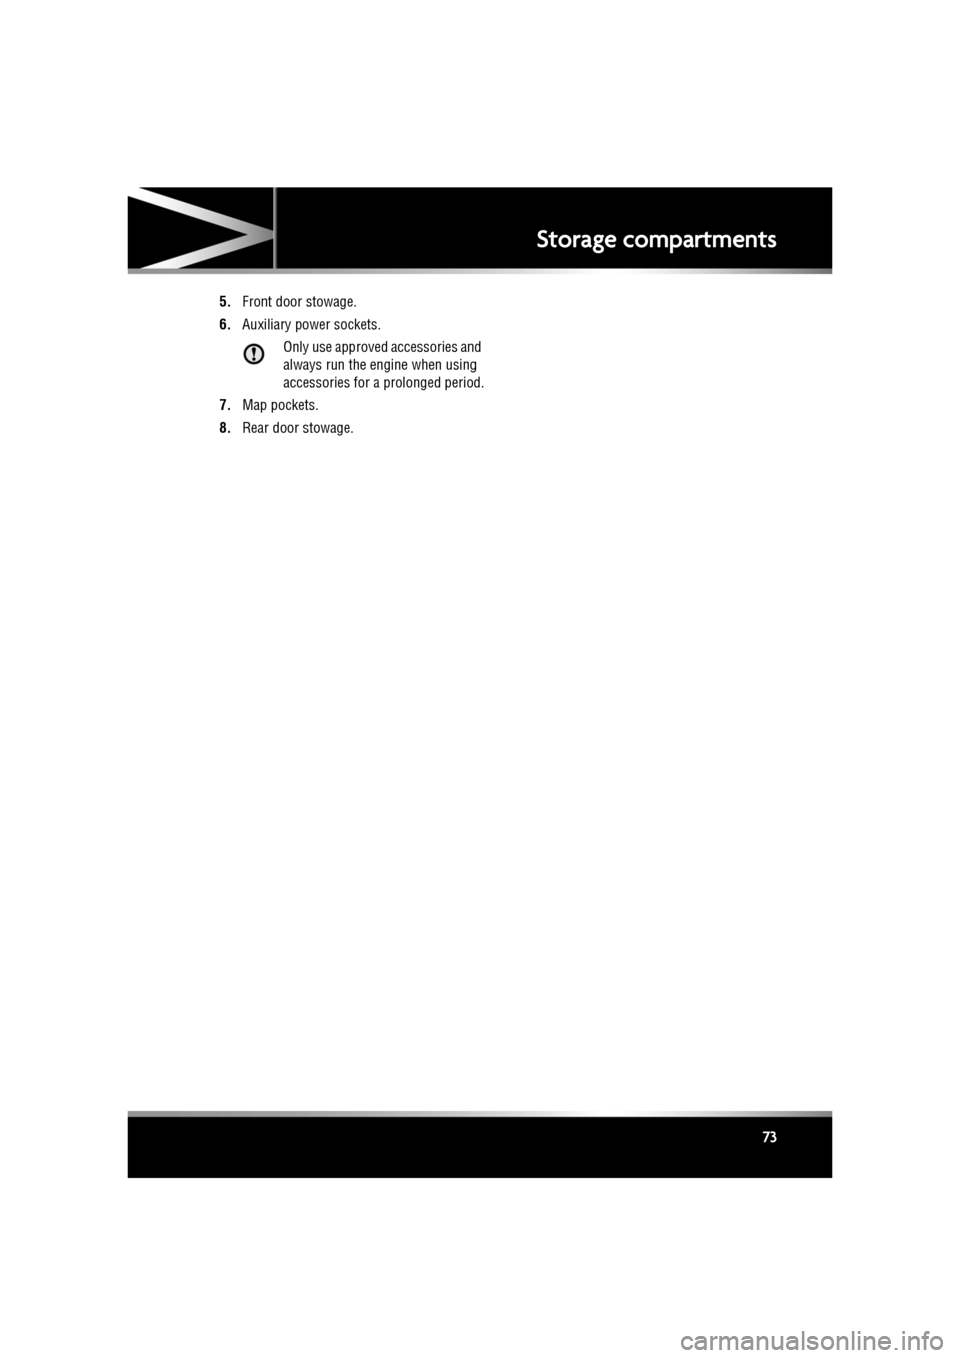
5. Front door stowage.
6. Auxiliary power sockets.
Only use approved accessories and
always run the engine when using
accessories for a prolonged period.
7. Map pockets.
8. Rear door stowage.
Page 113 of 225
R
(FM8) SEMCON JLR OWNER GUIDE VER 1.00 EURO
LANGUAGE: english-en; MARQUE: jaguar; MODEL: XF
Portable media
113
Portable mediaPORTABLE MEDIA CONNECTIONS
Portable media devices can be connected to
the media hub located in the cubby box.
Compatible portable devices include:
• USB mass storage devices (e.g. a memory
stick). Devices must use FAT or FAT32 file
format.
• iPod (iPod Classic, iP od Touch, iPhone and
iPod Nano are supported - full functionality
for older devices cannot be guaranteed).
iPod Shuffle functi onality cannot be
guaranteed.
Note: iPod and iPhone are trademarks of
Apple Inc., registered in the USA and other
countries.
• Auxiliary device (personal audio, MP3
players, all iPods).
Note: Auxiliary devices have no touch
screen control.
If you are connecting an iPod, mass storage or
Bluetooth® device, use the touch screen to
operate and search the device. Many of the
controls are similar to those available for CD
play.
Please disconnect your iPod when
leaving the vehicle. Failure to do so may
result in the iPod battery discharging.
Note: The audio system will play MP3, WMA
and AAC files.
To maximise playba ck quality, it is
recommended that lossless compression is
used for any media file s on USB or iPod. Failing
this, it is recommended that compressed files
utilise a minimum bitrate of 192 kb/s (a higher
bitrate is strongly recommended).
Note: Some MP3 players have their own file
system that is not suppor ted by this system. To
use your MP3 player, you must set it to USB
Removable Device or Mass Storage Device
mode. Only music that has been added to the
device in this mode can be played.
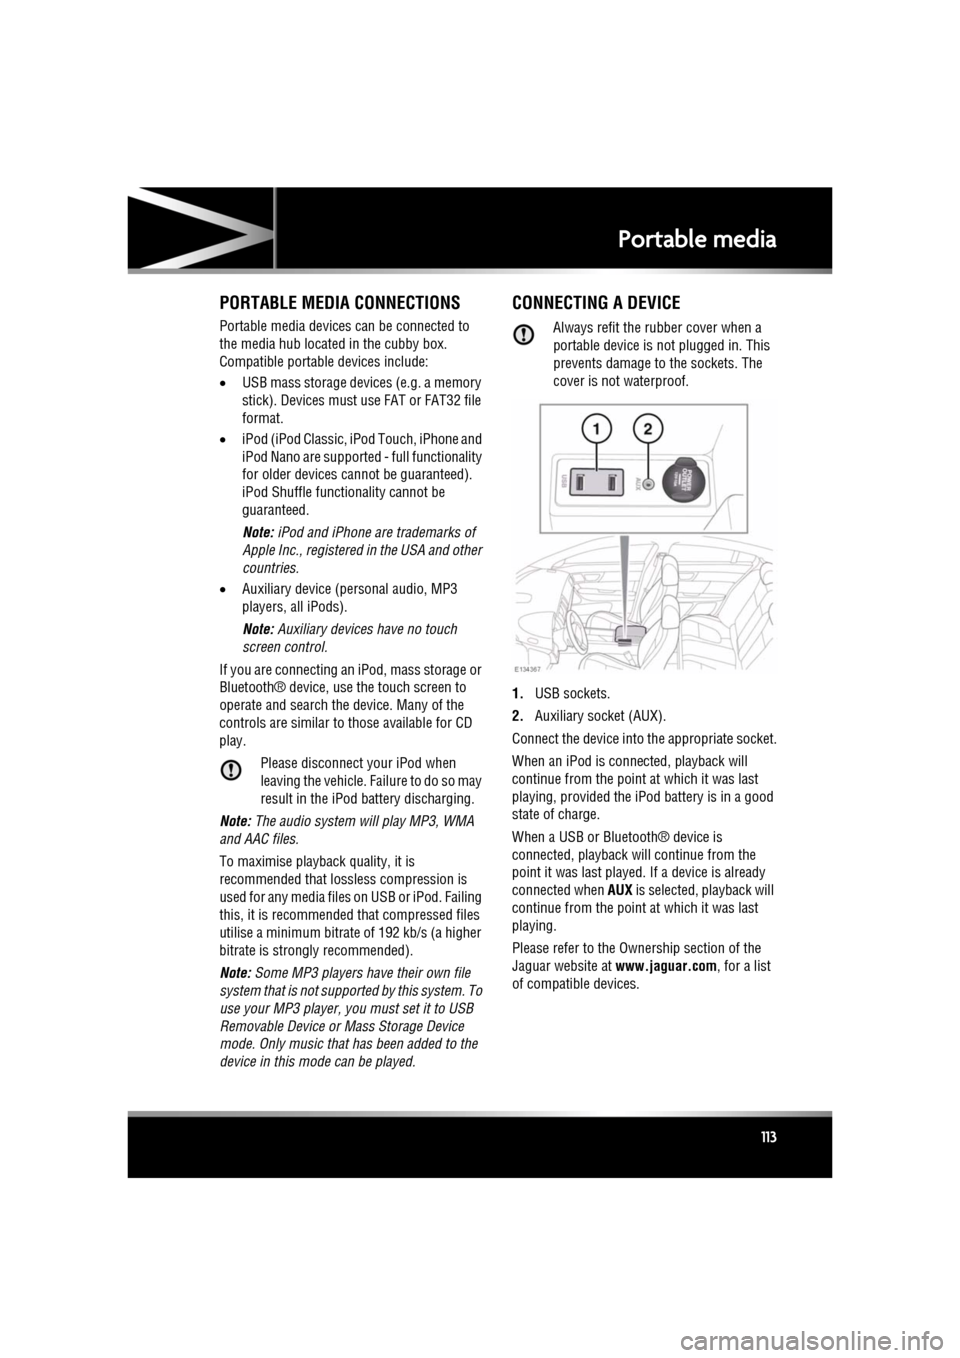
CONNECTING A DEVICE
Always refit the rubber cover when a
portable device is not plugged in. This
prevents damage to the sockets. The
cover is not waterproof.
1. USB sockets.
2. Auxiliary socket (AUX).
Connect the device into the appropriate socket.
When an iPod is conne cted, playback will
continue from the point at which it was last
playing, provided the iPod battery is in a good
state of charge.
When a USB or Bluetooth® device is
connected, playback will continue from the
point it was last played. If a device is already
connected when AUX is selected, playback will
continue from the point at which it was last
playing.
Please refer to the Ow nership section of the
Jaguar website at www.jaguar.com, for a list
of compatible devices.
Page 117 of 225
R
(FM8) SEMCON JLR OWNER GUIDE VER 1.00 EURO
LANGUAGE: english-en; MARQUE: jaguar; MODEL: XF
Portable media
117
PLAYING A PORTABLE DEVICE
If you are using a USB mass storage device or
approved iPod, you can control playback using
the touch screen controls.
If you are using a Blue tooth® device, you can
control playback using the touch screen, but
some controls are unavailable.
If you are using any portable media device via
the AUX socket, then you must control
playback from the device itself.
Jaguar does not recommend the use of
a Hard Disc Drive via the USB link while
the vehicle is in motion. These devices
are not designed for in car use and may
be damaged.
CONNECTING MULTIPLE DEVICES
Do not plug non-audio devices into the
USB port.
You can connect multiple devices
simultaneously to the portable media interface
and switch between th em using the touch
screen. Select iPod, USB , Bluetooth or AUX, to
switch between modes.
The device docked first will remain the active
device until you choose to change.
If, after changing to the newly-docked device,
you change back to the first device, play will
resume at the point you left it (USB and iPod
only).
Note: You cannot use a USB hub to connect
more than one USB devi ce to the audio unit.
Note: Devices connected to the iPod and USB
ports will be charged, but devices that are fully
discharged will not play.
Note: Options such as Repeat and Shuffle
relate to the device curre ntly playing, they will
not apply to any subsequent device.
PAIRING AND CONNECTING USING
THE MEDIA PLAYER
For further information on Bluetooth®, see
129, BLUETOOTH® INFORMATION .
Note: The process of pairing and connecting
your media device with the vehicle, using the
media device, will vary depending on the type
of media device.
1. Switch on the ignition and ensure the touch
screen is active.
2. From the Home menu, select Audio/Video,
then My Music .
3. A menu will appear. Select Search new.
4. Select Device to vehicle option.
Note: The vehicle’s Bluetooth® system is
only discoverable for 3 minutes.
5. Using the media device, search for
Bluetooth® devices. On some media
devices, this is referred to as new paired
device. See your medi a device’s operating
instructions for further information.
6. When the vehicle’s Bluetooth® system is
discovered, follow the on-screen
instructions. Select Yes when prompted, to
confirm the pairing.
Either your device or the vehicle system
will ask for a PIN (Personal Identification
Number). When prompted, enter a PIN of
your choice and select OK to confirm.
7. Enter the same PIN into the other device.
8. Once your device is paired and connected
to the system, a confirmation message will
be displayed, before switching to the My
music: Bluetooth screen.
Note: Some media devices do not
automatically connect and need to be
manually connected, via the device or by
using the Change device option.
Page 129 of 225
R
(FM8) SEMCON JLR OWNER GUIDE VER 1.00 EURO
LANGUAGE: english-en; MARQUE: jaguar; MODEL: XF
Telephone
129
BLUETOOTH® INFORMATION
The Jaguar Bluetoot h® system supports
Bluetooth® Hands-Fre e Profile (HFP),
Advanced Audio Distribution Profile (A2DP)
and Audio Video Remote Control Profile
(AVRCP).
Note: HFP and A2DP/AVRCP profiles can be
connected independently, so a phone can be
connected via one, while a media device can be
connected via the other, at the same time.
Before making use of the vehicle’s Bluetooth
phone system, your Bl uetooth phone must be
paired and connected to the vehicle system.
This is done using one of two methods; via
your phone to the vehicl e or from the touch
screen to your phone. If one of these methods
is not successful, try the other option.
Each time the ignition is switched on the
system will attempt to connect with the last
connected phone.
As mobile phones have a wide range of audio
and echo characteristics, it may take a few
seconds for the vehicle system to adapt and
deliver optimum audio performance. To
achieve this, it may be necessary to reduce the
in-vehicle volume a nd ventilation fan speed
slightly.
TELEPHONE SAFETY
Switch off your telephone in areas
with a high explos ion risk. This
includes filling stat ions, fuel storage
areas or chemical factories, as well
as places where the air contains fuel
vapour, chemicals or metal dust. Always stow your mobile phone
securely.
The functioning of cardiac
pacemakers or hearing aids may be
impaired when the phone is in use.
Check with a doctor or manufacturer
whether any such devices you or your
passengers are using, are sufficiently
protected against high-frequency
energy.
The Health Industry Manufacturers'
Association recommends that a minimum
separation of 15 centimetres (six inches) is
maintained between a wireless phone antenna
and a pacemaker, to avoid potential
interference with the pacemaker. These
recommendations are consistent with the
independent research by, and
recommendations of, Wi reless Technology
Research.
Bluetooth® is the name for
short-range radio frequency (RF)
technology that allows electronic
devices to communicate
wirelessly with each other.
Page 147 of 225
R
(FM8) SEMCON JLR OWNER GUIDE VER 1.00 EURO
LANGUAGE: english-en; MARQUE: jaguar; MODEL: XF
Tyre repair kit
147
Tyre repair kitTYRE REPAIR KIT
If you are in any doubt regarding your
ability to carry out the instructions,
contact your Dealer/Authorised
Repairer before attempting the repair.
Your vehicle may not be equipped with a spare
tyre. If this is the case, in its place in the rear
underfloor storage compartment, you will find
a tyre repair kit (except where run-flat tyres are
fitted). The tyre repair ki t can be used to repair
one tyre and it is essent ial that you read the
following guide before attempting to repair a
tyre.
The tyre repair kit seal s most punctures with a
maximum diameter of 6 mm (1/4 inch).
Note: The sealant used in the tyre repair kit has
a shelf life and the expiry date is shown on the
tyre sealant bottle. Ensur e that the container is
replaced before the expiry date.
TYRE REPAIR KIT SAFETY
INFORMATION
Some tyre damage may only be
partially sealed, or may not seal at
all, depending on the amount and type
of damage. Any loss of tyre pressure
can seriously affect vehicle safety.
Do not use the tyre repair kit if the tyre
has been damaged by driving while
under-inflated.
Only use the tyre repair kit to seal
damage located within the tyre tread
area.
Do not exceed 80 km/h (50 mph) when
a repaired tyre is fitted to the vehicle.
The maximum distanc e that should be
driven when a repaired tyre is fitted, is
200 km (125 miles). When a repaired tyre is fitted, drive
with caution and avoid sudden braking
or steering manoeuvres.
Only use the tyre repair kit for the
vehicle with which it was supplied.
Do not use the tyre repair kit for any
other purpose than tyre repair.
Never leave the tyre repair kit
unattended when in use.
Only use the tyre repair kit within the
-30°C to +70°C temperature range.
Always keep children and animals at a
safe distance from the tyre repair kit
when in use.
Do not stand directly beside the
compressor when it is operating.
Check the tyre sidewall prior to
inflation. If any cracks, damage or
deformities are apparent, do not
inflate the tyre.
Watch the tyre sidewall during
inflation. If any cracks, bumps or
similar damage, or deformities
appear, switch off the compressor and
deflate the tyre.
Page 194 of 225
L
(FM8) SEMCON JLR OWNER GUIDE VER 1.00 EURO
LANGUAGE: english-en; MARQUE: jaguar; MODEL: XF
Wheel changing
194
Wheel changingWHEEL CHANGING SAFETY
Before raising the vehicl e, or changing a wheel
ensure that you read, and comply with the
following warnings.
Always find a safe place to stop, off
the highway and aw ay from traffic.
Ensure that the vehicle and jack are
both on firm level ground.
Apply the parking brake, and engage
Park (P).
Switch on the hazard warning lamps.
Ensure that the front wheels are in the
straight ahead position, and engage
the steering lock.
Disconnect trailer/ca ravan from the
vehicle.
Ensure that all passengers, and
animals, are out of the vehicle and in
a safe place away from the highway.
Place a warning triangle at a suitable
distance behind the v ehicle, facing
towards oncoming traffic.
When one rear wheel is lifted off the
ground the selection P (Park) position
will not prevent the vehicle from
moving and possibly slipping off the
jack as the park brake only operates
on the rear wheels. Use the wheel
chock when jacking the vehicle.
Always chock the wheel diagonally
opposite the wheel to be changed,
using the wheel chock supplied in the
tool kit. Chock the front of a front
wheel, or the rear of a rear wheel.
If jacking the vehicle on a slight slope
is unavoidable, place chocks on the
downhill side of the two opposite
wheels. An additional chock will be
needed. Never place anything between the jack
and the ground, or the jack and the
vehicle.
Do not attempt to raise the vehicle
unless the jack head is fully engaged
in the jacking point. Only jack the
vehicle using the approved jacking
points.
Remove the spare wheel prior to
jacking the vehicle, to avoid
destabilising the vehicle when raised.
Take care when lifting the spare
wheel, and removing the punctured
wheel. The wheels are heavy, and can
cause injuries if not handled correctly.
Do not start or run the engine while the
vehicle is support
ed only by a jack.
Do not get under a vehicle that is
supported by a jack.
Never work or allow any person to
place any part of their body beneath
the vehicle with the jack as the only
means of support - use vehicle
support stands.
Take care when loosening the wheel
nuts. The wheel brace may slip off if
not properly attached, and the wheel
nuts may release suddenly. Either
unexpected movement may cause an
injury.
After use, the tool kit should be
returned to the under floor storage
area and correctly stowed.
Always ensure replacement tyres
have the correct rating and
specifications (e.g. load index, size,
speed rating) for your vehicle.
Page 218 of 225

L
english-en (10, 18, 21 & 25)
Index
218
fuel . . . . . . . . . . . . . . . . . . . . . . . . . . . 156
Fuel tank capacity . . . . . . . . . . . . . . . . 156
label locations . . . . . . . . . . . . . . . . . . . 200
lubricants. . . . . . . . . . . . . . . . . . . . . . . 175
methanol . . . . . . . . . . . . . . . . . . . . . . . 152
weight . . . . . . . . . . . . . . . . . . . . . . . . . 176
wheel alignment. . . . . . . . . . . . . . . . . . 180
Speed limiter setting . . . . . . . . . . . . . . . . . . . . . . . . . 103
Speed-dependent wipers . . . . . . . . . . . . . . 40
Split screen map . . . . . . . . . . . . . . . . . . . 137
SRS Airbags . . . . . . . . . . . . . . . . . . . . . . . . 158
SRS (Supplementary restraint system)
airbag covers . . . . . . . . . . . . . . . . . . . . 167
airbag deployment . . . . . . . . . . . . . . . . . 34
airbag warning lamp . . . . . . . . . . . . 34, 53
child seat check list . . . . . . . . . . . . . . . . 28
child seat positioning. . . . . . . . . . . . . . . 29
child seats . . . . . . . . . . . . . . . . . . . . . . . 27
ISOFIX Anchor points . . . . . . . . . . . . . . 30
seatbelts (beltminder) . . . . . . . . . . . . . . 26
seatbelts (beltminder) warning lamp . . . 52
Stability control
switching between DSC and tracDSC . . 84
switching off . . . . . . . . . . . . . . . . . . . . . 84
switching on . . . . . . . . . . . . . . . . . . . . . 84
tracDSC . . . . . . . . . . . . . . . . . . . . . . . . . 83 switching between tracDSC and DSC . 84
warning lamps . . . . . . . . . . . . . . . . . . . . 84
Starting preparation . . . . . . . . . . . . . . . . . . . . . 198
Starting navigation guidance . . . . . . . . . . 139
Starting the engine diesel engine . . . . . . . . . . . . . . . . . . . . . 74
petrol engine . . . . . . . . . . . . . . . . . . 74, 77
Steering column lock . . . . . . . . . . . . . . . . . 75
Steering wheel adjusting . . . . . . . . . . . . . . . . . . . . . . . . 22
column lock . . . . . . . . . . . . . . . . . . . . . . 75
controlsconnect phone call . . . . . . . . . . . . . . 132
decrease volume . . . . . . . . . . . . . . . 132 disconnect phone call . . . . . . . . . . . . 132
increase volume . . . . . . . . . . . . . . . . 132
scroll/search down . . . . . . . . . . . . . . 132
set cruise speed . . . . . . . . . . . . . . . . . 94
voice control talk . . . . . . . . . . . . . . . . 132
heated . . . . . . . . . . . . . . . . . . . . . . . . . . . 22
Steering wheel controls . . . . . . . . . . . . . . 132
Stop/Start . . . . . . . . . . . . . . . . . . . . . . . . . . 79
Storage compartments . . . . . . . . . . . . . . . . 72 cup holders . . . . . . . . . . . . . . . . . . . . . . . 72
front cubby box. . . . . . . . . . . . . . . . . . . . 72
glove box . . . . . . . . . . . . . . . . . . . . . . . . 72
rear armrest . . . . . . . . . . . . . . . . . . . . . . 72
Sunroof anti-trap mechanism . . . . . . . . . . . . . . . . 43
reset . . . . . . . . . . . . . . . . . . . . . . . . . . . 164
Suspending ASL (Automatic speed limiter) . . . . . . . . . . . . . . . . . . . . . . . . . 103
Switching off the engine . . . . . . . . . . . . . . . 75
Switching off the ignition while moving . . . 77
Switching on the engine diesel engine . . . . . . . . . . . . . . . . . . . . . . 74
petrol engine . . . . . . . . . . . . . . . . . . . . . . 74
Switching on the ignition . . . . . . . . . . . . . . 74
T
Technical specifications weights . . . . . . . . . . . . . . . . . . . . . . . . . 176
wheel alignment . . . . . . . . . . . . . . . . . . 180
Telephone bluetooth. . . . . . . . . . . . . . . . . . . . . . . . 129
call volume . . . . . . . . . . . . . . . . . . . . . . 132
changing the connected telephone . . . . 131
compatibility . . . . . . . . . . . . . . . . . . . . . 130
controls steering wheel . . . . . . . . . . . . . . . . . . 132
dialling . . . . . . . . . . . . . . . . . . . . . . . . . 132
icons . . . . . . . . . . . . . . . . . . . . . . . . . . . 131
last 10 . . . . . . . . . . . . . . . . . . . . . . . . . . 133
overview . . . . . . . . . . . . . . . . . . . . . . . . 128
pairing. . . . . . . . . . . . . . . . . . . . . . . . . . 130
phonebook . . . . . . . . . . . . . . . . . . . . . . 132