Engine Light on JAGUAR XJ 2004 X350 / 3.G User Guide
[x] Cancel search | Manufacturer: JAGUAR, Model Year: 2004, Model line: XJ, Model: JAGUAR XJ 2004 X350 / 3.GPages: 227, PDF Size: 4.22 MB
Page 88 of 227
On the Road 4 - 17
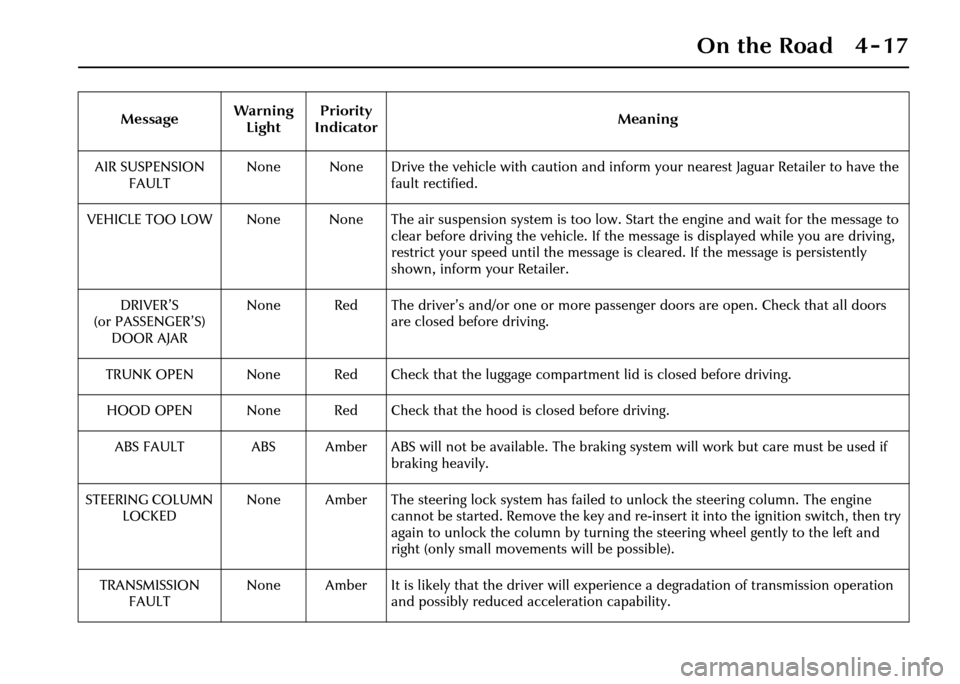
AIR SUSPENSION FAULT None None Drive the vehicle with caution and inform your nearest Jaguar Retailer to have the
fault rectified.
VEHICLE TOO LOW None None The air suspension system is too low. Start the engine and wait for the message to clear before driving the vehicle. If the message is displayed while you are driving,
restrict your speed until the message is cleared. If the message is persistently
shown, inform your Retailer.
DRIVER’S
(or PASSENGER’S) DOOR AJAR None Red The driver’s and/or one or more passenger doors are open. Check that all doors
are closed before driving.
TRUNK OPEN None Red Check that the luggage co mpartment lid is closed before driving.
HOOD OPEN None Red Check that the hood is closed before driving.
ABS FAULT ABS Amber ABS will not be available. The braki ng system will work but care must be used if
braking heavily.
STEERING COLUMN LOCKED None Amber The steering lock system has failed to unlock the steering column. The engine
cannot be started. Remove the key and re-insert it into th e ignition switch, then try
again to unlock the column by turning the steering wheel gently to the left and
right (only small movements will be possible).
TRANSMISSION FAULT None Amber It is likely that the driver will expe
rience a degradation of transmission operation
and possibly reduced ac celeration capability.
Message
Warning
Light Priority
Indicator Meaning
Page 99 of 227
4-28 On the Road
Illuminated entry/exit
The interior lights fade on when a door is
opened and go out when the engine is
started or 15 seconds after the last door
is closed. If any door is left open,
the lights will fade off after two minutes.
When the vehicle is unlocked with a key
or the key transmitter, the courtesy lights
will come on at maximum brightness for
two minutes if a door is not opened.
With the engine running, opening any
door will put on all interior lights, they
will go out immediately after the last door
is closed.Battery Saver
If the interior lights are switched on using
the centre switch in the overhead console
and the ignition swit ch is turned to
position ‘0’, the lights will automatically
turn OFF after 40 minutes.
If the interior lights are switched on by
opening a door and the ignition switch is
in position ‘0’, the lights will
automatically turn off after 10 minutes.
If the glove compartmen t or vanity mirror
lights are switched on and the ignition
switch is turned to positions ‘0’ or ‘I’ or
the key is removed, the lights will
automatically turn OFF after 40 minutes.
Page 105 of 227
4-34 On the Road
Parkbrake
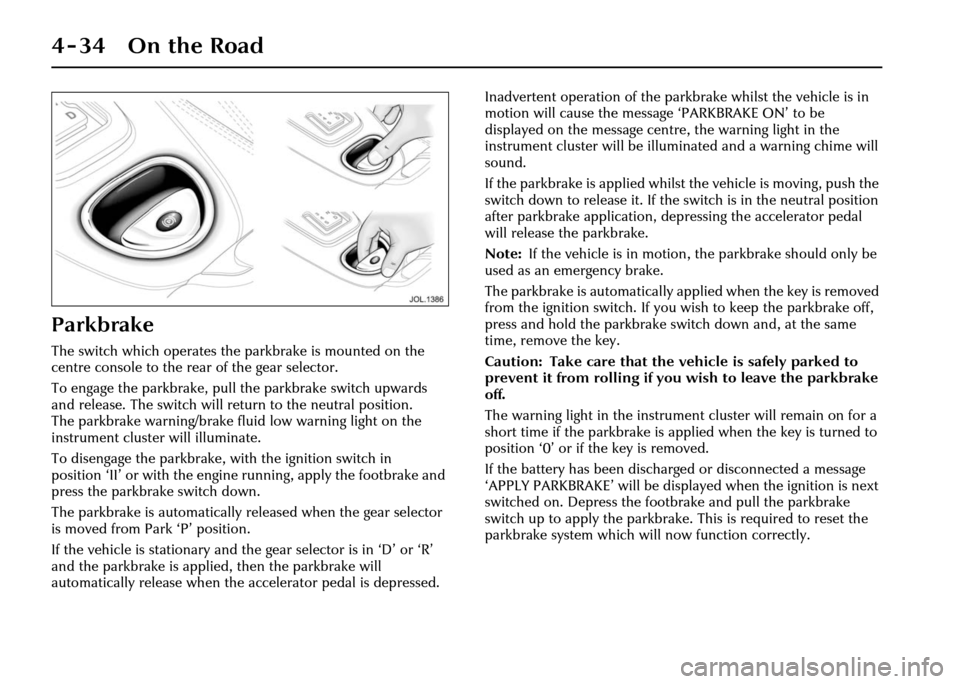
The switch which operates the parkbrake is mounted on the
centre console to the rear of the gear selector.
To engage the parkbrake, pull the parkbrake switch upwards
and release. The switch will return to the neutral position.
The parkbrake warning/brake fluid low warning light on the
instrument cluster will illuminate.
To disengage the parkbrake, with the ignition switch in
position ‘II’ or with the engine running, apply the footbrake and
press the parkbrake switch down.
The parkbrake is automatically released when the gear selector
is moved from Park ‘P’ position.
If the vehicle is stationary and the gear selector is in ‘D’ or ‘R’
and the parkbrake is applied, then the parkbrake will
automatically release when the accelerator pedal is depressed. Inadvertent operation of the parkbrake whilst the vehicle is in
motion will cause the message ‘PARKBRAKE ON’ to be
displayed on the message centre, the warning light in the
instrument cluster will be illuminated and a warning chime will
sound.
If the parkbrake is applied whilst
the vehicle is moving, push the
switch down to release it. If the switch is in the neutral position
after parkbrake application, depressing the accelerator pedal
will release the parkbrake.
Note: If the vehicle is in motion, the parkbrake should only be
used as an emergency brake.
The parkbrake is auto matically applied when the key is removed
from the ignition switch. If you wi sh to keep the parkbrake off,
press and hold the parkbrake switch down and, at the same
time, remove the key.
Caution: Take care that the vehicle is safely parked to
prevent it from rolling if you wish to leave the parkbrake
off.
The warning light in the instrument cluster will remain on for a
short time if the parkbrake is applied when the key is turned to
position ‘0’ or if the key is removed.
If the battery has been discharged or disconnected a message
‘APPLY PARKBRAKE’ will be displa yed when the ignition is next
switched on. Depress the footbrake and pull the parkbrake
switch up to apply the parkbrake. This is required to reset the
parkbrake system which will now function correctly.
Page 113 of 227
4-42 On the Road
Starting/Stopping the
Vehicle
When the vehicle is stationary the
automatic gear selector may be left in ‘D’,
‘ 2 ’, ‘ 3’, ‘ 4’ or ‘ 5’, unless the vehicle is to
be parked. When stopping for traffic
lights, junctions etc., either select ‘ P’ or
apply the parkbrake and select ‘ N’.
Before Starting
Before starting the engine, new owners/
drivers should familiarize themselves with
the layout and operation of the controls
and instruments.
!WARNING:
Before attempting to start the engine,
check parkbrake is ON and gear
selector lever is in position ‘P’ or ‘N’.
To Start the Engine
The engine cannot be started until the
gear selector is in ‘ N’ or ‘ P’.
Insert the key into the ignition switch and
turn clockwise to position ‘II’ to switch
on the ignition.
When the key is turned to position ‘III’
the starter motor will turn the engine
until:
• The key is released and automatically returns to position ‘II’.
• The ignition switch is turned to ‘0’ or ‘I’.
• The gear selector is moved out of ‘P’ or ‘N’.
• The engine starts.
If the engine fails to start, the key must be
turned to position ‘0’ before attempting
to restart.
Do not use the starter continuously for
longer than six seconds. Continued use of
the starter will disc harge the battery and
may damage the starter mechanism.
Wait until the engine stops turning before
re-using the starter.
When the engine starts, release the key. The red charge light and the oil pressure
light in the instrument cluster should go
out when the engine is running.
If the engine fails to start
If an ignition key is placed in the ignition
switch and turned to position ‘II’ and the
alarm security light is flashing, it is
possible that the engine will not start.
In any event, please contact a Jaguar
Retailer to investigate the cause of the
light flashing.
It is possible that the fuel system inertia
switch may have tripped, see page 6 - 3
for the resetting procedure.
If the engine persistent
ly fails to start and
flooding is suspected, depress the
accelerator pedal fully, hold it in this
position and turn the key to position ‘III’
for six seconds. Release the key, remove
your foot from the accelerator pedal and
then attempt to restart the engine.
Note: The engine cannot start whilst the
pedal is fully depressed, it must be
released to enable the engine to start.
If the engine still fail s to start, switch the
ignition OFF and contact a Jaguar
Retailer.
Page 115 of 227
4-44 On the Road
Note:
1. After selecting forward or reverse drive ranges from Neutral or Park,
wait briefly for th e transmission to
engage before accelerating.
2. When in Neutral or Park the engine can only be a ccelerated to
4500 rev/min.
R = Reverse – Do not select if the vehicle
is moving forward.
The reversing lights come ON
automatically when reverse gear is
selected and the ignition switch is in
position ‘II’.
D = Drive – All six gears are changed
automatically as required by the throttle
position and road speed.
2, 3, 4, 5 = If selected, the transmission
operates automatically in second, third,
fourth or fifth gear but will not engage
gears higher than the one selected. Drive to fifth
When driving in gear position ‘D’ with
sixth gear engaged, the gear selector can
be shifted sideways across the gate to ‘
5’.
Provided that the vehicle’s speed is not
too great, the transmission will shift
down to fifth. Sixth gear will be inhibited
until the gear selector is moved back to
‘D’.
Hill climbing and engine braking
When driving on roads with long
downhill gradients, selecting ‘3’ or ‘2’
(depending on road/traffic conditions)
will give engine braking.
When the gear selector is moved
from ‘D’, ‘5’, ‘4’ or ‘3’ down to ‘2’,
downshift to second ge ar will only take
place at appropriate road speeds.
Reverse inhibit
Reverse is inhibited when the vehicle is
moving forward at speeds above 5 mph
(8 km/h).
Note: Reverse inhibit will not function in
limp-home mode. Kickdown
Kickdown is operated when the pedal is
pressed fully down, beyond the normal
operating range and against a spring
pressure, to provide maximum engine
performance. Kickdown is used in
circumstances where rapid acceleration is
required, such as when overtaking.
Kickdown causes the transmission to
change down to the lowest gear possible
to achieve maximum acceleration.
The gear engaged depends on the road
speed at the time of kickdown.
As well as shifting
down, the gearshift
points are extended to give greater
performance. This mode is in effect for as
long as the pedal is pressed fully down.
Page 116 of 227
On the Road 4 - 45
Limp-home mode
In the unlikely event of an electrical or
mechanical failure, transmission
operation will be impaired. The vehicle
gear selector ranges P, R, N, D can still be
used to enable the vehicle to be driven to
a safe area. In this event consult a Jaguar
Retailer immediately.
!WARNING:
The driver should be aware that the
vehicle’s performance will be
reduced and must take this into
account when driving.
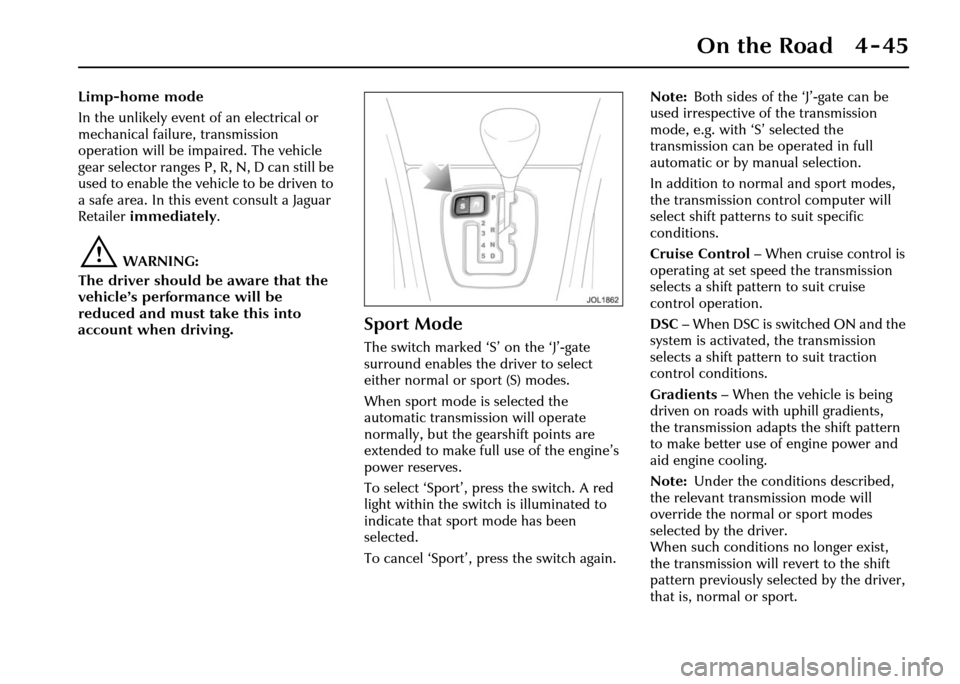
Sport Mode
The switch marked ‘S ’ on the ‘J’-gate
surround enables the driver to select
either normal or sport (S) modes.
When sport mode is selected the
automatic transmission will operate
normally, but the ge arshift points are
extended to make full use of the engine’s
power reserves.
To select ‘Sport’, press the switch. A red
light within the switch is illuminated to
indicate that sport mode has been
selected.
To cancel ‘Sport’, press the switch again. Note:
Both sides of the ‘J’-gate can be
used irrespective of the transmission
mode, e.g. with ‘S’ selected the
transmission can be operated in full
automatic or by manual selection.
In addition to norm al and sport modes,
the transmission control computer will
select shift patterns to suit specific
conditions.
Cruise Control – When cruise control is
operating at set speed the transmission
selects a shift pattern to suit cruise
control operation.
DSC – When DSC is switched ON and the
system is activated, the transmission
selects a shift pattern to suit traction
control conditions.
Gradients – When the vehicle is being
driven on roads with uphill gradients,
the transmission adapts the shift pattern
to make better use of engine power and
aid engine cooling.
Note: Under the conditions described,
the relevant transmission mode will
override the normal or sport modes
selected by the driver.
When such conditions no longer exist,
the transmission will revert to the shift
pattern previously selected by the driver,
that is, normal or sport.
Page 117 of 227
4-46 On the Road
Dynamic Stability
Control (DSC)
Unless it has been switched off, dynamic
stability control is operational whenever
the engine is running. If the system is
operating, the warning light in the
instrument cluster will flash.
The DSC system controls the anti-lock
braking system (ABS), traction control
and yaw control of the vehicle.Yaw control determines the vehicle’s
direction relative to
the driver’s inputs
(sideslip and under/ov ersteer). It applies
braking pressure to individual wheels if
excessive variation is detected.
This ensures that the vehicle follows the
driver’s intended direction of travel.
Traction control will intervene to reduce
wheel spin, by automatically reducing the
power output from the engine and
applying braking to individual wheels.
This improves acceleration, particularly
on surfaces with uneven friction,
for example, one wheel on ice the other
on tarmac.
ABS helps to prevent the road wheels
from locking and skidding during
emergency braking.
When the system is operating,
the warning light in the instrument
cluster will flash.
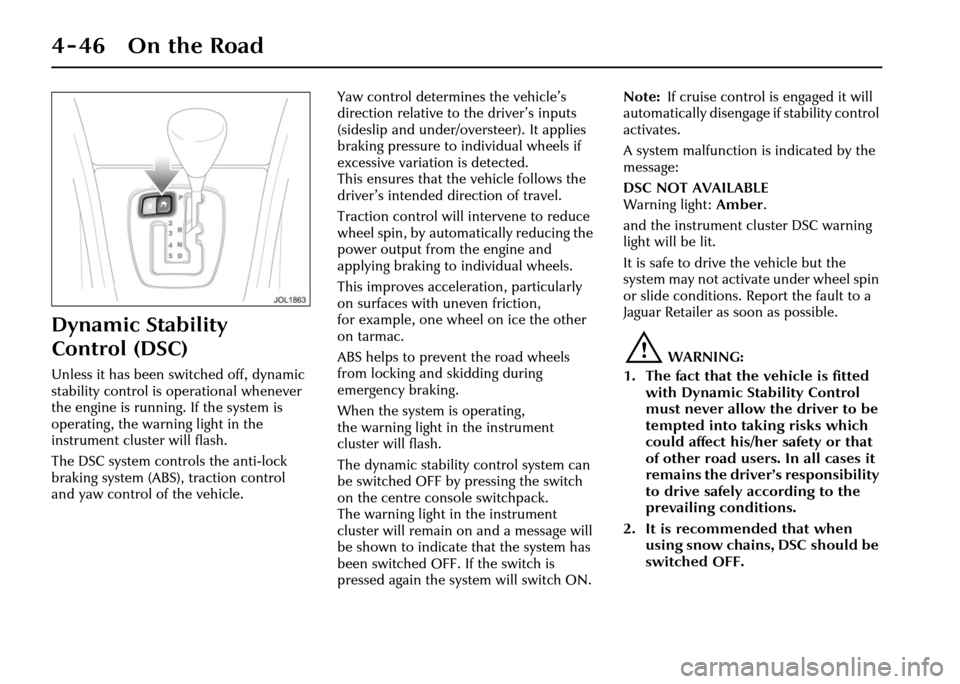
The dynamic stability control system can
be switched OFF by pressing the switch
on the centre console switchpack.
The warning light in the instrument
cluster will remain on and a message will
be shown to indicate that the system has
been switched OFF. If the switch is
pressed again the system will switch ON. Note:
If cruise control is engaged it will
automatically disengage if stability control
activates.
A system malfunction is indicated by the
message:
DSC NOT AVAILABLE
Warning light: Amber .
and the instrument cluster DSC warning
light will be lit.
It is safe to drive the vehicle but the
system may not activate under wheel spin
or slide conditions. Report the fault to a
Jaguar Retailer as soon as possible.
!WARNING:
1. The fact that the vehicle is fitted with Dynamic Stability Control
must never allow th e driver to be
tempted into taking risks which
could affect his/her safety or that
of other road users. In all cases it
remains the driver’s responsibility
to drive safely according to the
prevailing conditions.
2. It is recommended that when using snow chains, DSC should be
switched OFF.
Page 127 of 227
4-56 On the Road
Notes on using adaptive cruise
control
1. Adaptive cruise control operates when the gear selector lever is in
position ‘2’, ‘3’ ‘4’ ‘5’ or ‘D’.
2. When engaged, the accelerator pedal rests in the raised position.
Fully release the pedal to allow
normal ACC operation.
3. When braking is applied by the ACC
the brake pedal will move down and
up as braking is applied or removed.
The vehicle brake lights will be
switched on while braking is applied.
!WARNING:
The driver must not rest a foot under
the brake pedal, as it may become
trapped. Driving with ACC active
The system acts by regulating the speed
of the vehicle using engine control and
the brakes. Gear changes may occur in
response to decelerati
on or acceleration
whilst in ACC.
ACC is not a collision avoidance system,
however, during some situations the
system may provide the driver with an
indication that intervention is required.
An audible alarm will sound,
accompanied by a re d warning light and
the message ‘DRIVER INTERVENE’ if the
ACC detects:
• That using maximum ACC braking only is not sufficient.
• That the vehicle speed has decreased below the minimum for ACC
operation.
• A failure has occurred whilst the system is active.
Page 129 of 227
4-58 On the Road
Vehicle Suspension
This vehicle is fitted with a fully
automatic air suspension system.
It ensures that the vehicle is always at the
correct ride height with varying load
conditions, including luggage
compartment load or when towing.
The system will automatically adjust the
amount of air in the springs to level the
vehicle. Air is supplied either from an air
reservoir or a compressor.
The compressor will run periodically to
refill the reservoir.
Changes in ambient temperature will also
have an effect on vehicle height when the
vehicle is parked.
Caution:
1. Do not overload the vehicle. Vehicle load weights are shown
on page 8 - 4.
2. A slight air loss is expected over time causing the vehicle to lower,
so do not store or place anything
under the vehicle if it is to be left
for an extended period. Speed lowering
When driving at motorway speeds,
the system will lower the vehicle to
improve aerodynamics and vehicle
stability. The suspension will
automatically return the vehicle to the
normal height when the vehicle slows.
Caution: Speed lowering is
undesirable when towing.
Only Jaguar approved towing
equipment will not allow this feature.
Warning messages
If the message ‘VEHICLE TOO LOW’ is
displayed when the ignition is switched
on, start the engine and wait for the
suspension to raise. The vehicle should
not be driven until the message is
cleared.
If the message ‘VEHICLE TOO LOW’ is
displayed when driv
ing, restrict the
vehicle speed and wait for the system to
regain the correct height and the message
will then clear. If the message is displayed
frequently, it is advisable to inform your
Retailer to have the system attended to.
If the message ‘AIR SUSPENSION FAULT’
is displayed at any time, drive with
caution. Have the vehicle checked by a
Retailer at the earliest opportunity.
Note: If your vehicle needs to be
recovered by a roadside emergency
service ensure that the vehicle is securely
lashed by the wheels and NOT the body.
Page 130 of 227
On the Road 4 - 59
General Driving
Information
!WARNING:
Ensure the parkbrake is on and the
automatic gear selector is in
position ‘P’ or ‘N’ before attempting
to start the engine.
Before driving off, check the gauges and
warning lights and messages. Take special
note of any warning light that is on.
Seat belts are provided for your safety
and it is unwise, and in certain countries
illegal, to commence any journey,
however short, without wearing them.
Warming Up
Do not operate the en gine at high speed
when first started but allow time for the
engine to warm up and the oil to
circulate.
Engine Braking On Downhill
Gradients
When driving on mountain roads with
long downhill gradients it is advisable to
select a low gear.
Running-in
Apart from a few precautionary
recommendations, there are no strict
‘running-in’ procedures for this vehicle.
By observing the following advisory notes
you will ensure maximum engine,
transmission and brake life for your
vehicle:
1. Allow the engine to warm up thoroughly before operating at engine
speeds over 3500 rev/min.
2. Vary the speed frequently.
3. From 940 miles (1500 kilometres) onwards, gradually increase
performance of the vehicle up to the
permitted maximum speed, where
road conditions permit. Running-in for brakes
To ensure that the brake pads can
‘bed-in’ evenly and reach their optimum
wear and performance condition, usually
within 300 miles (480 kilometres),
the following points are recommended.
1. Where possible, avoid heavy braking
or rough usage of the brakes as this
can result in damage being caused to
the brake pads and discs.
2. Avoid prolonged use of the brakes, for example, when descending severe
gradients.
3. Frequent light application of the brakes is desirable. This helps to fully
‘bed-in’ the brake pads before the
normal running-in period is
completed and the vehicle is operated
at high speeds, when maximum brake
efficiency will be required.
The above equally applies when new
discs or pads have been fitted.