battery location JAGUAR XJ6 1994 2.G Electrical Diagnostic Manual
[x] Cancel search | Manufacturer: JAGUAR, Model Year: 1994, Model line: XJ6, Model: JAGUAR XJ6 1994 2.GPages: 327, PDF Size: 13.73 MB
Page 102 of 327

Electrical IT
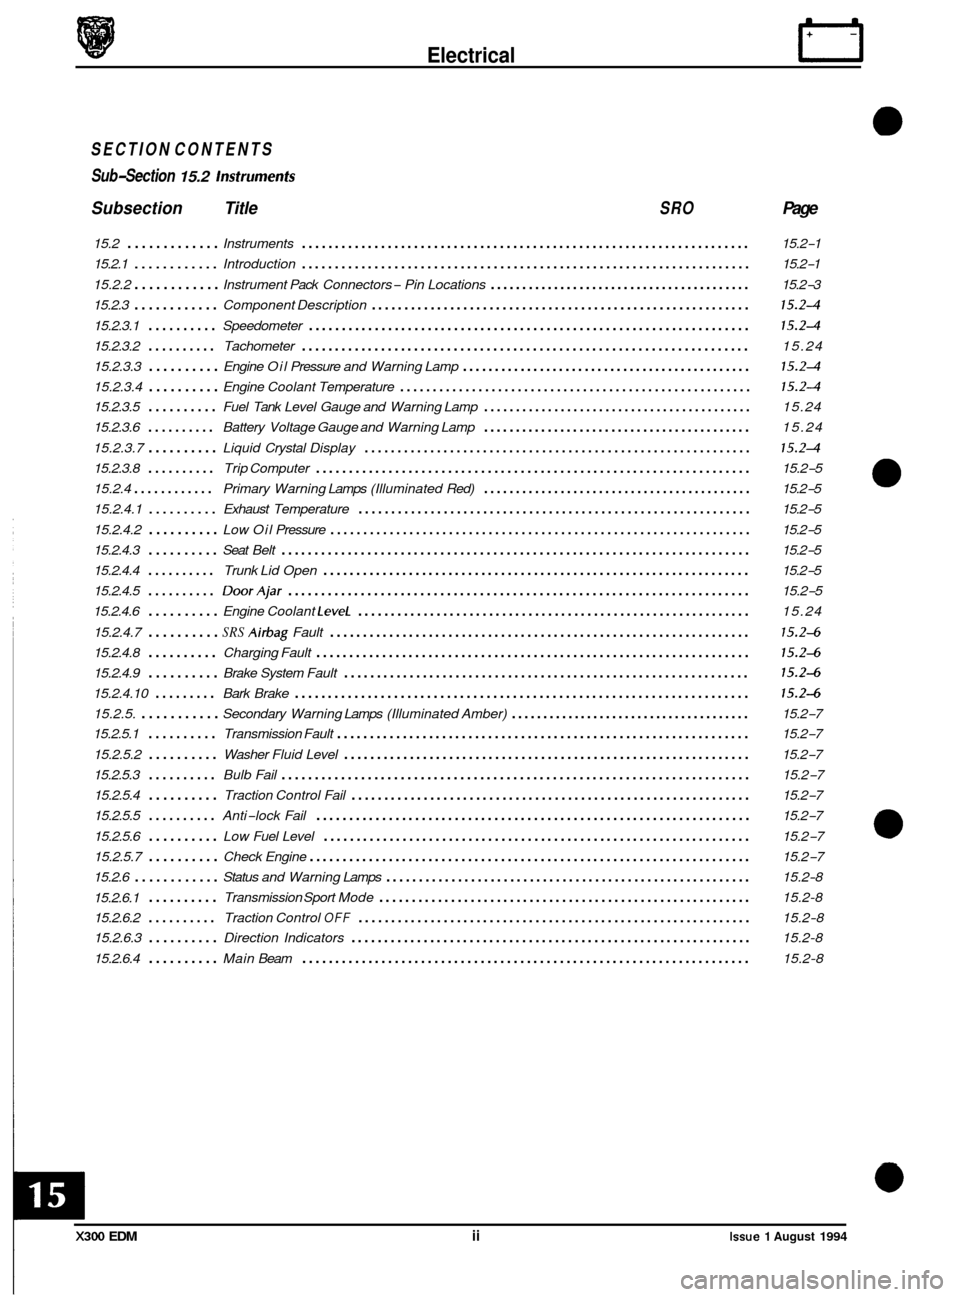
SECTION CONTENTS
Sub
-Section 15.2 lnsfrumenfs
Subsection Title SRO Page
15.2 ............. Instruments .................................................................... 15.2-1
15.2.1
............ Introduction .................................................................... 15.2-1
15.2.2
............ Instrument Pack Connectors - Pin Locations ......................................... 15.2-3
15.2.3
............ Component Description .......................................................... 15.24
15.2.3.1 .......... Speedometer ................................................................... 15.24
15.2.3.2 .......... Tachometer .................................................................... 15.24
15.2.3.3
.......... Engine Oil Pressure and Warning Lamp ............................................. 15.24
15.2.3.4 .......... Engine Coolant Temperature ...................................................... 15.24
15.2.3.5 .......... Fuel Tank Level Gauge and Warning Lamp .......................................... 15.24
15.2.3.6
.......... Battery Voltage Gauge and Warning Lamp .......................................... 15.24
15.2.3.7
.......... Liquid Crystal Display ........................................................... 15.24
15.2.3.8 .......... Trip Computer .................................................................. 15.2-5
15.2.4
............ Primary Warning Lamps (Illuminated Red) .......................................... 15.2-5
15.2.4.1
.......... Exhaust Temperature ............................................................ 15.2-5
15.2.4.2
.......... Low Oil Pressure ................................................................ 15.2-5
15.2.4.3
.......... Seat Belt ....................................................................... \
15.2-5
15.2.4.4
.......... Trunk Lid Open ................................................................. 15.2-5
15.2.4.5
.......... DoorAjar ...................................................................... 15.2-5
15.2.4.6
.......... Engine Coolant LeveL ............................................................ 15.24
15.2.4.7
.......... SRS Airbag Fault ................................................................ 15.24
15.2.4.8 .......... Charging Fault .................................................................. 15.24
15.2.4.9 .......... Brake System Fault .............................................................. 15.24
15.2.4.10 ......... Bark Brake ..................................................................... 15.24
15.2.5. ........... Secondary Warning Lamps (Illuminated Amber) ...................................... 15.2-7
15.2.5.1
.......... Transmission Fault ............................................................... 15.2-7
15.2.5.2
.......... Washer Fluid Level .............................................................. 15.2-7
15.2.5.3
.......... Bulb Fail ....................................................................... \
15.2-7
15.2.5.4
.......... Traction Control Fail ............................................................. 15.2-7
15.2.5.5
.......... Anti-lock Fail .................................................................. 15.2-7
15.2.5.6
.......... Low Fuel Level ................................................................. 15.2-7
15.2.5.7
.......... Check Engine ................................................................... 15.2-7
15.2.6.1
.......... Transmission Sport Mode ......................................................... 15.2-8
15.2.6.2
.......... Traction Control OFF ............................................................ 15.2-8
15.2.6.3
.......... Direction Indicators ............................................................. 15.2-8
15.2.6.4
.......... Main Beam .................................................................... 15.2-8
15.2.6
............ Status
and Warning Lamps ........................................................ 15.2-8
m
a
0
e
0
X300 EDM ii Issue 1 August 1994
Page 154 of 327

Electrical n
15.2 INSTRUMENTS
15.2.1 Introduction
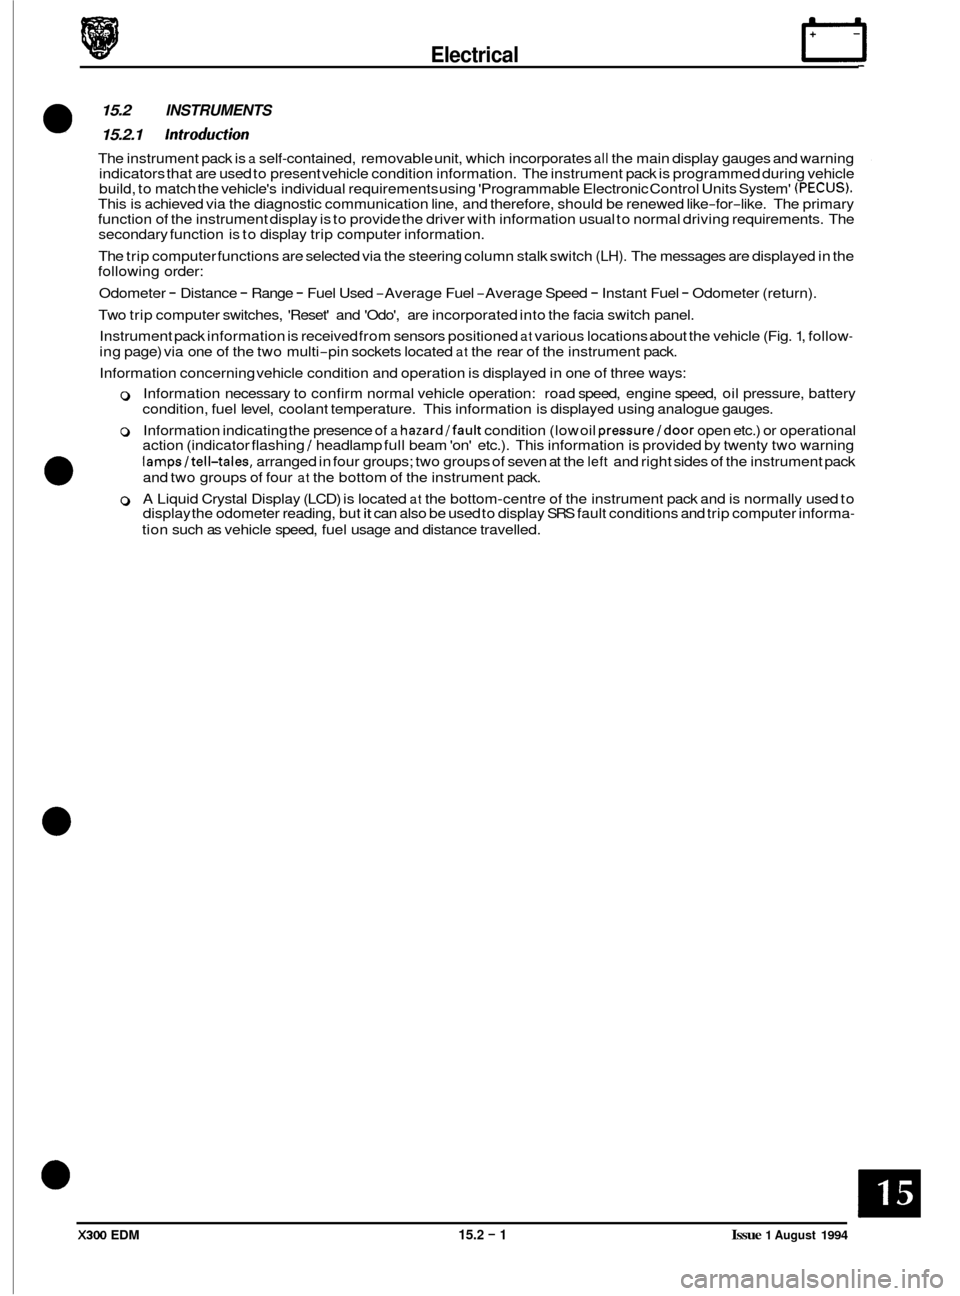
The instrument pack is a self-contained, removable unit, which incorporates all the main display gauges and warning
indicators that are used to present vehicle condition information. The instrument pack is programmed during vehicle
build, to match the vehicle's individual requirements using 'Programmable Electronic Control Units System'
(PECUS). This is achieved via the diagnostic communication line, and therefore, should be renewed like-for-like. The primary
function of the instrument display is to provide the driver with information usual to normal driving requirements. The
secondary function is to display trip computer information.
The trip computer functions are selected via the steering column stalk switch
(LH). The messages are displayed in the
following order:
Odometer
- Distance - Range - Fuel Used -Average Fuel -Average Speed - Instant Fuel - Odometer (return).
Two trip computer switches, 'Reset' and 'Odo', are incorporated into the facia switch panel.
Instrument pack information is received from sensors positioned
at various locations about the vehicle (Fig. 1, follow-
ing page) via one of the two multi-pin sockets located at the rear of the instrument pack.
Information concerning vehicle condition and operation is displayed in one of three ways:
0 Information necessary to confirm normal vehicle operation: road speed, engine speed, oil pressure, battery
condition, fuel level, coolant temperature. This information is displayed using analogue gauges.
0 Information indicating the presence of a hazard/fault condition (low oil pressure/door open etc.) or operational
action (indicator flashing / headlamp full beam 'on' etc.). This information is provided by twenty two warning
lampsltell-tales, arranged in four groups; two groups of seven at the left and right sides of the instrument pack
and two groups of four
at the bottom of the instrument pack.
0 A Liquid Crystal Display (LCD) is located at the bottom-centre of the instrument pack and is normally used to
display the odometer reading, but it can also be used to display SRS fault conditions and trip computer informa-
tion such as vehicle speed, fuel usage and distance travelled.
0
X300 EDM 15.2 - 1 Issue 1 August 1994
Page 156 of 327

Electrical IT
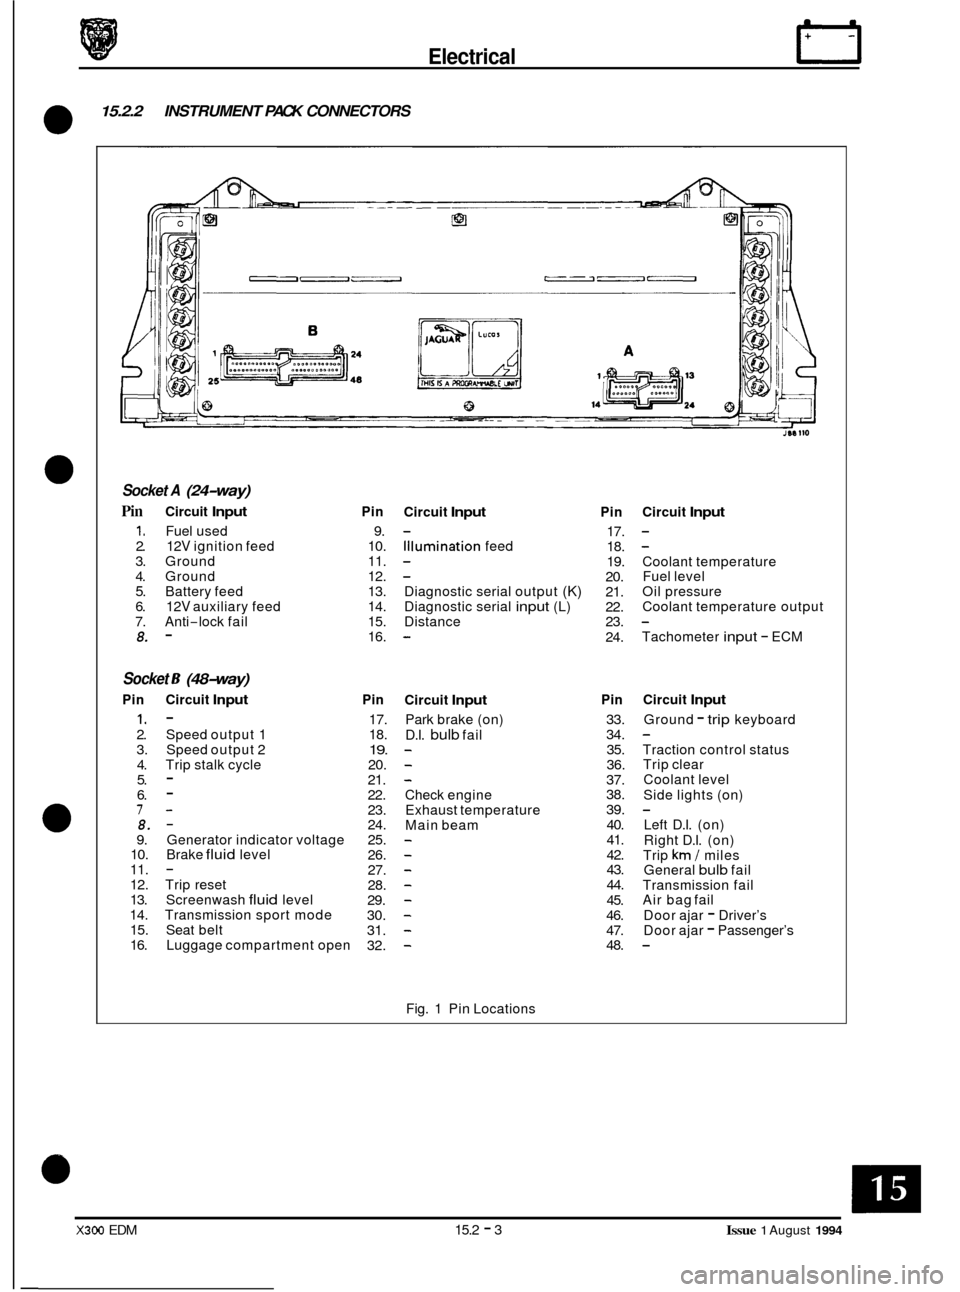
15.2.2 INSTRUMENT PACK CONNECTORS
0
Socket A (24-way)
Pin Circuit Input
1. Fuel used 2. 12V ignition feed 3. Ground 4. Ground 5. Battery feed 6. 12V auxiliary feed 7. Anti-lock fail 8. -
Socket 6 (48-way)
Pin Circuit Input
1. - 2. Speed output 1
3. Speed output 2
4. Trip stalk cycle 5. - 6. - 7- 8. - 9. Generator indicator voltage 10. Brake fluid level 11. - 12. Trip reset 13. Screenwash fluid level 14. Transmission sport mode 15. Seat belt 16. Luggage compartment open
Pin
9.
10.
11.
12.
13.
14.
15.
16.
Pin
17.
18.
19. 20.
21.
22.
23.
24.
25.
26.
27.
28.
29.
30.
31.
32.
Circuit Input
Illumination feed
-
- -
Diagnostic serial output (K) Diagnostic serial input (L)
Distance
-
Circuit Input
Park brake (on)
D.I.
bulb fail - - -
Check engine
Exhaust temperature
Main beam
- - - - - - - -
Fig. 1 Pin Locations
Pin
17.
18.
19.
20.
21.
22.
23.
24.
Pin
33.
34. 35.
36.
37.
38.
39. 40.
41.
42.
43.
44.
45.
46.
47.
48.
Circuit Input
-
Coolant temperature
Fuel level
Oil pressure
Coolant temperature output
Tachometer
input - ECM
-
Circuit Input
Ground - trip keyboard
Traction control status
Trip clear
Coolant level
Side lights (on)
Left D.I. (on)
Right D.I. (on)
Trip
km / miles
General bulb fail
Transmission fail
Air bag fail
Door ajar
- Driver’s
Door ajar - Passenger’s
-
X300 EDM 15.2 - 3 Issue 1 August 1994
Page 208 of 327

0
I I- - I 13 l-
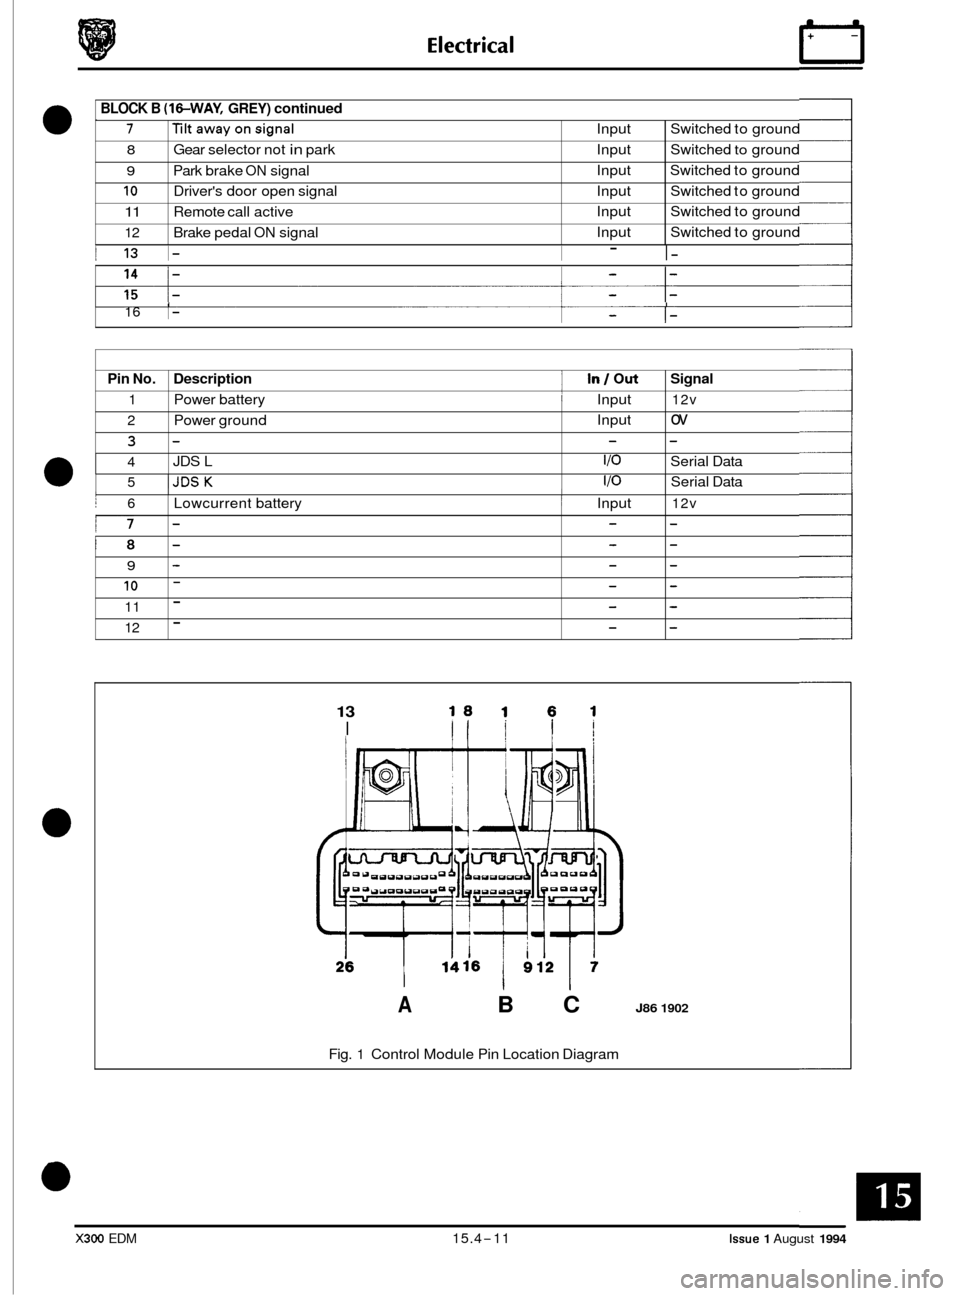
BLOCK B (W-WAY, GREY) continued
' 7 Tiltawayonsignal Input Switched to ground
8 Gear selector not in park Input Switched to ground
9 Park brake ON signal Input
Switched to ground
10 Driver's door open signal Input Switched to ground
11 Remote call active Input
Switched to ground
12 Brake pedal ON signal Input
Switched to ground
I I 16 1- - -
Pin No.
1
2
3
4
Description I In/ out Signal
Power battery i Input 12v
Power ground Input ov
- - -
JDS
L I/O Serial Data
5 IJDSK I/O
13
I I
Serial Data
A B C J86 1902
I j 6
i7
'8
9
10
11
12
Fig. 1 Control Module Pin Location Diagram
I Lowcurrent battery ~ Input 12v
- - -
- - -
- - -
- - -
- - -
- - -
X300 EDM 15.4-11 Issue 1 August 1994